
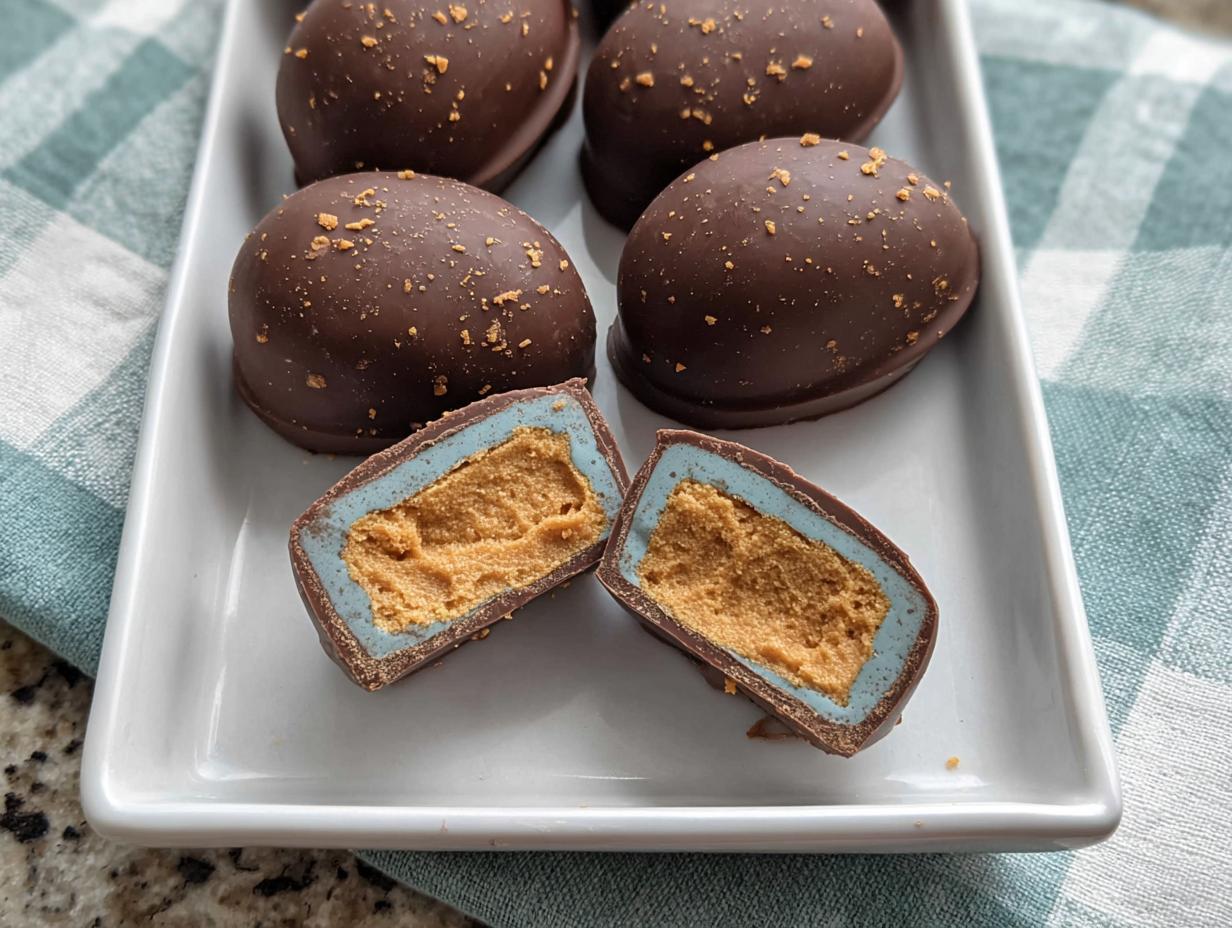
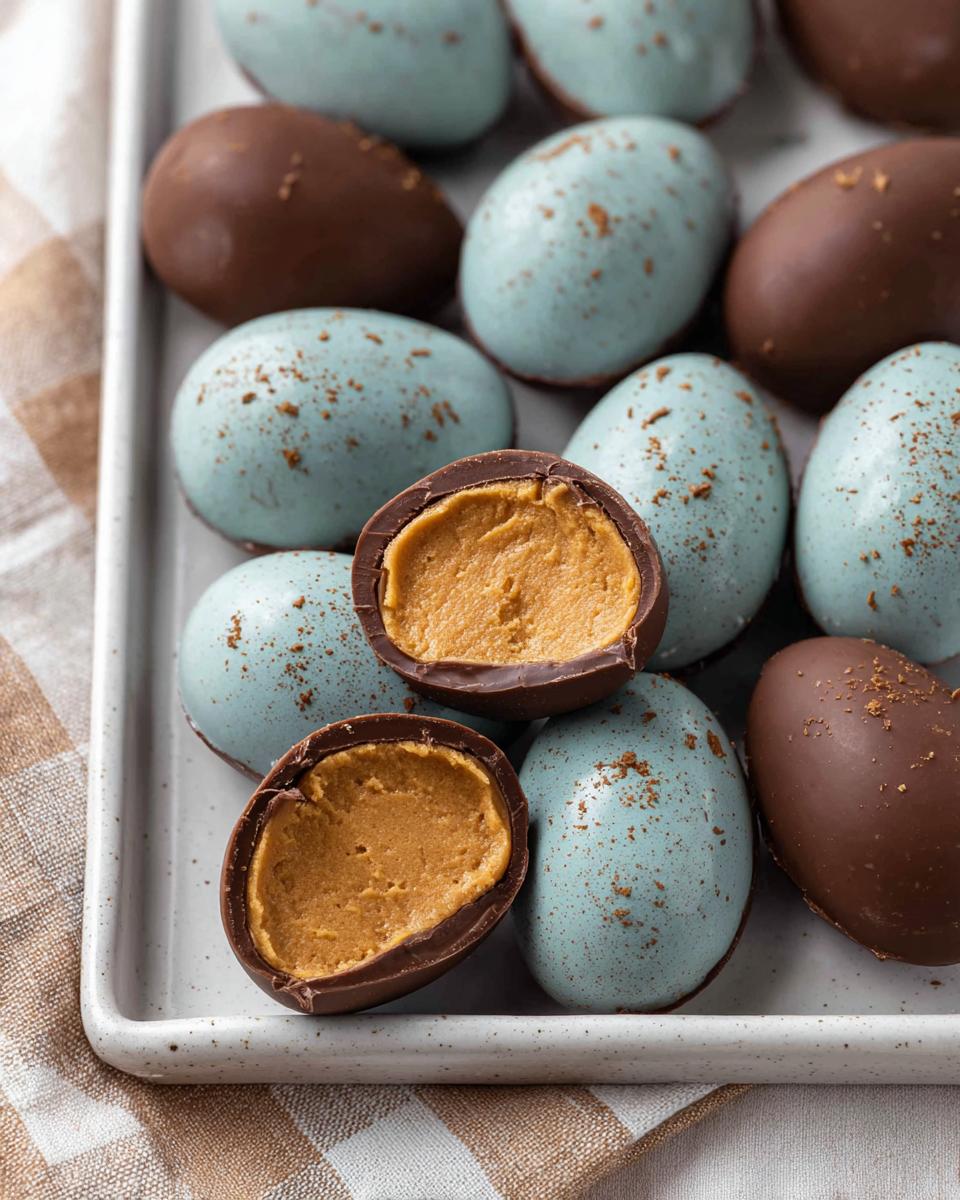
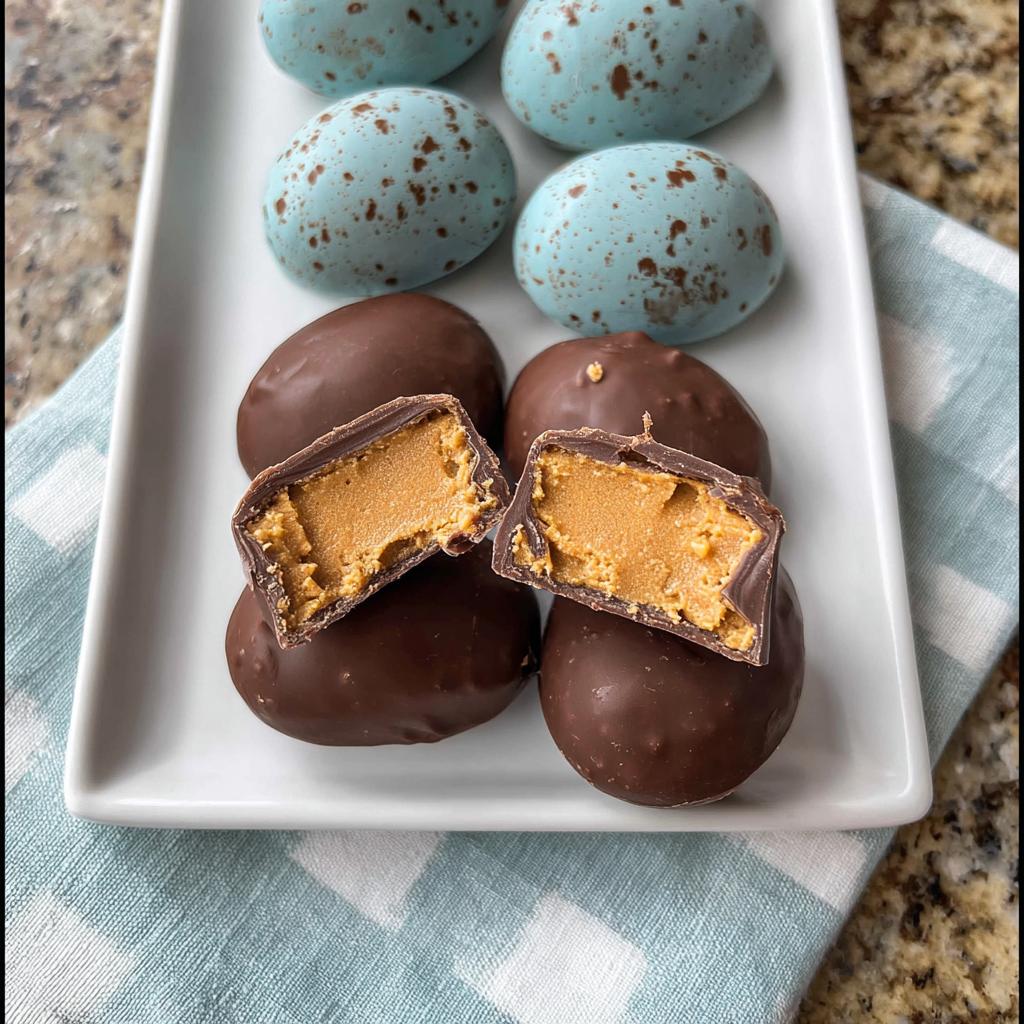
Oh, Easter! It just wouldn’t be the same without those little treats, right? For me, the absolute MUST-HAVE are homemade Peanut Butter Easter Eggs! Seriously, there’s just something magical about that creamy, dreamy peanut butter filling wrapped in sweet chocolate. I’ve been making these for years, and they always disappear faster than the Easter bunny can hop. My kids basically expect them now, and honestly, seeing their faces light up when they bite into one makes all the effort totally worth it. It’s a recipe that really brings that nostalgic holiday feeling right into my kitchen.
Why You’ll Love These Peanut Butter Easter Eggs
Seriously, these come together so fast! No fancy tricks needed. That classic combo of creamy peanut butter and smooth chocolate is a total winner for any Easter gathering. They’re shaped just right for the holiday and are always a huge hit with kids and adults alike. Making these homemade Peanut Butter Easter Eggs brings back all those wonderful holiday memories. You’ll totally love how simple and delicious they are!
Ingredients for Perfect Peanut Butter Easter Eggs
Alright, let’s talk ingredients! To get that perfect homemade Peanut Butter Easter Egg, using the right stuff makes all the difference. Here’s what you’ll need:
For the Creamy Peanut Butter Filling:
- 1 cup creamy peanut butter (the regular kind, not natural, works best here!)
- 4 tablespoons unsalted butter, softened
- 2 cups powdered sugar
- ½ teaspoon vanilla extract
- ¼ teaspoon salt
For the Smooth Chocolate Coating:
- 2 cups semi-sweet or milk chocolate chips (your favorite works!)
- 1 tablespoon coconut oil or vegetable shortening (this helps make the chocolate super smooth)
Optional Decorations:
- Sprinkles
- Drizzle of white or dark chocolate
Trust me, using good quality ingredients really does make these Peanut Butter Easter Eggs sing!
How to Make Homemade Peanut Butter Easter Eggs
Alright, let’s get down to business and make these amazing Peanut Butter Easter Eggs! It’s honestly way easier than you think, and the results are so worth it. Follow these steps, and you’ll have a batch of holiday candy that’ll make everyone ask for the recipe! It’s kind of like making fudgy chocolate chip cookie bars in that sense – simple steps for an incredible outcome.
Crafting the Creamy Peanut Butter Filling
First things first, grab a big mixing bowl. We’re going to whip up that glorious peanut butter filling. Pop in your creamy peanut butter, the softened butter, a splash of vanilla, and that pinch of salt. Now, get your electric mixer going – or a whisk and some elbow grease if you’re feeling old-school! Beat it all until it’s super smooth and creamy. Next, gradually add in your powdered sugar. You want to mix until it all comes together into a soft dough. If it feels a little too sticky, don’t panic! Just add another tablespoon or two of powdered sugar. It should be firm enough to handle, just like when you’re working on the texture of cookie bars.
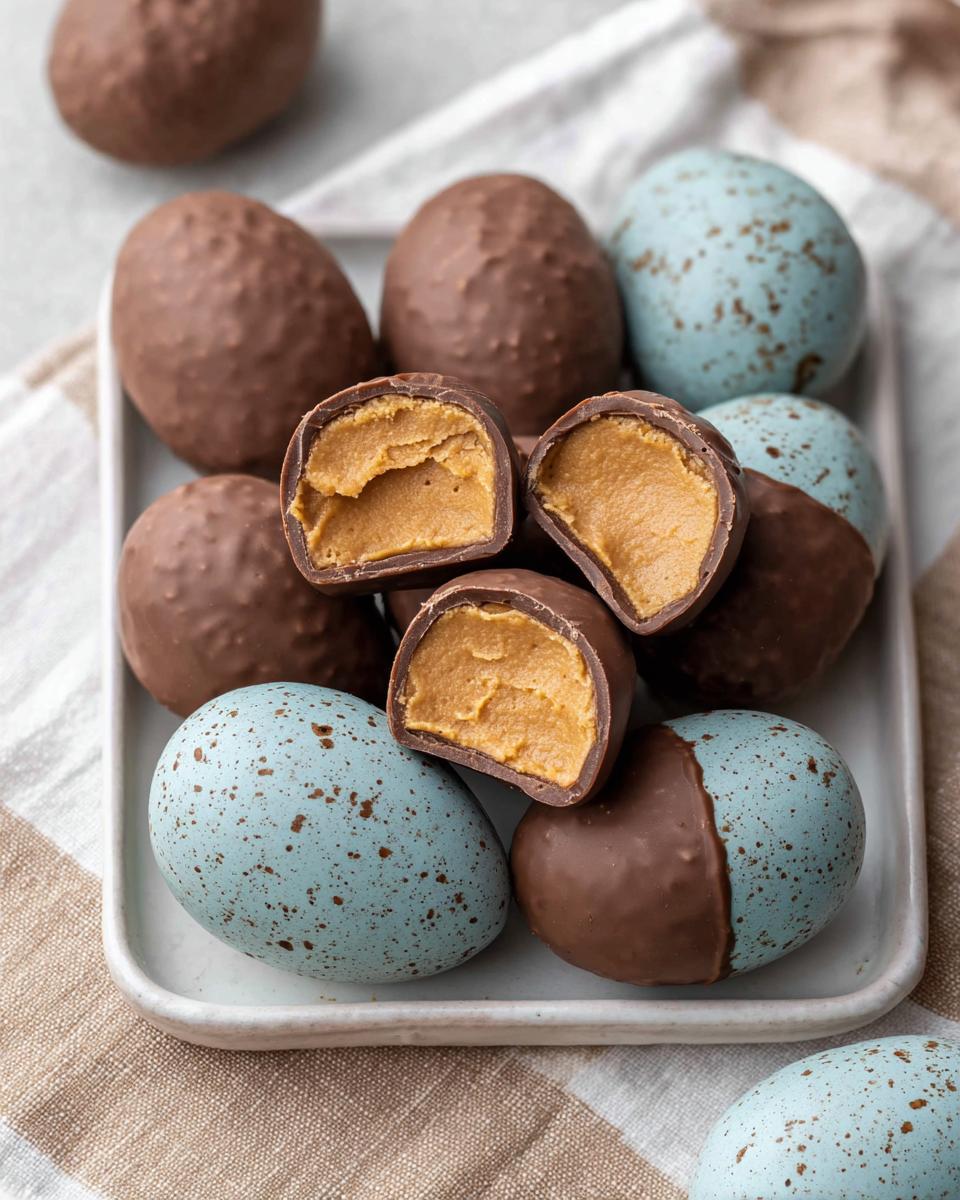
Shaping and Freezing the Easter Eggs
Now for the fun part – shaping! You want to scoop out little portions of that peanut butter dough. Really, think about the size of a normal Easter egg, maybe a little smaller. Roll them gently between your palms to get that classic egg shape. Then, lay them all out on a baking sheet lined with parchment paper. Parchment paper is your best friend here, trust me! Pop that whole sheet into the freezer for about 30 minutes. This is crucial – it freezes them just enough so they don’t fall apart when you dip them in chocolate.
Melting the Chocolate Coating
While those little eggs are chilling, let’s get the chocolate ready. Grab a microwave-safe bowl and toss in your chocolate chips and that tablespoon of coconut oil or shortening. The oil is key – it makes the chocolate coating super smooth and easy to work with, so it’s not too thick. Microwave it in 30-second bursts, stirring really well after each one. Keep going until it’s all melted and glossy smooth. If you prefer a double boiler, that works beautifully too. Just melt it gently over simmering water, stirring constantly.
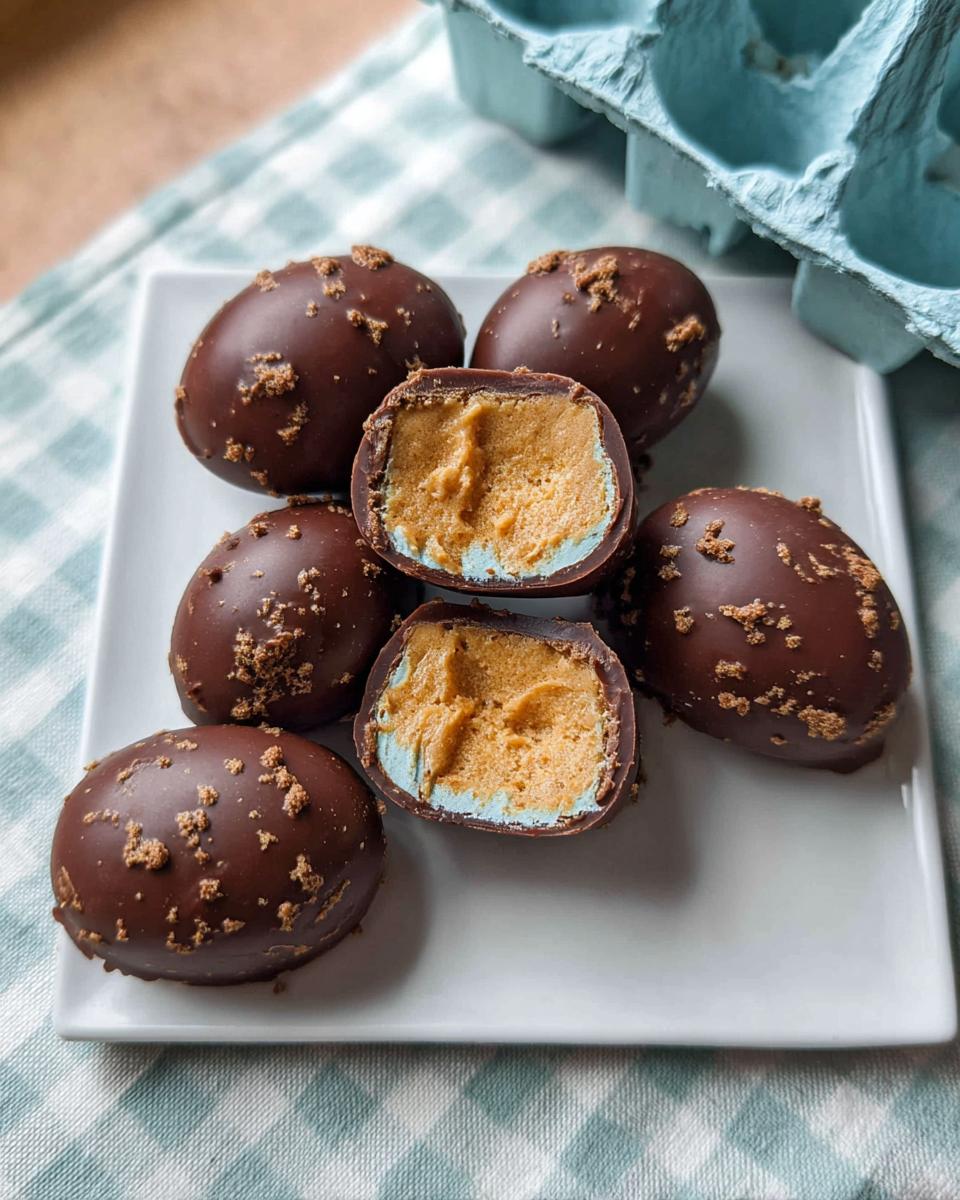
Dipping and Decorating Your Peanut Butter Easter Eggs
Okay, time for the grand finale! Carefully take your frozen peanut butter eggs out of the freezer. Grab a fork and dip each egg into the warm, melted chocolate. Make sure it’s fully coated, then gently lift it out and let the excess chocolate drip back into the bowl. A little tap on the side of the bowl can help. Place the perfectly coated Peanut Butter Easter Egg back onto your parchment-lined baking sheet. If you’re feeling fancy, now’s the time to add sprinkles or drizzle with a bit of white chocolate before the coating sets! Let them harden up at room temperature, or pop them back in the fridge for a faster set.
Tips for the Best Peanut Butter Easter Eggs
Okay, you’ve got the recipe, but let me give you a few little secrets I’ve picked up over the years to make your Peanut Butter Easter Eggs absolutely perfect. First off, temperature is key! Make sure your butter for the filling is *really* softened, not melted. It makes a huge difference in getting that smooth, creamy texture. And for the peanut butter, stick with the regular kind – the natural stuff can get a bit oily and make your filling too soft. If your chocolate coating seems a bit too thick when you’re dipping, stir in that extra little bit of coconut oil or shortening. It makes everything flow so much better! Also, don’t overcrowd your baking sheet when you’re freezing the eggs; give them a little space so they freeze evenly. Little things like this make all the difference!
Ingredient Notes and Substitutions
Let’s chat about the ingredients for these Peanut Butter Easter Eggs. I always recommend using regular, creamy peanut butter (like Jif or Skippy) for the filling. The natural kind can be a bit too oily and might make your filling too soft to shape properly. It’s just a little trick that helps ensure they hold their shape beautifully! For the chocolate coating, if you need to make these dairy-free, just swap out the semi-sweet or milk chocolate chips for dairy-free chocolate chips. There are some fantastic brands out there now that melt just as smoothly!
Frequently Asked Questions about Peanut Butter Easter Eggs
Got questions about whipping up these adorable Peanut Butter Easter Eggs? I’ve got your back! Here are some common things people ask. And hey, if you love Easter treats, you might also want to check out my classic deviled eggs recipe for another holiday favorite!
How long do these Peanut Butter Easter Eggs last?
These little guys are pretty good at hanging around! If you store them properly, they should last for about 1 to 2 weeks at room temperature. Honestly, they usually don’t last that long in my house!
Can I make these Peanut Butter Easter Eggs dairy-free?
Absolutely! It’s super easy. For the filling, make sure your butter is dairy-free, and for the coating, just swap out regular chocolate chips for good quality dairy-free chocolate chips. There are tons of great options out there now that work like a charm!
What’s the best way to store leftover Peanut Butter Easter Eggs?
Storing leftovers is simple. Keep them in an airtight container. If it’s warm where you are, or you just want them to stay nice and firm, popping them in the fridge is a great idea. They’ll stay fresh and delicious!
Why did my chocolate coating crack?
Oh, the dreaded chocolate crack! This usually happens if the peanut butter eggs are too frozen when you dip them, or if the temperature changes too quickly. Try letting the peanut butter eggs sit out for just a minute or two before dipping, and let the finished eggs harden at room temperature for a bit instead of going straight into the fridge. This helps them adjust more gradually!
Nutritional Information
Just a heads-up, the nutrition info for these Peanut Butter Easter Eggs is an estimate and can bounce around a bit depending on the exact brands you use. Think around 200-250 calories per egg, but remember, this can change! For more detailed info, check out my disclaimer page!
Peanut Butter Easter Eggs
Ingredients
Equipment
Method
- In a large mixing bowl, beat together peanut butter, butter, vanilla extract, and salt until smooth and creamy. Gradually add powdered sugar, mixing until a soft dough forms. If the mixture is too sticky, add a little more powdered sugar. Scoop out small portions and shape them into eggs. Place them on a parchment-lined baking sheet and freeze for 30 minutes until firm.
- In a microwave-safe bowl, combine chocolate chips and coconut oil. Microwave in 30-second intervals, stirring each time, until fully melted and smooth. Alternatively, use a double boiler to melt the chocolate gently.
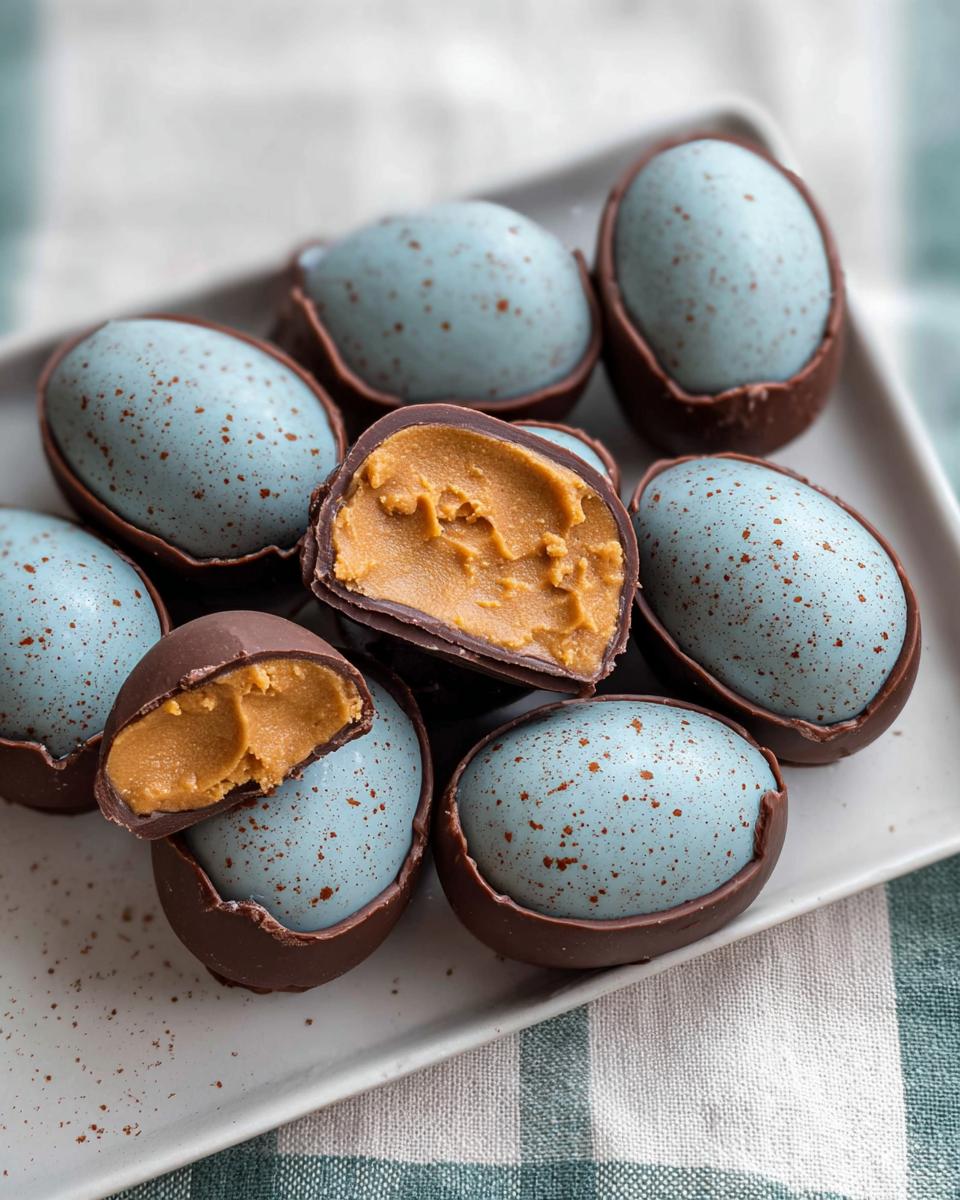
- Using a fork or dipping tool, coat each peanut butter egg in the melted chocolate, ensuring full coverage. Let the excess chocolate drip off before placing it back on the parchment paper. If desired, add sprinkles or drizzle with white chocolate before the coating sets. Allow the eggs to harden at room temperature or refrigerate for faster setting.


