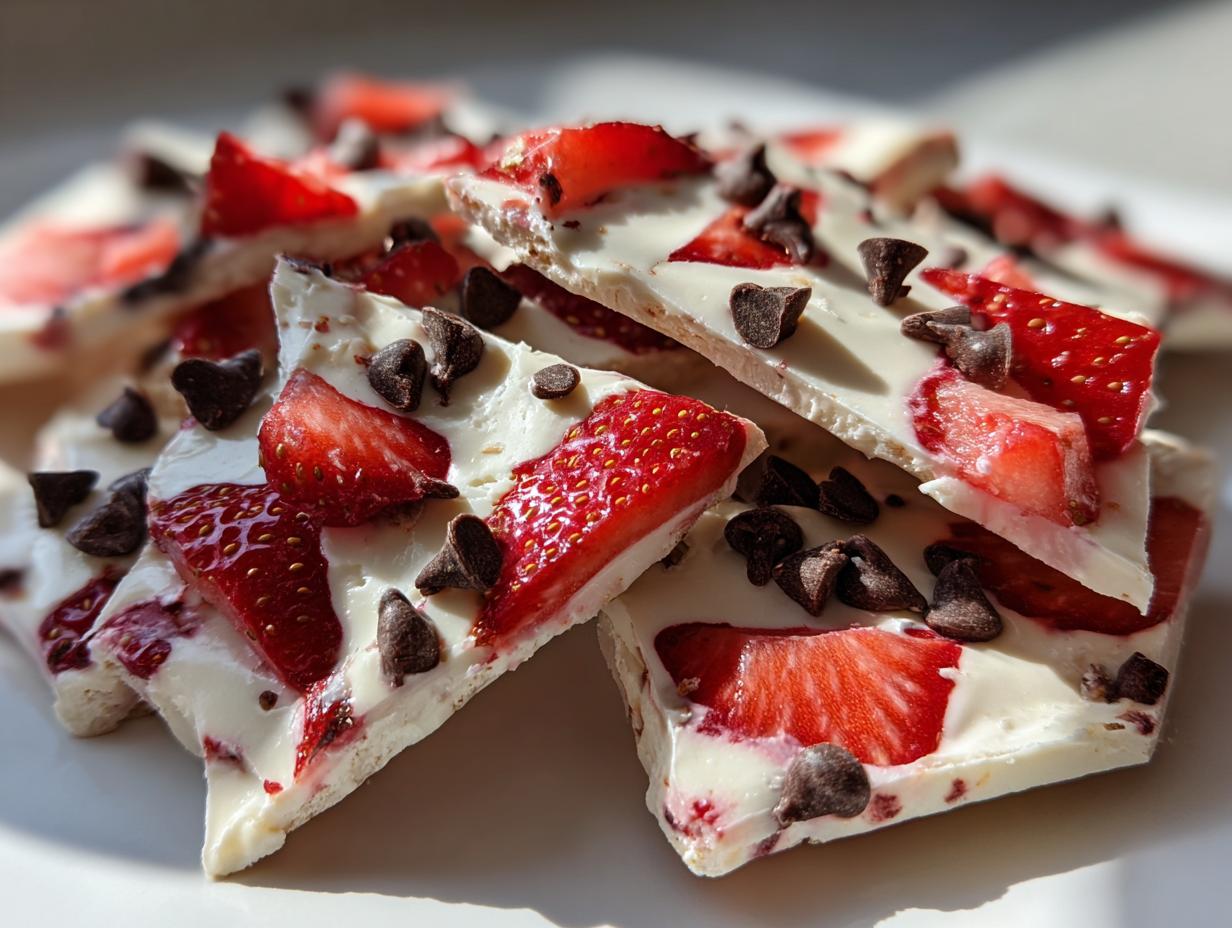
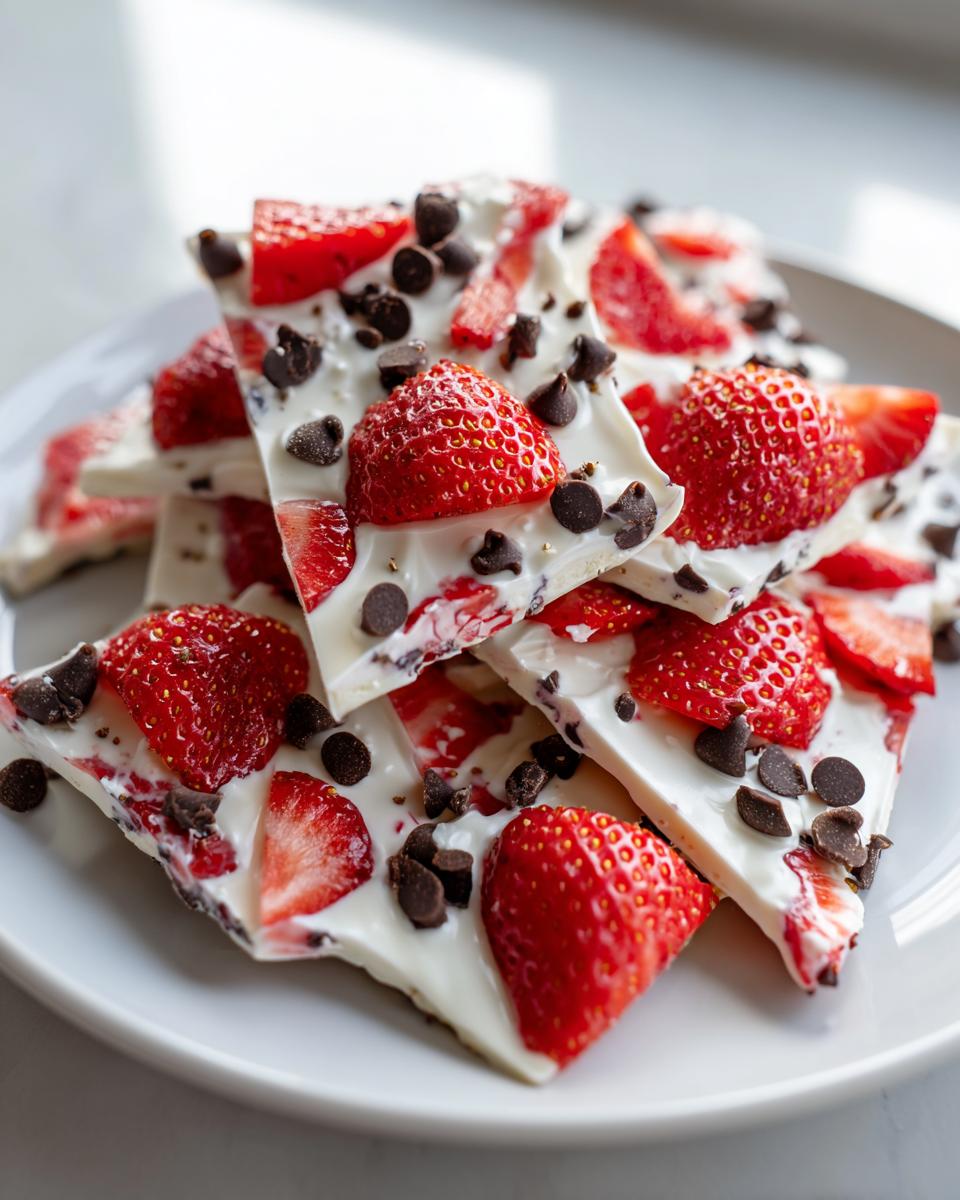
When that afternoon heat hits and you just need something cool, sweet, but you absolutely refuse to turn on the oven? Yep, I totally get it. That’s when we turn to frozen treats, but forget those sugary ice creams that leave you feeling heavy later. This no-bake Chocolate-Covered Strawberry Yogurt Bark is my absolute go-to light dessert recipe. Seriously, it’s yogurt, strawberries, and a touch of chocolate—it truly tastes like a dream dessert but takes zero actual baking effort. After years of perfecting quick, healthy desserts, I landed on this simple formula for the perfect Chocolate-Covered Strawberry Yogurt Bark. It’s ridiculously easy and tastes like pure joy!
Why This Chocolate-Covered Strawberry Yogurt Bark is a Must-Try
Honestly, this is my favorite kind of recipe because it practically makes itself! You toss it in the freezer and walk away. It’s perfect for those hot days when you want something light and refreshing, or when you need a quick treat for a last-minute gathering. Check out why I keep making this again and again:
- It’s ridiculously fast to assemble—active time is under 15 minutes, I swear!
- The flavor combination of tart strawberries and rich chocolate mixed into cool yogurt is just divine.
- It’s the best light dessert that satisfies that sweet craving without weighing you down.
Essential Equipment for Your Chocolate-Covered Strawberry Yogurt Bark
Okay, the equipment list is almost hilariously short, which is exactly what I love about this recipe! We aren’t messing around with immersion blenders or stand mixers here. You just need the basic tools to hold everything together while it freezes. Don’t skip the parchment paper, though—that’s the secret handshake for cleanup ease.
Here is what you need to have ready before you start mixing:
- Baking sheet: Any standard cookie sheet will work perfectly. You just need a flat surface to spread the yogurt thinly, remember we’re aiming for about 1/2 inch, so don’t use something with deep sides.
- Parchment paper: This is non-negotiable if you like your kitchen sanity! Because yogurt freezes rock-solid, trying to pry that frozen sheet off a bare metal pan is a guaranteed way to shatter your beautiful bark into a million sad shards. The parchment paper acts as a simple handle to lift the whole thing right off the sheet when it’s time to break it up. Trust me on this one; I learned the hard way!
Gathering Ingredients for Perfect Chocolate-Covered Strawberry Yogurt Bark
Even for something this simple, ingredient quality really shines through, especially since there’s no baking to hide behind! We are dividing our shopping list into two parts: what makes the creamy layer and what gives us that gorgeous, slightly decadent topping. If you’re looking for more calorie-smart recipes that don’t skimp on flavor, this is it. Getting that thick yogurt foundation right is the key to a successful bark structure that doesn’t turn into a runny mess!
For the Yogurt Base
Make sure you grab the full-fat version! It freezes much better and gives you that rich, creamy mouthfeel we are aiming for.
- 2 cups Greek yogurt, plain or vanilla (Full-fat recommended—don’t go low-fat here, trust me!)
- 1/4 cup Maple syrup or honey (This is your sweetener—feel free to adjust this up or down depending on how sweet you like your yogurt!)
- 1 tsp Vanilla extract
For the Toppings
Strawberries and chocolate are the dynamic duo here. I usually go for semi-sweet dark chocolate chips, but whatever you love works! Remember to slice those strawberries nicely beforehand.
- 1 cup Fresh strawberries, sliced (About 1 cup—we need good coverage!)
- 1/2 cup Chocolate chips, dark or milk (Or maybe you decide to chop up a nice bar of chocolate instead!)
Step-by-Step Instructions to Make Chocolate-Covered Strawberry Yogurt Bark
Alright, this is where the magic happens! Even though we aren’t turning on the oven, we do need to prepare for a good, solid freeze. If you happen to only have frozen strawberries on hand? No sweat! Just thaw them slightly and slice them very thinly before you add them, otherwise, they can make the yogurt layer a little too watery. I try to keep this process moving quickly so the Greek yogurt base stays nice and cold!
Preparing the Base and Freezing
First things first, grab that baking sheet and line it completely with parchment paper. This is your launchpad! Now, take your bowl with the yogurt mixture—it should be smooth from your mixing—and pour it right onto that paper. You really want to pay attention here: spread it gently but firmly until you have an even layer, aiming for about half an inch thick. If it’s too thin, it shatters weirdly; too thick, and it takes forever to freeze!
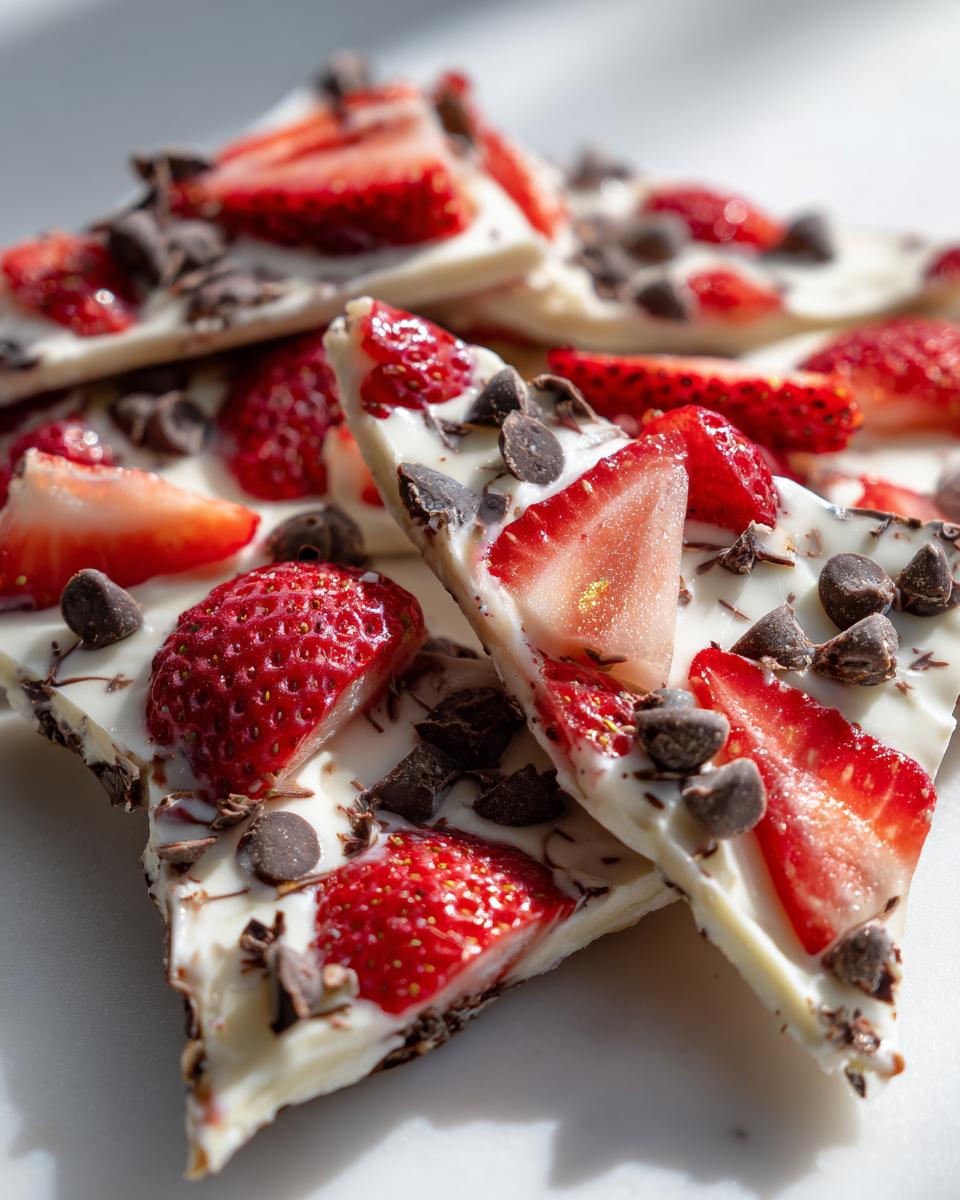
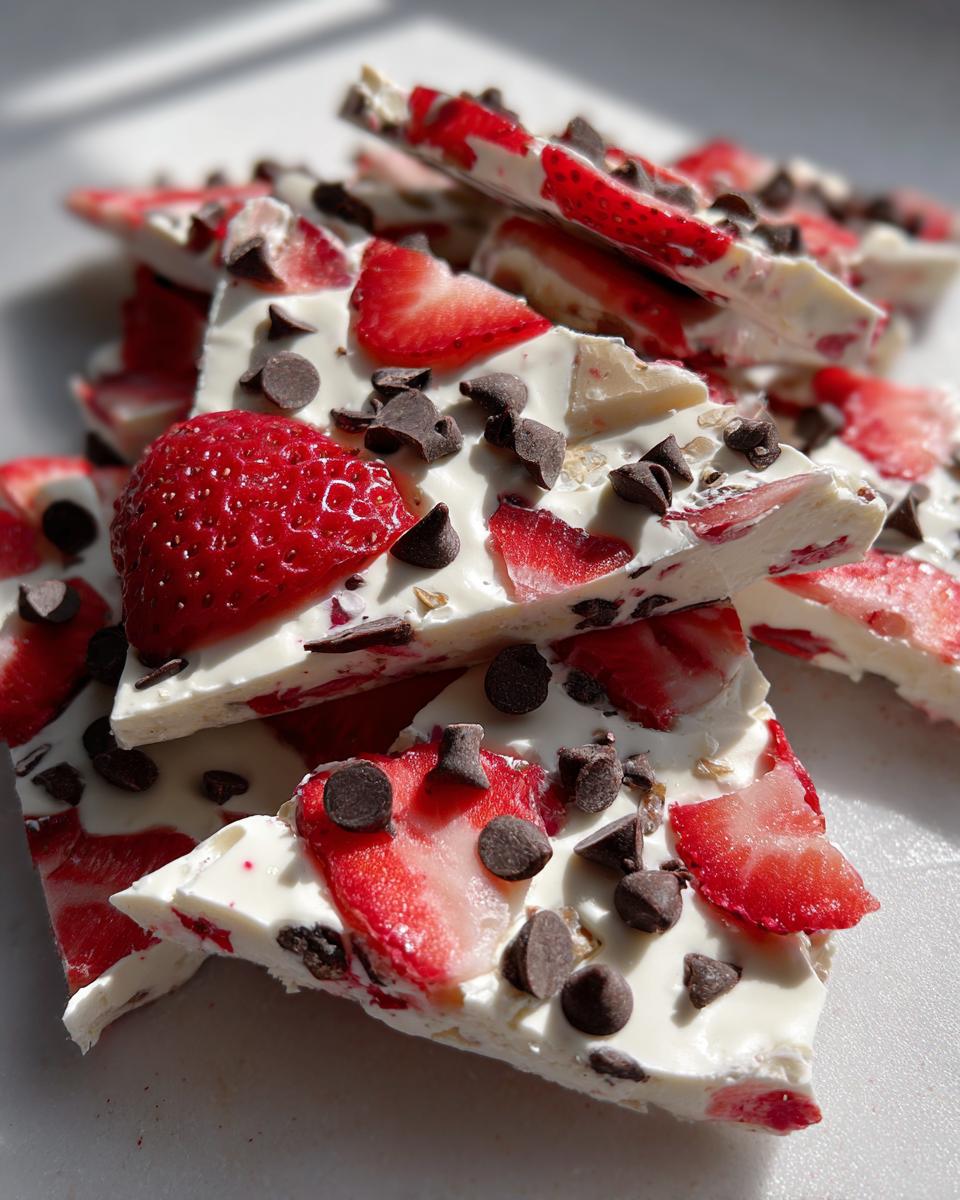
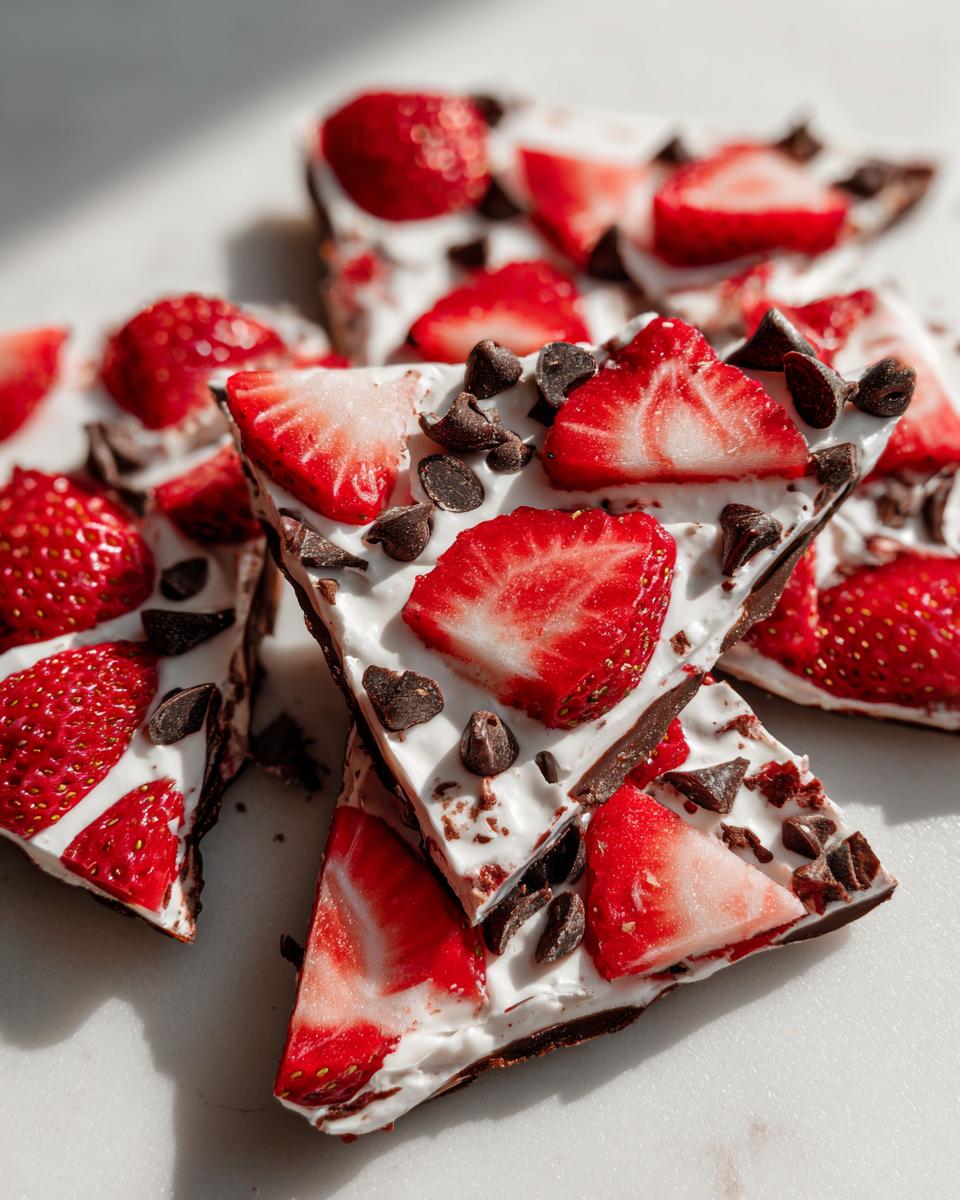
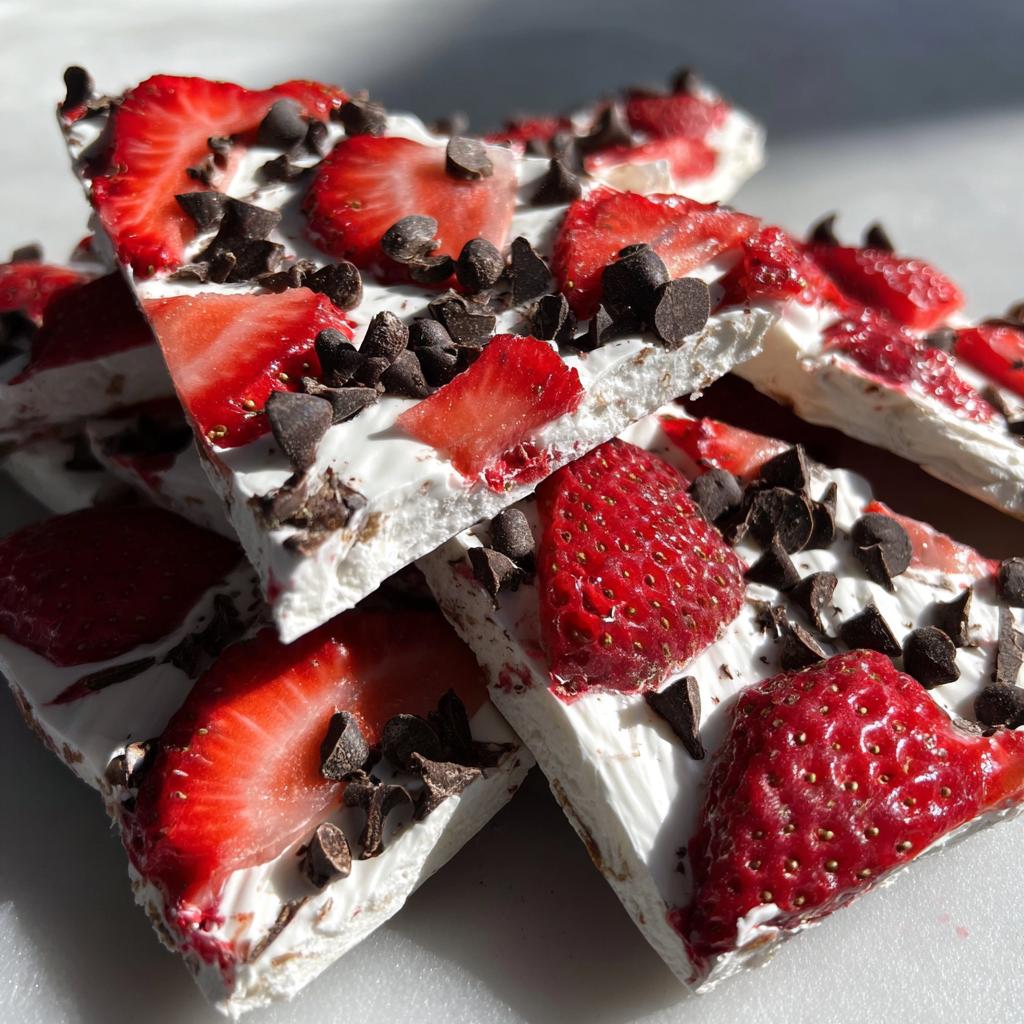
Next, art time! Arrange those lovely sliced strawberries evenly across the yogurt. Then, sprinkle your chocolate chips wherever you want them—I like mine totally covering the surface, naturally. Pop that whole sheet into the deep freeze. I say at least three hours, but honestly, I stick them in overnight if I can. You want it hard as a rock!
If you’re looking for some super quick recipes to keep in your arsenal for busy days, check out my tips for quick low-carb lunches while this barks, just to pass the time!
Breaking and Storing Your Chocolate-Covered Strawberry Yogurt Bark
Once it’s completely solid, take it out. This is so easy thanks to that parchment paper; just lift the paper, and the whole slab comes right off the pan! Now for the best part: breaking it. You can use your hands, or if you want straighter lines, use a big kitchen knife, smashing down sharply on the lines you want. I prefer the rustic, irregular look—it just feels more homemade!
Once you’ve got your fun, random chunks of yogurt bark, you need an airtight container. Keep it layered between sheets of wax paper or more parchment to stop the pieces from sticking together in one giant frozen brick. It will stay perfectly delicious in the freezer for weeks!
Tips for Perfect Chocolate-Covered Strawberry Yogurt Bark
Even though this recipe is foolproof, I’ve definitely messed up a few batches early on, trying to take shortcuts! If you want that professional-looking, easy-to-handle frozen yogurt bark that stays perfectly crisp, there are a couple of little things that make a huge difference. Don’t skip these tips, especially if you want to impress people!
First off, let’s talk yogurt consistency. The recipe calls for Greek yogurt, and that’s because it’s thick enough to hold its shape. But guess what? If your Greek yogurt seems a little runnier than usual, don’t fret! Just line a fine-mesh sieve with cheesecloth or a coffee filter, pour your yogurt in, and let it strain in the fridge for about an hour. It drains off just enough of that extra whey to guarantee a super-firm base layer. This little trick ensures your bark won’t crack weirdly when you break it because it’s structurally sound.
Now, for the chocolate! The recipe suggests sprinkling chips on top, which is fine if you like hard disks of chocolate mixed in. But if you want that classic, decadent, chocolate-covered strawberry look—like they dipped them?—you need to melt the chocolate chips first. I usually microwave them in 20-second bursts, stirring in between until they’re smooth. Then, use a fork or a small spoon to drizzle that melted chocolate right over the strawberries before you stick it in the freezer. It sets up into this beautiful, thin, gorgeous coating. It totally elevates the whole look, making it seem way harder than it actually is!
Also, always pay attention to your spreading! I mentioned aiming for 1/2 inch, but if you get one side that’s only 1/4 inch thick, that part is going to freeze fast and shatter into annoying little pieces. When you’re smoothing it out, take your time to make the surface as flat as possible. This uniformity ensures that the entire sheet freezes at the same rate, which is key for easy breaking later. If you’re looking for other ways to make your favorites feel a little lighter and cleaner, my advice on slimmed-down favorites might give you some fun new ideas!
Variations on Your Chocolate-Covered Strawberry Yogurt Bark
Listen, the basic Chocolate-Covered Strawberry Yogurt Bark is fantastic, but you know me—I love to tinker! Once you have that basic structure down—the good Greek yogurt base and the mandatory parchment paper—you can totally swap out the toppings to keep things interesting. This means you can make a totally new frozen treat out of the exact same base mixture! It’s all about keeping things fun and making sure you always have a healthy-ish snack on hand that feels special. If you’re always looking for ways to keep things light and tasty, check out my ideas for sweet without guilt recipes; they often involve this yogurt bark concept!
Don’t feel trapped by strawberries and chocolate chips, even though they taste amazing together. Your freezer is your playground here!
Switching Up the Fruit Game
The fruit has to be firm enough not to release too much water, so stick to berries or fruits that are already firm when sliced. I did a batch last summer that disappeared instantly!
- Blueberry Power: Substitute the strawberries with fresh blueberries. They look so adorable scattered across the white yogurt, and they actually freeze a bit firmer, which is nice.
- Tropical Twist: Thinly sliced kiwi works wonderfully, though it might get a little soft around the edges after a few weeks in the freezer. Mango cubes are also great, but make sure they aren’t dripping wet when you place them on the yogurt.
- Mixed Berry Magic: Combine halved raspberries and sliced strawberries for a beautiful autumnal color scheme, perfect for when you want a holiday feel without the oven heat.
Adding the Crunch Factor
Sometimes you just need that satisfying textural *snap* when you bite into something cold. The chocolate chips provide a soft crunch, but we can go harder!
- Nuts and Seeds: A light sprinkling of chopped pecans or walnuts adds healthy fats and great texture. I’ve even tossed on a few toasted slivered almonds right before freezing for an extra depth of flavor.
- Granola Sprinkles: If you have a low-sugar granola blend you love, crush it up lightly and sprinkle it over the chocolate layer. This works best if you add the granola *after* the chocolate drizzle, just before the final freeze, so the chocolate acts like glue to hold the granola in place.
- Coconut Flakes: Unsweetened toasted coconut flakes are incredible, especially if you pair them with a little lime zest in the yogurt base instead of just vanilla. Wow, that one surprises people!
Remember, whatever mixture you choose, just make sure those toppings aren’t too heavy or thick, or the yogurt underneath won’t freeze evenly. Keep those layers relatively thin, and you’ll have amazing, customized yogurt bark every single time!
Storing Leftover Chocolate-Covered Strawberry Yogurt Bark
Now, let’s be real: this Chocolate-Covered Strawberry Yogurt Bark is notoriously difficult to keep around. It’s just too good! But in the rare event that you don’t devour the whole thing in one afternoon (maybe you made a double batch, you savvy baker!), storage is super easy, provided you follow my cardinal rule: it absolutely has to stay frozen solid.
You cannot keep this yogurt bark in the fridge hoping it will gently soften up. It will melt right back into sad, sweet yogurt soup! We need the deep freeze to preserve that satisfying, crisp texture. Once you’ve broken your slab into those perfect irregular pieces, grab your best container—and I mean truly airtight container—that you have.
The trick to maintaining that perfect snap is preventing freezer burn and stopping the pieces from fusing back together. I always layer them! Before putting any pieces in, I lay down a sheet of wax paper or a fresh piece of parchment paper at the bottom of the container. Then I stack a layer of bark pieces, maybe top them with another small piece of paper, and continue until the container is full. This prevents any little sticky bits of yogurt or melted chocolate from bonding the pieces into one giant, unmanageable frozen brick.
How long does it last? Honestly, because it’s just yogurt, fruit, and chocolate, it holds up fantastically well in a deep freeze. If kept sealed tight, you can pull out perfect pieces weeks later—I’d say up to six weeks is my personal testing limit for peak quality, though it keeps longer. When you pull it out, let it sit on the counter for just five minutes before trying to break a piece off if it seems rock hard. Enjoy your freezer stash!
Frequently Asked Questions About Yogurt Bark
When you’re making something new, especially a frozen treat like this, I always end up with a million little questions popping into my head. I figured that if I was wondering about it, you probably are too! Here are the things I get asked most often about making perfect yogurt bark, especially when we’re talking about that dreamy Chocolate-Covered Strawberry combination.
Can I use regular yogurt instead of Greek yogurt?
Oh, this is a big one! Short answer: You *can*, but I strongly advise against it unless you take an extra step. Regular, non-Greek yogurt has way too much whey (water content). If you pour it onto the pan, it spreads too thin, freezes with a weird icy texture, and it’s much more likely to crack and shatter when you try to break it apart. If you absolutely must use regular yogurt—maybe it’s all you have—you have to strain it first. Line a sieve with a paper towel or cheesecloth and let it sit over a bowl in the fridge for at least an hour, or even two. You’re trying to drain off that excess liquid until it gets nearly as thick as Greek yogurt. That little bit of extra effort makes all the difference for texture!
How thick should the yogurt layer be for the best results?
Texture is everything in yogurt bark, right? If you make it too thin, say less than 1/4 inch, it freezes super fast into brittle shards that are hard to handle, and the toppings might completely fall off as you eat them. If you go too thick—over 3/4 inch—the middle takes an absolute age to freeze solid, and you might end up with that frustrating icy core where the yogurt didn’t freeze properly. I always tell people to aim for exactly 1/2 inch thick. Use the back of a spoon or a small offset spatula to spread it evenly across the whole pan. That sweet spot guarantees a sturdy, satisfying snap when you break off a piece.
Is it okay to skip the maple syrup or honey entirely?
I totally understand wanting to cut back on added sugar, especially when focusing on diet recipes! If you use vanilla-flavored Greek yogurt, you *might* be able to skip the sweetener, but I’d really taste your base first. Plain Greek yogurt, even the full-fat kind, can be quite tangy and tart on its own. When you freeze yogurt, it dulls the sweetness slightly, so if it tastes perfect before freezing, it might taste a little bland after. If you ditch the syrup, try adding a tiny pinch of salt—it actually helps bring out the sweetness from the strawberries and chocolate, even without the sugar.
My chocolate chips didn’t set nicely; what did I do wrong?
If you just sprinkled the chips on top and they stayed powdery or separated weirdly after freezing, you might have had two issues! Like I mentioned in the tips section, if you want a true “chocolate-covered” look, you really need to melt them first and drizzle them over the toppings after you add the fruit. Sprinkle chips work okay, but sometimes they can freeze unevenly. The second issue is temperature. If your yogurt base was already getting too soft (maybe you took too long mixing or spreading), the chocolate chips just sort of sink in rather than resting nicely on top. Make sure your yogurt base is spread cold and fast, and then get it straight into the freezer—no delays!
Nutritional Estimates for Chocolate-Covered Strawberry Yogurt Bark
Okay, confession time: when I’m whipping up something delicious like this Chocolate-Covered Strawberry Yogurt Bark, I’m usually not thinking about my macros! I’m thinking about how perfect that tart strawberry flavor is going to be against the creamy yogurt. But since we all want to keep things balanced, especially when looking for minimal calorie recipes, I did run the numbers based on the standard ingredient list for one serving (divided by 8).
You should always remember that these numbers are just estimates, though! They can swing wildly depending on whether you use 0% fat yogurt or full-fat, or if you swap out the maple syrup for honey, or if you decide to go heavy-handed with the dark chocolate! If you’re tracking strictly, you’ll need to input your exact brands, but this gives you a fantastic baseline for a light, guilt-free snack.
Assuming we use full-fat Greek yogurt and split the recipe evenly into 8 servings, here’s the general snapshot:
- Calories: Roughly 160–185 calories per serving. See? It’s a great, light treat!
- Protein: This is where Greek yogurt shines! You’re looking at a solid 10–12 grams of protein per piece, which keeps you feeling full and happy.
- Fat: This bumps up slightly because I highly recommend the full-fat yogurt for creaminess, putting us around 6–8 grams primarily from the yogurt and the chocolate chips.
- Carbohydrates: Around 18–22 grams, which comes mostly from the natural fruit sugars, the maple syrup we added, and the chocolate itself.
It’s easily one of the best high-protein, relatively low-calorie ways to satisfy that dessert craving. Enjoy knowing that you’re getting a healthy dose of calcium and protein along with that amazing taste!
Chocolate-Covered Strawberry Yogurt Bark
Ingredients
Equipment
Method
- Line a baking sheet with parchment paper.
- In a medium bowl, mix together the Greek yogurt, maple syrup (or honey), and vanilla extract until smooth.
- Pour the yogurt mixture onto the prepared baking sheet. Spread it into an even layer, about 1/2 inch thick.
- Arrange the sliced strawberries evenly over the yogurt layer.
- Sprinkle the chocolate chips over the strawberries and yogurt.
- Place the baking sheet in the freezer. Freeze for at least 3 hours, or until completely solid.
- Once frozen, remove the bark from the freezer. Lift the parchment paper to remove the bark from the sheet. Break the bark into irregular pieces.
- Store the yogurt bark pieces in an airtight container in the freezer.