
Oh, Twix bars, right? Those crunchy, caramel, chocolatey little delights that just melt in your mouth! Well, buckle up, because we’re about to recreate that magic right in your own kitchen. I’ve always loved a good baking project, especially when it can rival a store-bought favorite. After a few fun experiments, I’ve landed on this absolute winner for homemade Twix Cookies. It captures that perfect buttery shortbread base, gooey caramel, and rich chocolate coating that we all know and love. It seriously tastes just like the real deal, but with that special homemade touch.
Who Will Love These Twix Cookies?
Okay, so who is this recipe for? First off, if you’re a card-carrying member of the Twix fan club, you NEED to try these. Seriously, if you find yourself rummaging through the candy aisle specifically for those golden bars, get ready for your new favorite homemade treat. This recipe is also perfect for anyone who loves a little baking challenge that’s totally worth it. It’s not super complicated, but there are a few steps that make it feel like a real accomplishment when you’re done. Plus, if you’re feeling nostalgic and want to whip up a batch of something that reminds you of childhood or fun movie nights, these Twix Cookies are your answer. They’re for anyone who believes that homemade is almost always better!
Our Approach: Deliciously Authentic Twix Cookies
My goal here is to give you a recipe for Twix Cookies that tastes just like the candy bar, but with that extra special homemade love. We’re going for a friendly, can-do vibe. I’ll walk you through each step, making sure it’s super clear and easy to follow. Think of me as your kitchen buddy, cheering you on! Together, we’ll make these cookies absolutely perfect, striking that sweet spot between authentic candy-bar flavor and being totally achievable for anyone who loves to bake.
A Personal Baking Journey: Creating the Perfect Twix Cookies
You know, for years, I had this little voice in my head that just *knew* I could recreate my favorite candy bar at home, but it felt daunting! I remember one rainy Saturday, I was around 12, and I decided this was *the* day I was going to conquer homemade Twix. Let’s just say my first attempt was… interesting. The shortbread part was okay, but the caramel? Disaster! It was like chewy glue. I almost gave up right then. But then, I thought about how much I loved that perfect bite – the crunch, the chew, the chocolate – and I knew I had to try again. It took a few more tries, tweaking the caramel recipe until it was just right and getting that cookie base perfectly tender, but when I finally pulled a batch of these Twix Cookies out of the oven and took that first bite? Pure magic. It was like a taste of childhood and triumph all rolled into one!
Gather Your Ingredients for Twix Cookies
Alright, let’s get our mise en place ready! Having everything prepped makes the whole baking process so much smoother. Here’s what you’ll need to whip up these amazing homemade Twix Cookies. Trust me, using good quality ingredients makes a difference!
For the Buttery Cookie Base
1/2 cup salted butter, softened (that’s about 111g of pure buttery goodness!)
1/2 cup granulated sugar (115g – this helps with that perfect crispiness)
1 tsp vanilla extract (don’t skip this, it adds such a lovely warmth)
1 large egg white (just the white for that delicate texture)
1 1/2 cups all-purpose flour (around 228g – the backbone of our cookie)
1 tsp baking powder (for a little lift, but not too much – we want them dense like a Twix!)
For the Gooey Caramel Filling
20 unwrapped caramels (the soft, chewy kind work best!)
1 tbsp milk (just a splash to get that caramel lusciously smooth)
For the Dazzling Chocolate Coating
2 cups milk chocolate chips (about 400g – milk chocolate gives you that classic Twix flavor, but feel free to use semi-sweet if you prefer!)
Step-by-Step Guide to Making Twix Cookies
Alright, let’s get down to business! Making these homemade Twix Cookies is a little like assembling a delicious puzzle, and I promise, every piece is worth it. Grab your apron, and let’s dive in! You can find more amazing dessert recipes right here!
Preparing the Cookie Base
First things first, grab your stand mixer. You want to cream together that softened butter and granulated sugar until it’s nice and light, almost fluffy. This might take a couple of minutes, but it’s SUPER important for that perfect tender cookie. Add in your egg white and that splash of vanilla extract and mix until it’s all combined. Now, in a separate bowl, give your flour and baking powder a little whisk together. Gradually add these dry ingredients into your wet mixture, just until a soft dough starts to form. Don’t overmix it! You can find more helpful tips for baking cake ideas and recipes that apply here too.
Shaping and Baking the Cookie Layers
Time to get those cookie layers ready. Lightly flour a clean surface and gently roll out your dough to about 1/4 to 1/2 inch thick. You don’t want them too thin! Then, grab a round cookie cutter – I usually use one that’s about 2 inches wide – and cut out as many circles as you can. You can re-roll the scraps once, gently. Place these little beauties onto an ungreased cookie sheet, leaving a little space between them. Pop them into your preheated oven at 350°F (175°C) for about 6-8 minutes. You’re looking for the edges to be just lightly golden, and the centers should still look a little soft, not glossy. They’ll firm up as they cool!
Crafting the Caramel Filling
While those cookies are cooling completely on a wire rack (seriously, let them cool!), let’s tackle the caramel. Take your unwrapped caramels and put them in a microwave-safe bowl with that tablespoon of milk. Microwave them in short bursts – about 30 seconds at a time – stirring in between each burst. Keep going until it’s all melted down into a smooth, glorious stream of caramel. It should be thick but still pourable.
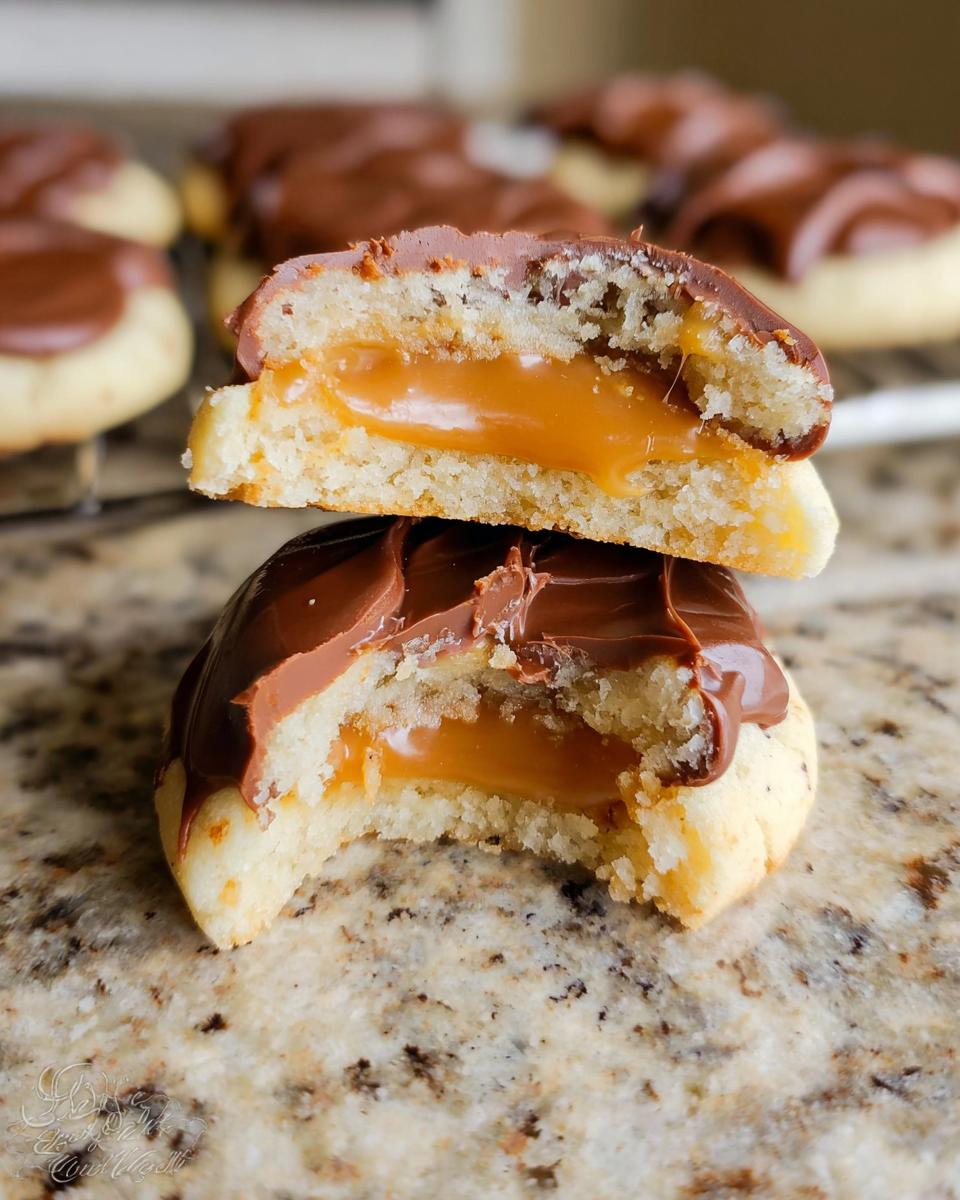
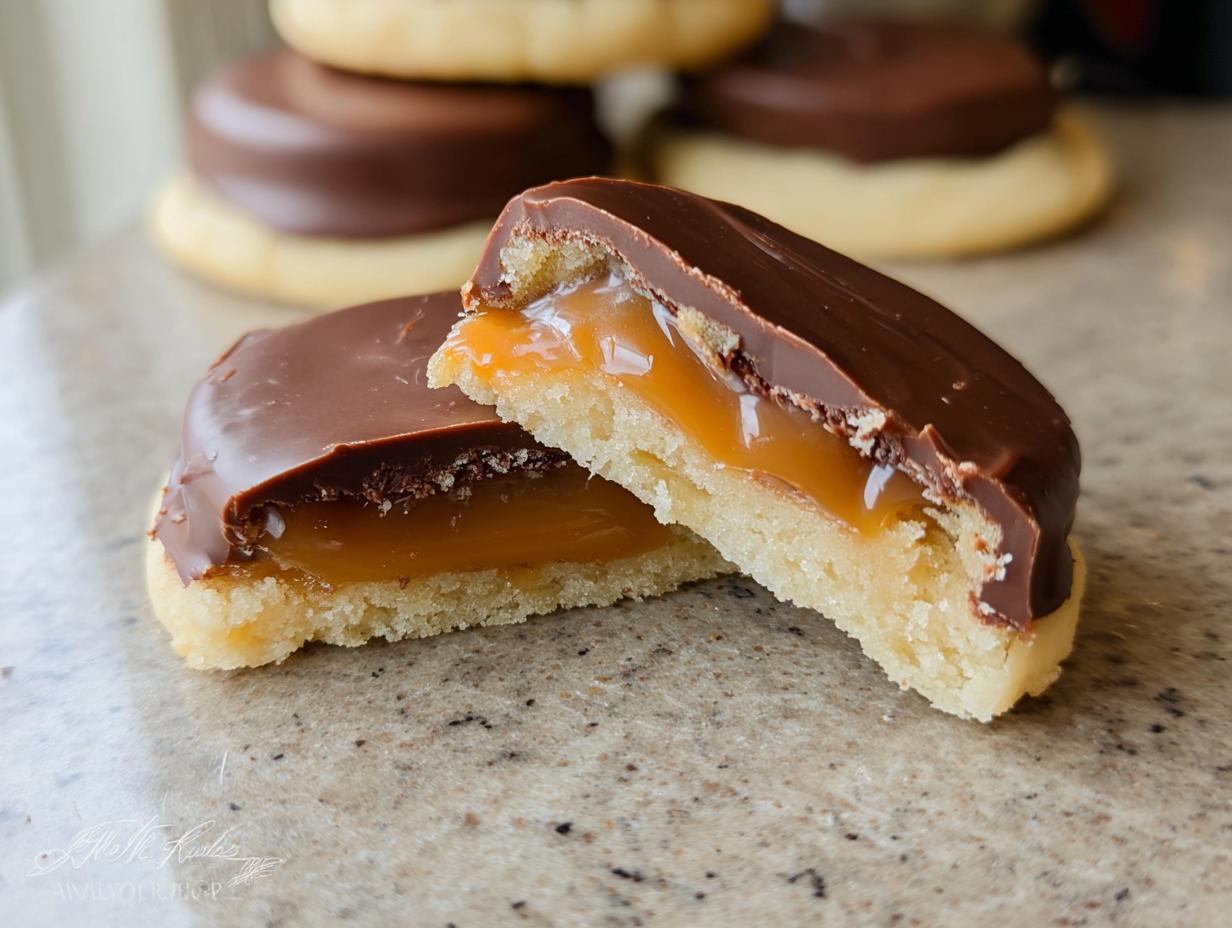
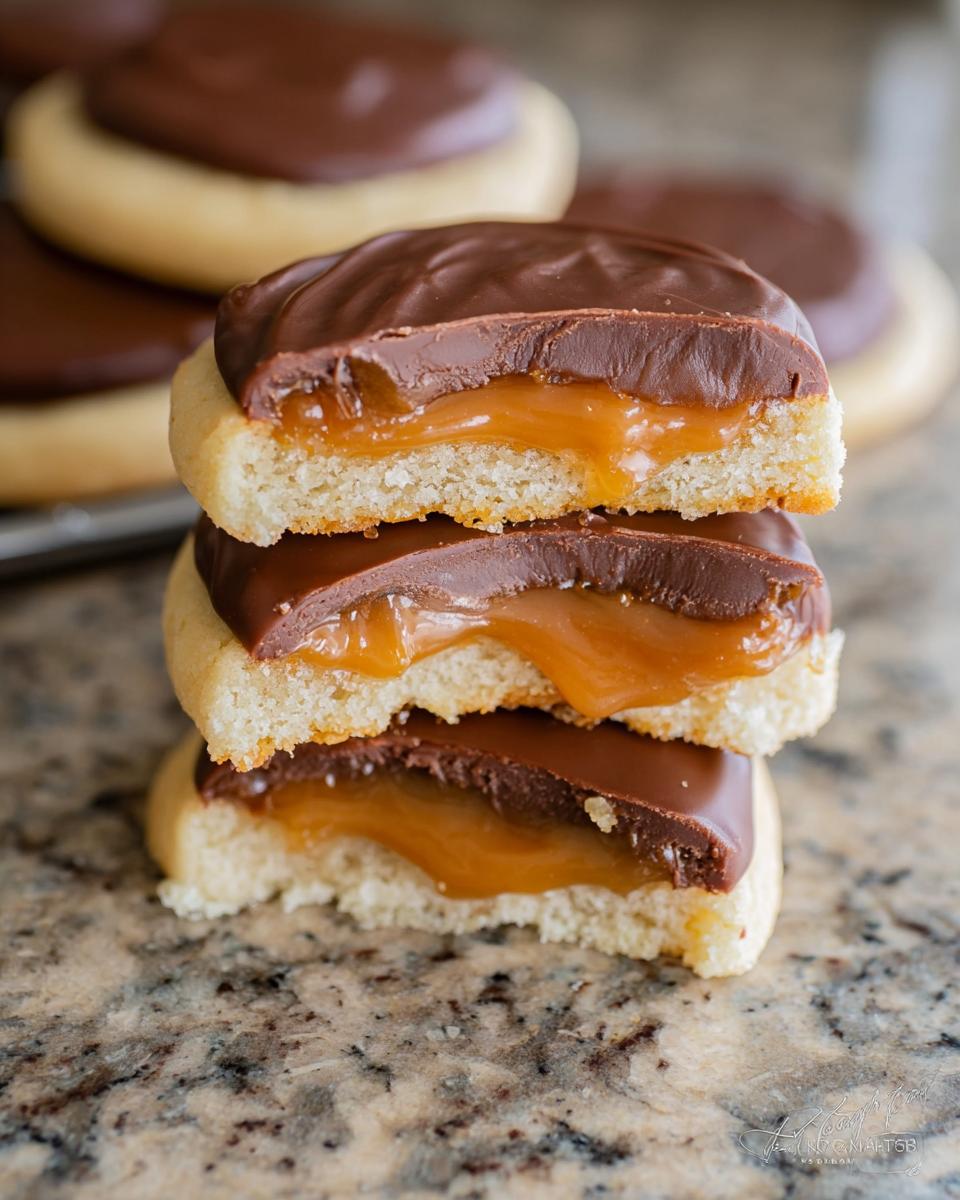
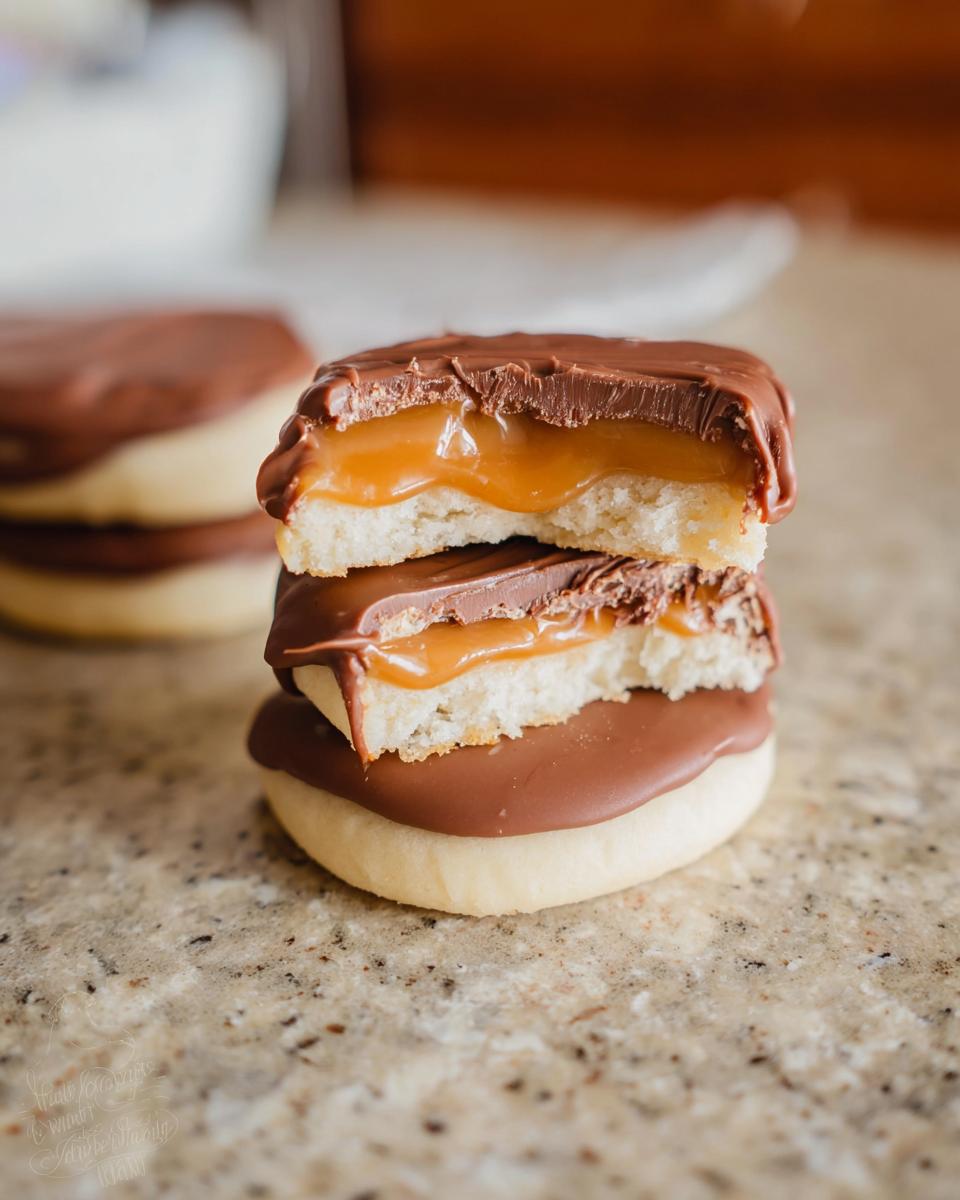
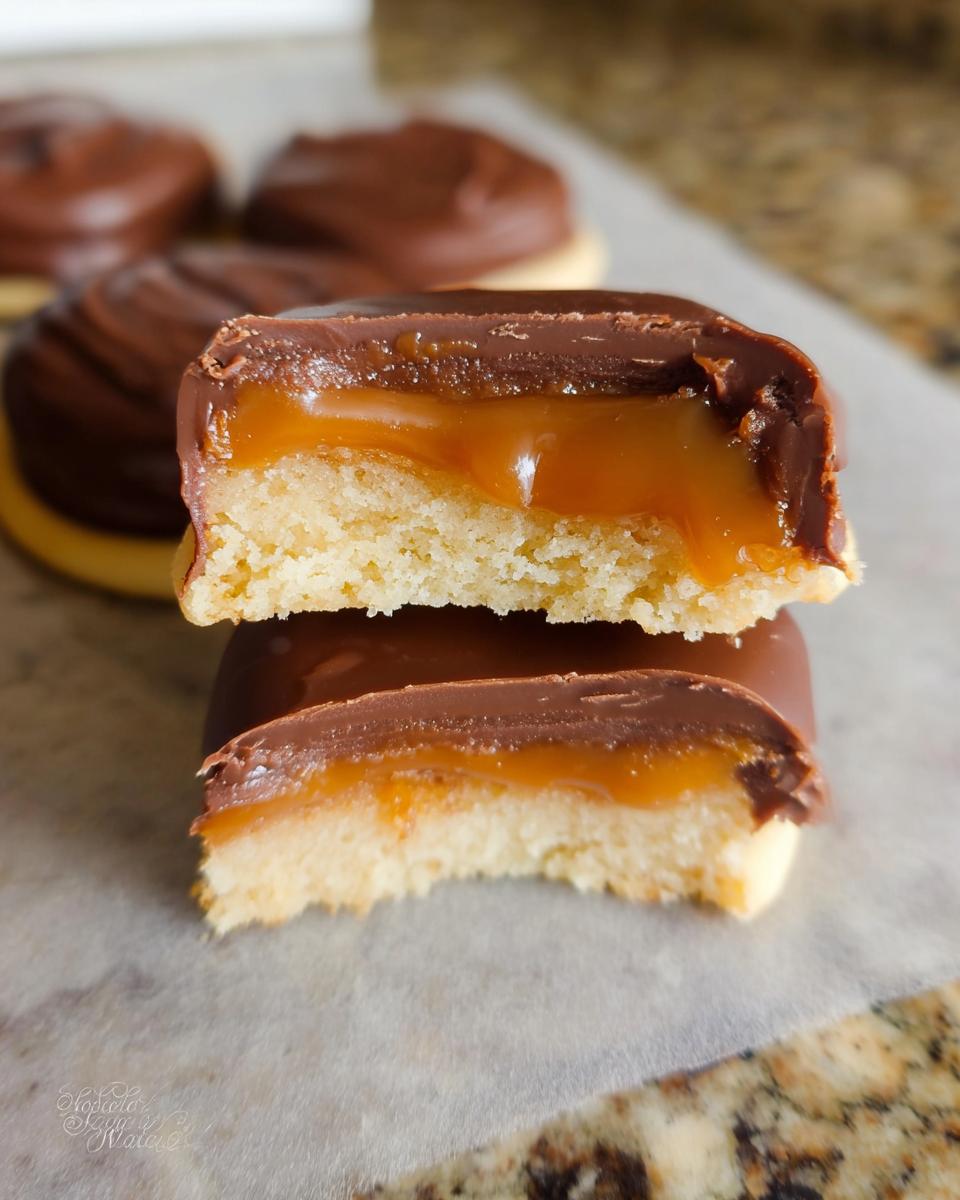
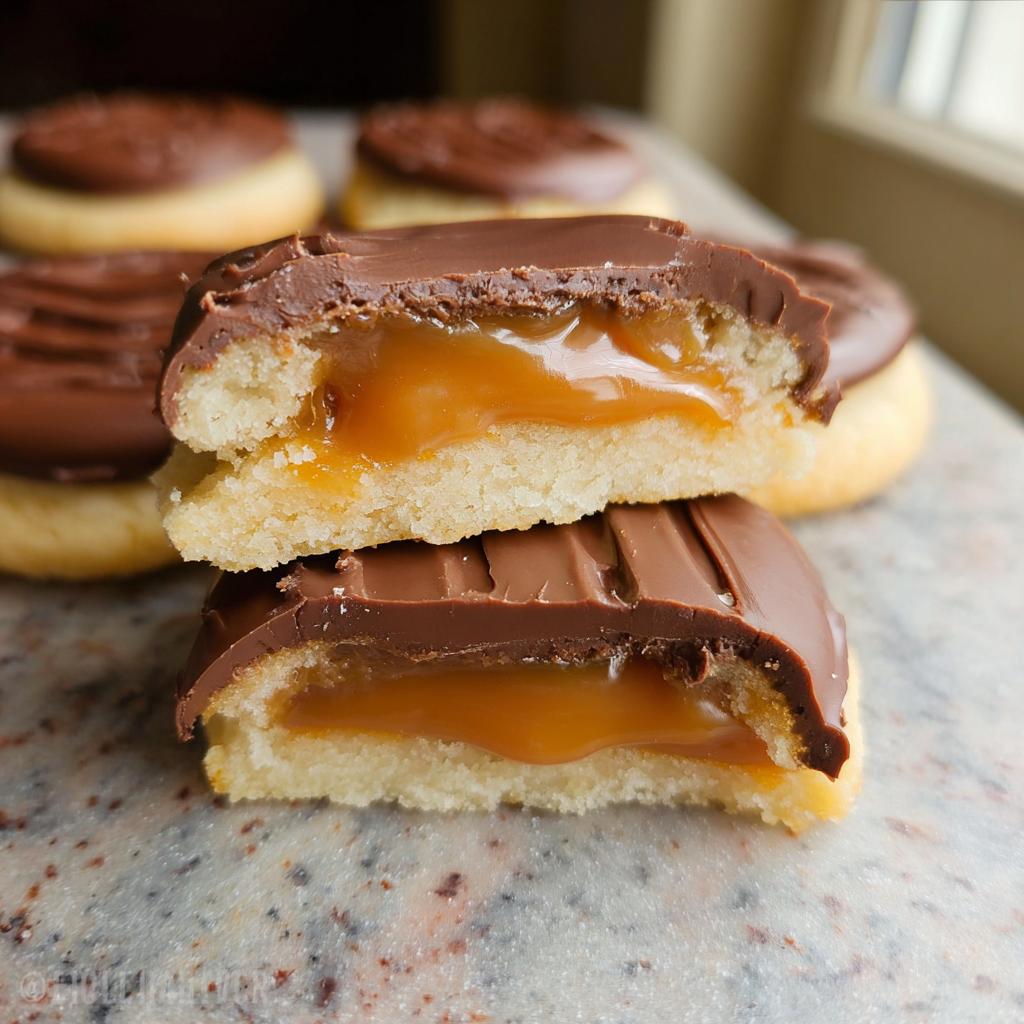
Assembling Your Twix Cookies
Okay, your cookies should be cool now, right? Perfect! Grab a small spoon and carefully place a little dollop of that warm caramel onto the center of each cookie. Gently spread it out towards the edges, but leave a tiny border so it doesn’t all ooze off. Now, here’s a crucial step forgetting that caramel to firm up: pop these caramel-topped cookies into the refrigerator for about 10-15 minutes. This helps set the caramel so it won’t slide off when you add the chocolate. It’s like giving it a little hug to set in place!
The Chocolatey Finish
Last but not least, the chocolate! Melt your milk chocolate chips in the microwave, again, in 30-second intervals, stirring really well each time. You want it super smooth and glossy. Once it’s melted, you can either dip the caramel-topped cookies right into the chocolate, letting any excess drip off, or use a small spatula or knife to spread a thin, even layer of chocolate over the caramel. Place them back on your wire rack (maybe with some parchment paper underneath to catch drips) and let that chocolate set completely before you dig in. And there you have it – homemade Twix Cookies!
Tips for Perfect Twix Cookies Every Time
Okay, so you’ve made these amazing Twix Cookies, but how do we make sure they turn out absolutely perfect *every* single time? It’s all about a few little tricks I’ve picked up along the way. First off, ingredient temperature is key for the cookie dough. Make sure that butter is truly softened – you know, the kind where you can easily press your finger into it, but it’s not melted or greasy. This helps it cream nicely with the sugar, creating that airy base for our cookies. If your dough feels too sticky when you’re rolling it out, don’t be afraid to pop it in the fridge for 10-15 minutes. It makes it so much easier to handle and cut cleanly! You can find more fun ideas for dessert recipes that share some of these baking secrets. Also, for the caramel, make sure your cookies are COMPLETELY cool before you spoon it on. Seriously, patience here pays off big time. If the cookies are warm, the caramel will just melt and slide right off. And when you’re melting chocolate, go slow and stir often – it’s better to melt it gradually than to scorch it. A little extra love and attention, and these Twix Cookies will be showstoppers!
Ingredient Notes and Substitutions for Your Twix Cookies
So, let’s chat about these ingredients just a little! The salted butter is great because it adds a touch of saltiness that balances the sweetness, but if you only have unsalted, just add a tiny pinch of salt to the dough. For the chocolate, I love milk chocolate for that classic candy bar vibe, but if you’re more of a dark chocolate fan, go for it! Semi-sweet works wonderfully too. And speaking of caramel, you can absolutely use a good-quality store-bought caramel sauce if you’re in a super rush, just make sure it’s thick enough not to run everywhere when you spread it!
Frequently Asked Questions About Twix Cookies
Got questions about these dreamy homemade Twix Cookies? I’ve got you covered! Making these is super fun, but it’s normal to have a few queries pop up.
How should I store my homemade Twix Cookies?
The best way to store these is in an airtight container at room temperature. They should stay delicious for about 3-4 days. If your kitchen is super warm, you might want to pop them in the fridge for a bit, but they can get a little hard when cold. They’re definitely best enjoyed closer to room temperature!
Can I make these Twix Cookies ahead of time?
Yes, absolutely! You can make the cookie bases a day or two in advance and store them in an airtight container. Then, just add the caramel and chocolate closer to when you want to serve them. The caramel can get a bit sticky if exposed to air for too long, so it’s best to assemble them within a day or two of wanting to eat them for optimal freshness!
What if my caramel is too runny or too thick?
If your caramel seems too runny after melting, try adding another unwrapped caramel or two and microwaving for another 30 seconds, stirring well. If it’s too thick, stir in another tiny splash of milk, maybe half a teaspoon at a time, until it reaches a good spreadable consistency. You want it thick but still smooth!
Can I use dark chocolate instead of milk chocolate for these Twix Cookies?
Oh, definitely! If you’re a dark chocolate lover, go right ahead. Using dark chocolate chips will give your Twix Cookies a richer, less sweet flavor profile, which is amazing! You can also mix milk and dark chocolate for a custom flavor. Just melt and use them the same way you would the milk chocolate chips. You can find more yummy dessert recipes that showcase different chocolate variations!
Estimated Nutritional Information
Just a heads-up, the nutritional info for these homemade Twix Cookies is an estimate, since it can totally depend on the brands you use and the exact size of your cookies. But generally, you’re looking at around 150-200 calories per cookie, with a good mix of carbs, fats, and a little bit of protein. For more details on how we track our numbers, you can check out our nutritional disclaimer.
Share Your Twix Cookie Creations!
Alright, I’ve spilled all my secrets for these amazing homemade Twix Cookies! Now it’s your turn! I would absolutely LOVE to hear what you think. Did you try them? Did they bring back some fun memories? Leave a comment below and tell me all about it. And if you share your creations on social media, give me a tag – I want to see your delicious masterpieces!
By Emilia
Hi, I’m EMILIA, the founder of MeltItClean.com – your digital space for natural weight loss, real wellness habits, and clean-living inspiration that actually fits your life. For years, I struggled with the ups and downs of dieting. I tried everything — juice cleanses, low-carb crazes, fitness challenges — but I always ended up back where I started: tired, bloated, and frustrated. I didn’t just want to “lose weight” — I wanted energy, mental clarity, glowing skin, and confidence without sacrificing my joy or sanity.
After years of experimenting, learning, and unlearning, I discovered a simple truth: your body is already powerful — it just needs support, not restriction. That’s when I created Melt It Clean — a site dedicated to real transformation through clean, intentional, and nourishing daily habits that anyone can follow. My goal was simple: build a place where people could feel informed, supported, and empowered without being overwhelmed by wellness fads. You can learn more about my journey here.
Twix Cookies
Ingredients
Equipment
Method
- Preheat your oven to 350°F (175°C).
- In a stand mixer, cream together the butter and granulated sugar until light and fluffy.
- Add the egg white and vanilla extract, mixing until well combined.
- In a separate bowl, whisk together the all-purpose flour and baking powder. Gradually add the dry ingredients to the wet ingredients, mixing until a dough forms.
- Roll the dough out on a lightly floured surface to about 1/4 to 1/2 inch thick. Use a round cookie cutter to cut out circles. Place the dough circles onto an ungreased cookie sheet.
- Bake for 6-8 minutes, or until the edges are lightly golden and the centers are no longer glossy.
- Transfer the cookies to a wire rack and let them cool completely.
- While the cookies cool, combine the unwrapped caramels and milk in a microwave-safe bowl. Microwave in 30-second intervals, stirring at the halfway point, until the caramels are melted and smooth.
- Spoon a small amount of the caramel mixture onto each cooled cookie, spreading it almost to the edges.
- Place the cookies in the refrigerator for 10-15 minutes, or until the caramel is firm.
- Melt the milk chocolate chips in the microwave, stirring every 30 seconds, until smooth and fully melted.
- Dip the caramel-topped cookies into the melted chocolate, or spread a thin layer of chocolate over the caramel. Let the chocolate set before serving.


