
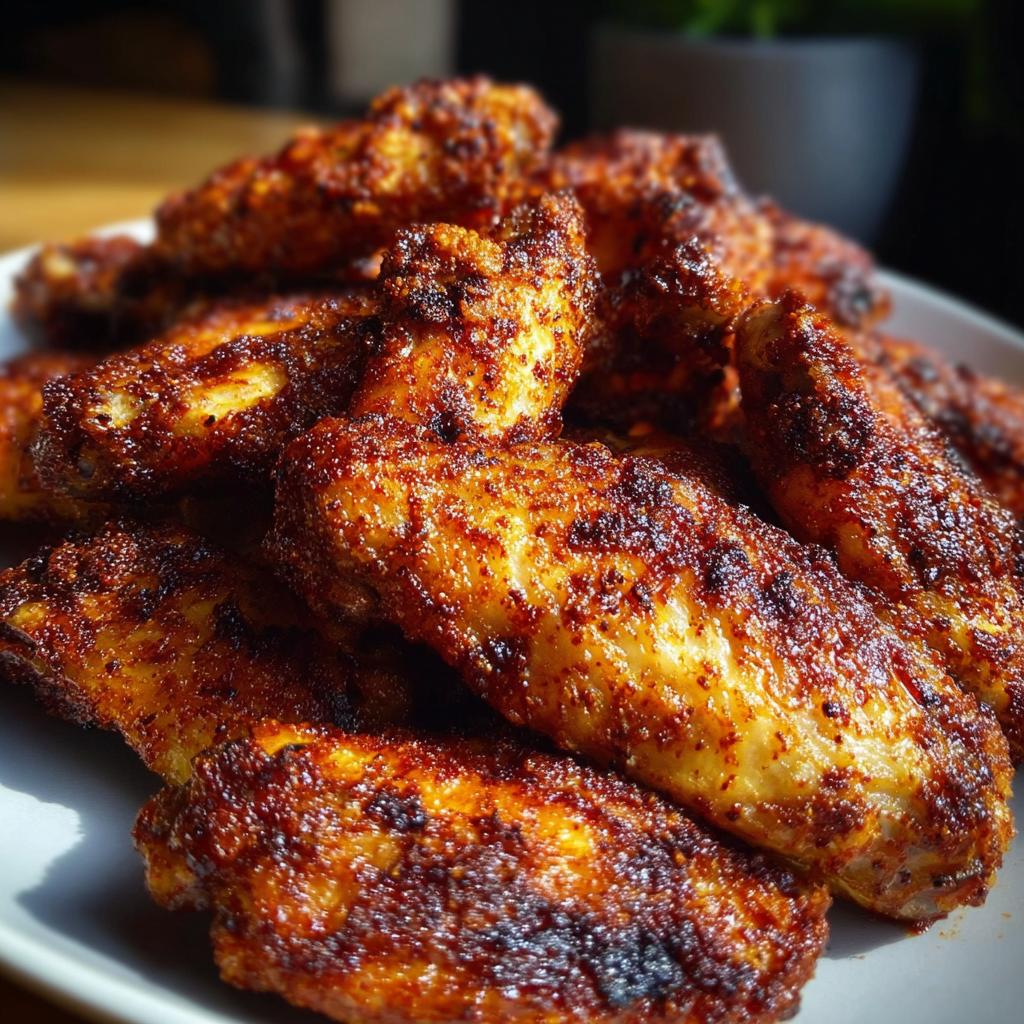
Listen, I get it. You want that satisfying crunch, that perfect savory flavor of restaurant-style wings, but you’re trying to keep things intentional and clean—no greasy deep fryer mess or heavy oils necessary! Over the years, while building sustainable wellness habits here at Melt It Clean, I’ve totally cracked the code on making truly crispy chicken wings right in the oven. Seriously, forget everything you thought you knew about soggy baked wings.
The absolute magic trick, the thing that guarantees incredible texture every single time for these Oven Baked Chicken Wings with Crispy Skin, is adding just a tiny bit of baking powder to the spice rub. I spent what felt like ages testing different fats and temperatures, but that baking powder stabilized the skin and made them shatteringly crisp. After years of trial and error, this recipe is my go-to for enjoying amazing comfort food without derailing my focus on real health.
If you’re starting your journey toward clean eating, you don’t have to sacrifice joy. This method, perfected over probably a dozen test batches, proves you can have indulgence the healthy way. You’re going to love how simple these are to toss together before you check out the rest of the recipe, which you can find right here: baked chicken recipes help keep things simple!
Why You Will Love These Oven Baked Chicken Wings with Crispy Skin
I promise you, once you try these, you’ll never want to bother with deep-frying again! Getting that awesome, crunchy skin without submerging the wings in oil felt like finding a wellness cheat code when I first nailed it. No guilt, just flavor!
Here is the shortlist of why these wings are now a staple in my healthy rotation:
- No Frying Required: We’re skipping the mess and the heavy oil. This is real-deal crispness achieved purely through heat and a little seasoning magic.
- Maximum Crunch Factor: Thanks to the baking powder secret, the skin gets incredibly brittle and satisfyingly crunchy, just like your favorite takeout spot.
- Simple Seasoning: The spice blend is vibrant and smoky, but it uses pantry staples—no specialty shopping required!
- Perfect for Meal Prep: Since they bake so beautifully, they hold up great for leftovers. You can grab a quick bite of satisfying flavor later! Check out more easy recipe ideas for quick healthy snacks.
- Amazing Texture Consistency: Whether you’re making four wings or twenty, the technique ensures even cooking and that perfect texture every time.
Essential Equipment for Perfect Oven Baked Chicken Wings with Crispy Skin
Getting that perfect crispness isn’t just about the ingredients, trust me; it’s totally about setting up your kitchen right! When I first started experimenting, I tried baking them directly on the pan, and yuck, it was a soggy mess. You need the air to circulate underneath them, which is why setting up your equipment correctly is non-negotiable for beautiful Oven Baked Chicken Wings with Crispy Skin.
Don’t worry if you think you need fancy gear; this list is super accessible. I like to think of it as prepping my assembly line:
- The Oven: Obviously! Make sure you’ve got enough space for your baking sheet to fit comfortably, and that it can hold a steady 425°F (220°C).
- Baking Sheet: This is the base of our structure. Aluminum foil on top keeps cleanup a breeze, which means less time scrubbing and more time enjoying your wellness wins!
- Wire Rack: This is the MVP! You absolutely must put a wire rack on top of your baking sheet. This lets the hot air circulate completely around the wing, ensuring the bottom doesn’t steam itself into sogginess.
- Large Bowl: You need a good, spacious bowl for tossing everything together. If you try to do this in a small container, you’ll end up flinging spices and oil all over your counter, and nobody wants that extra cleaning step.
Preparation is half the battle won here. Having these pieces ready before you even start mixing ensures you move quickly when those wings need to hit the high heat!
Ingredient Notes for Achieving the Crispiest Oven Baked Chicken Wings with Crispy Skin
Okay, let’s talk about what actually goes into the wings because this isn’t just a random grab of spices! The success of great Oven Baked Chicken Wings with Crispy Skin hinges on two things: taking the moisture *out* before you season, and putting the special ingredient *in*.
First things first: your wings must be dry. I mean, bone-dry. You can’t just rinse and toss them in the bowl. Get some paper towels—grab a whole roll if you need to—and pat every single wing until they feel relatively dry. If you skip this, the moisture steams off instead of crisping up the skin, and we end up with chewy rather than crunchy wings. It’s a quick extra step, but it makes a huge difference!
The Secret Weapon: Baking Powder
I know, it sounds crazy to put something you use for pancakes on savory chicken wings, but this is the game-changer. Baking powder (specifically, the plain aluminum-free kind works best) is what reacts with the high heat to wick away moisture from the skin surface, creating that incredible crackle. Don’t use baking soda here; it’s way too strong and will leave an odd, soapy flavor behind. A little goes a long way, so don’t dump in a whole box!
Spice Blends and Oil Substitutions
Our seasoning blend is classic, leaning into that savory, slightly smoky profile. The smoked paprika really deepens the flavor profile, making it taste intense without needing heavy sauces. You’ll see the recipe calls for olive oil, which is great for adherence, but if you run out or want something with a higher smoke point, avocado oil works perfectly too; I often swap it in when I’m making a big batch.
We’re keeping the spice mix simple so you can focus on the texture, but make sure you mix those spices thoroughly before adding them to the oil-coated wings—you want that tiny touch of cayenne and the baking powder evenly distributed across all two pounds of chicken. Trust me, an even coat is what gives you a consistent crisp on your chicken!
Step-by-Step Instructions for Oven Baked Chicken Wings with Crispy Skin
Alright, now for the fun part! Once you’ve patted those wings totally dry (don’t forget that crucial step from earlier!), it’s time to make some noise in the kitchen. This process moves quickly, which is why having your equipment ready to go is so important. We are aiming for that savory, crunchy texture that makes these Oven Baked Chicken Wings with Crispy Skin taste like they came straight from a professional kitchen, not just sitting sad and pale on a sheet pan.
Follow along with these steps exactly, and you’ll be enjoying the best baked wings of your life in under an hour. If you are looking for more inspiration after this, check out some chicken recipes that prioritize whole, clean ingredients!
Prepping the Oven and Rack Setup
First things first: crank that oven up! We need serious heat here—preheat it to 425°F (220°C). This high temperature is key to rendering out fat quickly and crisping the skin. While it’s warming up, get your setup ready. Line a sturdy baking sheet with aluminum foil—that’s for easy cleanup later, bless it—and then place your wire rack right on top. Remember, the rack is non-negotiable! If the wings sit directly on the foil, they steam, and we definitely aren’t making steamed wings here.
Coating the Wings for Oven Baked Chicken Wings with Crispy Skin
Grab your large bowl. Toss the wings first with the olive oil until every piece looks lightly slicked. Now, the dry mix! In a separate, smaller bowl, combine all your spices—garlic powder, paprika, salt, pepper, and yes, that crucial baking powder. Make sure you mix this really well so that baking powder doesn’t clump up anywhere. Sprinkle the entire spice mix over the oiled wings and use your hands to toss everything thoroughly. You want an even dusting of that crisping mixture over every single wing for perfect Oven Baked Chicken Wings with Crispy Skin.
Baking Technique for Maximum Crispness
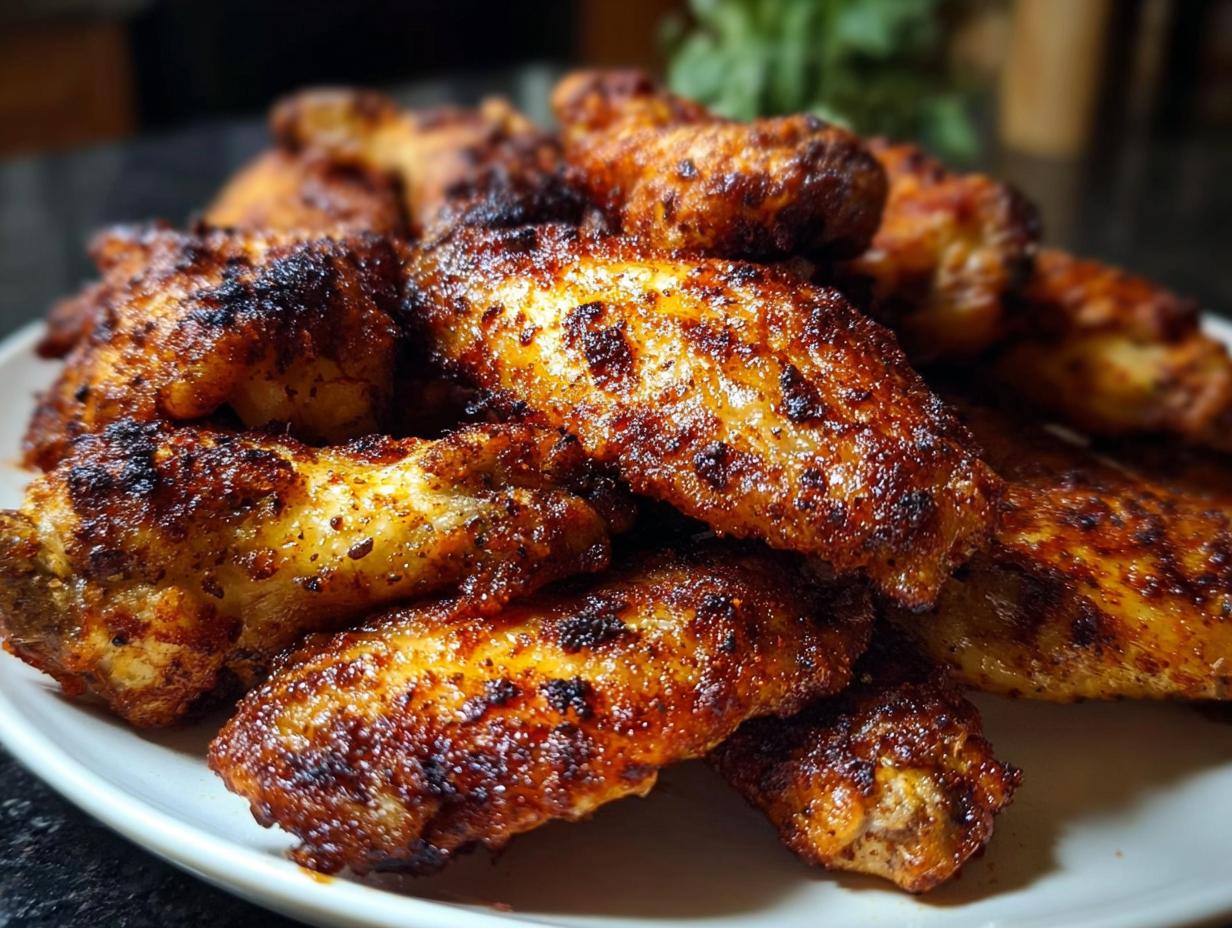
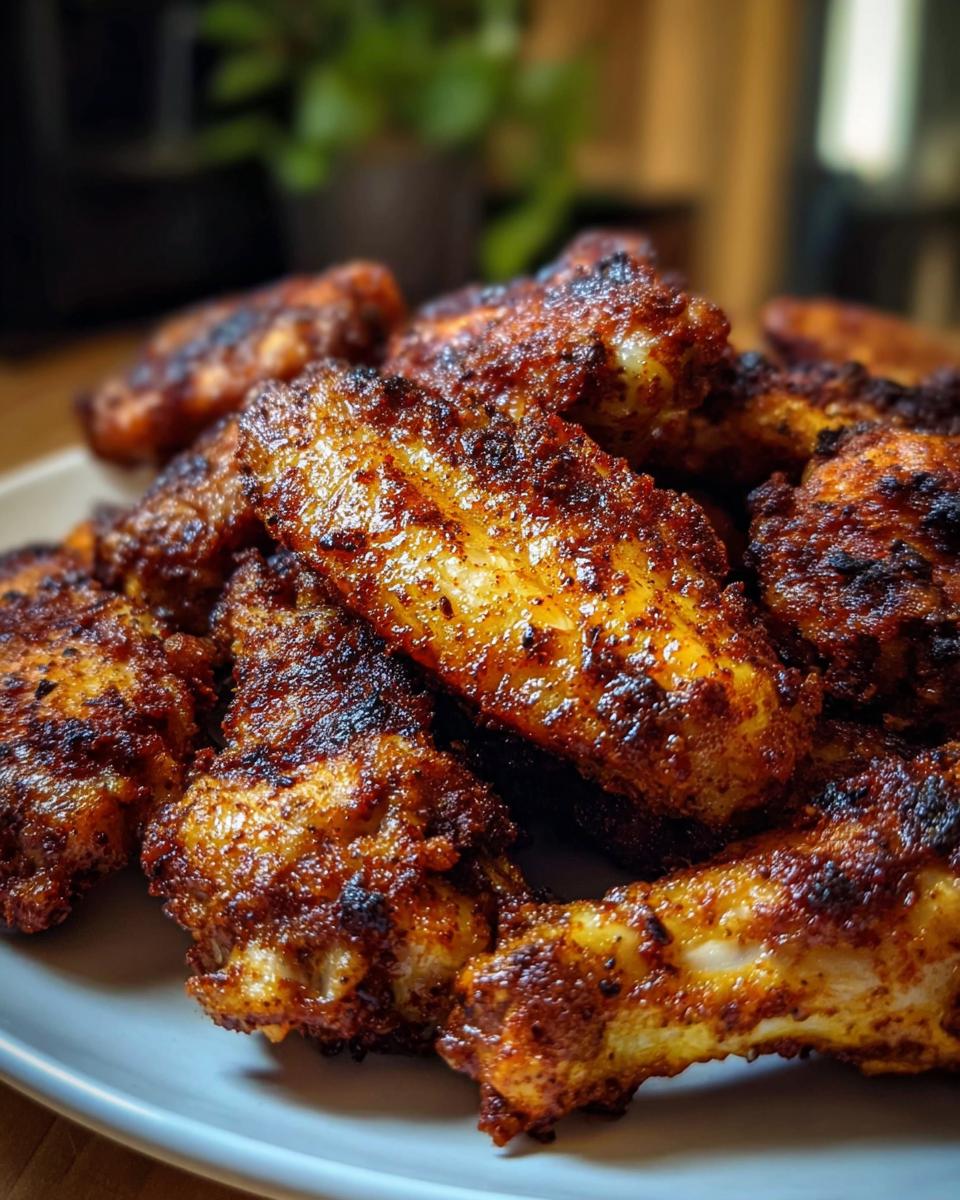
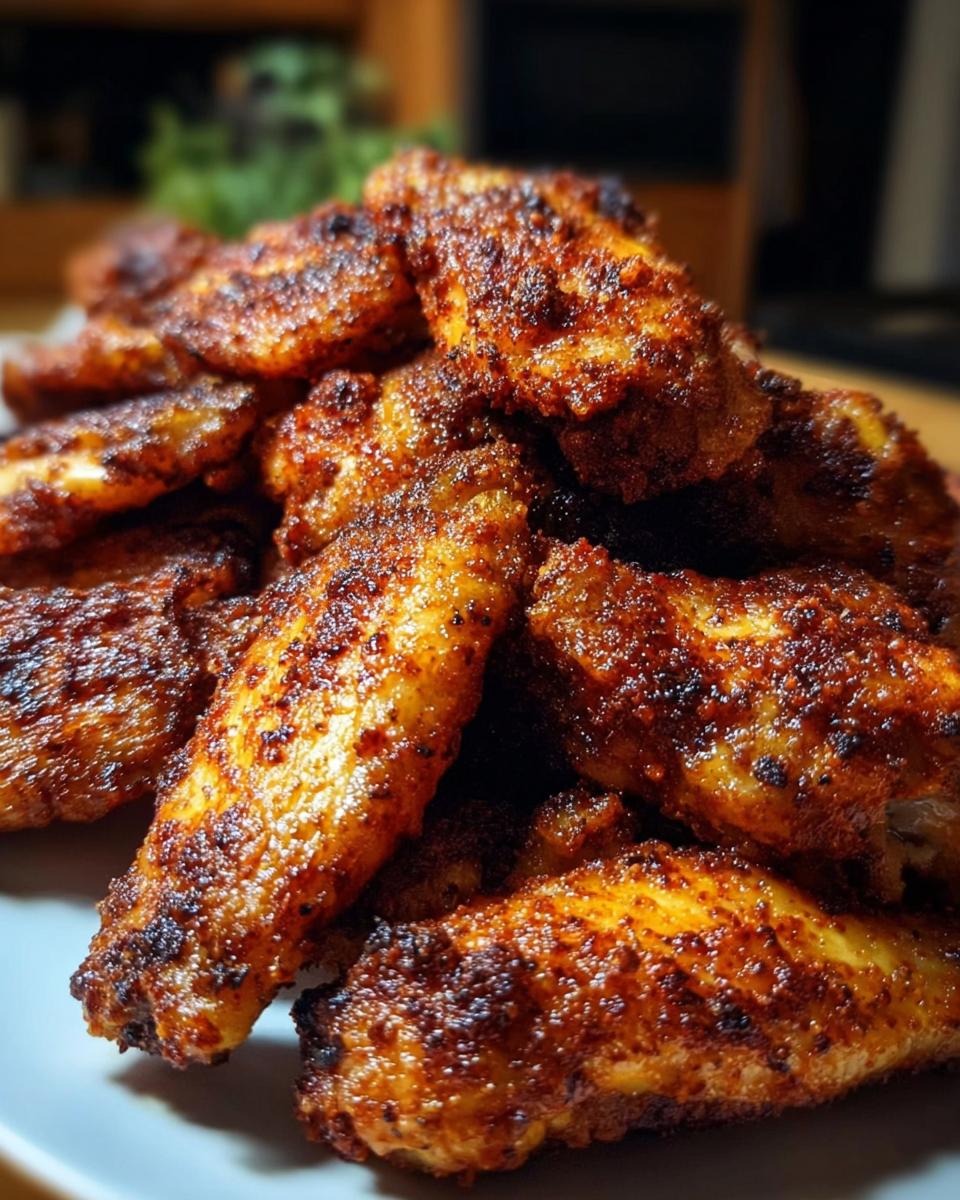
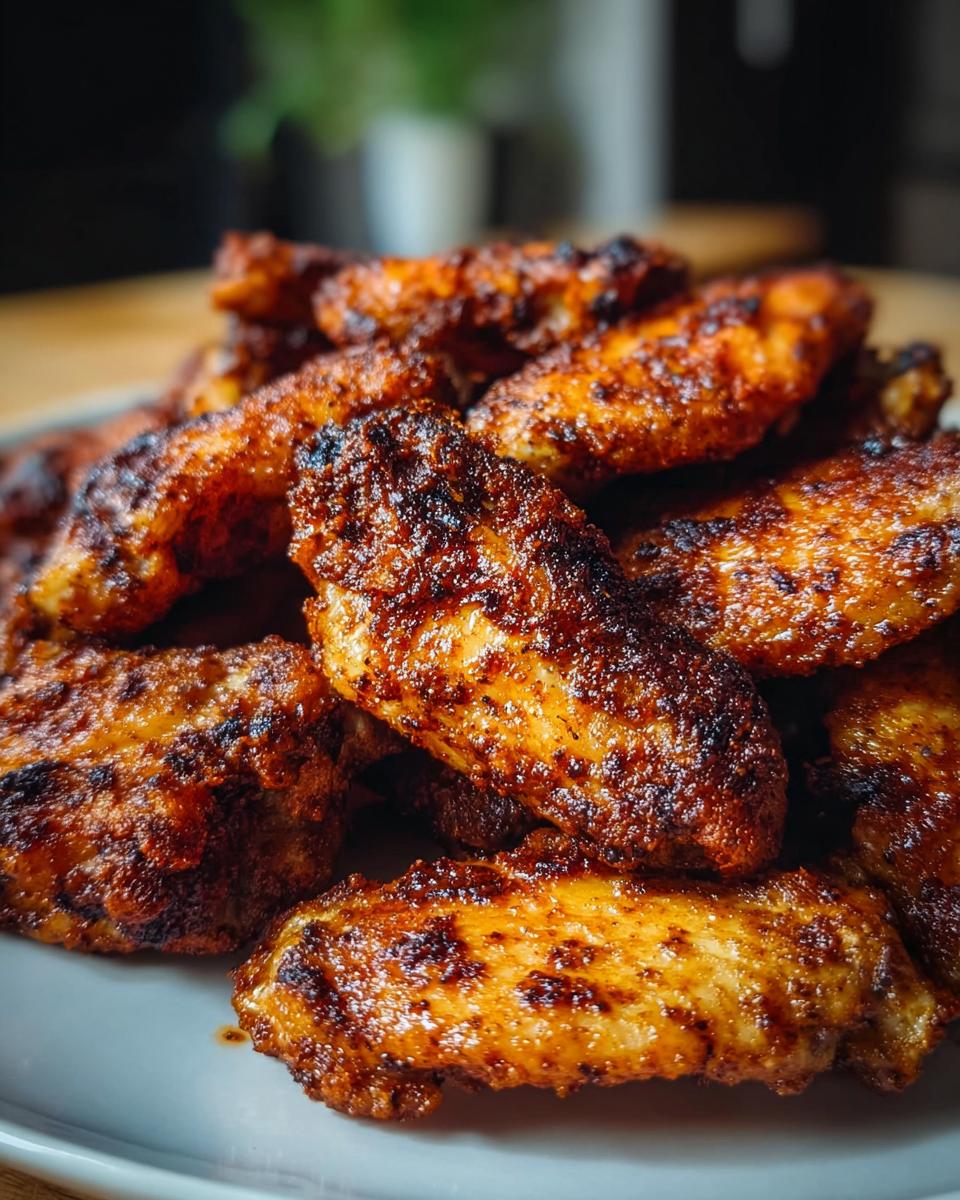
Time to arrange them! Lay the seasoned wings out on the wire rack in a single layer. I mean it—they cannot be touching each other! If they overlap, they steam each other, and boom, no crispness. Bake them exactly as arranged for the first 20 to 22 minutes. Then, pull the sheet out, and use tongs—carefully, it’s hot—to flip every single wing over. Pop them back in for the remaining 20 to 23 minutes. You’re looking for deeply golden brown and firm to the touch. Once they hit that perfect crispy exterior, remove them and let them rest for five minutes before diving in!

Expert Tips for Perfect Oven Baked Chicken Wings with Crispy Skin
I’ve shared the essential steps, but if you want to elevate these Oven Baked Chicken Wings with Crispy Skin from just “great” to “I can’t believe these aren’t fried,” you need to lean into a couple of my favorite veteran cook tricks. These small tweaks really help align the recipe with the clean, intentional habits we build here at Melt It Clean.
Don’t skip these next few suggestions; they are the difference between a good wing and a truly outstanding, crunchy wing that fits perfectly into your wellness routine. For even more ways to master your kitchen game, check out my guide on how to make chicken recipes like a pro.
The Overnight Marinade: Go Slow for Maximum Flavor
Remember how I mentioned patting the wings dry? That’s step one for crispiness. Step two, for flavor, is patience. If you have the foresight (or if you’re making these for a weekend gathering), I highly recommend tossing your patted-dry chicken wings with the olive oil and all the dry spices—including the magic baking powder—the night before. Cover them and leave them in the fridge overnight.
When the spices sit with the oil and soak into the chicken for 12 to 24 hours, the flavor payoff is HUGE. It penetrates deeper than just sitting on the surface. Plus, when you pull them out of the fridge, the skin is often even drier from the cold air, which is another bonus for crisping them up later!
Don’t Crowd the Rack—Seriously!
I mentioned this in the instructions, but I have to reiterate it! If you have a giant batch of wings, resist the urge to cram them all onto one rack. If they are touching, they are going to steam each other, and that moisture buildup ruins the baking powder trick instantly. It’s better to run two batches through the oven than to have one soggy batch. Think small, spaced-out groups for maximum heat exposure on every surface.
The Power of High Heat Follow-Up
If, after 45 minutes, you’ve flipped them, and they look *almost* there but still feel a little soft in spots, don’t panic! You can use the broiler trick—but you have to be super careful. Turn your oven from the Bake setting to Broil (High). Watch them like a hawk, maybe two minutes per side, just until those edges pop and look intensely golden brown. Broilers work fast, so walking away for even 30 seconds means you go from crispy to burnt instantly. Trust your eyes and your nose on this final boost!
Storage and Reheating Your Oven Baked Chicken Wings with Crispy Skin
We all know the struggle. You’ve just made the most perfectly crunchy Oven Baked Chicken Wings with Crispy Skin, but you have leftovers! That’s a victory, but nobody wants sad, limp wings the next day. The key to keeping that crisp texture alive when you store them is letting them cool completely before they ever touch the container. If you put hot wings into something sealed, all that steam has nowhere to go, and it just softens the beautiful crust we worked so hard to create.
For storage, always let the wings cool down to room temperature on a cooling rack—don’t cover them while they cool! Once they are completely cool, transfer them to an airtight container. I find that popping a paper towel in the bottom of the container helps absorb any stray moisture they might release overnight. They should be good in the fridge for about three to four days, and honestly, they still taste amazing!
The Best Way to Reheat for a Second Crunch
Here’s my biggest secret for reviving leftovers: Skip the microwave! Please, for the sake of crispy goodness, do not microwave them unless you are in a real, desperate hurry. The microwave heats the moisture inside the wing, essentially re-steaming the skin we worked so hard to dry out.
The revival method follows the same rule we used for cooking them fresh: high, dry heat! Pop those cooled wings back on a wire rack set over a baking sheet. Put them back into a hot oven—aim for about 375°F (190°C) this time, as they are already cooked through. Give them about 8 to 10 minutes.
Watch them closely; they don’t need much time to heat up, just enough time for the residual oil and surface layer to wick away that slight coolness and crisp back up. It works like magic every time! This way, you capture that satisfying crunch again for a quick, satisfying meal or snack later on. If you are loving simple meal prep, you should definitely explore some other ideas for healthy meals and recipes that taste great.
Frequently Asked Questions About Oven Baked Chicken Wings with Crispy Skin
It’s natural to have questions when you’re trying a new technique, especially when you’re aiming for that perfect crunch without frying! I’ve had so many readers ask me about little details of this recipe, and I totally get it—we want consistency for our clean eating goals. We’re tackling the most common concerns right here so you can confidently achieve those amazing Oven Baked Chicken Wings with Crispy Skin every single time.
If you need even more foundational knowledge on making mindful choices moving forward, you should check out my guide on the ultimate healthy meals recipes guide for beginners.
Can I skip the baking powder when making Oven Baked Chicken Wings with Crispy Skin?
Oh, I really wouldn’t advise it, sweet friend! If you skip the baking powder, you miss the entire point of how we achieve ultra-crispy skin in the oven. Baking powder is alkaline, and when it hits that high heat, it raises the pH level of the surface of the skin. This allows the outside layer to dry out and crisp up beautifully without burning—almost like a tiny chemical assist to dehydration!
If you skip it, your wings will still cook, but they’ll end up looking duller, and the texture will be soft and chewy rather than satisfyingly crunchy. It’s not worth the risk when you’re aiming for perfectly golden Oven Baked Chicken Wings with Crispy Skin!
What temperature should my oven be for the best Oven Baked Chicken Wings with Crispy Skin?
We need high heat to render that chicken fat quickly and crisp up the skin before the meat overcooks. The magic number here is exactly 425°F (220°C). Don’t dip down to 400°F or crank it up to 450°F; 425°F gives you the best balance.
If your oven isn’t fully preheated to this temperature before those wings go in, they spend too much time warming up, and that steam starts working against our baking powder trick. So, give it at least 15 minutes to climb up there and stabilize before you even think about opening the door! High heat equals crispy success.
What should I use if I don’t have a wire rack?
I talked about the wire rack being an MVP earlier, and that’s because it creates that necessary airspace around the wing. If you absolutely cannot find one—maybe you donated it or left it behind at an old apartment—you do have a couple of slightly less ideal but useable options. First, you can try stacking two sturdy baking sheets on top of each other, and then simply placing your foil-lined sheet on top of those to create a little extra height. It’s clunky, but it helps.
Or, if you are making a smaller batch, you can carefully turn the wings every 10 minutes during the first half of the bake time instead of just flipping them once halfway through. This requires you to be hyper-vigilant! But honestly, investing in one inexpensive wire rack is the best move you can make for fantastic Oven Baked Chicken Wings with Crispy Skin—it’s truly worth it.
Serving Suggestions to Complete Your Oven Baked Chicken Wings with Crispy Skin Meal
You’ve nailed the crunch, and now you’ve got to decide what to serve alongside these glorious Oven Baked Chicken Wings with Crispy Skin! Since we went through the effort of making them clean and intentionally delicious, we don’t want to ruin the vibe with a heavy, complicated side, right?
When I’m serving these up, whether it’s for a game day event or just a weeknight meal when I need something satisfying, I always lean toward sides that offer a vibrant contrast—something cool, something green, or something that balances out that savory, smoky spice we added to the wings.
A Bright, Crunchy Slaw of Cabbage and Apples
This is my absolute favorite match. You need something cool and fresh to cut through the richness of the chicken skin. I take a bag of pre-shredded coleslaw mix—yes, the pre-shredded one is a time-saver I allow because the oven did the hard work on the main course! I toss it with finely chopped crisp apple (Honeycrisp or Fuji are fantastic) and use a very light dressing made of Greek yogurt, a little cider vinegar, and a tiny drizzle of maple syrup.
It’s tangy, slightly sweet, and adds a brilliant fresh texture that complements the crispy wings perfectly. It keeps the entire meal feeling light and totally clean. You can find more ideas on creating well-rounded meals like this over in my guide to balanced meals for a healthy lifestyle!
Simple Roasted Asparagus with Lemon
If you want a warm side that mirrors the roasting process of the wings, you can’t beat asparagus. Get those spears ready while the wings are in their final 15 minutes of baking time. Toss them lightly with olive oil, salt, pepper, and maybe a pinch of dried oregano if you’re feeling fancy.
Roast them right alongside the wings—if you have a second rack—or immediately after. When they come out, squeeze fresh lemon juice all over them. The slight bitterness of the lemon brightens everything up beautifully. It’s quick, requires almost no cleanup, and keeps the focus right where it should be: on those perfectly cooked wings!
Celery Sticks and Homemade Greek Yogurt Dip
Sometimes, you just need that classic blue cheese dip experience, but without the heavy dairy. I whip up a quick dip using plain Greek yogurt mixed with a little Dijon mustard, garlic powder, a splash of white wine vinegar (for that tang!), and just a few crumbles of actual blue cheese if I want a strong flavor. Honestly, the yogurt base keeps the probiotics up and cuts the heaviness way down.
Serve these cool, crunchy celery sticks alongside your hot Oven Baked Chicken Wings with Crispy Skin for the perfect classic pairing. It’s all about small, intentional swaps that add up to big wellness wins!
Share Your Success with Oven Baked Chicken Wings with Crispy Skin
I truly believe that food should bring you joy, and nothing makes me happier than hearing when one of these clean-living recipes fits perfectly into *your* busy life! Creating these Oven Baked Chicken Wings with Crispy Skin without the deep-fryer was a game-changer for me, and I hope it is for you too!
Now that you’ve tried the baking powder trick and experienced that amazing, guilt-free crunch, I really want to know what you thought!
Leave a Star Rating and Tell Me How It Went!
Did they turn out crispier than you ever imagined? Did your family notice the difference? Don’t be shy! Drop a rating right here on the recipe card.
Even more than a rating, I want to hear the story behind your batch! Did you use the overnight marinade trick? Did you experiment with a different spice blend? Sharing your little kitchen wins helps the entire Melt It Clean community learn and feel supported. Please leave a comment below sharing your experience—I read every single one!
Tag Us When You Share on Social Media
If you snapped a picture of those gorgeous, golden-brown wings resting on your cooling rack, you absolutely have to share it! Post it up on Instagram or Facebook and tag us! Seeing your beautiful food reminds me that living clean doesn’t mean giving up on delicious, satisfying meals. It’s proof that intentional habits lead to great results.
Sharing visuals helps spread the word that you don’t need messy frying to achieve absolute poultry perfection. Let’s build this community of people who support each other on the journey to better energy and confidence—one amazingly crunchy wing at a time!
By EMILIA, founder of MeltItClean.com
Hi, I’m EMILIA, the founder of MeltItClean.com – your digital space for natural weight loss, real wellness habits, and clean-living inspiration that actually fits your life.
For years, I struggled with the ups and downs of dieting. I tried everything — juice cleanses, low-carb crazes, fitness challenges — but I always ended up back where I started: tired, bloated, and frustrated. I didn’t just want to “lose weight” — I wanted energy, mental clarity, glowing skin, and confidence without sacrificing my joy or sanity.
After years of experimenting, learning, and unlearning, I discovered a simple truth: your body is already powerful — it just needs support, not restriction. That’s when I created Melt It Clean — a site dedicated to real transformation through clean, intentional, and nourishing daily habits that anyone can follow.
My goal was simple: build a place where people could feel informed, supported, and empowered without being overwhelmed by wellness fads.
If you want to learn more about finding balance without restriction, come visit my about page: About Me.
Oven Baked Chicken Wings with Crispy Skin
Ingredients
Equipment
Method
- Preheat your oven to 425°F (220°C) and line a baking sheet with aluminum foil. Place a wire rack on top.
- In a large bowl, toss the chicken wings with the olive oil until they are nicely coated.
- In a separate bowl, mix together the garlic powder, onion powder, smoked paprika, salt, black pepper, cayenne pepper (if using), and baking powder.
- Sprinkle the spice mixture over the wings and toss until they’re generously coated.
- Arrange the wings in a single layer on the wire rack, ensuring they’re not touching.
- Bake the wings in your preheated oven for 40-45 minutes, flipping halfway through for even browning.
- Remove from the oven and let cool for a few minutes before serving.


