
If your mornings usually involve scrambling for coffee and grabbing a stale granola bar, oh boy, do I have a game-changer for you! Life gets hectic, but that doesn’t mean breakfast has to suffer. I spent months testing and re-testing this dough structure until I nailed the absolute perfect combination for these **Breakfast Rolls – Warm, Fluffy & Make-Ahead Friendly (breakfast ideas Recipe, 2025 Edition)**. You can find more great morning meals over at my breakfast category!
Seriously, these rolls are pure magic: incredibly warm, unbelievably fluffy, and best of all, they sort of bake themselves! You mix them the night before, and when you wake up, you just pop them in the oven. The scent that fills the house the next morning is incredible. They became my secret weapon for stress-free weekends and busy weekdays alike. Trust me, once you try these, your old breakfast routine is toast!
Why These Breakfast Rolls – Warm, Fluffy & Make-Ahead Friendly (breakfast ideas Recipe, 2025 Edition) Are Your New Morning Staple
Why bother with complicated weekday mornings when you can have freshly baked sweetness ready to go? These rolls check every box a busy home cook needs. If you’re hunting for reliable breakfast ideas for busy weeknights that magically transition to mornings, look no further.
- Seriously Fluffy Texture: My careful kneading and rising times guarantee a light, airy crumb every single time—no dense doorstops here!
- Make-Ahead Magic: Prep them the night before so all you do is bake them while you’re making the kids’ lunches.
- Perfectly Cinnamon-Spiced: The filling is rich without being overly sweet, making them satisfying all morning long.
These **Breakfast Rolls – Warm, Fluffy & Make-Ahead Friendly (breakfast ideas Recipe, 2025 Edition)** are worth adding to your regular rotation immediately.
Gathering Ingredients for Your Breakfast Rolls – Warm, Fluffy & Make-Ahead Friendly (breakfast ideas Recipe, 2025 Edition)
Okay, let’s talk about what you need! Because this is a yeast dough, the quality of your starting ingredients really sets the stage for that amazing fluffiness we all crave. You want to make sure everything is measured correctly. I always keep my pantry stocked for spontaneous baking sessions—you can find some of my general stock-up tips right over here!
Don’t substitute the butter unless you absolutely have to, and pay close attention to the temperatures needed for the milk and the state of the butter for the filling. These small details really do matter when you are shooting for that perfect, warm, fluffy texture in your **Breakfast Rolls – Warm, Fluffy & Make-Ahead Friendly (breakfast ideas Recipe, 2025 Edition)!**
For the Dough Ingredients
- 1 cup Milk (It has to be WARM, not hot! We are waking up the yeast, not killing it off.)
- 2 tsp Active dry yeast
- 1/4 cup Granulated sugar
- 1/4 cup Unsalted butter, Melted
- 1 large Egg
- 3 cups All-purpose flour (Plus more for dusting when we turn it onto the counter)
- 1 tsp Salt
That warm milk is crucial for the yeast. If it’s too cold, nothing happens. If it’s too hot, you’ve basically got science soup instead of bread dough! Aim for that cozy bath water temperature—you’ll see the foam in about five minutes, which tells you the yeast is ready to work!
For the Filling Ingredients
- 1/2 cup Brown sugar, Packed
- 2 tbsp Ground cinnamon
- 1/4 cup Unsalted butter, Softened (This needs to be easily spreadable, like room temperature!)
The filling is so simple, but using packed brown sugar ensures you get that lovely, deep caramel flavor when it melts slightly during baking. And make sure that butter is genuinely soft—trying to smear hard butter on the dough guarantees uneven flavor distribution, which is a tragedy!
Step-by-Step Instructions for Fluffy Breakfast Rolls – Warm, Fluffy & Make-Ahead Friendly (breakfast ideas Recipe, 2025 Edition)
This is where the magic really starts to happen! Don’t be intimidated by yeast; we’re keeping things super simple here, just like in my quick lunch prep, where simple steps lead to big flavor wins down the road. Follow these stages, and I promise you’ll end up with the softest dough you’ve ever worked with. I always have my mixing bowl ready before I even start heating the milk!
Activating Yeast and Mixing the Dough
First things first: wake up that yeast! Combine your warm milk and the yeast in a little bowl. You just have to let that hang out for about 5 minutes. If it gets nice and foamy on top, great—that means it’s alive and ready to puff up our rolls! While that’s happening, whisk your sugar, melted butter, and egg together in your big mixing bowl. Then, pour in the foamy yeast mixture and give it a quick stir.
Now, slowly bring in the dry stuff: the flour and the salt. Mix it all up until you can’t really stir anymore and you have what I call ‘shaggy dough.’ Don’t panic if it looks messy; that’s exactly what we want before we get our hands dirty!
Kneading and First Rise for Breakfast Rolls
Time to knead! Turn that shaggy mound out onto a lightly floured surface. You want to work this dough for a good 5 to 7 minutes. You’re looking for it to stop fighting you and turn smooth and elastic—you’ll know it when you feel it. It should feel soft under your palms.
Once it’s smooth, tuck it into an oiled bowl and give the top a gentle turn so it’s coated in oil. Cover it up tight and tuck it away somewhere warm. It needs a full hour to rise, or at least until it has doubled in size. Patience is key here for those fluffy results!
Preparing the Cinnamon-Sugar Filling
While the dough is busy getting big and puffy, we make the tasty stuff! Grab a small bowl and mix your packed brown sugar and ground cinnamon together really well. That’s it for now! Set that bowl aside; those sweet, spicy flavors are waiting their turn.
Assembling and Second Rise for Warm, Fluffy Breakfast Rolls
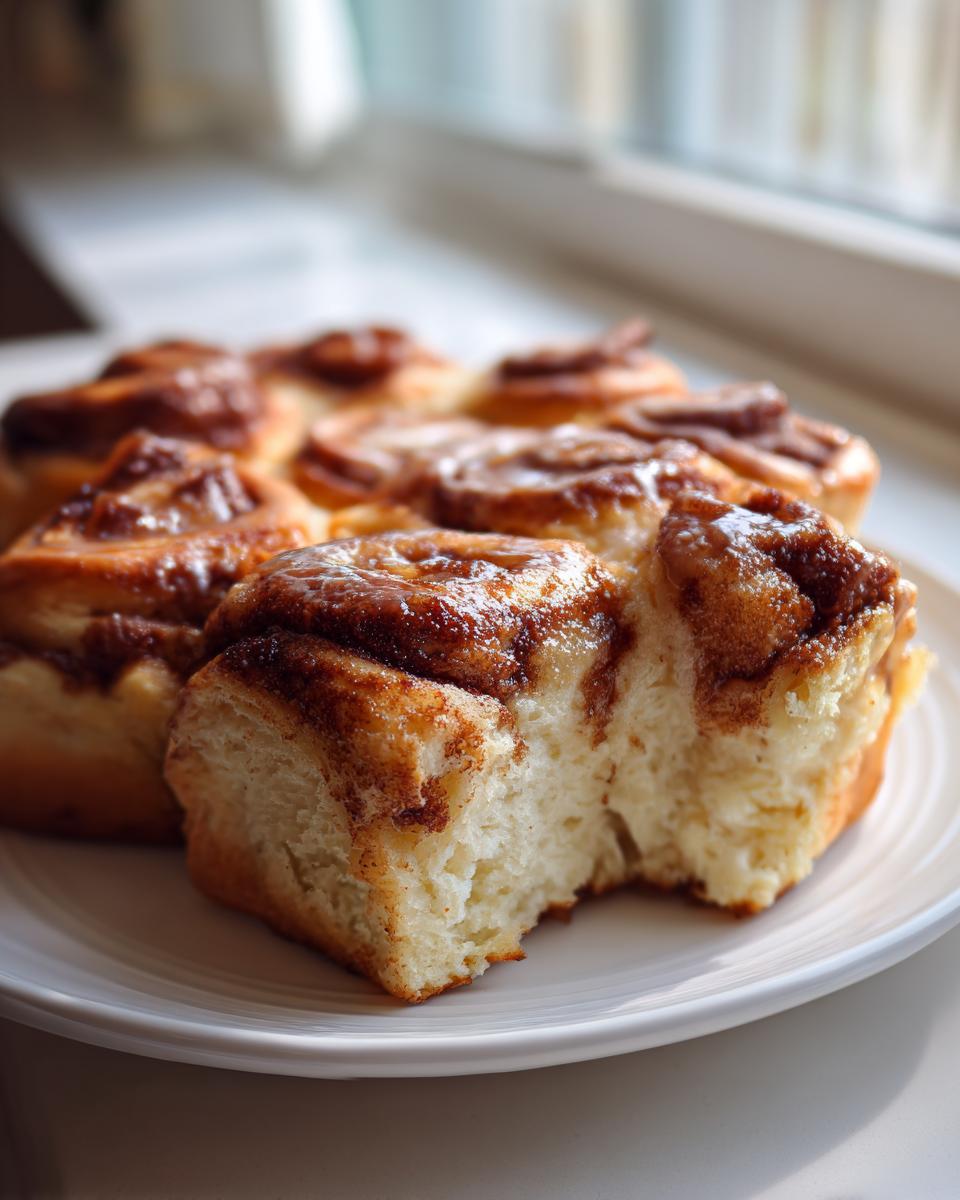
When the dough has doubled, gently punch the air out of it. Now roll it out on your floured spot into a big rectangle—aim for about 12 inches by 18 inches wide. Get that softened butter spread edge-to-edge over that whole sheet of dough. It acts as the glue for our spice mix!
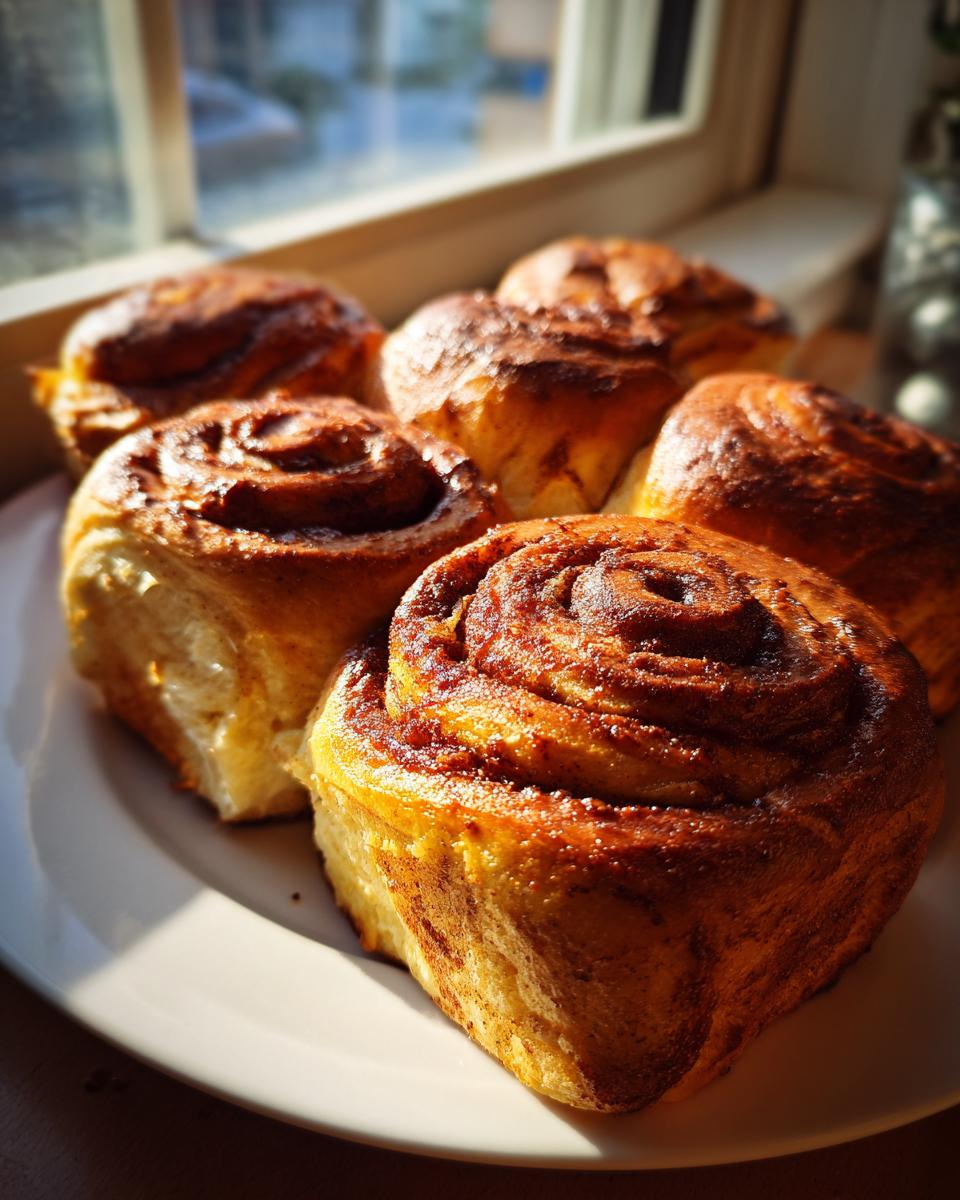
Sprinkle that cinnamon-sugar mixture evenly on top of the butter. Then, this is important: roll it up tightly, starting from the long side, so you create the best possible log. Slice that log right into 12 equal pieces. Place these cut rolls on your greased baking sheet, cover them again, and let them have one more short rest—about 30 minutes—before they hit the heat.
Baking Your Breakfast Rolls – Warm, Fluffy & Make-Ahead Friendly (breakfast ideas Recipe, 2025 Edition)
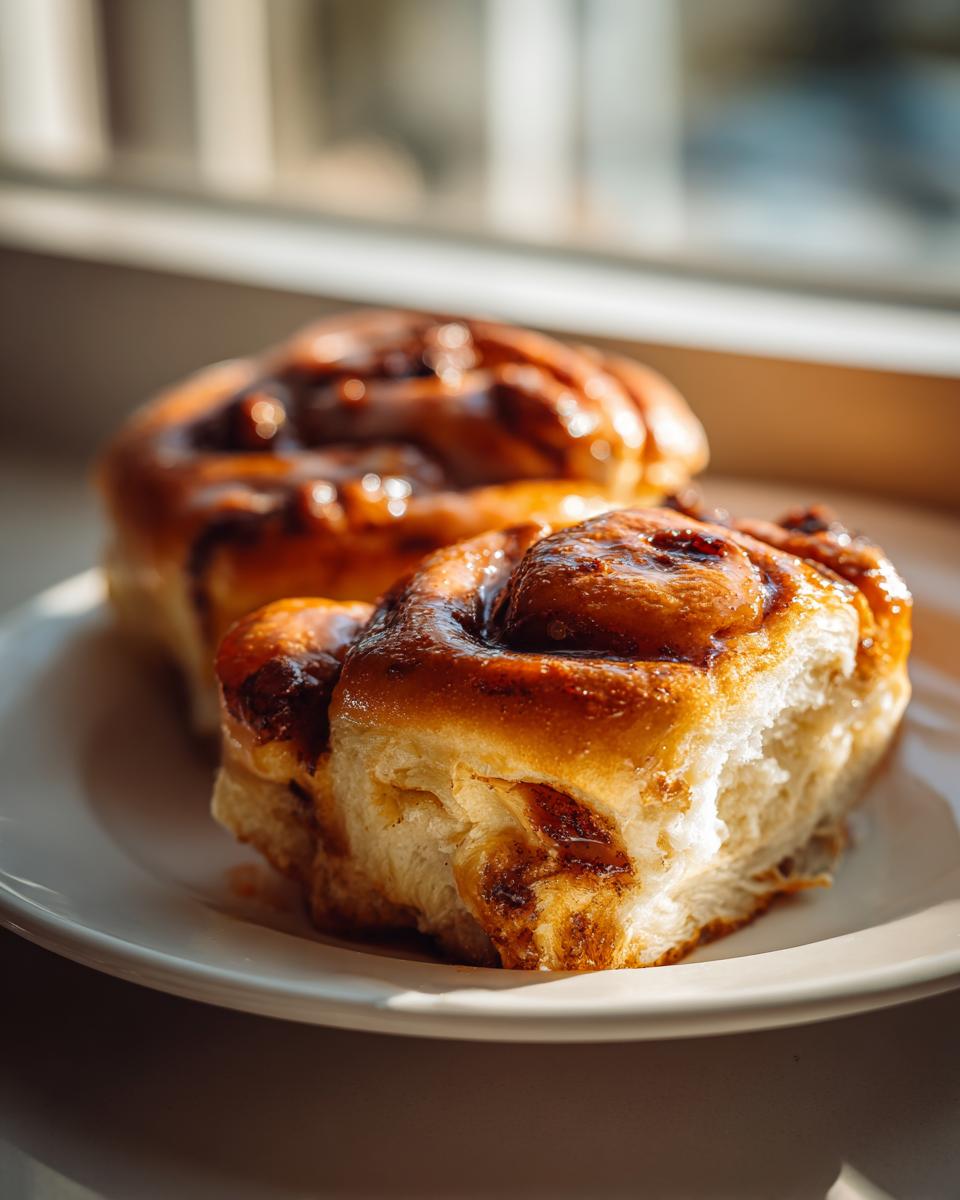
Right before that final nap is over, get your oven cranking up to 375 degrees F (that’s 190 degrees C). We want it nice and hot when they go in! Bake those beautiful rolls for about 18 to 20 minutes. You are aiming for that gorgeous, golden brown top. When they smell done and look golden, pull them out and get ready for the best breakfast!
Expert Tips for Perfect Breakfast Rolls – Warm, Fluffy & Make-Ahead Friendly (breakfast ideas Recipe, 2025 Edition)
Getting that perfect, cloud-like texture from yeast dough can sometimes feel like guesswork, but I’ve learned a few tricks over the years that make these **Breakfast Rolls – Warm, Fluffy & Make-Ahead Friendly (breakfast ideas Recipe, 2025 Edition)** foolproof. Since you’re already making delicious things like banana bread, you’ll appreciate these little secrets that elevate the final product!
Here are my absolute must-dos to guarantee success every single time:
The Water Temperature Test
We talked about the milk needing to be warm, but let’s get specific because this is where most people ruin their yeast right away. If you don’t have a thermometer, ditch the guesswork! You want the milk to feel comfortably warm on your wrist, like warm bath water, not hot! If you can comfortably dip your finger in for five seconds without flinching, you’re good to go. Too hot, and the yeast dies. Too cold, and it sleeps in!
Don’t Over-Flour the Surface
When you turn the dough out to knead and then again to roll it for the filling, resist the urge to dump flour everywhere. A little flour is necessary to stop sticking, but too much gets incorporated into the dough, making your rolls tough instead of fluffy. Use just enough to prevent sticking, and rely on your kneading skill more than excess flour to keep it workable.
Sealing the Roll Log Tight
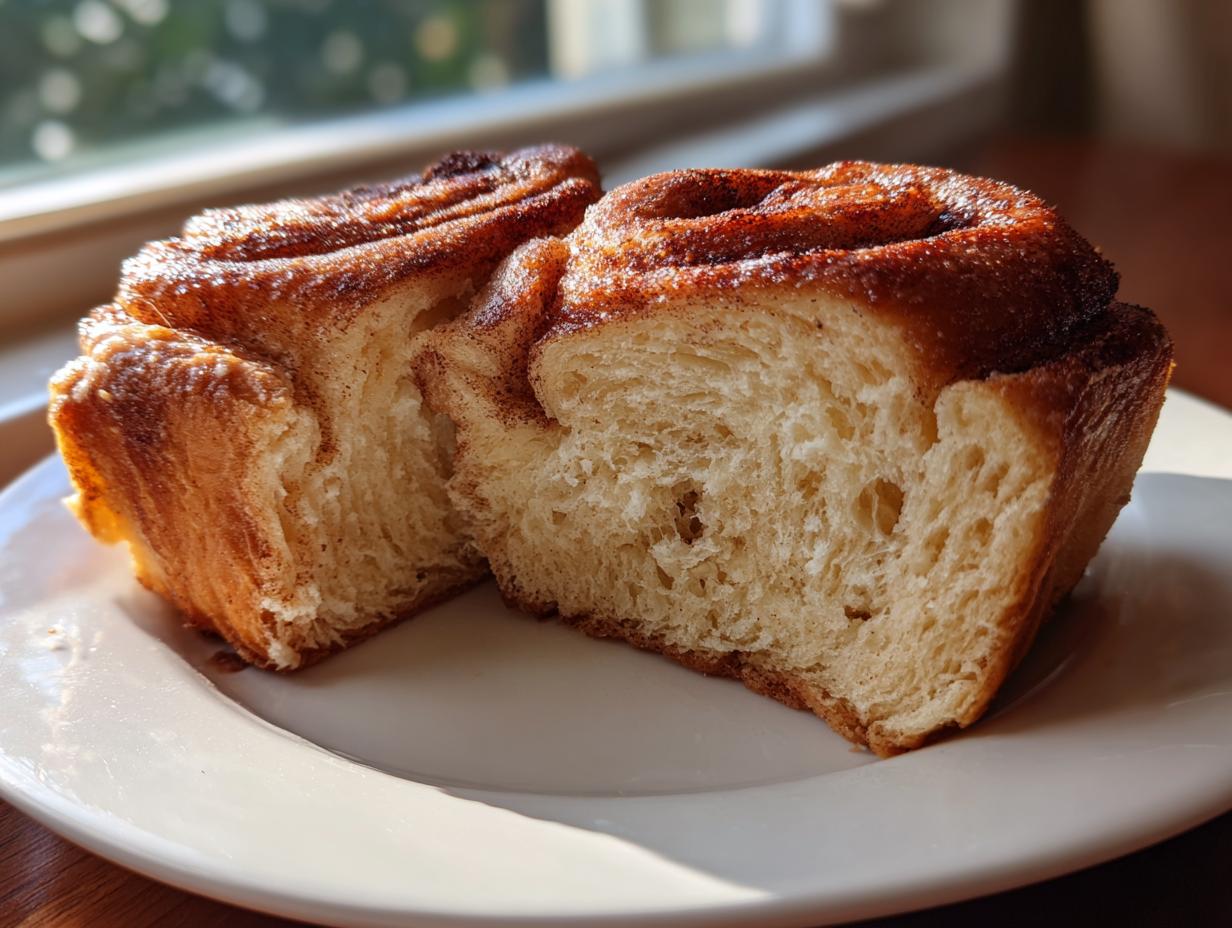
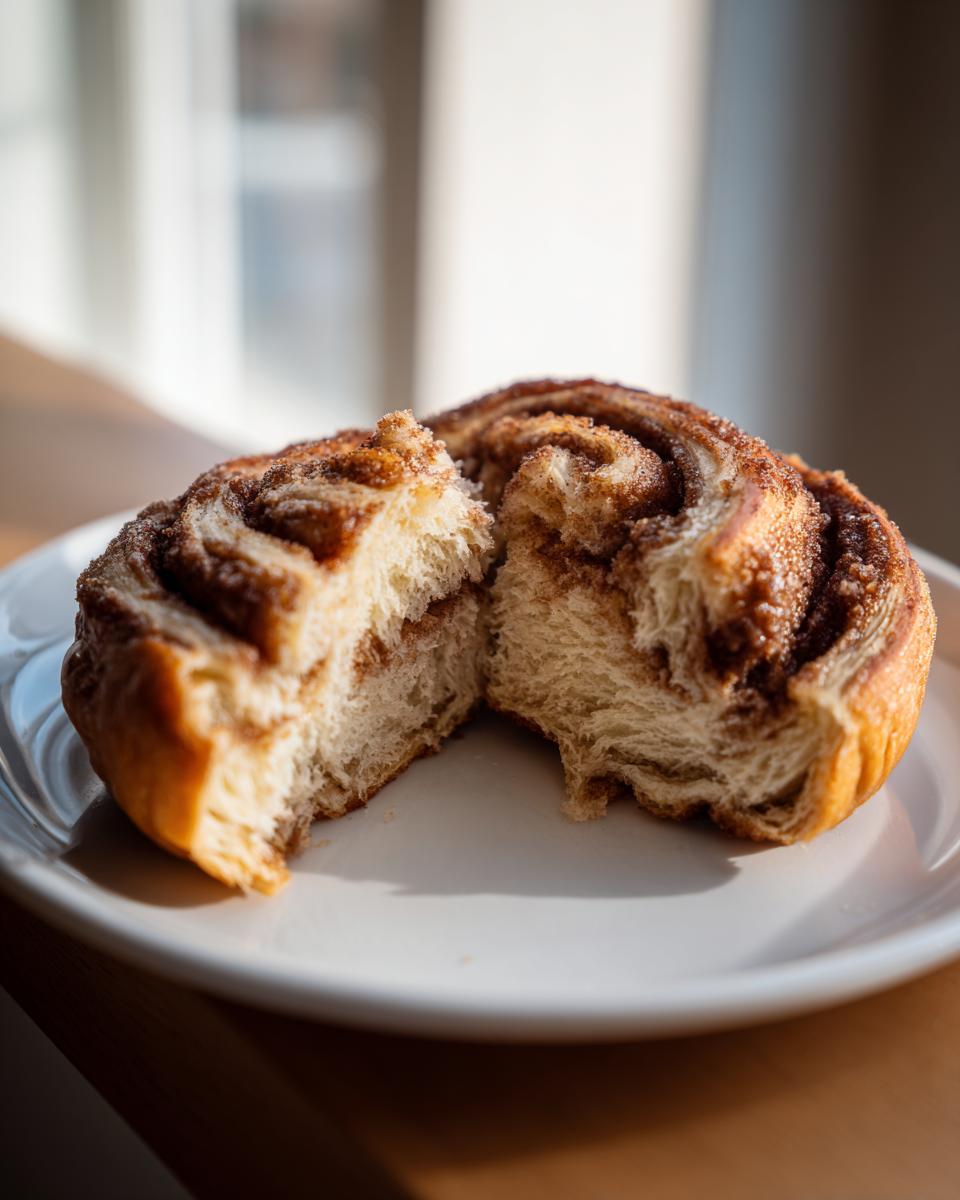
When you roll up that beautiful, butter-soaked rectangle, make sure you roll it as tightly as humanly possible along the long side. A very tight roll minimizes gaps inside the log. When you slice them, those tight spirals bake up into those gorgeous, distinct cinnamon layers. If it’s loose, you get squashed sides instead of perfectly upright, fluffy rolls.
The Second Rise is Non-Negotiable!
I know you’re tempted to skip that final 30-minute rise after you’ve cut the rolls and placed them in the pan, especially if you’re rushing. Don’t do it! That second rise lets the yeast give one last puff before the heat hits them. This is the secret sauce for truly warm, fluffy rolls that spring back when you gently poke them. That final rest pays off huge!
Make-Ahead and Storage for Your Breakfast Rolls
This is truly where these **Breakfast Rolls – Warm, Fluffy & Make-Ahead Friendly (breakfast ideas Recipe, 2025 Edition)** earn their title as a busy morning savior! I use this trick at least once a month when I know the next day is going to be crazy. The beauty of this dough is that the cold temperature slows the yeast way down, letting those flavors deepen a little bit while you sleep.
To set these up for an easy morning, you do everything right up until the final 30-minute rise. Once you’ve sliced your rolls and arranged them in your greased baking pan, cover that entire pan tightly—I mean TIGHTLY—with plastic wrap. You don’t want any air getting in there to dry them out!
Now, slide that whole setup into the refrigerator. They can happily chill out in there for up to 12 hours. Yes, you read that right! That gives you overnight prep! You can find some other great time-saving meals in my dinner prep section, but this roll method is my favorite piece of counter-strategy.
The Morning Wake-Up Call
When you wake up, take the pan right out of the fridge while the oven preheats to 375 degrees F. Let those rolls sit on the counter while the oven gets hot. They need that final 30-minute rest at room temperature to proof up again before baking. Don’t try to bake them cold, or they’ll be dense!
Bake them exactly according to the instructions once they look puffy! If you have any leftover (which is rare in my house!), store them in an airtight container at room temperature. They usually stay wonderfully soft for two days, but if you need them to last longer, you can freeze them once they are baked and cooled.
How to Reheat Baked Rolls
If you freeze them, just peel off a few and wrap them loosely in foil. Pop them in a 350-degree oven for about 10 minutes. If they’re just a day old and need a little refresh, a quick 10-second blast in the microwave works wonders to bring that warmth and fluff back, though they’ll lose some of that fresh-from-the-oven crispness on the bottom.
Serving Suggestions for Breakfast Rolls – Warm, Fluffy & Make-Ahead Friendly (breakfast ideas Recipe, 2025 Edition)
You’ve got these stunning, warm, fluffy rolls fresh out of the oven—now what? Honestly, they are perfect just as they are! That cinnamon-sugar filling sort of oozes into the dough layers, meaning they aren’t really missing anything. But since we love to go a little extra at our house, I always have a few simple pairings ready to go. You can find some other great baked favorites in my casserole section, but for these rolls, keep it light!
The Perfect Match
First, you absolutely need a strong cup of coffee. The rich bitterness cuts through the sweetness of the rolls beautifully. If you are serving these to little ones (or yourself!), a simple glass of cold milk is just as good—it really emphasizes that fresh-baked flavor.
A Little Something Extra
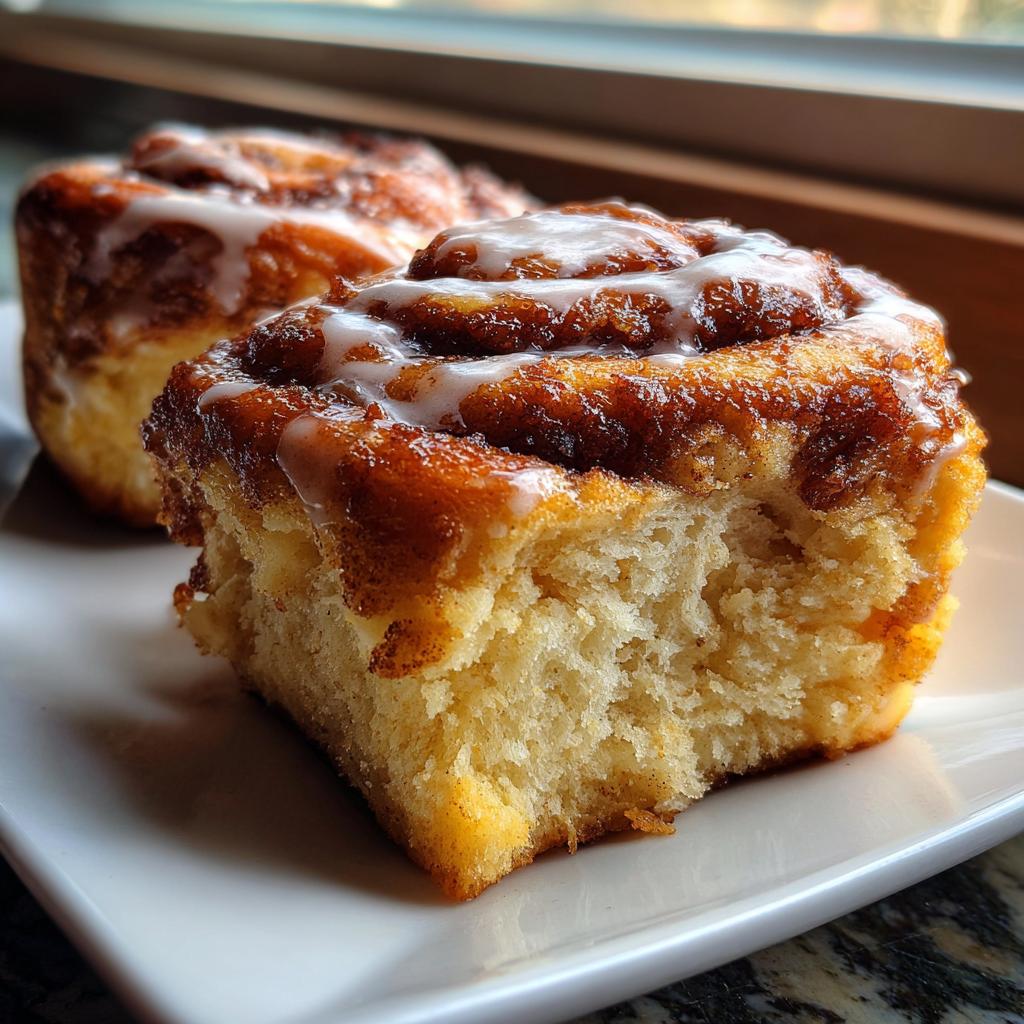
If you want to dress them up just a touch, skip the heavy frosting and go for something light. I sometimes whip up a super simple glaze using powdered sugar, a splash of milk, and maybe half a teaspoon of vanilla extract. You want it thin enough to drizzle loosely over the warm rolls so it melts slightly.
Another easy winner is a side of fresh fruit. A bowl of bright berries—strawberries, blueberries, whatever is in season—adds color and freshness that balances out the richness of the bread. It makes the whole plate feel lighter, even though you know you’re eating a decadent breakfast roll!
Frequently Asked Questions About Breakfast Rolls
I totally get it; when you’re dealing with dough and yeast, questions pop up fast! I’ve compiled some of the things I always get asked about these **Breakfast Rolls – Warm, Fluffy & Make-Ahead Friendly (breakfast ideas Recipe, 2025 Edition)**. We want to make sure every batch of rolls you pull out of the oven is truly warm and fluffy, which means getting these little details right. If you’re trying to balance great flavor with easier eating goals, check out my weight loss recipe section for other ideas!
Can I use instant yeast instead of active dry yeast in these breakfast rolls?
Oh yes, you absolutely can! Instant yeast is designed to skip the bubbling intro we do with active dry yeast. If you’re using instant yeast, you can skip that very first step of combining it with the warm milk and waiting 5 minutes. Just mix the instant yeast right in with your dry ingredients (the flour and salt) before you add the wet stuff.
It saves you about 5 minutes of waiting time, which is great when you’re really eager to get kneading! It still needs that warm milk to activate, of course, but it doesn’t need that initial proofing step. It’s a super handy shortcut for making these delicious **Breakfast Rolls – Warm, Fluffy & Make-Ahead Friendly (breakfast ideas Recipe, 2025 Edition)** even faster.
What is the best way to reheat these warm, fluffy rolls?
This is key for maximizing that “fresh-baked” experience, even if they came out of the fridge overnight! For the absolute best results to restore both warmth and that fluffy texture, use the oven. Wrap the rolls you want to eat loosely in a piece of aluminum foil—this keeps the tops from crisping up too much while the inside heats through.
Pop that foil packet into an oven preheated to about 325 degrees F for about 10 to 12 minutes. They come out steamy, soft, and perfect. If you’re REALLY in a hurry and only grabbing one, the microwave works, but be warned: microwave heat can sometimes make bread chewy if you go too long. Try 10 to 15 seconds max for a single roll. Start low, you can always add more heat!
Reader Feedback and Next Steps
Wow, I really hope you enjoyed the process of making these **Breakfast Rolls – Warm, Fluffy & Make-Ahead Friendly (breakfast ideas Recipe, 2025 Edition)** as much as I loved developing them for you! Seeing your kitchen filled with that warm, cinnamon scent makes all the early morning tests worth it.
Now that you’ve pulled those beauties out of the oven—did they live up to the hype? Did they come out as warm and fluffy as you hoped? Please, please let me know how they turned out for you in the comments below!
I always get so excited hearing about your successes, or even what you might tweak next time. Did you add a little extra cinnamon? Did the make-ahead trick save your morning the way it saves mine? If you have any photos, feel free to share them!
If you’re already planning your next great bake, take a peek at my About Me page to see what other kitchen adventures I’ve been tackling lately. Happy baking, and I can’t wait to read your thoughts on these rolls!
Breakfast Rolls
Ingredients
Equipment
Method
- Combine the warm milk and yeast in a small bowl. Let it sit for 5 minutes until foamy.
- In a large mixing bowl, whisk together the sugar, melted butter, and egg. Pour in the yeast mixture and stir.
- Gradually add the flour and salt to the wet ingredients. Mix until a shaggy dough forms. Turn the dough out onto a lightly floured surface.
- Knead the dough for about 5 to 7 minutes until it is smooth and elastic. Place the dough in a lightly oiled bowl, turning to coat. Cover and let it rise in a warm place for 1 hour, or until doubled in size.
- While the dough rises, prepare the filling. Mix the brown sugar and cinnamon in a small bowl. Set aside.
- Punch down the risen dough. Roll it out on a floured surface into a rectangle, about 12 by 18 inches.
- Spread the softened butter evenly over the dough surface. Sprinkle the cinnamon-sugar mixture over the butter.
- Roll the dough tightly along the long edge to form a log. Cut the log into 12 equal pieces.
- Place the rolls cut-side up on a greased baking sheet. Cover and let them rise again for 30 minutes.
- Preheat your oven to 375 degrees F (190 degrees C). Bake for 18 to 20 minutes, or until golden brown.


