
Oh, trust me, we all have those nights, right? When the clock is ticking toward dinnertime and you realize you haven’t even thought about what you’re making. It’s chaos! That’s when I lean hard on my staples—the recipes that are totally reliable and taste like they took hours, when they really took mere minutes. These Quick Tuna Patties are number one on that list.
Seriously, these are the fastest, easiest tuna patties you will ever make. From the moment you open the can to pulling them golden brown from the skillet, you are looking at a total time commitment of just 20 minutes. I’ve spent years perfecting easy, real-food cooking for my own busy house, and that focus on simple, reliable methods is baked right into this recipe. They are so satisfying!
Why You Need These Quick Tuna Patties in Your Rotation
I can tell you from years of desperate weeknight cooking that these patties are lifesavers. You actually have time for a quick phone scroll while these simmer away! If you’re trying to keep things easy but still want something homemade that truly hits the spot, you need these tuna patties in your repertoire. Here’s why they earn their spot right at the top of my favorite list:
- They are genuinely fast! Prep is only 10 minutes, tops, and they cook in 10 more. Total time? Twenty minutes for a substantial meal.
- You’re likely using pantry staples, so there’s almost never a need for an emergency grocery run.
- They are super versatile—serve them on a bun, tucked into lettuce cups, or just plop them beside some salad.
- They hold together beautifully. No mushy crumble disasters here, which is crucial when you’re rushing!
- They freeze well, too! Double the batch on the weekend and you’ve got quick lunches ready for later this week.
- They are a fantastic way to get dinner on the table if you’re watching your budget without sacrificing flavor. We love finding ways to keep things simple, and these are perfect for that goal. You can even look at ways to make them low-carb with a few tweaks!
Gathering Ingredients for Perfect Quick Tuna Patties
Okay, since these are meant to be quick, the ingredients list has to be short and sweet. I promise you don’t need any fancy spices or obscure jars for this one. The magic of these simple tuna patties is that they rely on what you should already have lurking in the pantry and fridge. When I make these, I always lay everything out first—it helps keep the assembly line moving fast!
The only thing that takes a tiny bit of focus is the tuna itself. You absolutely must get it drained well so we don’t end up with soggy centers. Once we have that taken care of, the rest just mixes together. If you’re looking to keep an eye on your intake, remember these are already a pretty calorie-smart choice, too!
Here is exactly what you need for our four perfect patties:
- Tuna: Two 5-ounce cans, make sure that water tuna is drained thoroughly!
- The Binder: One large egg, whisked just until it’s light and fluffy.
- Texture Agents: Half a cup of bread crumbs—plain ones work best here.
- Flavor Creams: Two tablespoons of your favorite mayonnaise and just one teaspoon of bright yellow mustard.
- A Little Zing: A quarter cup of onion, chopped as finely as you can manage.
- Simple Seasoning: A quarter teaspoon of salt and just an eighth of a teaspoon of black pepper.
- Cooking Fat: Two tablespoons of oil, whatever you usually fry with, for that beautiful golden crust.
Step-by-Step Guide to Making Your Quick Tuna Patties
This is the best part because everything moves so fast! You’ve got your ingredients ready, now we just need to combine them and get them sizzling. My goal here is always maximum flavor and crispy edges in the shortest amount of time possible. Since we’re aiming for simple, reliable cooking, pay just a little attention to two key spots: how you mix the ingredients and how hot your pan is.
If you’re making these for a weeknight lunch rotation, try to keep the steps flowing smoothly. Trust me on the gentle mixing bit; it makes all the difference between a fluffy patty and one that turns into rubber!
Mixing the Base for Your Quick Tuna Patties
Grab that large mixing bowl. Into it goes the well-drained tuna, your lightly beaten egg, the bread crumbs, that dollop of mayo, the mustard, the finely chopped onion, and of course, the salt and pepper. Now, here’s the real secret to a good patty texture: mix them gently. I mean it! Just fold everything together until you don’t see huge streaks of any one ingredient anymore. If you stir it like you’re creaming butter for a cake, you’ll get tough patties, and we want tender ones.
And listen, if you skip the thorough draining step, I’m warning you—the batter will be wet and floppy. If you see a lot of water coming out of the tuna when you mix, just press it against the side of the bowl to get the excess moisture out. That’s my biggest authority tip right there: Dry tuna equals sturdy patties.
Forming and Cooking the Quick Tuna Patties
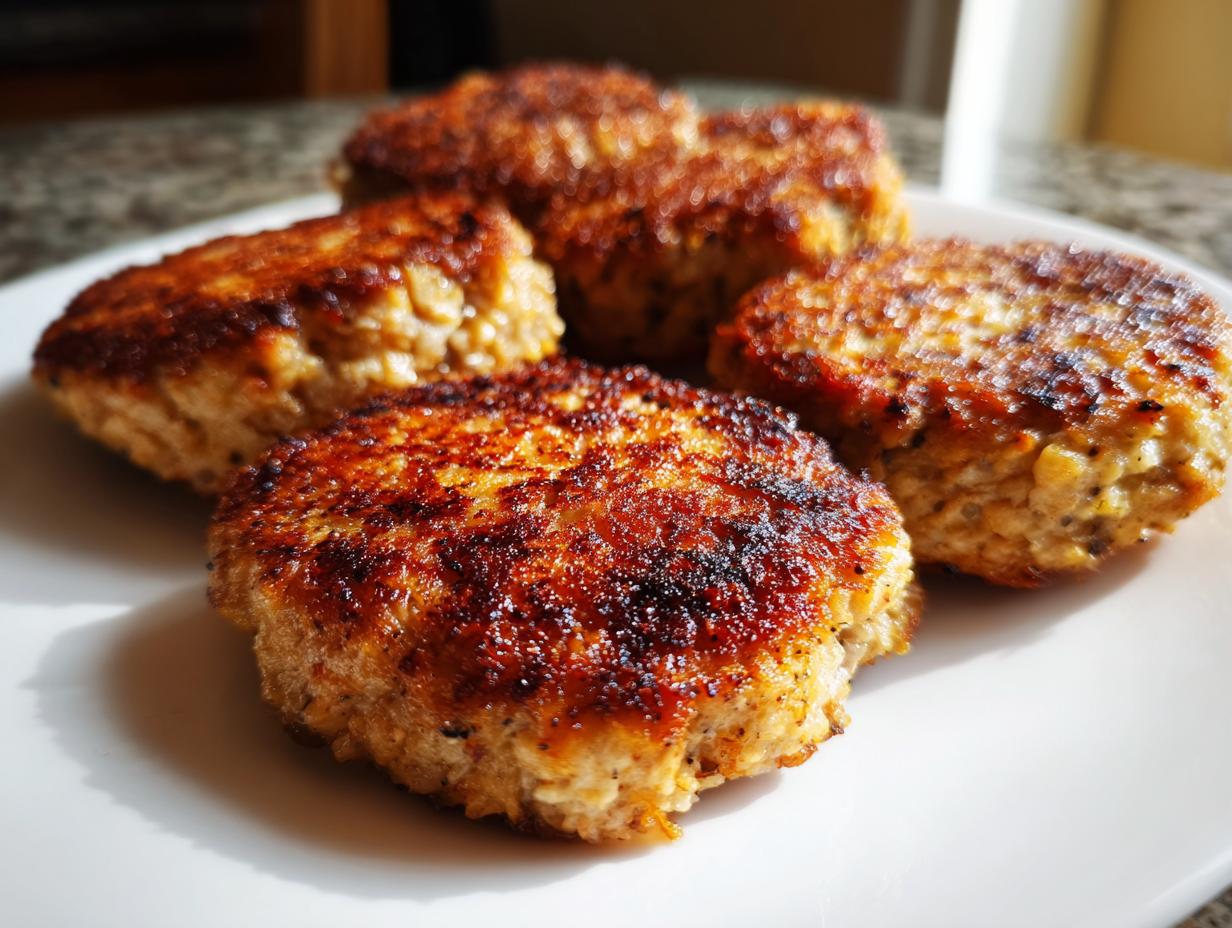
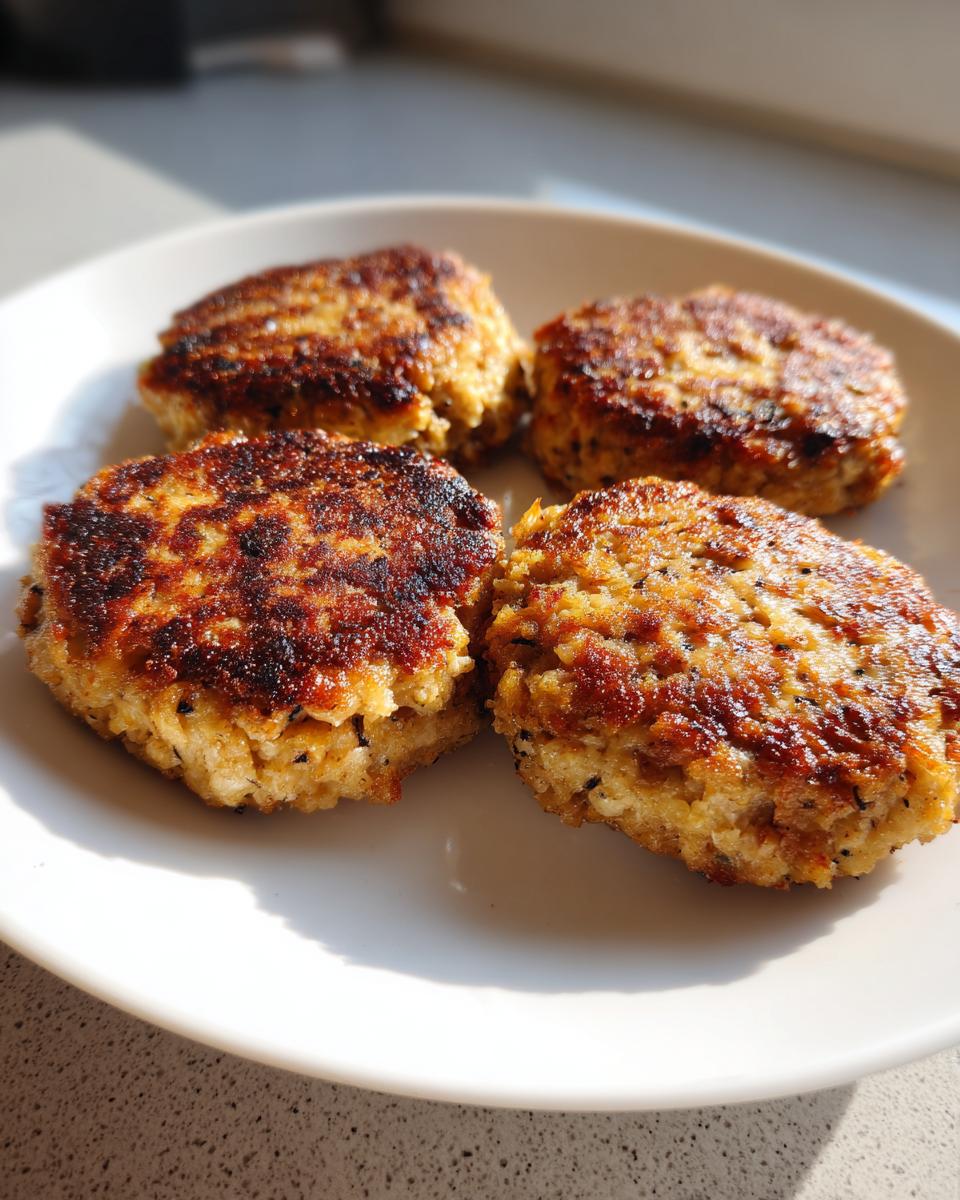
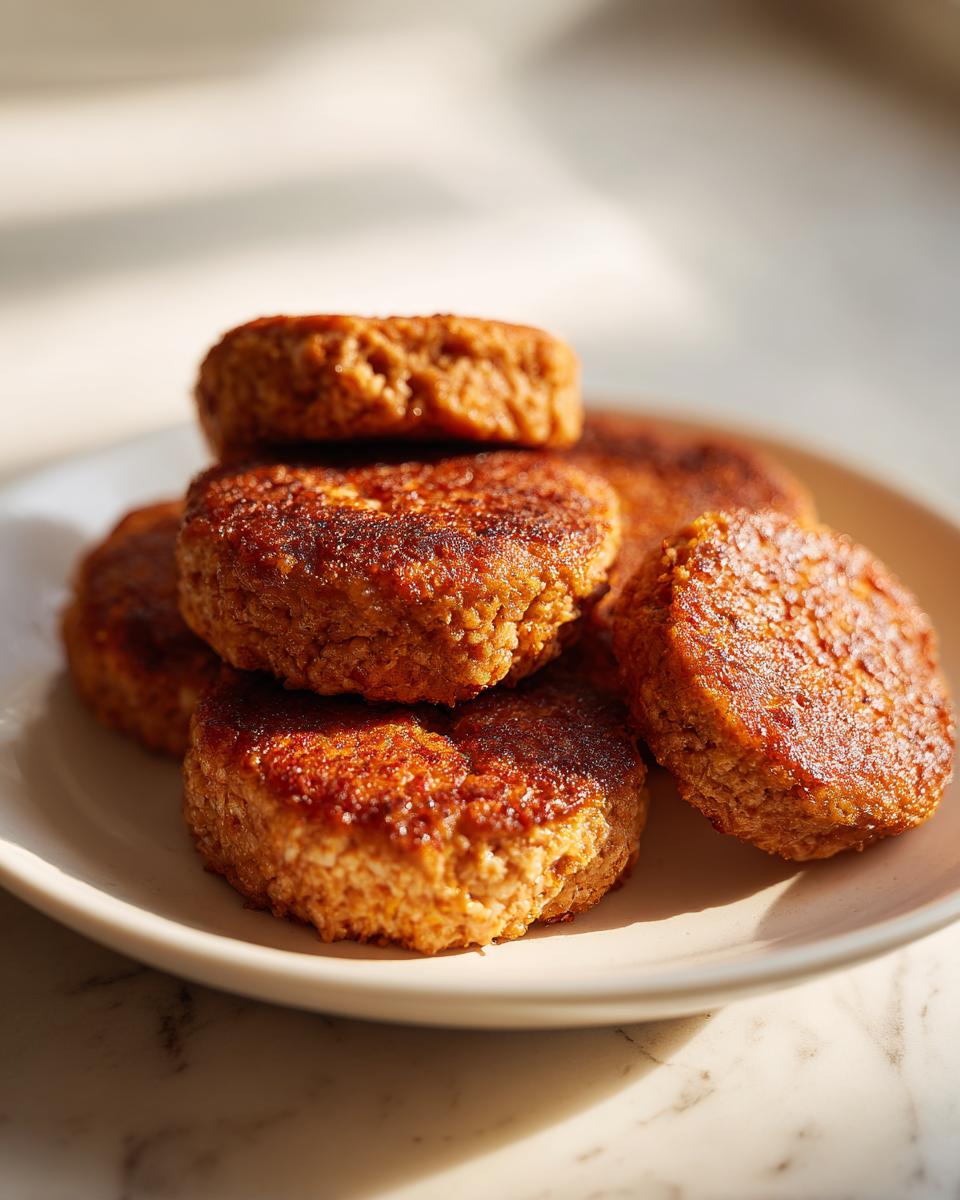
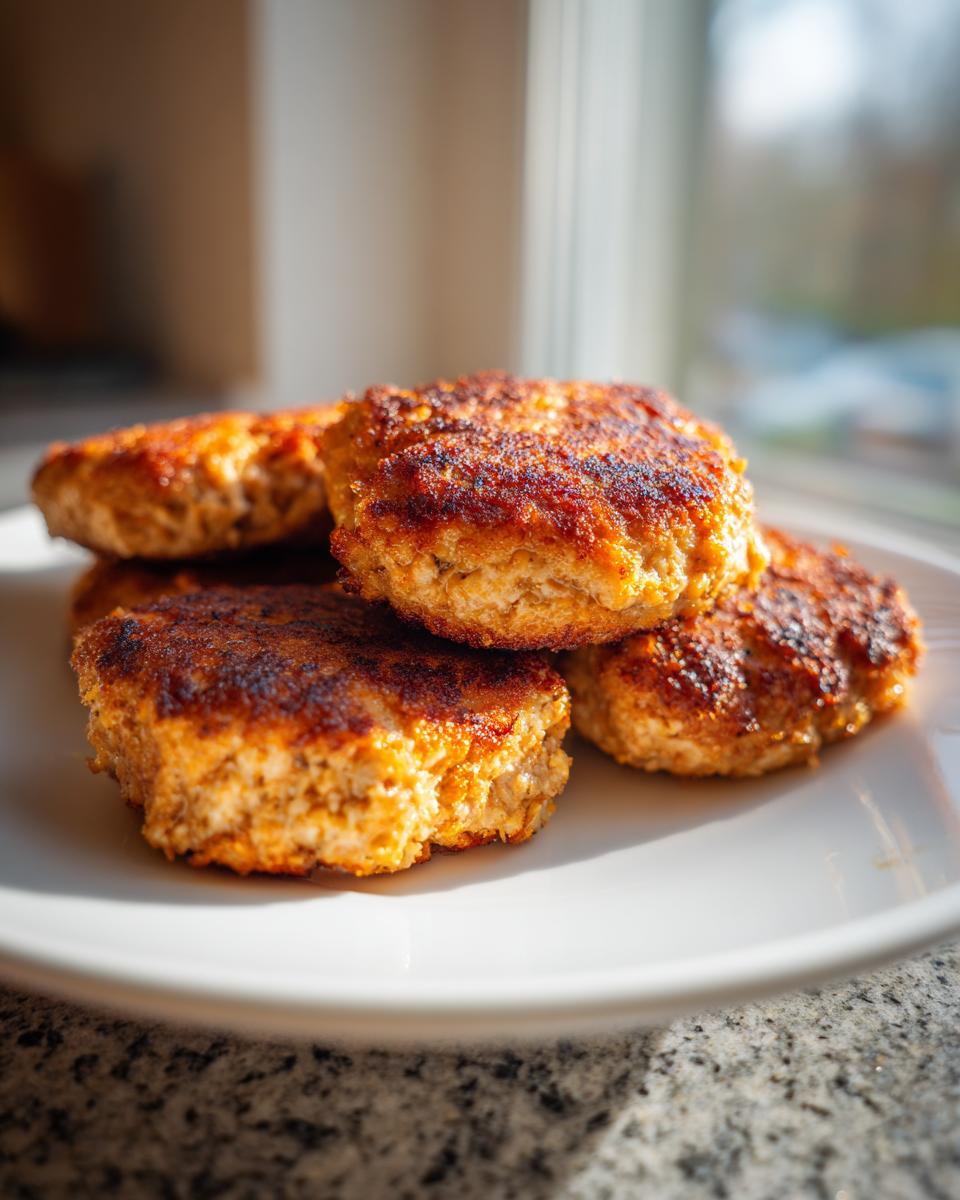
Once mixed, divide that tuna mound into four equal portions right there in the bowl. Gently roll and press each portion into a nice, firm patty shape, aiming for about one inch thick. Don’t flatten them too much, or they’ll dry out fast when cooking!
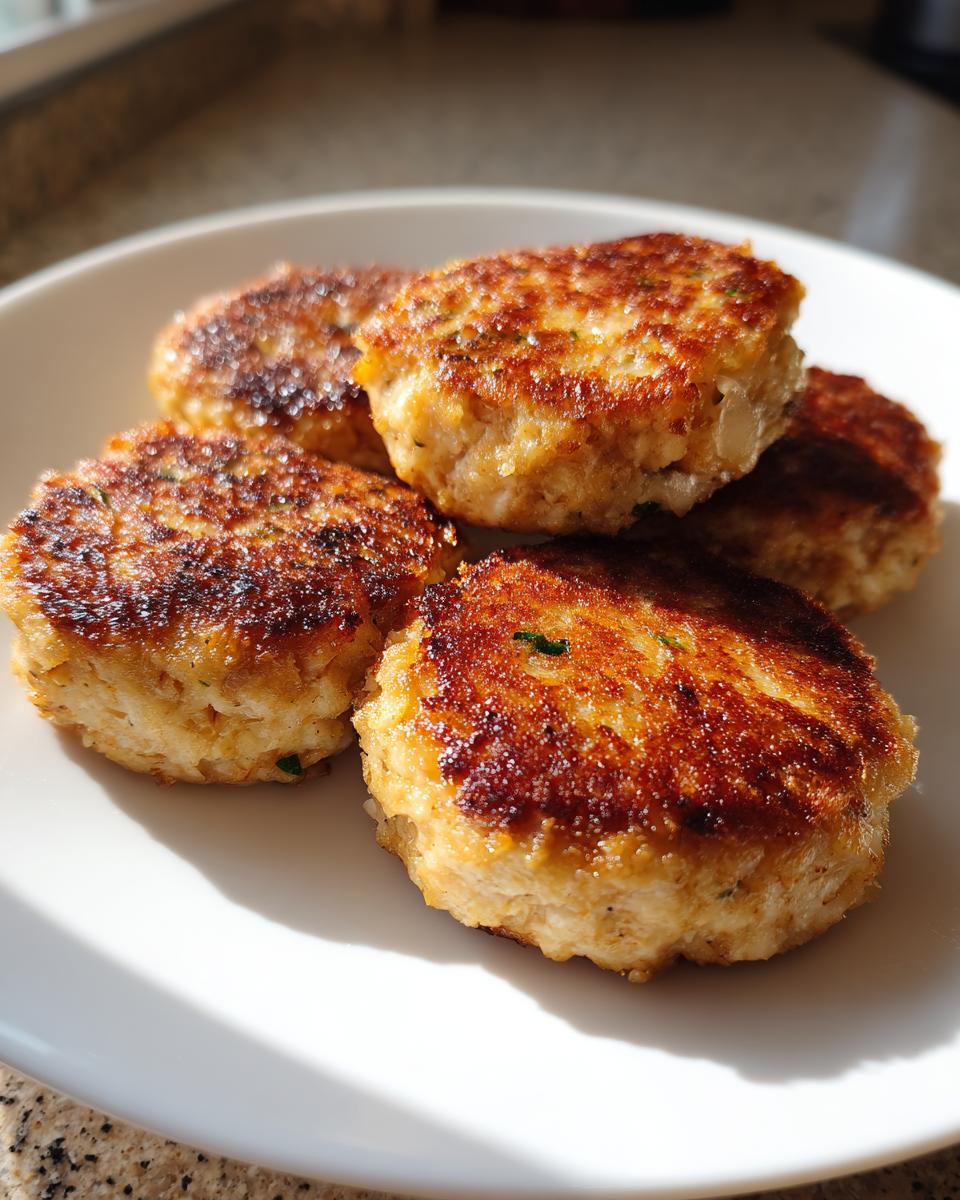
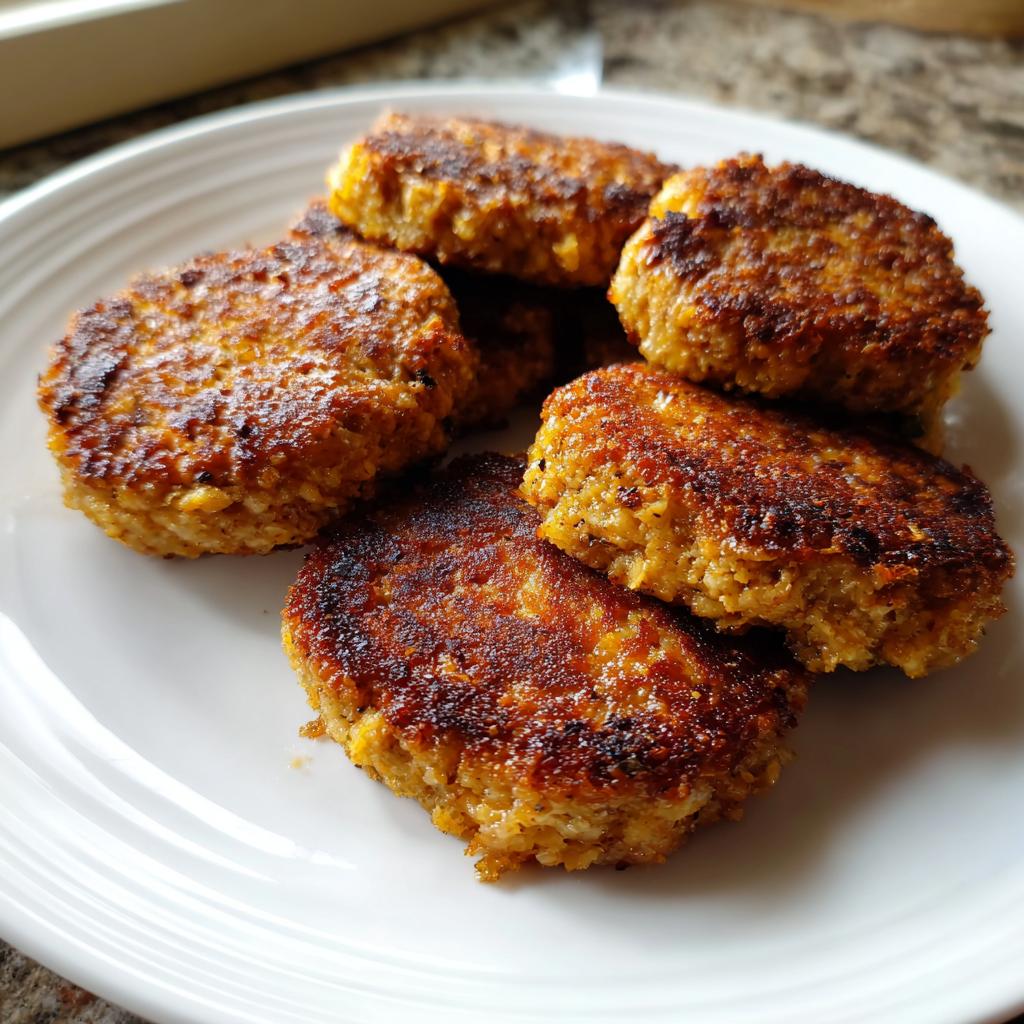
Next, get your skillet going over medium heat—we want medium, not screaming hot. Add your two tablespoons of oil and let it warm up until it shimmers a bit. Carefully place your four patties into that hot oil. Don’t crowd the pan; they need room to crisp up! Let them cook undisturbed for 4 to 5 minutes until the bottom is deeply golden brown. Then, flip them gently and cook the other side for another 4 to 5 minutes. Once they’re beautifully browned and heated all the way through, pull them out onto a paper towel-lined plate. Perfect!
Expert Tips for the Best Quick Tuna Patties
Look, the basic recipe gets you a decent patty, but if you want to make these truly *great*—the kind of quick dinner that people rave about—you need a couple of baker’s tricks. Remember, even though this is fast food, it still deserves respect! I’ve learned these little secrets over years of needing dinner on the table pronto, so take notes if you want that extra edge.
My number one rule here involves temperature, which sounds weird for a canned fish dish, but hear me out. Keep your egg cold! If the egg is ice cold, it firms up the mixture just a tiny bit faster. When you’re mixing quickly, that slight temperature difference helps the binders set up sooner, which means less time handling the patties before they hit the hot oil. You want stability when you’re cooking fast.
And speaking of stability, let’s talk about those bread crumbs. Once, I was making these on a Sunday night and realized I was totally out of plain bread crumbs. Disaster, right? Not quite! I grabbed the leftover crushed cornflakes from the kids’ breakfast. Sound crazy? Maybe, but it worked! I used the same amount, mixed them in gently, and they gave the patties a fantastic, extra-crispy crunch that I actually preferred!
The key takeaway is always: feel free to adjust the bread crumbs slightly if your mixture seems too wet, but always adjust them gently. Too much agitation makes the tuna rubbery. For the best texture, I always recommend resting the formed patties in the fridge for about five minutes before frying, if you have the time. It’s only five minutes, but that little chill time firms them up so they don’t break when you flip them over in that hot oil. That small pause is seriously worth the wait before you whip up these amazing easy dinner recipes!
Ingredient Notes and Substitutions for Quick Tuna Patties
I know how it goes. You’re relying on this recipe because it’s quick, which means you’re probably cooking from what you have on hand. If you look at the ingredient list and realize one thing is suddenly missing, don’t panic and race back out to the store! We can absolutely make swaps here, and honestly, some of my favorite versions came from making substitutions out of necessity.
This recipe is definitely welcoming to slight adaptations. If you’re trying to keep things lighter or just don’t personally love mayo, we can fix that right up. I’ve also tested gluten-free options that work perfectly, keeping these patties accessible for everyone.
Think of these notes as permission to use what you have, especially if you’re looking for more lightened-up dinner ideas!
- The Bread Crumbs Dilemma: If you’re fresh out of standard bread crumbs—and this happens to me constantly—don’t feel stuck. You can swap them out 1-to-1 with crushed crackers (saltines work great!), plain rolled oats, or if you’re needing a gluten-free fix, almond flour or finely ground gluten-free cereal works too. Just make sure whatever you use is very fine so it absorbs the moisture well.
- Swapping Out the Mayo: My personal favorite substitution here is plain Greek yogurt. It adds a wonderful tanginess that cuts through the richness of the yolk and makes the patties super tender. Use the mayonnaise amount exactly, but if you use a thick Greek yogurt, perhaps only add one tablespoon initially until you check the mix consistency.
- Mustard Matters: I specified yellow mustard because it’s mild and adds necessary acidity without overpowering the tuna flavor. If you only have Dijon, cut that amount back to just half a teaspoon. Dijon is much stronger, and we don’t want our patties tasting like a deli sandwich condiment!
- Onion Omissions: Can you skip the onion? Sure, but you really lose a layer of freshness. If you don’t have a fresh onion, one teaspoon of onion powder or garlic powder mixed into the dry ingredients works in a pinch. It’s a flavor sacrifice, but it keeps things moving quickly!
Serving Suggestions for Your Quick Tuna Patties
The absolute best part about these quick tuna patties is that they are total chameleons! Once they come out of that pan golden brown, they are ready for whatever you need them to be. You can lean into that classic American comfort food feeling, or you can pivot hard into something lighter and fresher if you need it. Because they are already so simple, they just act as the perfect anchor for whatever sides you whip up.
I know the recipe note mentioned putting them on a bun like a burger, and that’s a fantastic way to go for a super satisfying weeknight meal. Toast the bun lightly first—it keeps the bread from getting soggy when the patty steams a bit. Grab some crisp lettuce, a slice of tomato, and maybe a smear of tartar sauce, and you’ve got a top-tier lunch or dinner in about 20 minutes flat.
But if you’re looking to keep it a little lighter, or maybe you’re doing one of those simple, balanced suppers, serving them alongside a fresh salad is my go-to move. The richness of the little fried patty cuts through the acidity of a vinaigrette so nicely.
Here are a few ways I mix and match when serving these up. They are so flexible, which just adds to why this recipe is a constant winner in my kitchen:
- The Dinner Plate Classic: Skip the bun entirely and serve two patties next to a big scoop of creamy coleslaw or some homemade tartar sauce for dipping. If you happen to have some crispy roasted potatoes lying around, like my favorite smash potatoes, they make the perfect sturdy sidekick!
- The Lettuce Wrap Hack: For a low-carb option, skip the bun and wrap the warm patty snugly in a large piece of butter lettuce or romaine. A squeeze of fresh lemon juice over the top brightens everything beautifully.
- The Power Bowl Base: If you have any leftover grains like quinoa or brown rice, pile those in a bowl first. Top with sliced avocado, a few cherry tomatoes, and one of these tuna patties on top. Drizzle with olive oil and a dash of hot sauce. It turns a 20-minute meal into what looks like a gourmet lunch!
- Simple Side Salad: Honestly, sometimes a simple green salad with cucumber and maybe a sprinkle of dried cranberries is all you need. The patties are flavorful enough that the sides can stay minimal, keeping the focus on that quick, savory protein.
No matter how you plate them up, just make sure you serve them hot. That initial crispiness from the frying process is what makes them extra delicious!
Storage and Reheating Instructions for Leftover Quick Tuna Patties
Who doesn’t love having pre-made lunch sitting in the fridge? These quick tuna patties store like a dream, but you have to treat them right when you’re cooling them down and heating them back up. If you just toss them in a sealed container and microwave them the next day, you’re going to end up with a sad, steamy, soft patty, and honestly, we worked too hard for that!
The goal when saving these is to preserve that lovely golden crust we worked so hard to achieve in the skillet. Since these are some of my favorite last-minute dinner recipes, I always make sure I have options for leftovers ready to go. They usually last great for a few days, which makes them perfect for stretching a small batch across several meals.
Here’s exactly how I handle storing and reheating mine so they taste almost as good as fresh:
- Storage Time: Once they are totally cool, place your leftover tuna patties in an airtight container. I promise they stay perfectly good in the refrigerator for up to three days. If you stack them, use a layer of paper towel between each patty. This absorbs any lingering moisture and keeps the tops from getting that weird damp texture overnight.
- Avoid the Microwave Trap: I need you to promise me something: try to avoid the microwave unless you are seriously, I mean *seriously*, pressed for time. Microwaving heats them unevenly and definitely turns that nice crisp exterior into something chewy and sad.
- The Oven Revival is Best: If you have about 10 minutes to spare, the oven is your absolute best friend for restoring the texture. Preheat your oven to about 350 degrees Fahrenheit. Pop those patties directly onto a baking sheet—no need to cover them. Let them heat for 8 to 10 minutes. They warm all the way through, and that exterior crisps right back up! It’s honestly miraculous how well this works.
- Air Fryer Magic: If you have an air fryer—and if you don’t, maybe you should consider it for reheating—this is even faster than the oven! Set your air fryer to 350 degrees. Cook the patties for just 4 minutes. They come out perfectly golden again. This is the fastest route back to that fresh-off-the-skillet deliciousness!
If you follow these cooling and reheating steps, you’ll barely notice these leftovers aren’t fresh off their first fry. They hold up so much better than I ever expected for such a quick little meal!
Frequently Asked Questions About Quick Tuna Patties
I get so many questions about these patties because people can’t believe how fast they are and how tasty they turn out! I’ve gathered the most common ones I hear from readers, especially when they’re trying to adapt the recipe to fit their specific dietary needs or cooking style. Honestly, most of the time the answer is yes, you absolutely can tweak it!
If you’re looking for healthy recipes in a pinch, this is a fantastic place to start because the ingredients are so simple, and you can make slight adjustments to dial in those macros!
Can I bake these instead of frying for a lighter version?
Oh, you totally can! If you want to skip the frying oil—and maybe you’re doing a big batch—baking is a great alternative. You should arrange the formed patties on a baking sheet lined with parchment paper (use that cake goop trick if you have some left over!). Bake them in a preheated oven at 375 degrees Fahrenheit for about 15 to 20 minutes total. You’ll need to flip them halfway through, just like frying, to make sure both sides get nicely golden brown and firm up properly. They won’t get quite as crisply edged as the pan-fried ones, but they’ll be cooked perfectly through!
Can I use canned salmon instead of tuna in this recipe?
Yes, you absolutely can substitute salmon! Canned salmon works beautifully in this base recipe. Just like with the tuna, the absolute most important thing is to drain it super, super well. Salmon tends to be a bit oilier than water-packed tuna, so you might even find you need to add an extra teaspoon of bread crumbs or oats to the mixture just to help bind it together before you shape them. The flavor will be richer, but the cooking time stays pretty much the same!
How can I make these Quick Tuna Patties gluten-free?
That’s a great question, especially when we’re looking for healthy recipes! The only ingredient providing gluten here is the bread crumbs. Like I mentioned in the tips section, you can seamlessly swap them out for gluten-free binding agents. I love using almond flour or finely ground gluten-free oats—just use the exact same measurement. If you’re using the oats, give the mixture an extra minute or two before shaping just to make sure those oats have time to absorb the moisture from the egg and mayo. They hold together like a charm!
My patties keep falling apart while cooking! What did I do wrong?
Ugh, that is so frustrating when you’re trying to keep things fast! Nine times out of ten, this comes down to two things. First, the tuna wasn’t drained well enough, leaving too much water in the mixture, which prevents the binders (egg/crumbs) from setting up properly. Second, you might have mixed it too gently, which is strange, but if you don’t mix *just* enough to combine everything, the ingredients don’t adhere. Make sure to press the mixture firmly when shaping, and remember that little five-minute chill in the fridge before they hit the hot pan is my secret weapon against crumbling!
Estimated Nutritional Snapshot
Okay, so here’s the deal with nutrition when you’re cooking fast and simple meals: things are estimates! Since we aren’t using laboratory equipment to measure every tiny bit of oil absorption or mayonnaise variation, you definitely want to take these numbers with a grain of salt. But, for those of you trying to keep track of your intake while grabbing these quick, protein-packed minimal calorie recipes, this gives you a solid ballpark figure for one patty.
Based on the standard ingredients listed, when you divide everything out for four servings (four patties), you’re looking at a really satisfying and non-intimidating breakdown. This is why I love having these on hand for busy days—they keep you full without weighing you down!
Here is the estimated nutritional breakdown per single Quick Tuna Patty, cooked in the oil as directed:
- Calories: Approximately 150 to 175 Calories per patty.
- Protein: Wow, the tuna really shines here! Expect around 18 to 20 grams of protein.
- Fat: This will vary most based on your oil choice, but we’re estimating around 7 to 9 grams of total fat.
- Carbohydrates: Since we only use about 1/4 cup of bread crumbs total, the carbs are kept quite low, usually sitting around 4 to 6 grams.
See? That’s a powerhouse of almost 20 grams of protein for under 175 calories! That’s why I call this recipe a weeknight miracle. If you decide to bake them instead of fry them, you can shave off about 1 to 2 grams of fat per patty easily. Happy cooking, and don’t stress too much about the exact calorie count when the meal tastes this good this fast!
Quick Tuna Patties
Ingredients
Equipment
Method
- In a large bowl, combine the drained tuna, beaten egg, bread crumbs, mayonnaise, mustard, chopped onion, salt, and pepper.
- Mix the ingredients gently until they are just combined. Do not overmix.
- Shape the mixture into four equal patties, about 1 inch thick.
- Heat the oil in a skillet over medium heat.
- Carefully place the patties in the hot skillet. Cook for 4 to 5 minutes on each side, until they are golden brown and heated through.
- Remove the patties from the skillet and serve immediately.


