Are you tired of sweet cravings hitting right when you need maximum energy for your busy day? I totally get it! We all want a dessert that hits the spot but doesn’t derail our wellness goals, right? That’s why I’m so excited to share these incredibly easy, no-bake **Protein Cottage cheesecake Jars** with you today. Seriously, they take about fifteen minutes from start to finish, and they pack an incredible protein punch, making them the ultimate healthy snack staple!
When I was deep into creating sustainable habits—the kind that actually stick—I desperately needed quick wins in the kitchen. Micromanaging every meal felt impossible between running things at Melt It Clean and just, you know, living life! These little jars became my lifesaver for those afternoons when I needed a treat that supported my energy levels. You absolutely *have* to see how simple these are to assemble. They’ll revolutionize your snack game, trust me!
We’re talking real cheesecake indulgence, but boosted with protein, and no oven required! I’ve even prepped a batch or two for the week using this method, which you can read more about here if you’re looking for more meal prep magic.
Who Should Make These Protein Cottage cheesecake Jars?
Honestly, these jars were made for people who value their time as much as their macros—that’s you! If you’re juggling a busy work schedule, family life, or just trying to fit in consistent workouts, you need snacks that don’t require an hour of fuss.
This recipe is a total win for fitness folks who need a reliable, high-protein dessert option after a tough session. Forget those chalky shakes; this tastes like real dessert while keeping your protein goal on track. Plus, if you’re deep into the clean-living mindset I talk about on Melt It Clean, these satisfy that sweet tooth guilt-free. They are perfect for anyone who needs satisfying, portion-controlled eating without the stress of baking or complicated layering. See how these fit into your high-protein routine right here!
The Approach: Tone and Style for Your Protein Cottage cheesecake Jars Recipe
When I lay out these recipes for you, I want you to feel like you’re hanging out with me in the kitchen, not reading a textbook. That’s why the tone here is super friendly, encouraging, and totally practical!
We’re skipping the fancy jargon. We’re keeping things direct and actionable so you can whip up these **Protein Cottage cheesecake Jars** even on your most chaotic Tuesday evening. Expect clear steps and lots of supportive tips because clean living should feel joyful, not like a chore!
My Journey to Quick High-Protein Dessert Fixes Like Protein Cottage cheesecake Jars
You know, when I first started focusing on real wellness—not just crash dieting—I faced a major hurdle: the afternoon slump hit hard. I’d be deep into planning content for Melt It Clean, feeling great, and suddenly BAM! I needed something sweet, but everything in the fridge was either pure sugar or required an hour of baking prep.
I remember one specific afternoon. I was training for a 10K, so my protein needed to be high, but I was staring at a massive pile of emails. I was craving that creamy, decadent cheesecake texture but couldn’t justify the sugar crash. I looked at my tub of cottage cheese—a staple for protein but usually reserved for savory meals—and thought, “Why not?”
It took a few messy tries, I won’t lie! But when I finally got that blender whining perfectly smooth—no lumps, pure velvety texture—and stacked it over a tiny graham cracker base, I realized I’d cracked the code. These weren’t just a snack; they were an actual, satisfying, guilt-free dessert solution. That moment was huge for me because it proved that fueling my body intentionally didn’t mean sacrificing the joy of eating something delicious. That’s when I knew I had to share these **Protein Cottage cheesecake Jars** with everyone who feels too busy to be healthy. You can read more about that whole journey toward sustainable habits on my About Me page.
Essential Ingredients for Perfect Protein Cottage cheesecake Jars
Okay, let’s talk what goes into these amazing little parfaits. Because we aren’t baking these **Protein Cottage cheesecake Jars**, the quality of the blending step is everything. You need that filling to be silkier than a summer evening!
I’ve laid out exactly what you need below. Remember that most of the magic happens in the blender, so pay attention to the notes—especially about that cottage cheese! If you’re looking for more quick, minimal-ingredient ideas, check out these sweet cups for inspiration.
For the Cheesecake Filling
This is where the high-protein magic happens. You must blend these until they are completely smooth—I mean, porcelain-smooth. Don’t rush this part!
- Cottage Cheese: You need 1.25 cups. This is the star, so try to use a brand you know blends well. If you see lumps later, you didn’t blend long enough!
- Fat-Free Cream Cheese: One cup is your binder. If you want a slightly richer, more traditional cheesecake flavor, swapping this for full-fat cream cheese is totally fine, but keep in mind the macros will shift slightly.
- Vanilla Protein Powder: Use 0.5 cups. This is fun territory! I use vanilla because it’s neutral, but feel free to try chocolate or even a cheesecake-flavored powder if you can find one.
- Sugar-Free Maple Syrup: To taste. Start small! The protein powder might already be sweet. You can always add more syrup later, but you can’t take it out once it’s in there.
For the Crust Base
The crust is small but crucial for that classic textural contrast. It gives you that lovely little crunch at the bottom.
- Graham Crackers or Crumbs: Six pieces, crushed fine. If you’re avoiding gluten or grains, grinding up some almond flour or nut-based cookies works wonderfully here instead.
- Melted Butter: Just 1 tablespoon. This is all you need to bind those crumbs nicely together so they don’t just float away into the filling when you spoon it in.
Topping Suggestions
This is where you personalize your **Protein Cottage cheesecake Jars**! Since the base is simple, toppings really make it shine. Keep your toppings fresh and add them right before serving if you’re meal prepping!
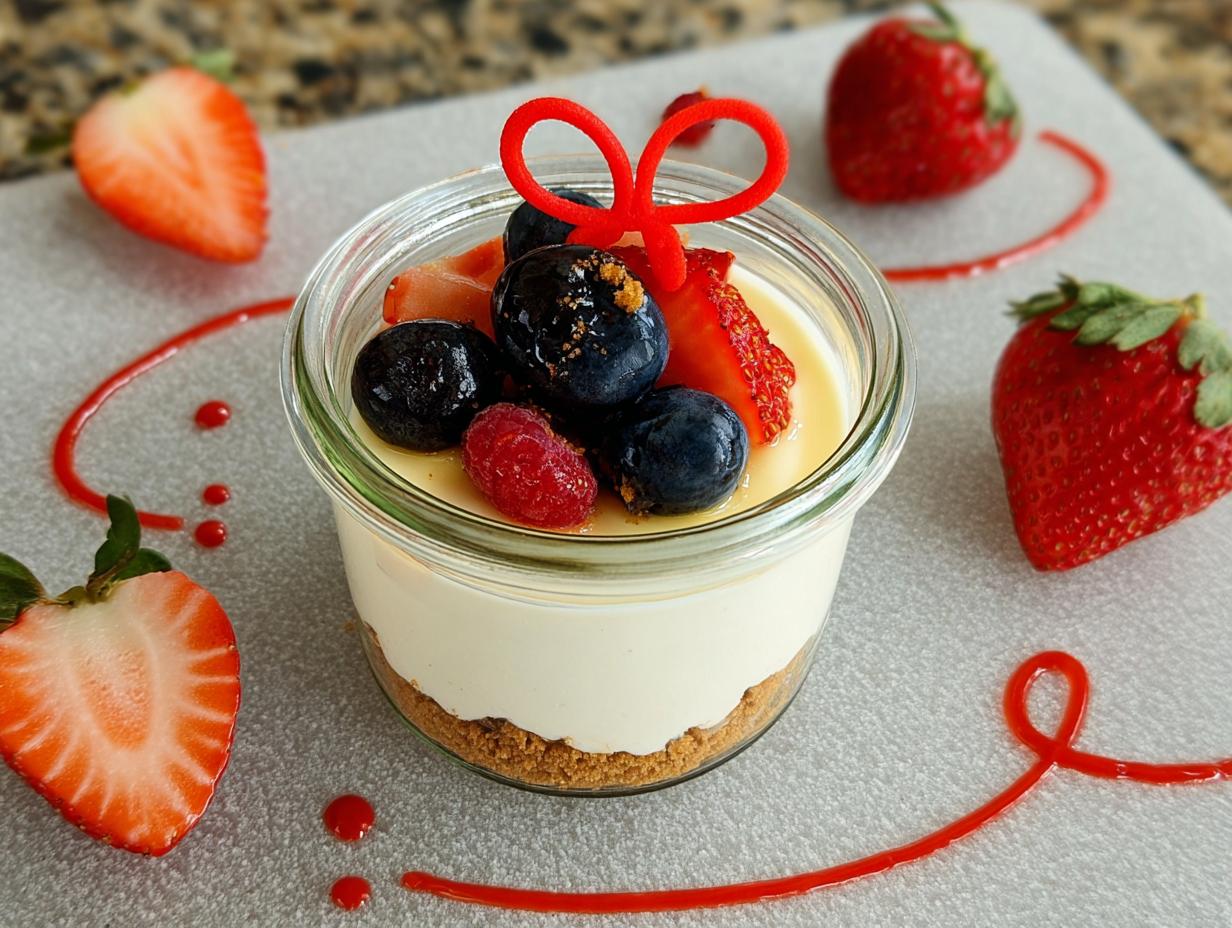
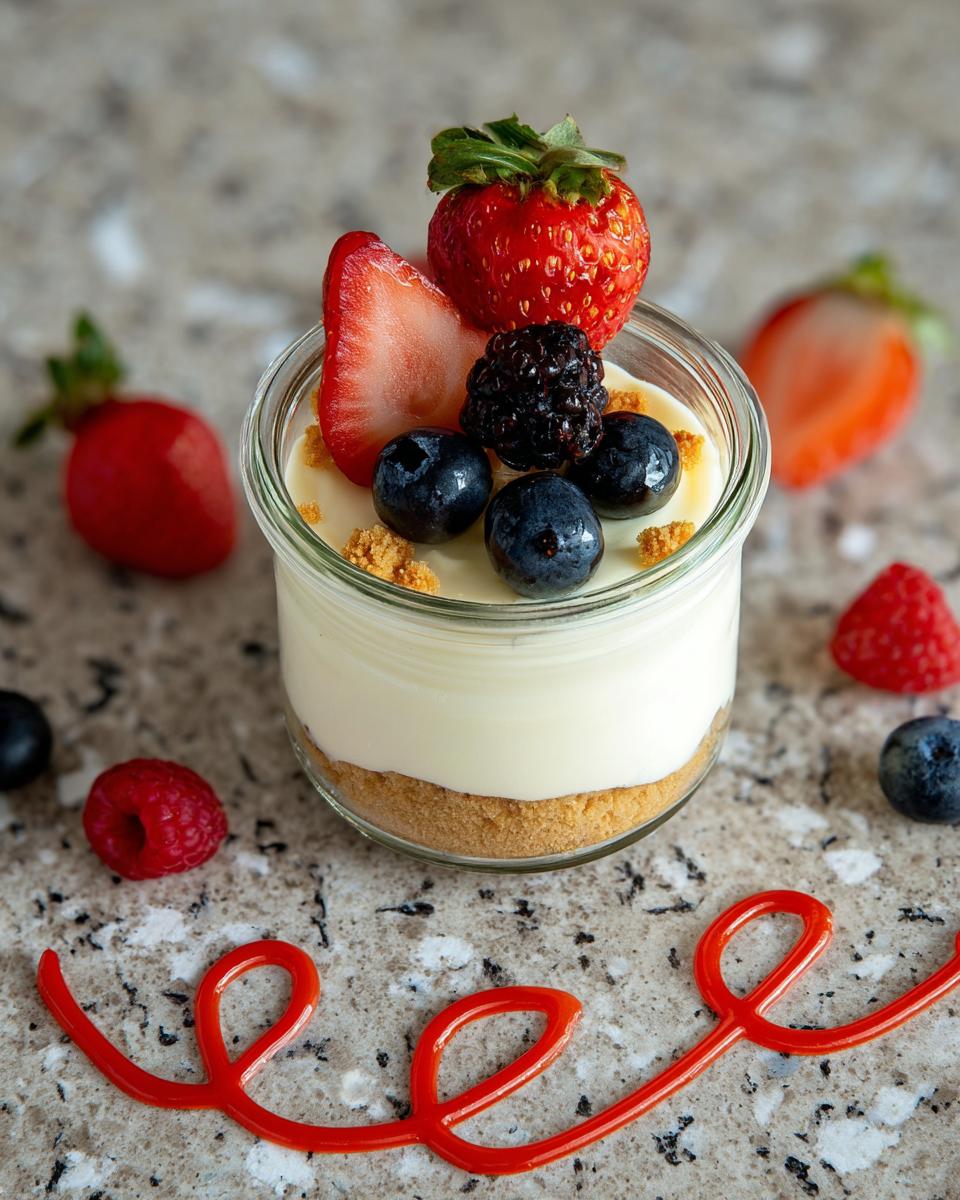
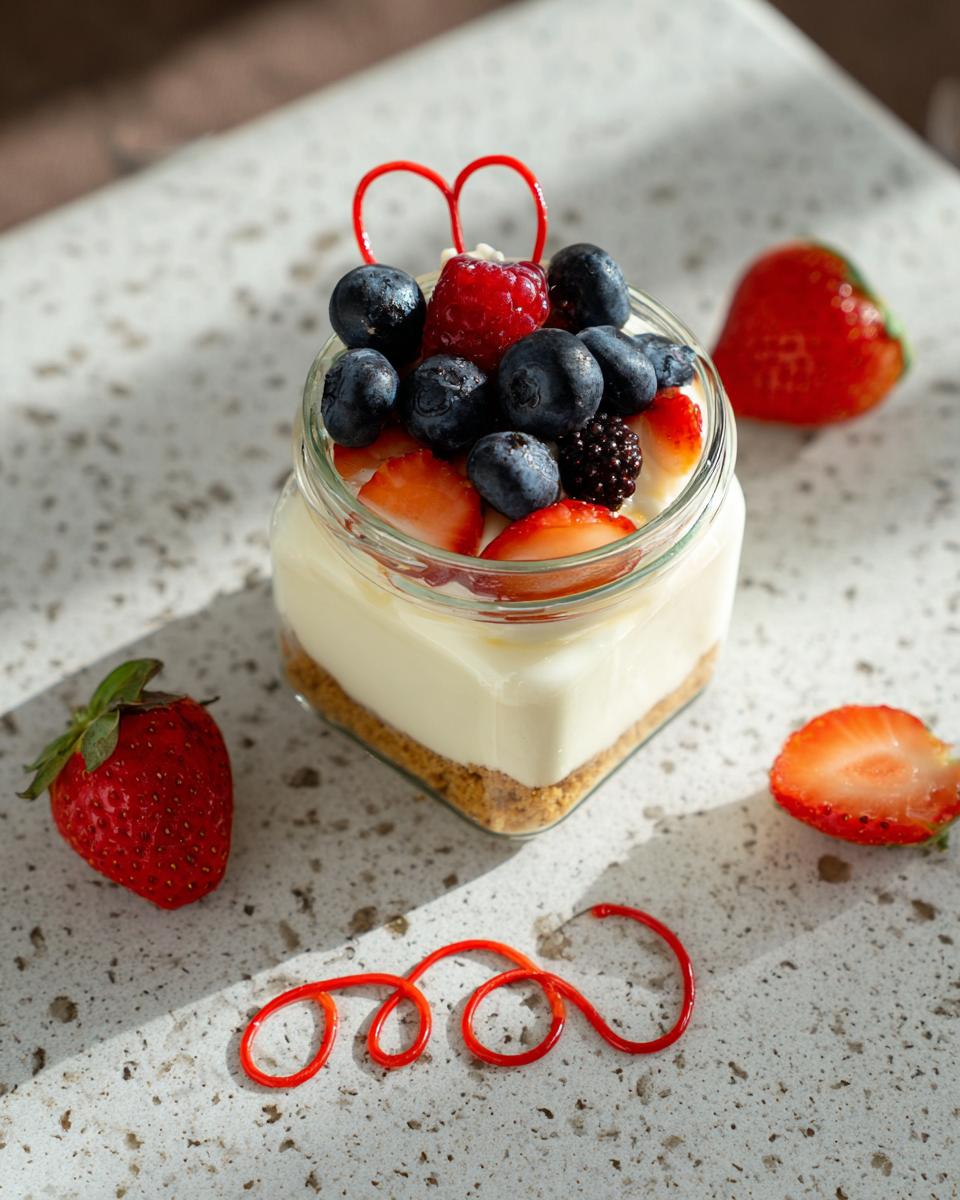
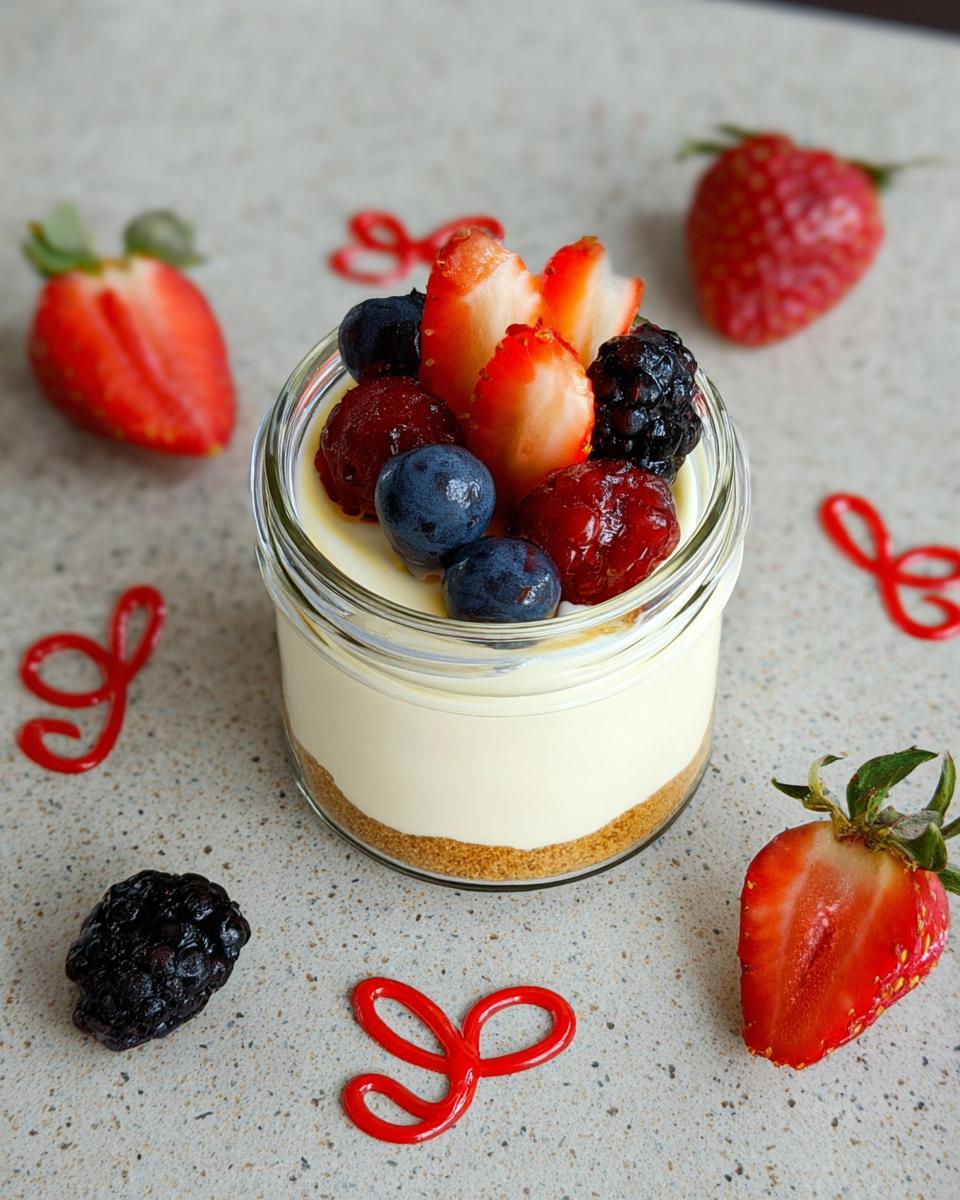
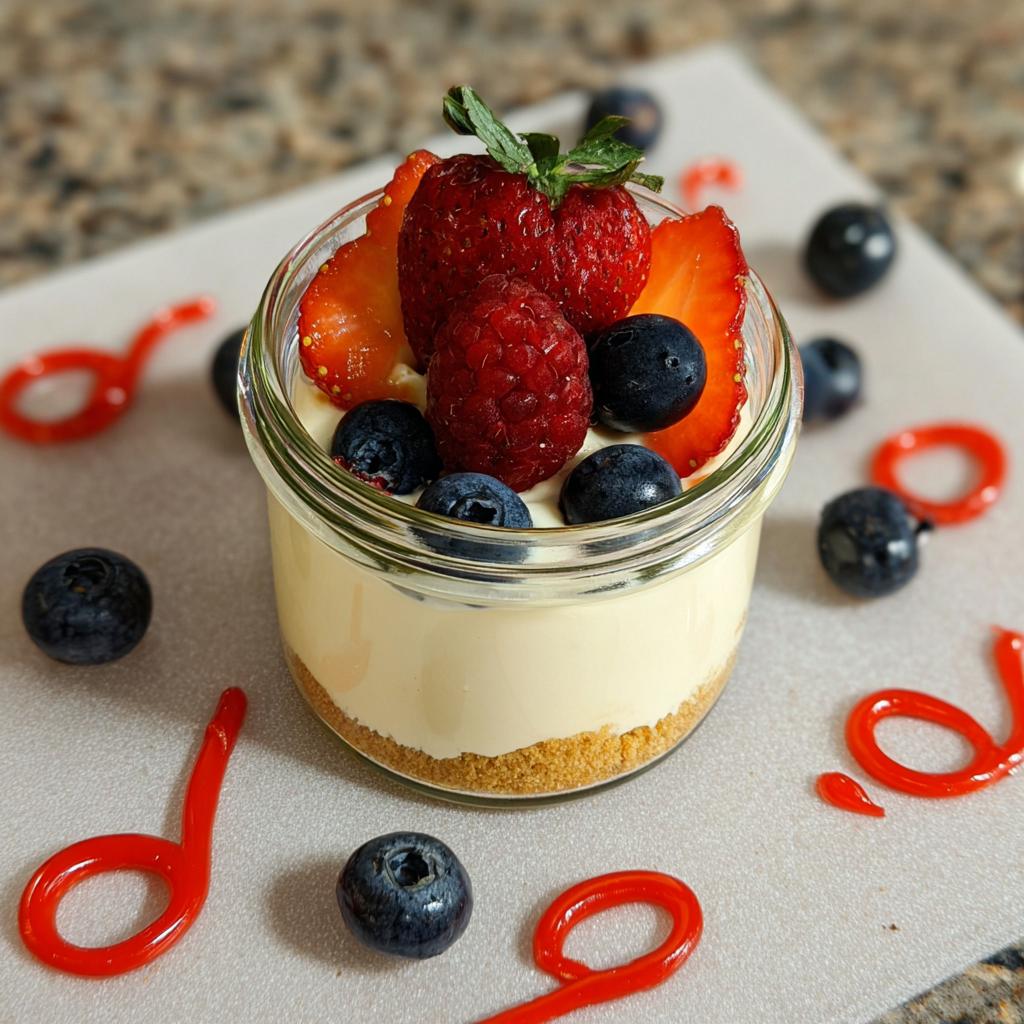
- Fresh Fruit: Berries are my go-to—strawberries, blueberries, raspberries. Sliced bananas or even peaches are fantastic when they’re in season.
- Jam: A small spoonful of high-quality, low-sugar jam works as a quick, flavorful swirl that looks impressive.
- Extra Crunch: A sprinkle of chopped nuts or a drizzle of sugar-free chocolate sauce never hurt anyone!

Step-by-Step Instructions to Assemble Your Protein Cottage cheesecake Jars
Putting these **Protein Cottage cheesecake Jars** together is honestly faster than making toast, but you still have to follow the steps in order. We’re moving fast in the kitchen, but we’re not cutting corners on assembly time because that’s where the texture gets set!
If you’re prepping a whole week’s worth of snacks, make sure you look at my guide on meal prepping in under an hour—this recipe fits perfectly into that busy schedule!
- Get the Filling Blended: Grab your blender! Toss in the cottage cheese, cream cheese, protein powder, and that sugar-free maple syrup. You need to blend this until it’s unbelievably smooth. I mean, you shouldn’t be able to tell it was cottage cheese whatsoever—it should look like rich, thick pudding. Scrape down the sides once or twice just to make sure everything incorporates well.
- Prep the Crust: While the blender is doing its thing, crush your graham crackers super fine, like coarse sand. Then, stir in that tablespoon of melted butter until all the crumbs are slightly damp and stick together when you squeeze them.
- Layer the Bottom: Take your clean jars—I use six of them—and evenly distribute that buttery crust mixture into the bottom of each one. You don’t need to pack it down super hard, just gently press it so it forms a nice, compact base for the filling.
- Add the Creamy Layer: Now, carefully spoon the beautiful, smooth cheesecake filling right on top of the crust layer in each jar. Try to keep the sides of the jar clean as you go; it looks nicer when you finally serve it!
- Chill Out! (The Critical Step): This is non-negotiable if you want that cheesecake texture. Cover the tops of the jars loosely and pop them into the refrigerator. They need at least one to two hours to chill deeply. This chilling time allows the filling to firm up properly, giving you that fantastic cheesecake density.
- Top and Serve: Once they are thoroughly chilled and firm, take them out! Top each jar with your selected fresh fruit or a dollop of jam and enjoy immediately, or cover them tightly and save them for later!
Expert Tips for Making the Best Protein Cottage cheesecake Jars
You’ve got the basic steps down, but trust me, small tweaks turn these **Protein Cottage cheesecake Jars** from good to absolutely phenomenal. Since there’s no baking involved, every step in the assembly phase matters a lot for that signature texture!
If you’re looking for inspiration on what else to cook when you crave healthy recipes, I shared some of my favorite go-to options over on my site, which you can check out right here.
Here are the tricks I rely on every single time to ensure maximum smoothness and long-lasting freshness:
- The Blender is Your Best Friend: Listen, if you have a high-powered blender—like a NutriBullet or a standard Vitamix—use it for the filling! Cottage cheese can be stubbornly lumpy. Blending for a solid two to three minutes, scraping down the sides halfway through, is necessary to get that fully homogenized, velvety consistency that mimics real cream cheese filling. Lumps are *not* welcome here.
- Don’t Skip the Chill Time: I know you want to eat this right away! But forcing the chill time (that full hour or two) is critical. It’s what allows the protein powder and the cream cheese to work their magic and firm up the mixture against the crust. If you try to eat them too soon, it will just be sweet, thick cottage cheese soup.
- Meal Prep Topping Strategy: This is key for making these ahead. If you plan to eat these jars over several days (which you totally should!), *do not* put the fruit or jam on top until the day you plan to eat that specific jar. Fresh fruit releases moisture, and wet toppings can start leaching into your otherwise perfect filling if stored for too long. Keep the topping separate, or only top the jar you plan to eat tomorrow!
- Sweetness Check Before Sealing: Taste the filling mixture *before* you portion it into the jars. Since protein powders vary wildly in sweetness, take a small spoonful. If it needs more sweetness now, add a tiny splash more sugar-free syrup and blend for 10 seconds. It’s much easier to adjust the flavor when everything is liquid!
Storing and Keeping Your Protein Cottage cheesecake Jars Fresh
One of the best things about these **Protein Cottage cheesecake Jars** is that they are total rockstars when it comes to meal prepping! They really shine when you make them ahead of time, which is exactly what we busy clean-eaters need, right? You can totally save yourself the prep time on a busy weeknight.
I actually try to make a huge batch of six jars on Sunday evening. It takes no time, and then I have guaranteed, high-protein snacks ready to grab for the first half of the week. It helps me stay consistent, which is the whole point of Melt It Clean!
If you’re prepping a big batch of meals for the week, make sure you check out some of my favorite tips on how to keep everything tasting fantastic over several days right here.
Here’s how you need to handle storage to keep that creamy filling perfectly fresh:
- Tightly Covered is Key: Always cover your jars securely. If you’re using standard mason jars, the standard lids work great. If you’re using small deli containers, make sure the lids snap on or seal completely. Keeping them tight prevents the filling from absorbing any weird fridge smells and keeps the moisture locked in.
- Refrigeration Window: These **Protein Cottage cheesecake Jars** are best eaten within four days. I find that around day five, the graham cracker crust starts getting a little too soft against the moisture of the filling. They are sturdy, but I always aim to finish them before the end of the work week.
- Topping Separation: I mentioned this before, but it’s worth repeating as a storage tip: never store them with fresh fruit or jam already applied when making them several days ahead. Keep your berries or jam in a tiny separate container. Layering the topping right before you eat that specific jar preserves the best texture for both the crust and the filling.
When they come out of the fridge, they are perfectly chilled, firm, and ready to go—no excuses for grabbing something sugary instead!
Common Questions About These High-Protein Dessert Jars
Whenever I share a recipe that uses cottage cheese in a surprising way—like turning it into a **high protein dessert**—I always get a flood of questions! That’s totally normal. Changing up how we look at staple ingredients is part of creating real wellness habits that stick. I pulled together the questions I hear most often about these amazing **Protein Cottage cheesecake Jars** right here for you!
If you’re still curious about how to fit these into a balanced day, you might find some inspiration in building bowls that are packed with protein and flavor, which you can read more about here.
Can I use different flavors of protein powder?
Absolutely! This is where you get to play around. Vanilla is my standard because it is so neutral and lets the other flavors shine. However, you can definitely experiment with chocolate protein powder—that turns it into a chocolate cheesecake jar! Just remember that if you use an unflavored powder, you’ll definitely need to add that sugar-free syrup to taste, as unflavored powders are usually quite bland.
What if I don’t want the graham cracker crust? Can I skip it?
You sure can skip it, but I highly encourage you to try at least a small base layer! The crust provides that necessary contrast; it gives you something firm to scoop against, and honestly, it makes it feel so much more like real cheesecake. If you skip it completely, the filling will just sit on the bottom of the jar, and you might find it slightly less satisfying. If you skip the graham crackers, just ensure you press the filling directly against the jar bottom, or try using a layer of crushed nuts instead for some texture!
How long do these high-protein dessert jars really last in the fridge?
I mentioned this in the storage section, but it bears repeating because I want you to enjoy them at their best! They are perfectly creamy and fresh for about four days, provided you keep them tightly covered. I wouldn’t let them slide past day five, especially if you used fresh fruit on top; otherwise, the texture might start degrading a little too much. If you’re meal prepping for five days, just plan to top the Day 5 jar fresh that morning!
Do I have to use fat-free cream cheese?
Nope! I use fat-free because I’m keeping a close watch on saturated fat for my wellness goals, but feel free to use regular cream cheese if that’s what you prefer or if it’s what you have on hand. The regular cream cheese will give you a richer, slightly creamier mouthfeel when blended. It’s a great swap if you’re not tracking macros strictly that day. It will still be a fantastic **cottage cheese recipe** with great protein!
Sharing Your Delicious Protein Cottage cheesecake Jars Creations
Now that you have your own stash of incredible **Protein Cottage cheesecake Jars**, I really want to know what you think! Did you manage to blend that cottage cheese until it was perfectly smooth? That’s always my biggest success indicator!
Please don’t be shy! Head down to the comments section below and leave a rating for the recipe—it helps others looking for a quick, high-protein dessert find these gems. I also absolutely love seeing your creations!
What kind of fruit combinations did you try on top? Did you stick to my simple berries, or did you go wild with cinnamon and pecans? Tag me on social media when you post a picture so I can see the beautiful work you’re doing in the kitchen. It keeps me motivated to share more clean-living inspiration that actually fits into our busy lives!
By Hi, I’m EMILIA, the founder of MeltItClean.com – your digital space for natural weight loss, real wellness habits, and clean-living inspiration that actually fits your life.
For years, I struggled with the ups and downs of dieting. I tried everything — juice cleanses, low-carb crazes, fitness challenges — but I always ended up back where I started: tired, bloated, and frustrated. I didn’t just want to “lose weight” — I wanted energy, mental clarity, glowing skin, and confidence without sacrificing my joy or sanity.
After years of experimenting, learning, and unlearning, I discovered a simple truth: your body is already powerful — it just needs support, not restriction. That’s when I created Melt It Clean — a site dedicated to real transformation through clean, intentional, and nourishing daily habits that anyone can follow.
My goal was simple: build a place where people could feel informed, supported, and empowered without being overwhelmed by wellness fads.
Author Information
By Hi, I’m EMILIA, the founder of MeltItClean.com – your digital space for natural weight loss, real wellness habits, and clean-living inspiration that actually fits your life.
For years, I struggled with the ups and downs of dieting. I tried everything — juice cleanses, low-carb crazes, fitness challenges — but I always ended up back where I started: tired, bloated, and frustrated. I didn’t just want to “lose weight” — I wanted energy, mental clarity, glowing skin, and confidence without sacrificing my joy or sanity.
After years of experimenting, learning, and unlearning, I discovered a simple truth: your body is already powerful — it just needs support, not restriction. That’s when I created Melt It Clean — a site dedicated to real transformation through clean, intentional, and nourishing daily habits that anyone can follow.
My goal was simple: build a place where people could feel informed, supported, and empowered without being overwhelmed by wellness fads.
Protein Cottage Cheesecake Jars
Ingredients
Equipment
Method
- In a blender, combine the cottage cheese, cream cheese, protein powder, and sugar-free maple syrup. Blend until smooth.
- Crush the graham crackers into fine crumbs and mix with the melted butter.
- Press the graham cracker mixture into the bottoms of each jar.
- Spoon the cheesecake filling over the crust in each jar.
- Refrigerate the jars for 1 to 2 hours.
- Once chilled, top with fresh fruit or your favorite jam and serve.