Oh, you know those days, right? You get that intense craving for wings—that delicious, sticky, saucy goodness—but the thought of deep-frying just sends you straight to the couch because you know the cleanup will take *forever* and frankly, deep-frying never feels like the clean, intentional fuel my body needs anymore.
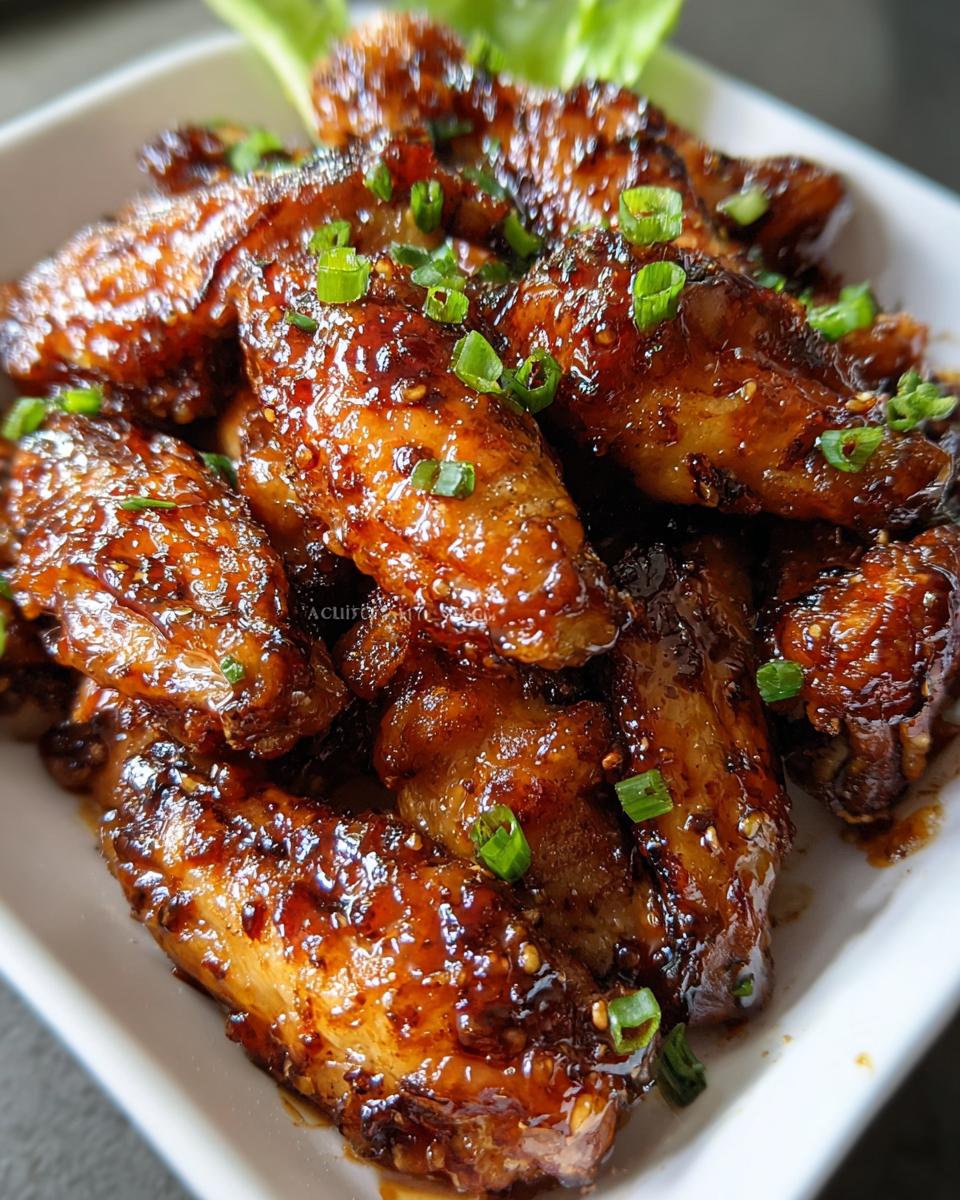
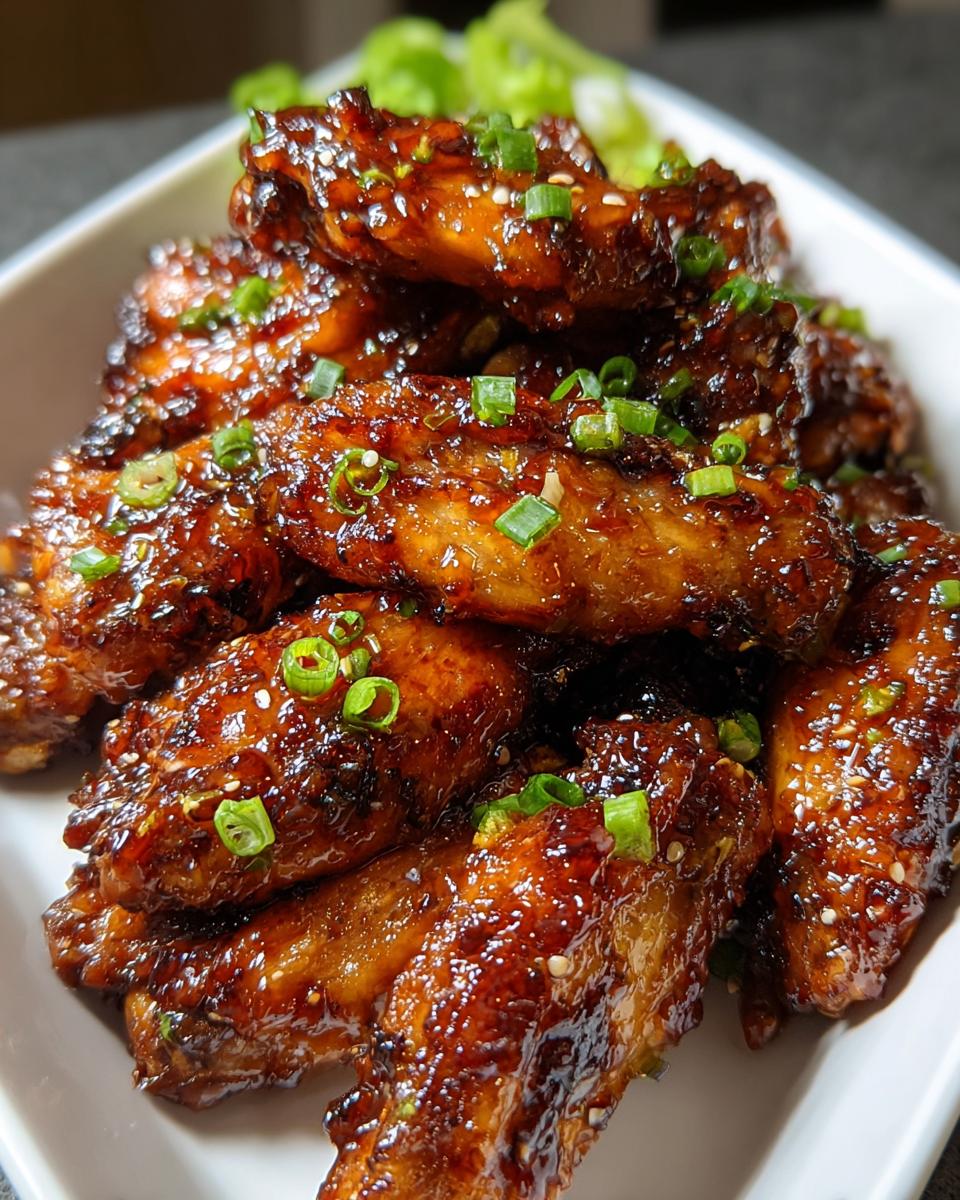
Well, forget that hassle! Because I found the magic trick. These Honey Garlic Wings with Sticky Glaze are baked, not fried, and they come out perfectly crisp with a glaze that actually sets up beautifully in the oven. Trust me, after years of chasing clean habits that didn’t feel restrictive, finding simple, ultra-satisfying flavor bombs like this is what Melt It Clean is all about. This recipe delivers that flavor punch without the usual wellness guilt!
Why You Will Crave These Honey Garlic Wings with Sticky Glaze
When I say these are my go-to wings, I mean it. They hit every single craving I have, especially when I want that great takeout flavor without all the greasy aftermath. If you’re looking to simplify your cooking without sacrificing big flavor, you need these on your rotation. You’ll be obsessed!
- They are genuinely baked—no messy oil splatter, no need for a deep fryer!
- The glaze is the perfect dance between sweet honey and savory garlic.
- You get that satisfying crispness on the outside, just like you want in a wing.
- Everything happens right on a sheet pan, making cleanup almost nonexistent.
- The sticky glaze coats every little nook and cranny perfectly.
- They taste gourmet but honestly come together in just about an hour total.
I love linking these delicious wings with my guide on making crispy chicken cutlets—it’s all about using simple techniques to maximize texture when you’re keeping things clean!
Gathering Ingredients for Perfect Honey Garlic Wings with Sticky Glaze
When it comes to getting the best texture from baked wings, the ingredients matter a ton, even before you start cooking. You can’t just toss things in a bowl; you need the right balance of seasoning for the initial bake and the right sticky texture for that intense sweet-savory coating. I’ve broken down exactly what you need for these 10-ingredient chicken recipes that feel like a massive treat.
Essential Components for the Honey Garlic Wings with Sticky Glaze
First up, the wings themselves. Don’t skip the drying step; that’s how we get close to fryer crispiness without the oil! Make sure your chicken wings are split into drumettes and flats.
- 2 lbs chicken wings, which you’ll want to split into drumettes and flats
- 1 tbsp olive oil (just enough to help the seasoning stick)
- 1 tsp salt
- 1/2 tsp black pepper
- 1/2 tsp paprika or garlic powder (your choice for that delicious base flavor)
Crafting the Signature Sticky Glaze for Honey Garlic Wings with Sticky Glaze
The sauce is where the real party starts! This glaze needs to bubble just right so it adheres beautifully. If you want that ultra-sticky, thick coating that makes everyone grab a third wing, utilizing that optional cornstarch slurry at the end is the secret weapon. It helps that glaze cling instead of just dripping off.
- 1/2 cup honey (the quality really shows here!)
- 3 cloves garlic, minced (use fresh, please—it makes a difference)
- 1/4 cup soy sauce
- 2 tbsp brown sugar
- 1 tbsp apple cider vinegar
- 1 tsp cornstarch mixed with 1 tbsp water (optional, but highly recommended for that sticky texture)
- For Garnish (Optional): 1 tbsp sesame seeds and 2 tbsp chopped green onions
Step-by-Step Instructions for Baked Honey Garlic Wings with Sticky Glaze
This is where we turn simple ingredients into something spectacular! Because we aren’t deep-frying, the prep work—especially getting that oven hot and using the rack correctly—is totally key to getting that crispy texture we love. I always feel like I’m channeling my inner culinary scientist waiting for those wings to bake perfectly. If you need a quick weeknight solution, check out my guide on fast chicken recipes, but these are worth the extra 15 minutes of patience!
Preparing and Seasoning the Wings
First things first: preheat your oven to 400°F (200°C). Remember to line your baking sheet with foil or parchment first—trust me on this, it saves so much scrubbing later! Now, grab those wings and pat them *bone dry* with paper towels. Seriously, moisture is the enemy of crispiness. Once they are dry, toss them with a little olive oil, salt, pepper, and your seasoning choice. Make sure they are arranged in a single layer on top of a wire rack set on the baking sheet. Space them out; air needs to circulate!
Baking for Maximum Crispiness
Pop those trays into the hot oven and set your timer for about 40 to 45 minutes. The trick here is flipping them right around the halfway mark. This ensures both sides get wonderfully golden brown and crispy. You’re looking for a beautiful color and cooked-through tenderness before we move on to the sticky part.
Simmering the Honey Garlic Glaze
While the wings are doing their crispy thing, make the sauce! Get a small saucepan going over medium heat. I toss in the honey, soy sauce, brown sugar, vinegar, and all that minced garlic. Let it simmer gently for about 3 to 5 minutes until it thickens up slightly. If you want that super-thick, restaurant-style clingy sauce, whisk in your cornstarch slurry now and let it cook for one more minute until it looks glossy and thick.
Glazing and Setting the Honey Garlic Wings with Sticky Glaze
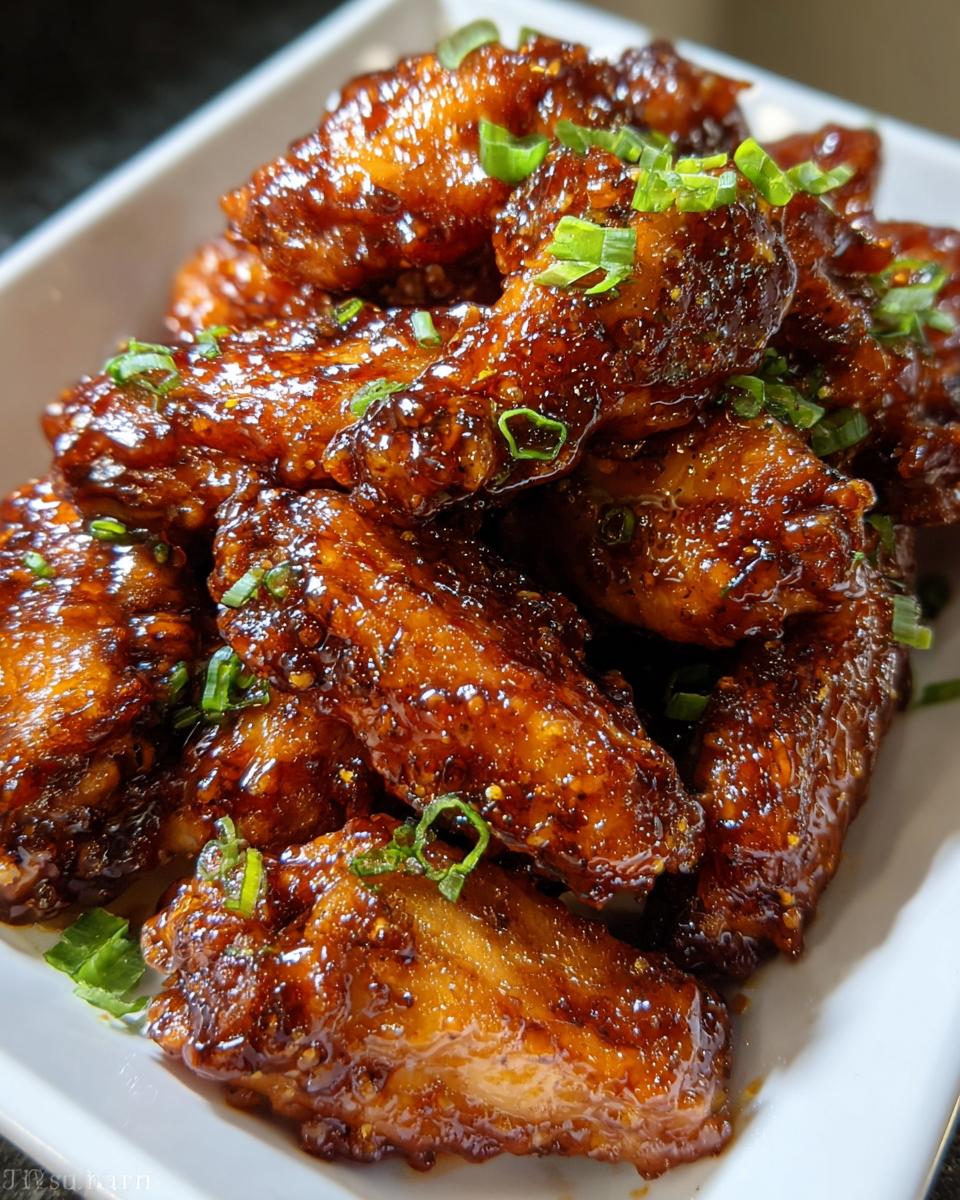
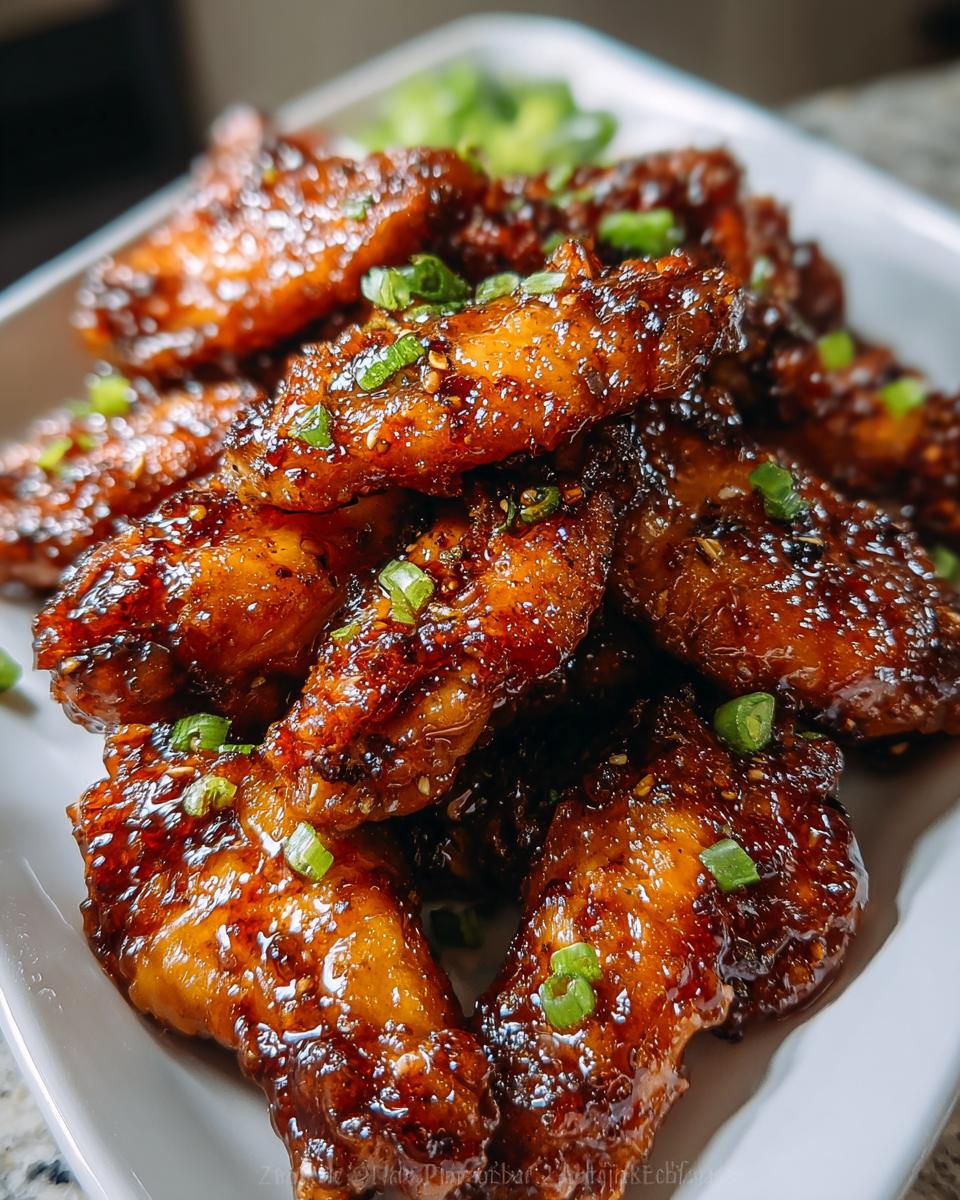
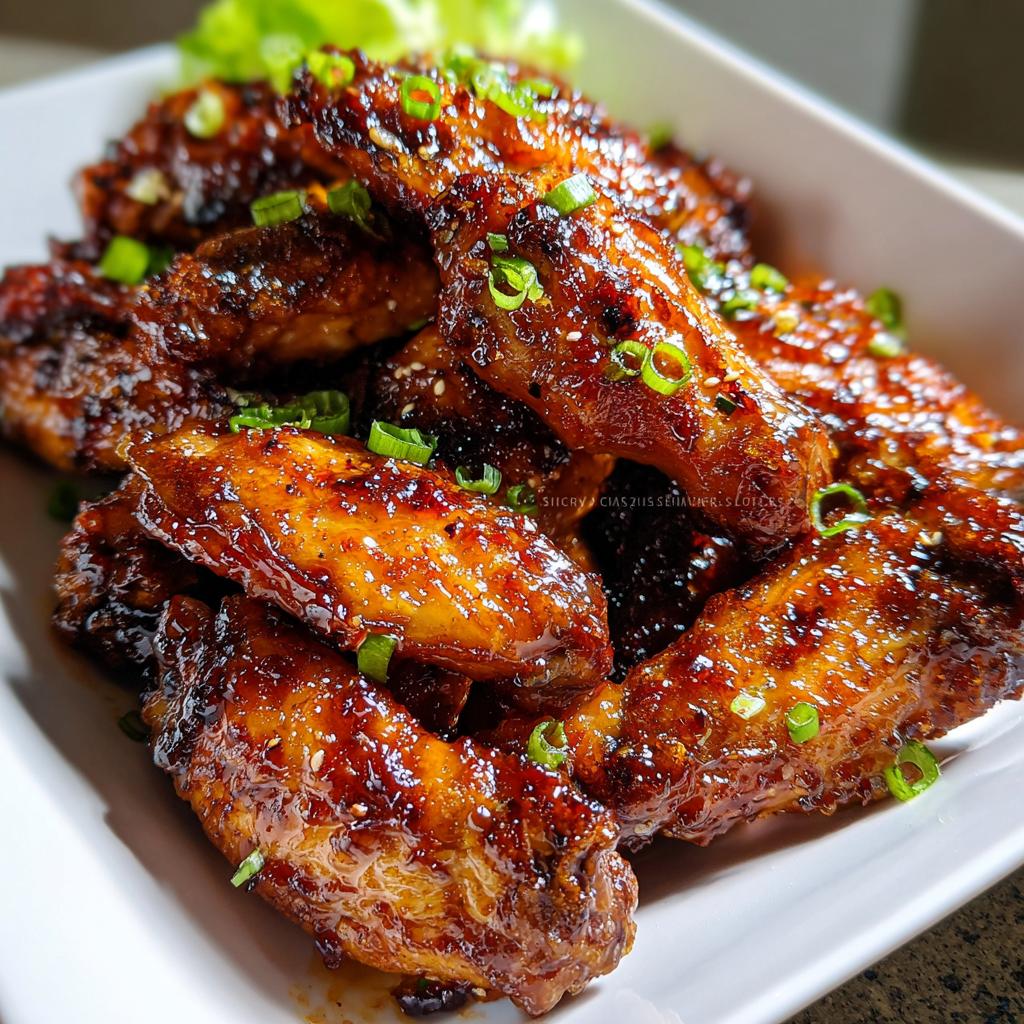
Alright, time for the grand finale! Take those gorgeous, crispy baked wings out of the oven and immediately transfer them to a large bowl. Drizzle that warm, sticky honey garlic glaze all over them. Toss them gently but thoroughly until every single wing is coated in that sweet, savory goodness. For an extra layer of set glaze, you can return them to the rack for just 5 more minutes. Garnish with sesame seeds and green onions, and serve them hot!
Tips for Achieving the Best Honey Garlic Wings with Sticky Glaze Texture
Look, I know baking wings can feel like a compromise sometimes, but these steps really ensure you still get that satisfying crunch you’re reaching for. My biggest lesson learned? You absolutely must pat those wings dry. I mean, almost aggressively dry them with paper towels. Any surface moisture has to go before they even see the seasoning!
Want to know a little trick I picked up from watching professional kitchens? Add about 1 teaspoon of baking powder right into your initial salt and pepper mix. It raises the pH level on the skin, helping it crisp up like magic in the oven. Yes, baking powder! It doesn’t affect the flavor at all, I promise. This little addition, combined with using that metal rack for airflow, is what makes these chicken recipes taste like they were fried. It’s all about intentional habits, even in the simple things!
Variations on Your Honey Garlic Wings with Sticky Glaze
You know I love a good core recipe, but the real fun happens when you start tweaking things just slightly to fit your mood for the night! These Honey Garlic Wings with Sticky Glaze are fantastic as they are—a pure sweet and savory hug—but customizing the sauce is so easy and instantly changes the vibe.
The easiest way to switch things up? Bring the heat! If you like things a little spicy, which sometimes I absolutely do when I need a flavor kick, just stir in about a teaspoon of red chili flakes when you’re simmering the glaze. You can also add a drizzle of Sriracha or even a dash of your favorite hot sauce right in there. It blends beautifully with the honey and garlic.
I also play around with the acid component. The recipe calls for apple cider vinegar because I love the subtle fruitiness it brings, but sometimes I swap that out entirely. If you have rice vinegar on hand, that works wonderfully, giving the glaze a slightly cleaner, sharper tang. Or, for a deeper, almost smoky note, try using balsamic vinegar—use just a little less, since it’s stronger! These little swaps keep the recipe feeling fresh every time you make it.
Serving Suggestions for Honey Garlic Wings with Sticky Glaze
So, you’ve got these incredible, sticky, flavor-packed wings—what do you serve them with? Since the glaze is rich and intensely flavored, you need pairings that offer a little balance, a bit of crunch, or something cool to cut through the sweetness. I try to build a whole meal around these, not just serve a bowl of wings!
If I’m serving these Honey Garlic Wings with Sticky Glaze as a main event, I always lean heavily on fresh, slightly crunchy vegetables. Think about cooling things down. A simple slaw made with shredded cabbage and a light, vinegary dressing works wonders. It gives you that needed snap against the tender chicken.
Here are a few of my favorite ways to round out the plate. You can keep it super light, or pair it up for a full dinner:
- Cooling Dip: A small bowl of plain Greek yogurt mixed with a tiny squeeze of lime and maybe some chopped cilantro is heavenly for dipping. It calms down the sweetness instantly.
- Fresh Greenery: Roasted broccoli or steamed green beans tossed with just a tiny bit of olive oil and salt are perfect. They offer a great earthy counterpoint to the honey.
- Rice Base: If you are serving these up with rice, make sure it’s plain white or brown rice to soak up any extra glaze drips that fall off!
- Crunchy Veggies: Keep things simple with carrot sticks and cucumber slices. They’re crisp, fresh, and require zero cooking time, which is always a win in my book.
The goal is always balance. We’ve got the rich, savory, sweet star of the show with our wings, so the sides should handle the freshness and texture contrast!
Storing and Reheating Leftover Honey Garlic Wings with Sticky Glaze
Okay, let’s talk about leftovers, because honestly, sometimes the leftovers are even better the next day once the flavors have really married—though maybe not the *texture* right out of the fridge!
If you actually manage to have any of these Honey Garlic Wings with Sticky Glaze left sitting around, storage is simple. Just make sure to use an airtight container. You shouldn’t leave them sitting out too long since the glaze has sugar and soy sauce, so get them tucked away in the fridge quickly. They’ll keep perfectly well for up to 3 days. I’ve tested this many times; they are surprisingly resilient!
Now, reheating is where we need to be intentional if we want to save that crispy skin we worked so hard for. Please, please, please do not microwave these if you value texture! Microwaving them just turns that beautiful crispness into sad, floppy skin.
Instead, I rely on the oven for recovery. Here’s my rule for reheating sticky glazed wings:
- Put the oven back on to about 375°F (190°C).
- Lay the wings out on a wire rack set over a baking sheet—yes, use that rack again! Air circulation is our friend for bringing back the crisp.
- Bake them for about 8 to 10 minutes. This gently warms the meat through and dries that glaze back out slightly so it gets tacky and sticky again, rather than wet.
If you’re in a real rush and just have to have them in 2 minutes, the air fryer works wonders too! Just set it to 350°F for about 5 minutes. Either way, the goal is to dry out that exterior. You’ll be shocked how close to fresh they taste when you reheat them the right way!
Frequently Asked Questions About Making Honey Garlic Wings with Sticky Glaze
I totally get it—sometimes the basic recipe directions just spark a few more questions, especially when you’re trying to keep things clean but crave that ultimate takeout flavor! Don’t sweat it; I’ve answered the main things people ask me when they try these baked Honey Garlic Wings with Sticky Glaze for the first time.
What if I don’t have a wire rack for baking the wings?
Oh, the eternal kitchen problem! If you don’t have a wire rack, try to avoid placing the wings directly on the foil or parchment paper. The bottom will just steam instead of crisping up. My hack is to use a cooling rack that perhaps isn’t baking-grade, but you can also create a makeshift rack by placing toothpicks evenly spaced on a foil-lined sheet pan, creating little “legs” for the wings to rest on. You need air circulation underneath for them to get that beautiful crisp texture we are after!
How can I easily make these Honey Garlic Wings with Sticky Glaze spicy?
This is my favorite customization! Since we are already simmering the glaze on the stovetop, it’s the perfect time to introduce heat. I usually add about one teaspoon of red pepper flakes right along with the honey and soy sauce. If you like things really hot, use a teaspoon of your favorite cayenne pepper or even whisk in a tablespoon of your go-to Sriracha or chili-garlic sauce right near the end. It blends right into that sticky consistency, giving you a wonderful sweet-spicy kick!
Can I use frozen wings instead of fresh ones for this recipe?
You absolutely can! But we have to treat frozen wings differently because they hold so much ice crystal moisture. If you try to bake them straight from the bag, you’ll end up with steamy, limp wings, and we worked too hard on that glaze recipe for that to happen! You must thaw them completely first, and then this is the most important part: you need to pat them aggressively dry, just like with fresh wings. I even let them sit on paper towels for about 15 minutes after drying just to wick away any last surface wetness before seasoning and baking. A little extra time prepping frozen wings is worth it!
Do I have to use brown sugar in the glaze, or can I use white sugar?
You *can* technically swap it for white sugar, but it won’t give you the deep, rich, almost molasses-like flavor that makes the glaze truly special. Brown sugar is essential here because it adds great depth that complements the savory soy sauce really well. Since we are trying to build flavor intentionally in every component of these Honey Garlic Wings with Sticky Glaze, I strongly recommend sticking with the brown sugar for that authentic sticky texture and flavor profile.
Sharing Your Next Culinary Win
Seriously, I want to know how these Honey Garlic Wings with Sticky Glaze turn out for you! When I first perfected the baked wing method that ditches the deep fryer fuss, I felt like I’d won a little battle in the kitchen. That feeling of enjoying something deeply satisfying while sticking to clean habits? That’s what we’re celebrating here!
Please, snap a picture once you’ve got that perfect sticky glaze coating your wings and tag me! Seeing you recreate these recipes and fit them into your real, busy lives is the whole reason I built Melt It Clean. Don’t be shy about sharing your experience in the comments below. Did you add extra spice? Did the baking powder trick work its magic for you?
Leaving a rating tells me exactly what you loved, and it helps other people who are looking for simple, clean ways to enjoy comfort food know they can trust this recipe. Go ahead, make a batch this week, and let’s share that culinary win together!
By EMILIA, founder of MeltItClean.com – your digital space for natural weight loss, real wellness habits, and clean-living inspiration that actually fits your life.
I’m EMILIA, and for years, I really struggled with the constant ups and downs of dieting. I tried everything—juice cleanses, those crazy low-carb phases—but I always ended up right back where I started: feeling bloated, tired, and frustrated with the whole process. I realized I didn’t just want to lose a few pounds; I needed energy, mental clarity, and confidence without sacrificing my sanity or the joy of actually eating delicious food!
After what felt like forever experimenting and learning what actually supports my body—not what restricts it—I figured out a simple truth: your body is already powerful; it just needs support, not restriction. That’s why I started Melt It Clean. This site is dedicated to showing you real transformation through clean, intentional, and nourishing daily habits that you can actually stick with. Whether it’s finding a crispier way to bake wings or mastering mindful eating, my goal is simple: to be that informed, supportive, and empowering space for you without all the wellness drama.
If you want to see more about my journey or check out other ways we can make clean living fit seamlessly into your real life, you can read more about that over on my About Me page!
Honey Garlic Wings with Sticky Glaze
Ingredients
Equipment
Method
- Preheat oven to 400°F (200°C) and line a baking sheet with foil or parchment paper. Place a wire rack on top for airflow.
- Pat chicken wings dry with paper towels to remove moisture. Toss wings in olive oil, salt, pepper, and paprika until evenly coated.
- Arrange wings in a single layer on the wire rack and bake for 40–45 minutes, flipping halfway through, until golden brown and crispy.
- Meanwhile, make the honey garlic glaze. In a small saucepan over medium heat, combine honey, soy sauce, brown sugar, vinegar, and minced garlic.
- Simmer for 3–5 minutes until slightly thickened. For a thicker sauce, whisk in cornstarch slurry and cook for 1 more minute.
- Remove wings from the oven and transfer them to a large bowl. Pour the glaze over the wings and toss to coat evenly.
- Optional: Return the wings to the oven for 5 minutes to help the glaze set.
- Garnish with sesame seeds and green onions before serving warm.