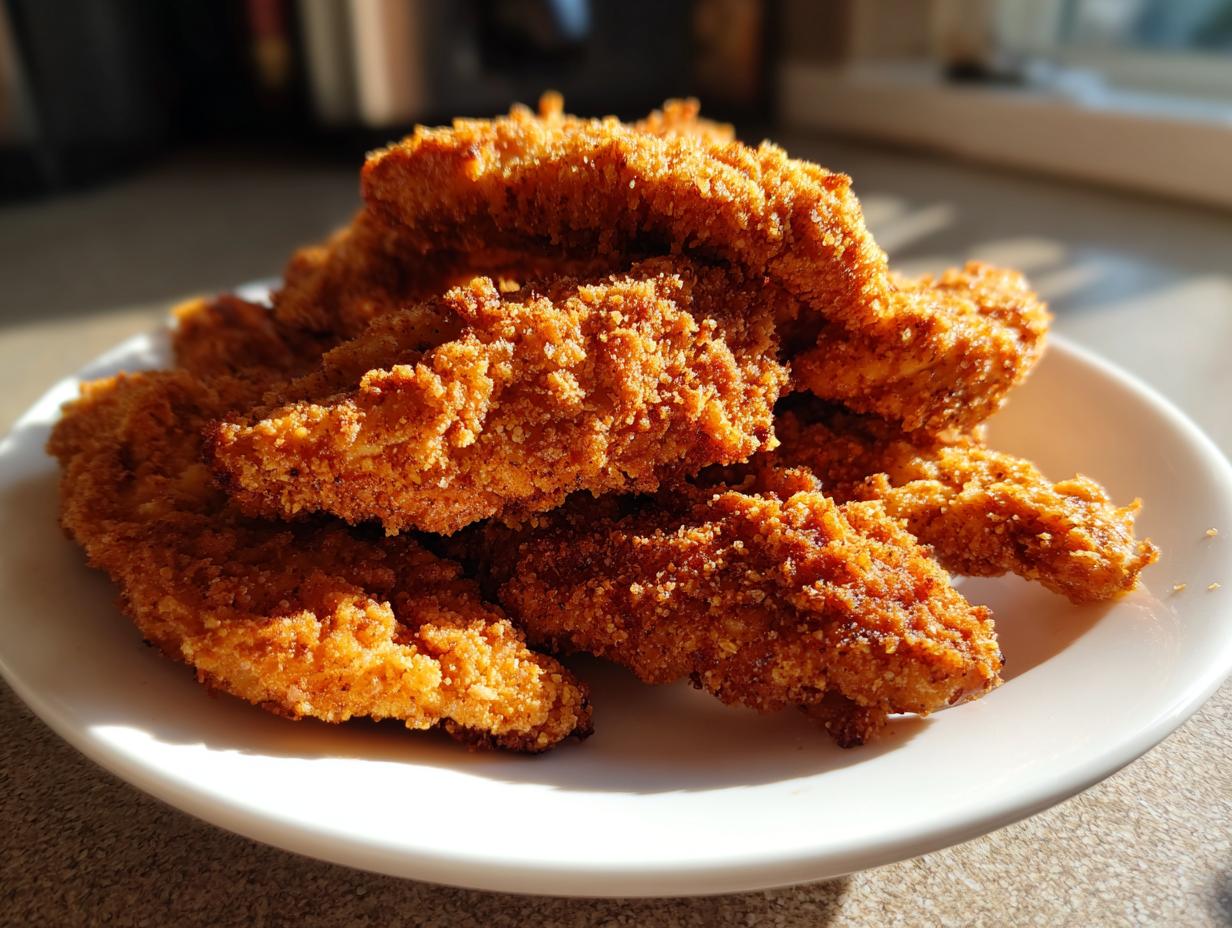
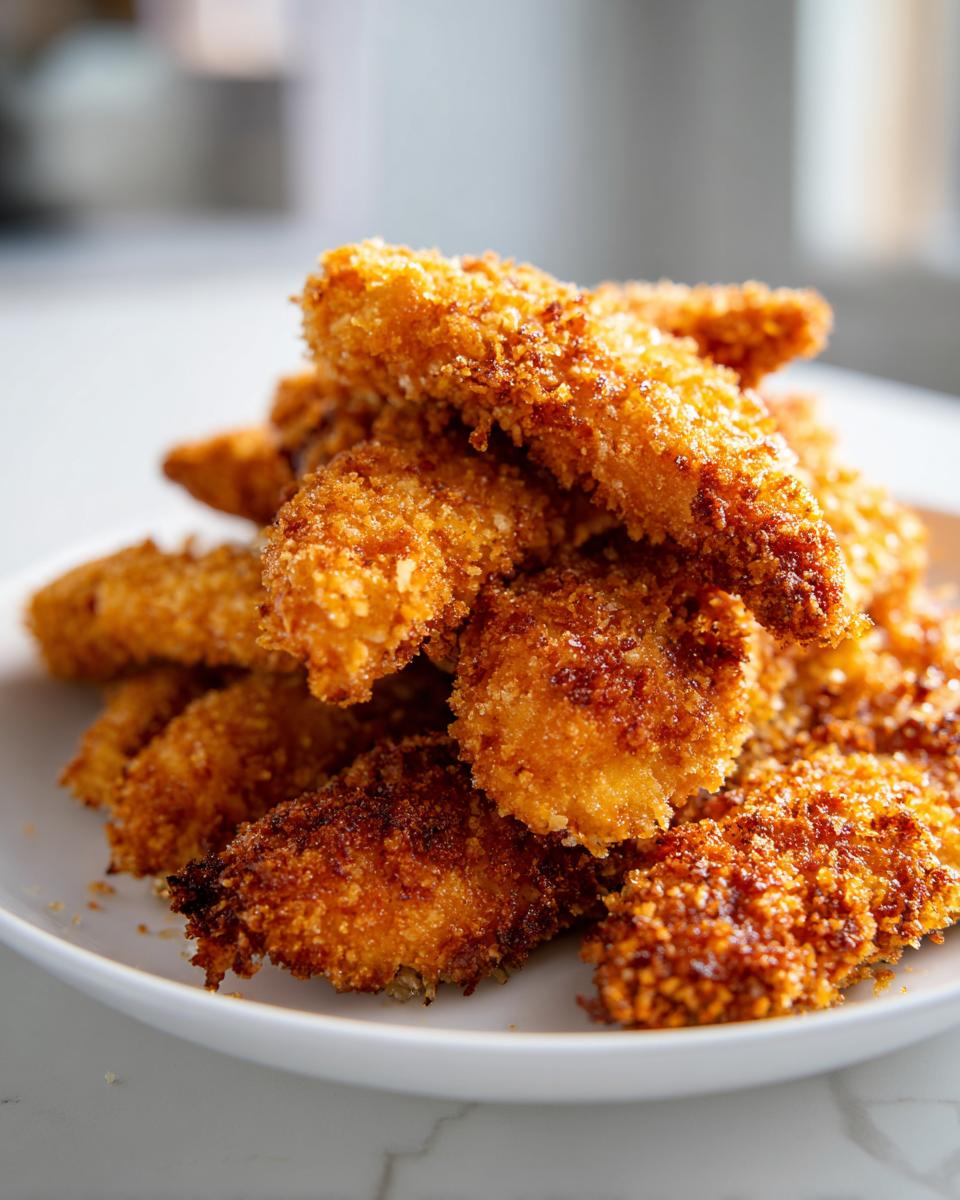
Oh, believe me, I totally get it. Some days, only that satisfying, audible CRUNCH of perfect fried chicken will do, right? But who wants to deal with a vat of hot oil and the greasy cleanup afterward? Not me! That’s why I spent way too much time testing my oven until I cracked the code on making the most incredible Crispy Baked Chicken Tenders you’ll ever try. Seriously, these taste like they came straight out of the fryer, but we’re doing this the smart way. We use a couple of little tricks involving racks and Panko that locks in the flavor and keeps the texture unbelievably crunchy. If you’re looking for an easy chicken recipe that your whole family will actually devour, stick around. These are a total weeknight game-changer, and you can check out more of my favorite chicken recipes right here once you see how easy these are!
Why You Will Make These Crispy Baked Chicken Tenders Often
I’m telling you, once these tenders are in your rotation, you won’t go back. Forget complicated gourmet meals; this recipe is about fast results and happy eating. Why are they such a winner in my house?
- Prep time is lightning fast—we’re talking 15 minutes max before they hit the oven.
- They feel naughty, but they’re actually a genuinely healthy chicken tenders option since we skip the deep fryer.
- That crunch? Yes, true, reliable crispiness, guaranteed every time.
- My picky eater actually asks for these, which is high praise, trust me on that one!
If you’re after more quick wins for busy nights, explore my collection of easy dinner recipes; I’ve got a bunch!
Essential Ingredients for Perfect Crispy Baked Chicken Tenders
Listen, achieving that beautiful, rock-hard crispiness when baking isn’t just about the heat; it’s about the coating. We need layers that work together to give us that golden armor. Since these are one of my go-to healthy chicken tenders, every ingredient counts! For the best results, make sure you have everything set up before you even look at the chicken.
For the Chicken and Breading Station
We’re working with a three-bowl system here, which is non-negotiable for the best coating. You’ll need about 1.5 pounds of boneless, skinless chicken breasts, which I always slice into strips about 1 inch thick before starting. Make sure they aren’t huge—thin strips bake faster and crisp up better!
For the actual breading setup, here’s the lineup:
- The first bowl gets 1/4 cup of all-purpose flour. It’s just a light dusting!
- The second bowl? That’s where my one large egg, fully beaten, hangs out.
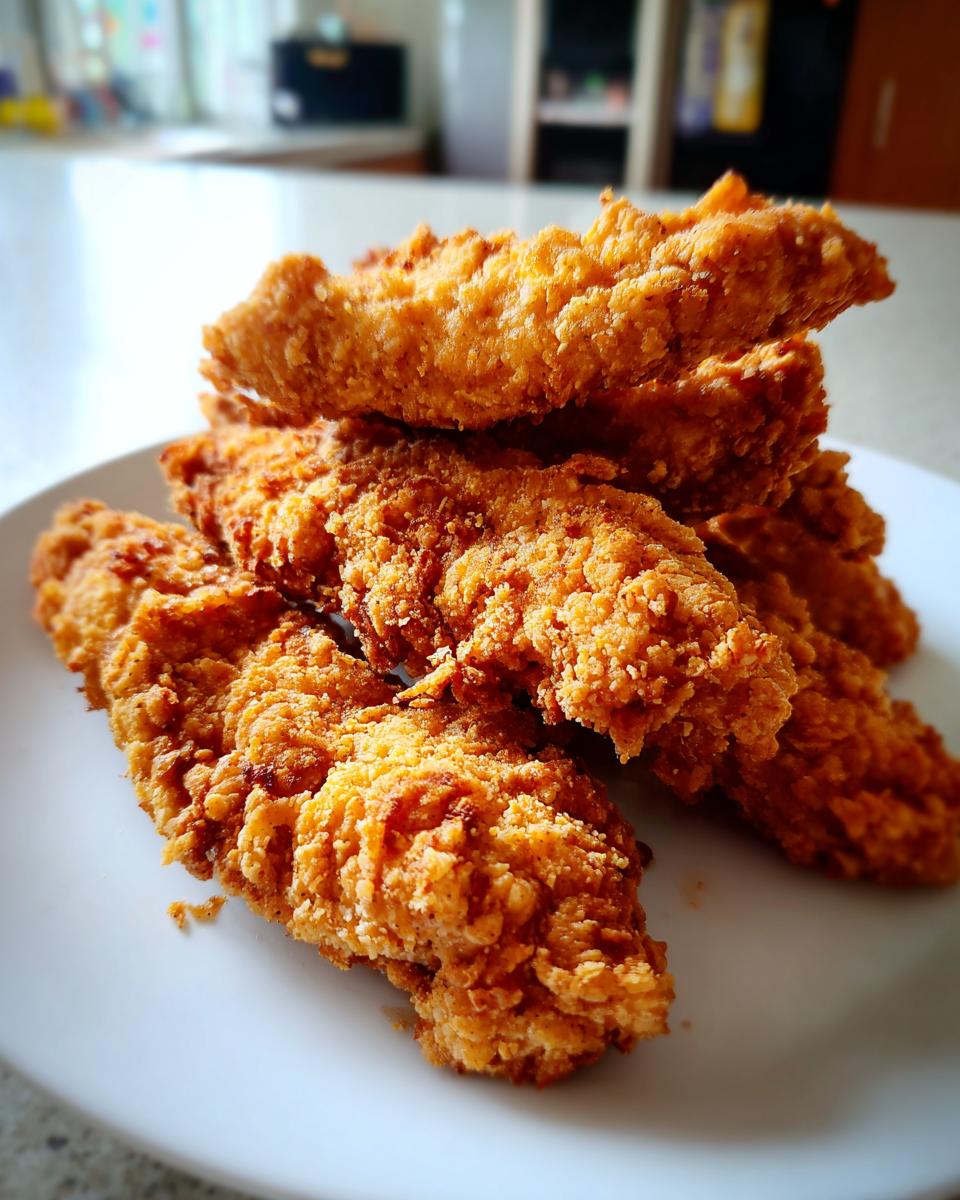
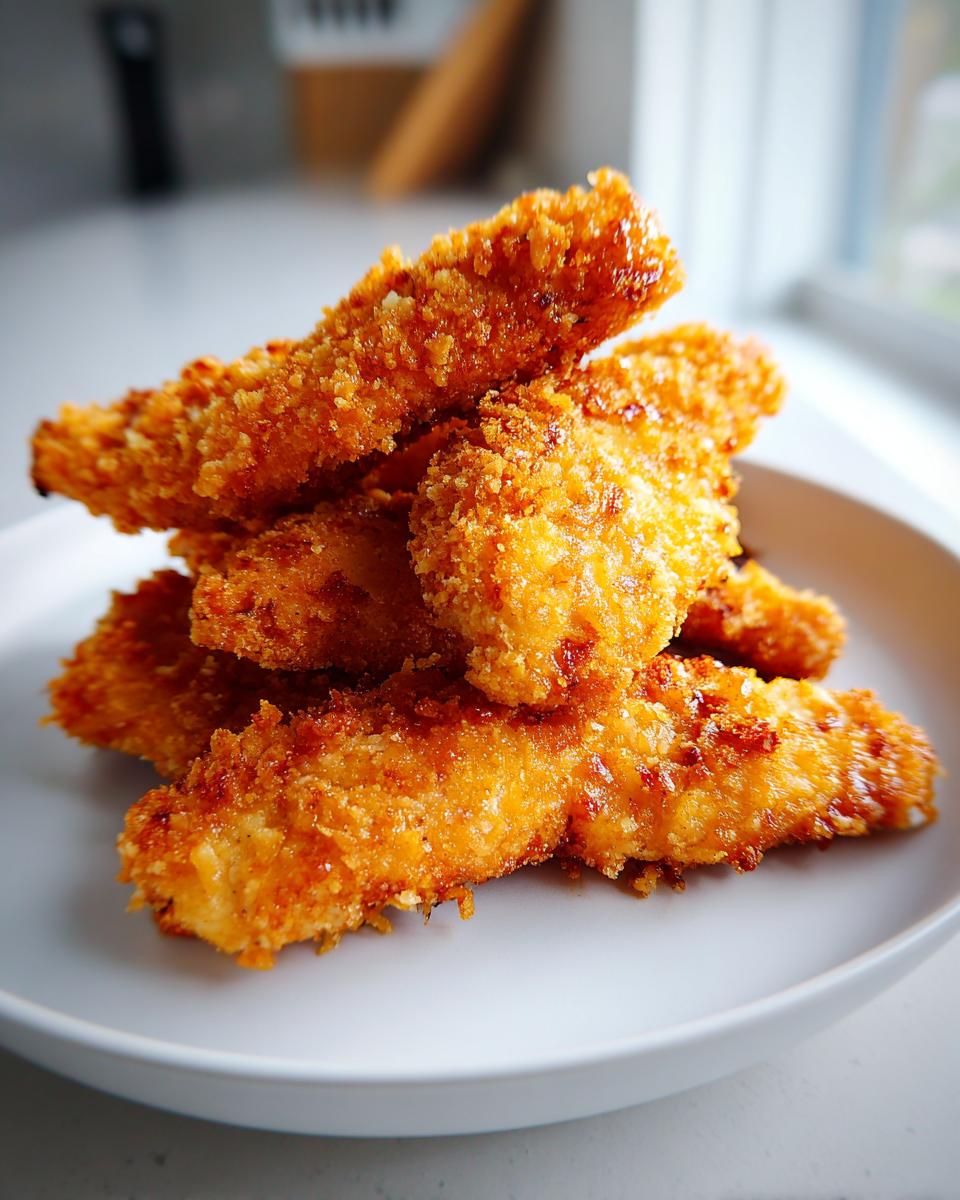
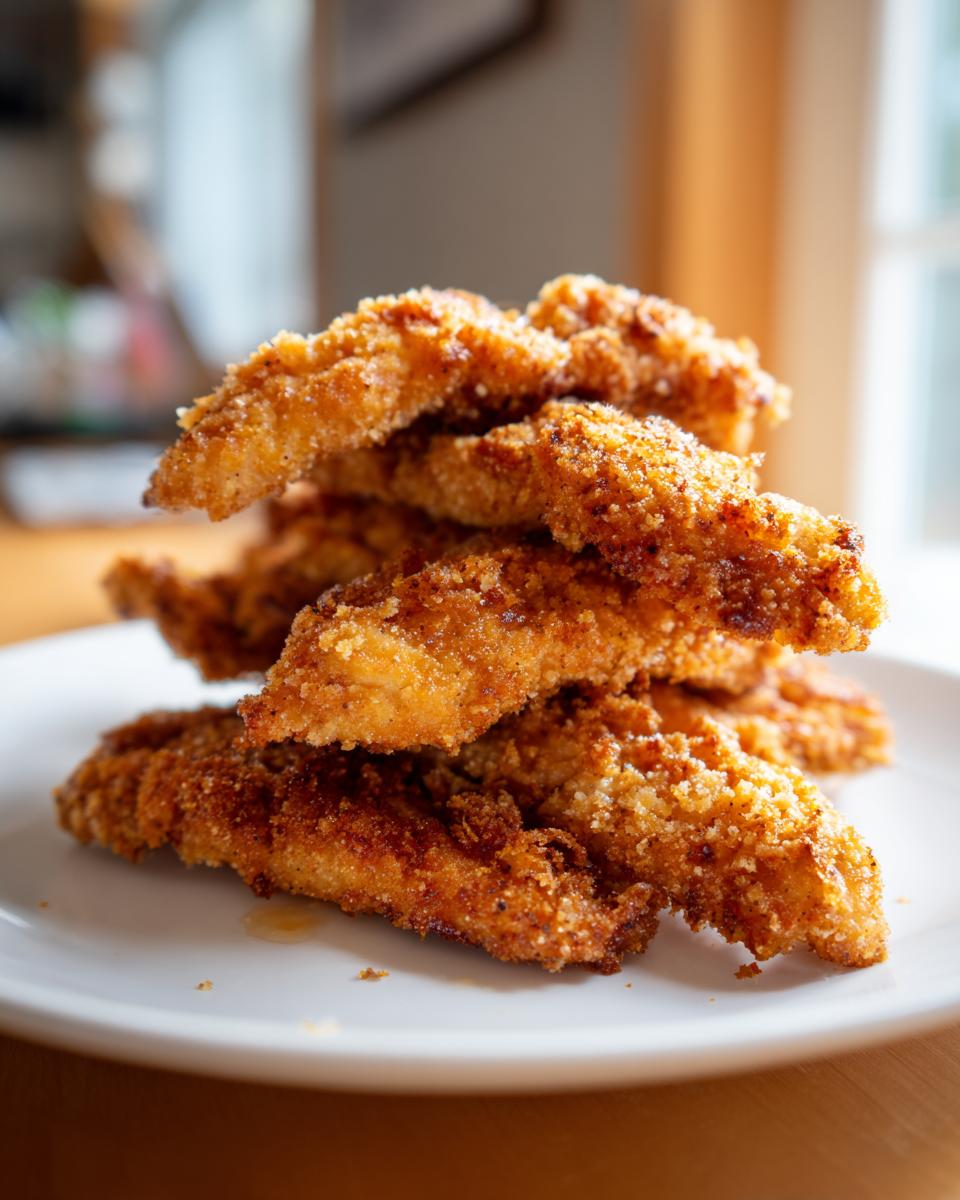
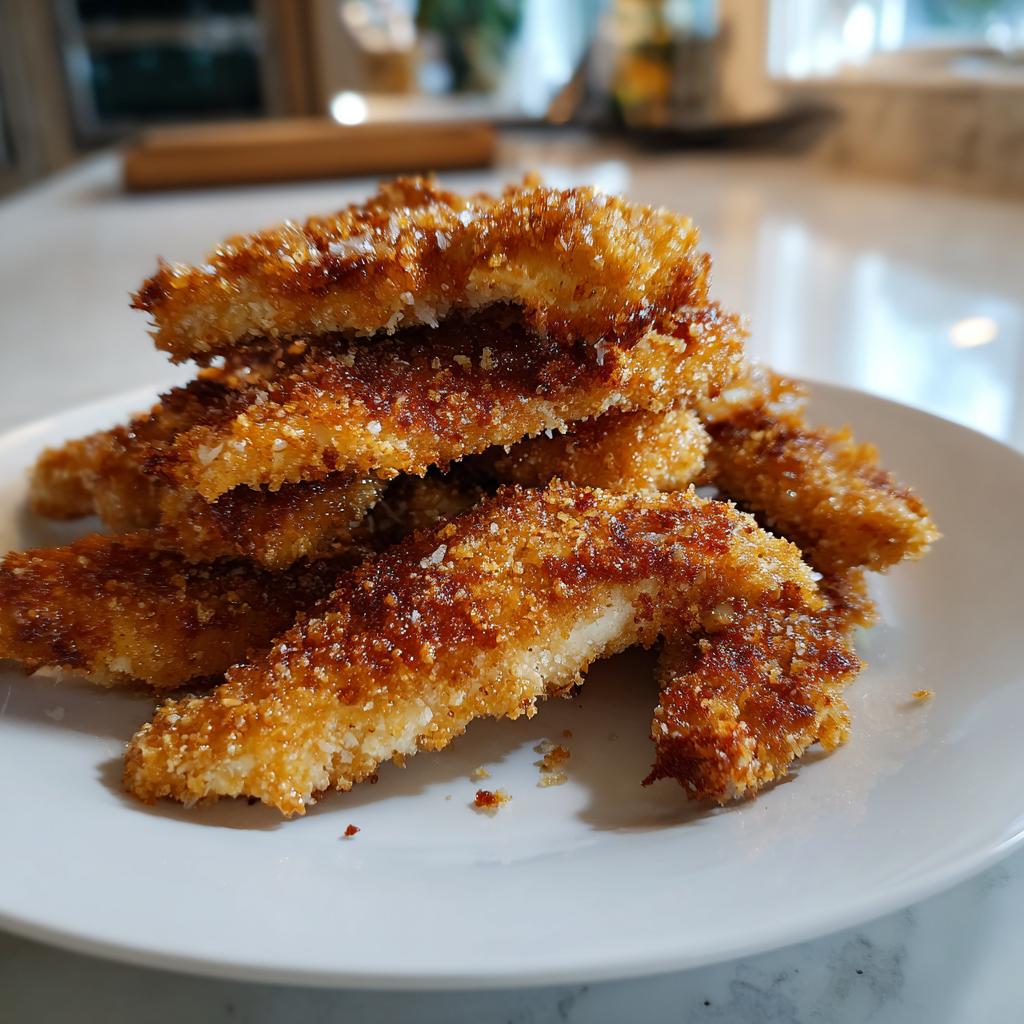
- The MVP basket is Bowl Three: We need 1 full cup of Panko breadcrumbs. Trust me, regular breadcrumbs get soggy; Panko is what gives you that fantastic, jagged texture that stays crisp under the heat.
For flavor, we mix the garlic powder (1 tsp), paprika (1/2 tsp), salt (1/2 tsp), and black pepper (1/4 tsp) right into those Panko crumbs. Oh, and you absolutely need an olive oil spray—that light misting right before baking makes all the difference. You’ll also want your baking sheet ready with a wire rack placed right on top!
Step-by-Step Guide to Making Crispy Baked Chicken Tenders
Alright, time to put on your apron! This process is so streamlined that even if you’re juggling kids or trying to answer emails, you can nail these tenders. We need to focus on three things: a hot environment, a great coating, and air circulation underneath the chicken. That’s how we fool our taste buds into thinking these were fried!
Preparing the Oven and Breading Setup
First things first, get that oven cranked up to 400 degrees Fahrenheit, or 200 degrees Celsius if you prefer. While it’s heating, grab that baking sheet. You absolutely need a wire rack to sit on top of that sheet—this is essential so air can circulate under the tenders and prevent the bottoms from getting soggy. That’s cooking equipment 101 right there! Now, set up your three shallow bowls in a little assembly line. We need the plain flour in the first, the beaten egg in the second, and our flavor-packed Panko mix in the third.
Coating the Chicken for Maximum Crispiness
This is the dance! Take one chicken strip at a time—don’t rush this part. Lightly dredge that strip in the flour, making sure to shake off any thick clumps. Next, dip it into the egg bath so it gets nice and tacky. Finally, move it straight into the Panko bowl. Here’s my pro tip: when you press that chicken into the crumbs, really give it a good squeeze! Pressing the Panko onto the surface helps it stick tight so it doesn’t fall off halfway through baking. Once coated, place it right on the wire rack.
Baking the Crispy Baked Chicken Tenders
Once every tender is coated and sitting on that rack, grab your olive oil spray—don’t pour, just spray lightly over the tops. This helps them brown beautifully! Pop them in that 400-degree oven for about 18 to 20 minutes total. I always set a timer for the halfway mark so I can flip them over. Flipping ensures both sides get that gorgeous golden color. Make sure they reach an internal temperature of 165 degrees Fahrenheit for safety. If you have a meat thermometer, use it! That’s how you get perfect, safe, and wonderfully crispy baked chicken every time.
Expert Tips for Achieving the Crispiest Baked Chicken Tenders
Okay, so we’ve got the basic method locked down, but if you want to go from ‘good baked tenders’ to ‘these taste fried!’ you need these insider secrets. If you skip these steps, you might as well have just eaten a piece of plain chicken, and nobody wants that!
First off, drying the chicken is huge. Before you even touch the flour, pat those 1-inch strips dry with paper towels. Any surface moisture gets trapped and turns into steam, which results in a sad, soggy coating. We want zero steam!
Secondly, use that wire rack. I can’t say this enough. If the tenders are sitting directly on the foil or parchment, the bottom side steams itself silly. The rack lets the heat hit all sides, creating an all-around crisp exterior. Want to see what other speedy lunch wins I have? Look at these quick low carb lunches I love!
Lastly, don’t skimp on pressing that Panko! Really push that breadcrumb mixture onto the meat after the egg bath. It creates a thicker crust that holds its integrity while baking. A firm press equals a lasting crunch!
Ingredient Notes and Substitutions for Crispy Baked Chicken Tenders
So, what happens when you run out of something important? It happens to all of us! Don’t panic if you’re missing an ingredient, but you might need to tweak the end result slightly. The one thing I absolutely won’t budge on is the Panko breadcrumbs. Trust me, regular breadcrumbs just don’t have the right size or texture; they turn mushy fast. Panko creates those wonderful little pockets that crisp up like nothing else when baked.
If you’re trying to make these gluten-free, swap that all-purpose flour for a GF blend, and critically, use certified gluten-free Panko. It’s out there now, and it works nearly as well!
For anyone dipping their toes into lower-carb recipes, you can substitute the white flour with almond flour. It won’t produce the exact same texture, but it’s a decent option. Just use a little less of it since almond flour is denser than standard white flour. Remember, we want everything light and airy for that perfect crunch!
Serving Suggestions for Your Crispy Baked Chicken Tenders
We’ve made the absolute best homemade tenders, so now we have to serve them up right! These go way beyond ketchup, although that’s totally fine if that’s what the kids want. For me, the perfect pairing has to involve dipping sauces. A creamy honey mustard is non-negotiable, or if you like a kick, mix a little sriracha into mayonnaise—instant spicy aioli!
Since these tenders are such an easy chicken recipe, I usually pair them with something equally fast on the side to make it a full dinner. Think about simple oven-roasted sweet potato fries or maybe a bag of steamable broccoli. They are perfect for packing alongside some of my dinner ideas for lunch the next day, too, provided you reheat them properly. They’re just so versatile!
Storing and Reheating Your Crispy Baked Chicken Tenders
I always hope we eat them all in one sitting because when these tenders are fresh, they are unbeatable! But leftovers happen, and we need a plan to keep that crispiness alive. If you’re doing some meal prep, here’s what you do: Let the tenders cool completely first—this stops condensation, which is our enemy. Then, store them in an airtight container in the fridge for up to three days.
Now, about reheating—please, please, please do not use the microwave. It will turn your beautiful crisp exterior into sad, chewy rubber. The best method? Pop them back onto your wire rack set over a baking sheet in a 350-degree oven for about 5 to 7 minutes. If you have an air fryer, even better! Just 3 minutes at 375 degrees works wonders to bring that crunch right back. That way, they are almost as good as new!
Frequently Asked Questions About Making Crispy Baked Chicken Tenders
I always get asked the same few things when people try this recipe for the first time, especially those worried about getting that perfect, non-soggy finish. I’ve gathered the top questions right here to clear everything up so you can serve up the tastiest easy chicken recipe!
Can I use chicken thighs instead of breasts for these Crispy Baked Chicken Tenders?
Absolutely, you can! Chicken thighs are actually a bit more forgiving because they have more fat, which keeps them incredibly moist. If you use thighs, just make sure they are trimmed up nicely and cut into similar-sized strips. The only real change you might see is in the cooking time. Thighs can sometimes take 2 or 3 minutes longer to fully cook through—always check that internal temperature of 165 degrees F, no matter what cut you use!
What is the secret to getting baked chicken tenders truly crispy?
If you remember nothing else from this whole guide, remember the crunch commandments! The absolute #1 secret is getting the hot air underneath the meat. That means using a baked chicken needs that wire rack set directly on top of your baking sheet. It allows heat to circulate, preventing steam from building up on the bottom, which is what turns crisp coating soft.
The second trick, which I also included in the instructions, is the light, finishing spray of olive oil. We need a little fat up top to help brown the Panko crumbs in the oven’s dry heat. Mist them just before they go in, and you’ll have restaurant-quality crisp without the deep fryer!
Why are my chicken tenders coming out pale instead of golden brown?
That usually points to one of two things: either your oven wasn’t hot enough when they went in, or you didn’t use enough oil spray on top. If your oven is only at 375°F, they’ll dry out before they brown. Make sure you hit that 400°F mark! Also, if you skipped the paprika, you lose some of that beautiful golden hue. The paprika adds color, not huge amounts of flavor, so don’t skip it if you want that golden look!
Do I have to use the Panko breadcrumbs, or will regular ones work?
I strongly advise sticking with the Panko! Honestly, I tested regular breadcrumbs so many times, and they just didn’t give that light, jagged, shatteringly crisp crust we want. Panko crumbs are lighter and more airy, so they toast up quicker in the dry heat of the oven, giving you that satisfying crunch we’re aiming for in these healthy chicken tenders.
Nutritional Snapshot of These Healthy Chicken Tenders
I always love looking at the breakdown once we’ve managed to keep the deep fryer tucked away! Keep in mind that since we’re baking these instead of frying, the fat content is significantly lower than traditional versions. These are definitely among my go-to calorie-smart recipes. Of course, these numbers are just estimates based on the ingredients listed, and they can shift depending on the exact cuts of chicken you buy!
Here is a rough rundown per serving:
- Calories: Around 300
- Protein: A whopping 35g!
- Carbohydrates: About 25g
- Fat: Roughly 8g (and only 1.5g saturated!)
It’s a pretty solid balance for a family dinner, full of protein and surprisingly low in the bad stuff. Enjoy knowing you made something delicious *and* responsible!
Share Your Experience Making Crispy Baked Chicken Tenders
Now that you know all my secrets for getting that perfect crunch without the mess, I am dying to hear from you! Have you made these Crispy Baked Chicken Tenders yet? Did you manage to fool your family into thinking they were deep-fried? I truly hope so!
Don’t be shy! Head down to the comments section below and leave me a rating—how many stars are we giving this easy chicken recipe? Tell me what dipping sauces you served with them, too. Are you a honey mustard purist, or did you get creative?
If you snapped a photo of your beautiful golden tenders, please share it on social media and tag me! It absolutely makes my day when I see your creations. You can always learn more about me and my kitchen adventures over at my About Me page. I love connecting with fellow home cooks! Happy baking, everyone!
Crispy Baked Chicken Tenders
Ingredients
Equipment
Method
- Preheat your oven to 400 degrees Fahrenheit (200 degrees Celsius). Line a baking sheet with parchment paper and place a wire rack on top of it.
- Set up three shallow bowls for the breading station. Place the flour in the first bowl.
- Place the beaten egg in the second bowl.
- In the third bowl, combine the panko breadcrumbs, garlic powder, paprika, salt, and pepper.
- Take one chicken strip and dredge it lightly in the flour, shaking off any excess.
- Dip the floured chicken strip into the egg mixture, allowing excess to drip off.
- Press the chicken strip firmly into the breadcrumb mixture until it is fully coated on all sides.
- Place the coated tender on the prepared wire rack.
- Repeat this process for all the chicken strips.
- Spray the tops of the coated tenders lightly with olive oil spray.
- Bake for 18 to 20 minutes, flipping the tenders halfway through the cooking time, until they are golden brown and cooked through (internal temperature reaches 165 degrees Fahrenheit).
- Serve immediately with your preferred dipping sauce.