Okay, listen up! Sometimes you just need that ultimate comfort food hit—something warm, garlicky, and gloriously cheesy—but you don’t have an hour to stand over the broiler, right? Me neither, especially when I’m focused on real wellness habits and keeping things simple during the week.
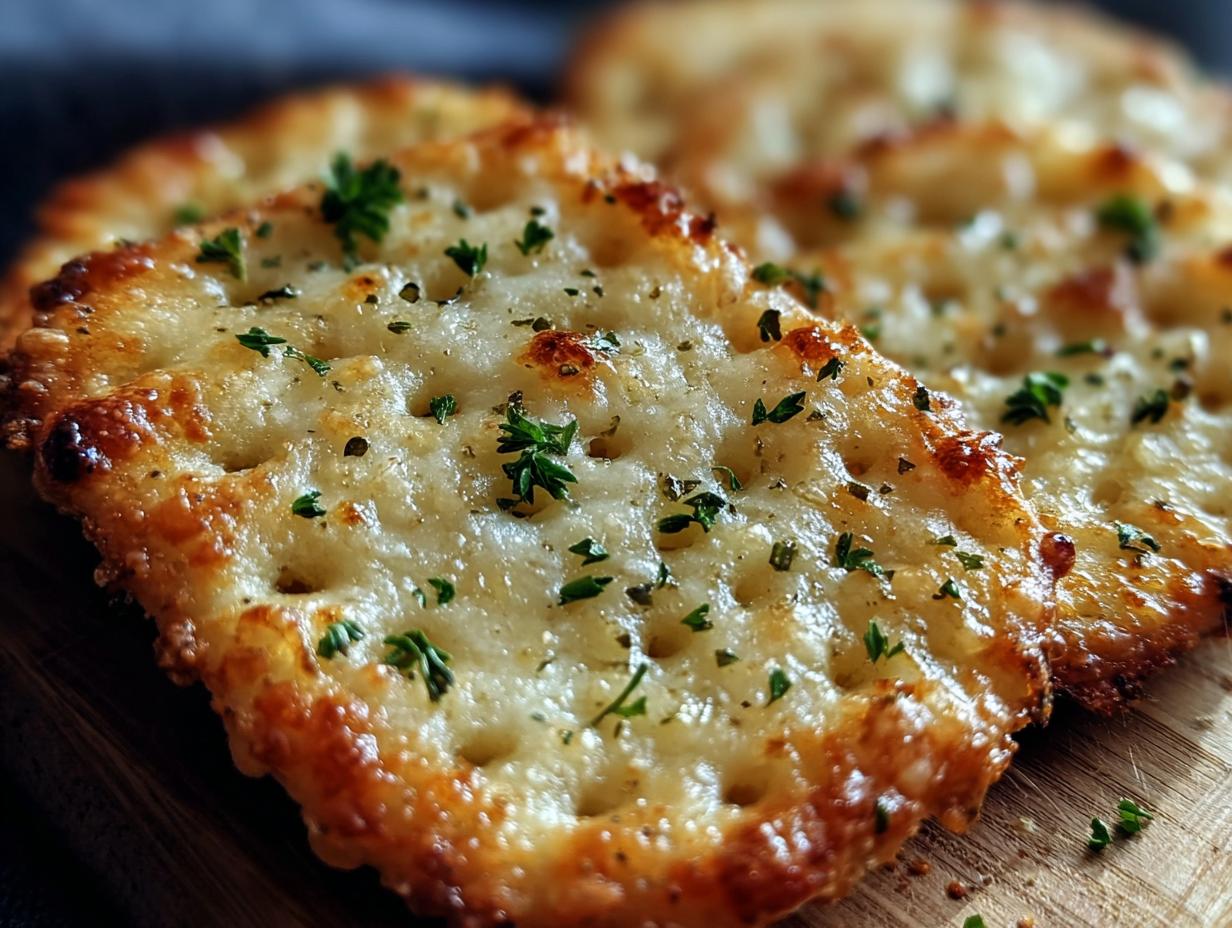
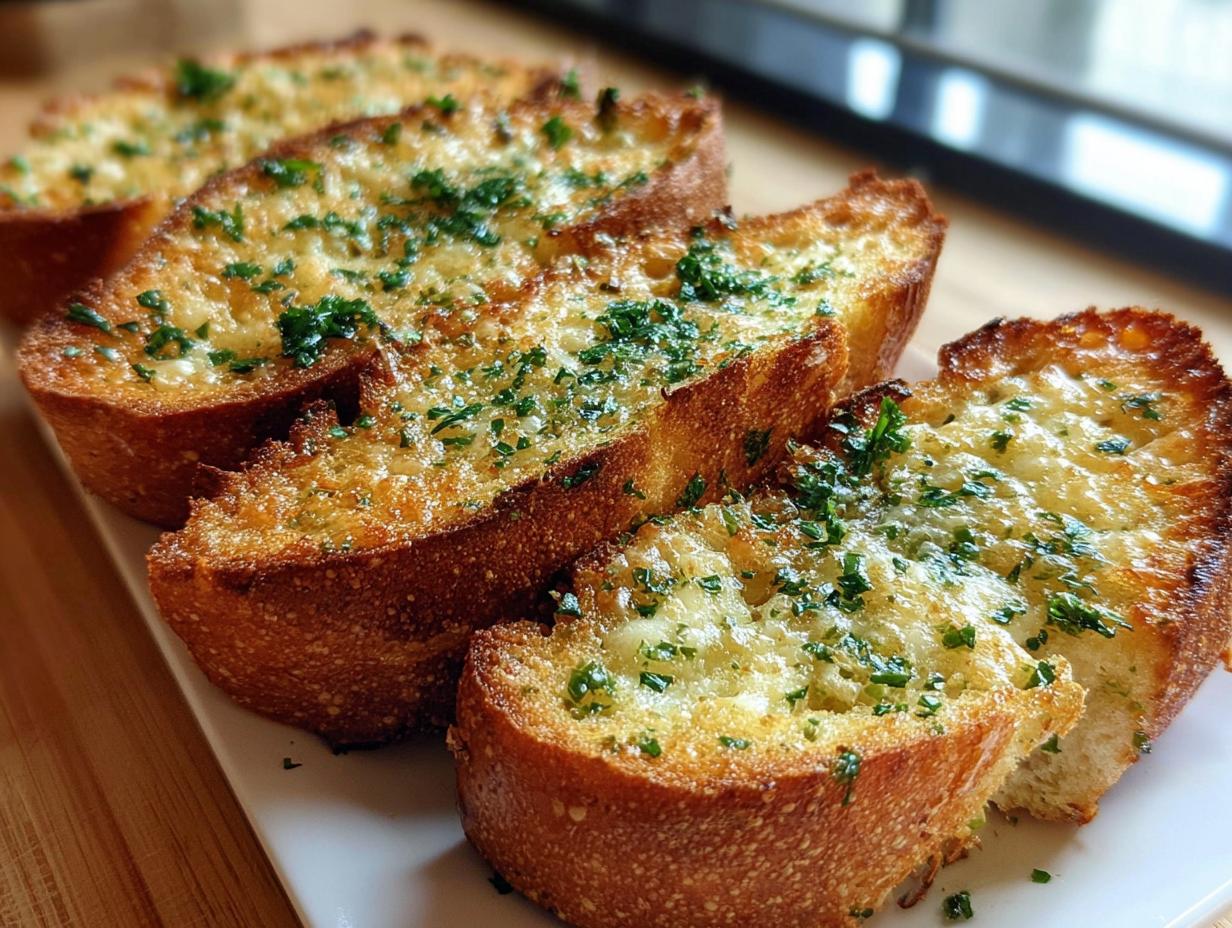
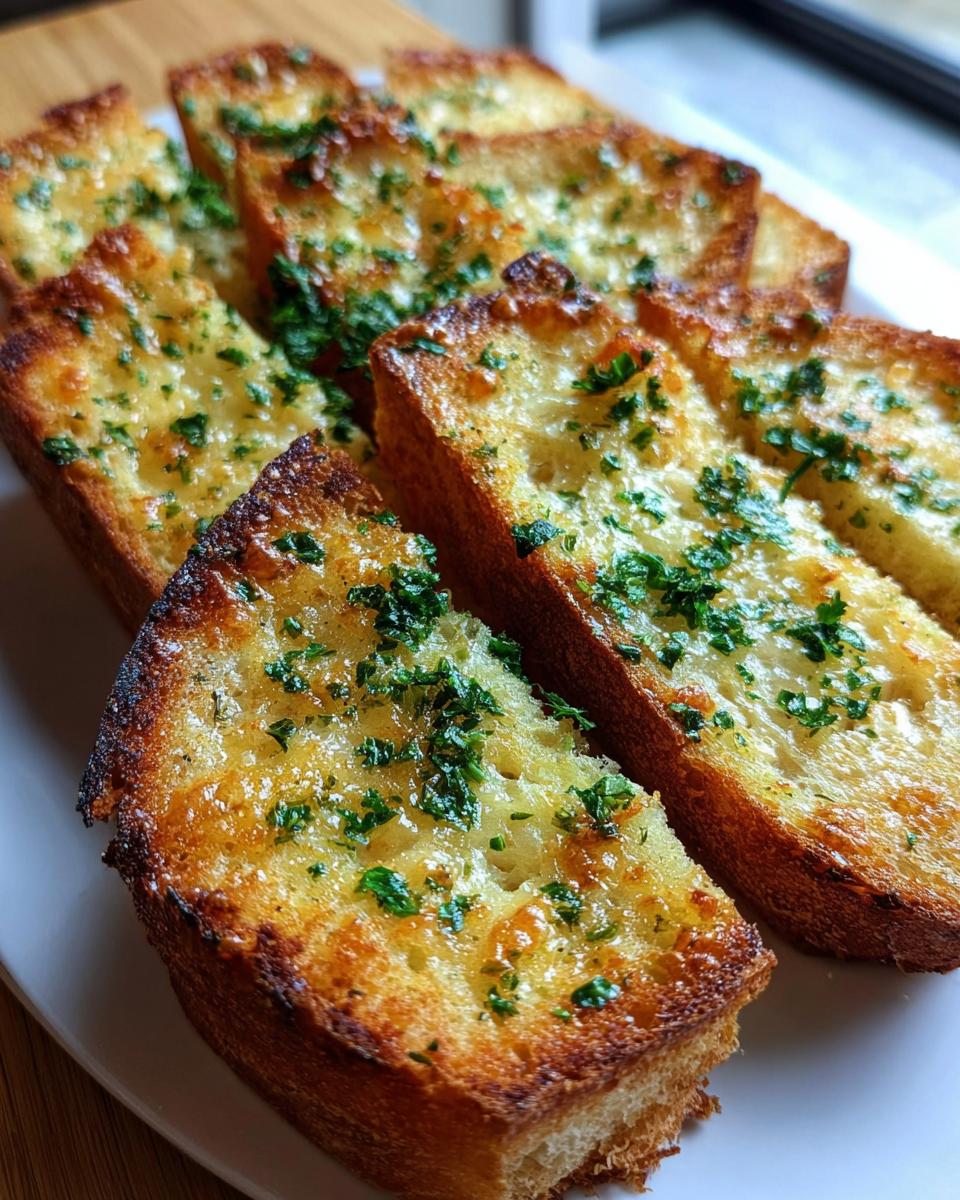
That’s why I’ve perfected the way to make incredible Air Fryer Garlic Bread with Melty Cheese. Seriously, five minutes is all it takes to go from a boring loaf to the crispiest, most aromatic side dish you’ve ever made outside of a traditional oven. It’s fast, it’s delicious, and the cleanup is almost non-existent, which means less stress and more energy for the good stuff in your day.
If you thought garlic bread was off-limits when trying to eat cleaner because of the heavy cleanup or uneven toasting, trust me, your air fryer has changed the game completely!
Why You Will Love Making Air Fryer Garlic Bread with Melty Cheese
Honestly, this recipe is a game-changer for busy nights when you want something indulgent without the effort. Why wrestle with aluminum foil and a hot oven when your air fryer can handle this so perfectly? This is comfort food made intentionally simple.
- It’s unbelievably fast! Total time from start to crispy finish is less than 15 minutes, making it perfect for impromptu snack attacks.
- The texture is superior. You get that deep golden crisp on the outside while the center stays deliciously soft and just a little chewy.
- Cleanup is a breeze! Since you’re only using a small bowl and the air fryer basket, wiping down is the hardest part—and that takes thirty seconds flat.
- That smell! When the garlic butter hits that hot air, your kitchen smells like the best Italian place in town. It’s instant happiness.
- Perfect portion control. You can easily scale this up or down just by adjusting how much bread you toss in the basket.
- The cheese melts flawlessly without burning, thanks to the circulating air temperature control we look for in clean cooking.
Essential Equipment for Perfect Air Fryer Garlic Bread with Melty Cheese
When we’re aiming for clean, intentional preparation, we don’t need a kitchen full of gadgets collecting dust. For this absolute winner, we keep things wonderfully simple. You probably already have everything you need sitting right there on your counter!
Here’s the short, sweet list of what you’ll need to make amazing Air Fryer Garlic Bread with Melty Cheese:
- The Air Fryer: Obviously! This is the star of the show. Make sure whatever model you have is clean and ready to go.
- A Simple Mixing Bowl: You need just one spot to whip up that glorious garlic butter mixture. Don’t worry about scrubbing a massive bowl afterward!
- A Knife: For slicing your baguette into those perfect 1-inch portions.
Now, here is my little piece of expertise about air frying—it’s all about space! If you jam too many slices in there, the hot air can’t hug every single piece properly. My best tip? Don’t overcrowd the basket. If you are making a whole loaf, you might need to work in two quick batches. You want the slices lying flat, either touching just barely or with just a tiny bit of space between them. This ensures uniform golden crispness all around, not just on the edges where the hot air hits first!
Ingredient Clarity for Your Air Fryer Garlic Bread with Melty Cheese
When we talk about clean eating and real wellness, it starts right here—with the ingredients! I’m not a fan of loading up on things my body doesn’t need, and thankfully, this recipe is super straightforward. The quality of these few components makes a huge difference, especially when we’re not obscuring the flavor with heavy sauces or tons of additives. You want that pure, bright garlic flavor to shine through.
Grouping the Ingredients
We are dealing with two main teams here: the flavor powerhouse (the Garlic Butter) and the glorious finisher (the Topping). Keep them separated until it’s time to mix!
For the Garlic Butter:
- You need 1/2 cup of unsalted butter. Important note: It absolutely has to be softened! If it’s rock hard, the garlic won’t mix in evenly, and you’ll get clumps of garlic rather than smooth coverage.
- We’re using 4 cloves of fresh garlic, minced. Please, please use fresh! Dried garlic powder just doesn’t give you that zing we’re looking for here.
- Fresh parsley, chopped: Use 2 tablespoons. Fresh herbs bring life, which is exactly what we need for clean, bright flavor.
- A quick 1/4 teaspoon each of salt and black pepper to balance everything out.
For the Topping:
- If you want that extra chewy, crispy top layer, grab 1/4 cup of grated Parmesan cheese. This is optional, but highly recommended for achieving that amazing delicious texture in the air fryer.
And of course, 1 loaf of French bread or a good baguette. Choose one that feels solid in your hands; a flimsy loaf tends to collapse when air-fried.
Ingredient Notes and Substitutions
Because we are aiming for real results, let’s talk tweaks and substitutions. I know sometimes pantry staples look different!
First, that butter! If you only have salted butter on hand, that’s okay. Just pull back a little on the added 1/4 teaspoon of salt in the butter mix, maybe just use a pinch, and taste it before you finalize the seasoning. Always taste as you go, right?
For the parsley: I love using fresh because it adds that vibrant green color and immediate flavor burst. If you are in a pinch, you can substitute 2 teaspoons of dried parsley for the fresh, but you’ll miss out on that fresh brightness.
Handling the garlic: Remember, we want smooth spreading! Make sure your softened butter is at a good room temperature—soft to the touch, but not melted or oily looking. If it’s too warm, the butter will just run off the bread before it toasts up. We need that butter to stick around and do its job!
Step-by-Step Instructions for Air Fryer Garlic Bread with Melty Cheese
This is the part where the magic happens, and I promise you, it’s so fast you might almost miss it! Quick results are key when you’re trying to stay on track with your wellness goals but still crave something truly satisfying. If you prepped your ingredients correctly (remember that softened butter!), this whole process is smooth sailing. Getting these steps down guarantees you get that beautiful golden crispness every single time you make your Air Fryer Garlic Bread with Melty Cheese.
We’re going to divide this into prepping our flavor base and then getting everything in the air fryer to toast perfectly. Ready? Let’s do this!
Preparing the Garlic Butter Mixture
First things first, grab that bowl we talked about. Take your 1/2 cup of softened, unsalted butter—it should yield easily when poked—and start combining everything together. Dump in your 4 cloves of minced garlic. Listen, I know mincing garlic takes a minute, but that fresh punch is non-negotiable for the best flavor payoff here. It simply smells and tastes better than pre-minced stuff, which supports that intentional eating habit we’re building!
Toss in your 2 tablespoons of chopped fresh parsley, the 1/4 teaspoon of salt, and the 1/4 teaspoon of pepper. Now, get that spoon (or even a sturdy fork) and mix it really well until it’s one uniform, fragrant, creamy spread. That’s the heart of our recipe right there.
Assembling and Air Frying the Air Fryer Garlic Bread with Melty Cheese
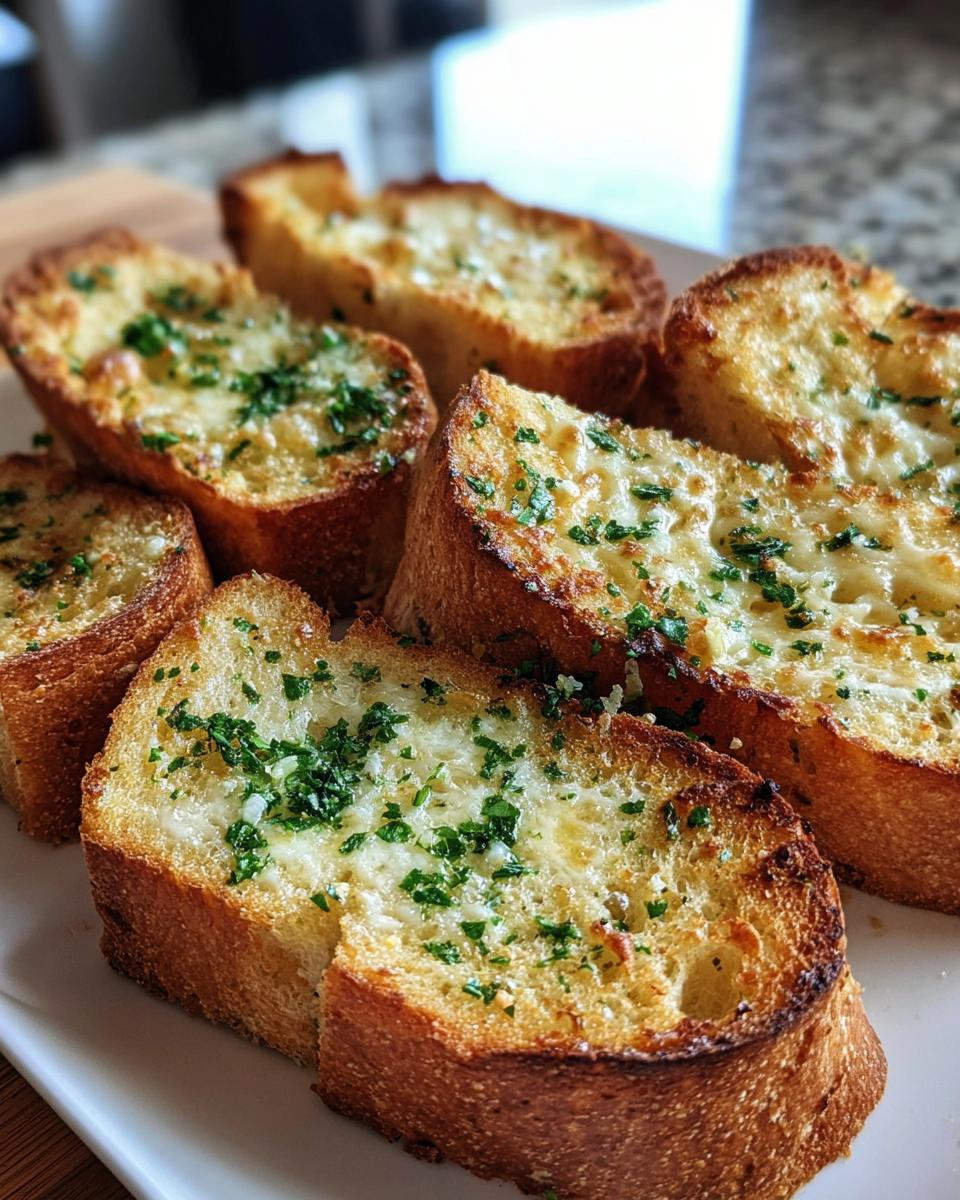
Once your butter is mixed, take your loaf of French bread and slice it into nice, uniform 1-inch thick pieces. You usually get about 10 to 12 slices, depending on the loaf size.
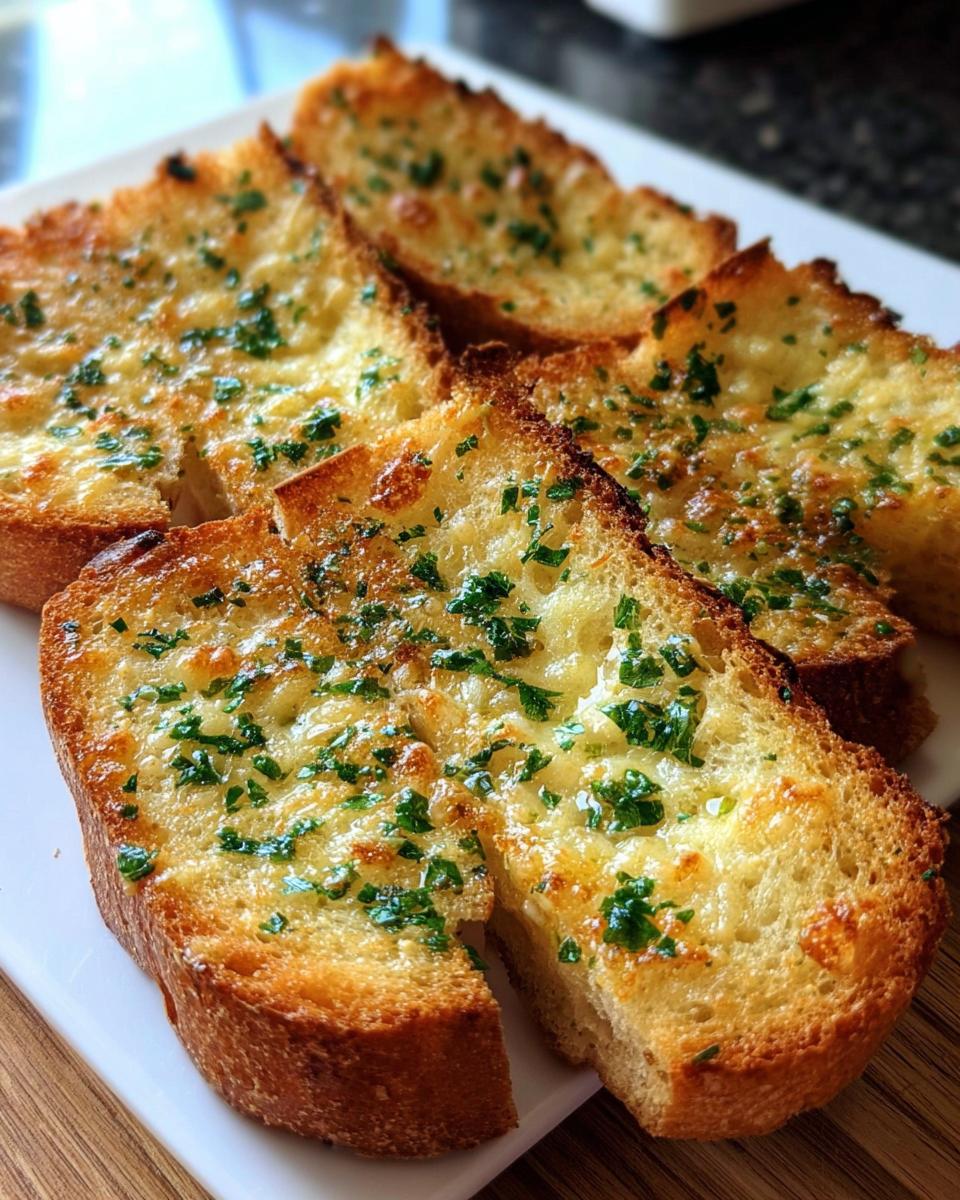
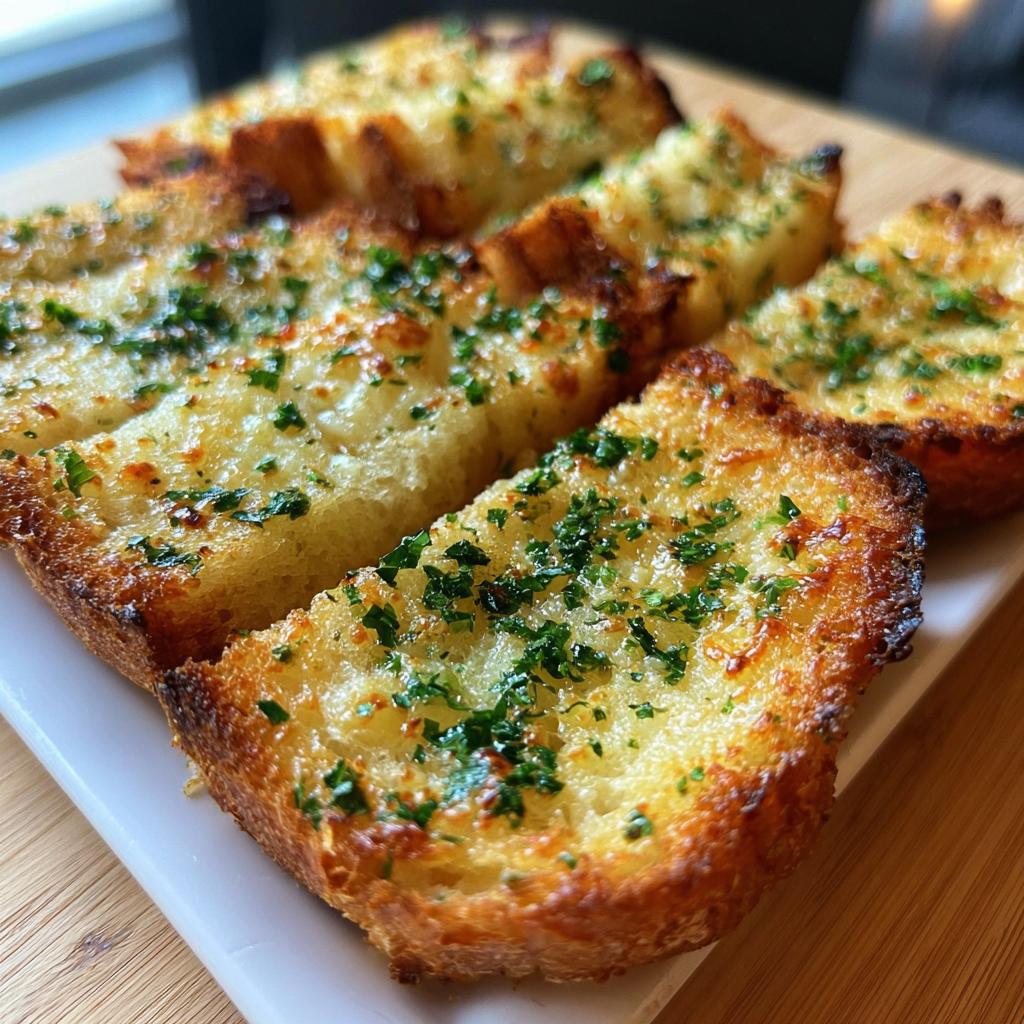
Take your prepared garlic butter and spread it generously but evenly over the top surface of every slice. You want full coverage so you get flavor in every bite! If you are using Parmesan, now is the time to sprinkle that 1/4 cup over the top of the buttered slices.
Next, we preheat! Set your air fryer to 350°F (175°C) and let it warm up for about 3 minutes. This step is critical for that initial crisp. Once it’s hot, carefully place your prepared slices into the air fryer basket in a single layer. Remember what I said? Don’t stack them, or they won’t toast properly and you’ll lose that essential texture point we’re aiming for! Speedy cooking is key here.
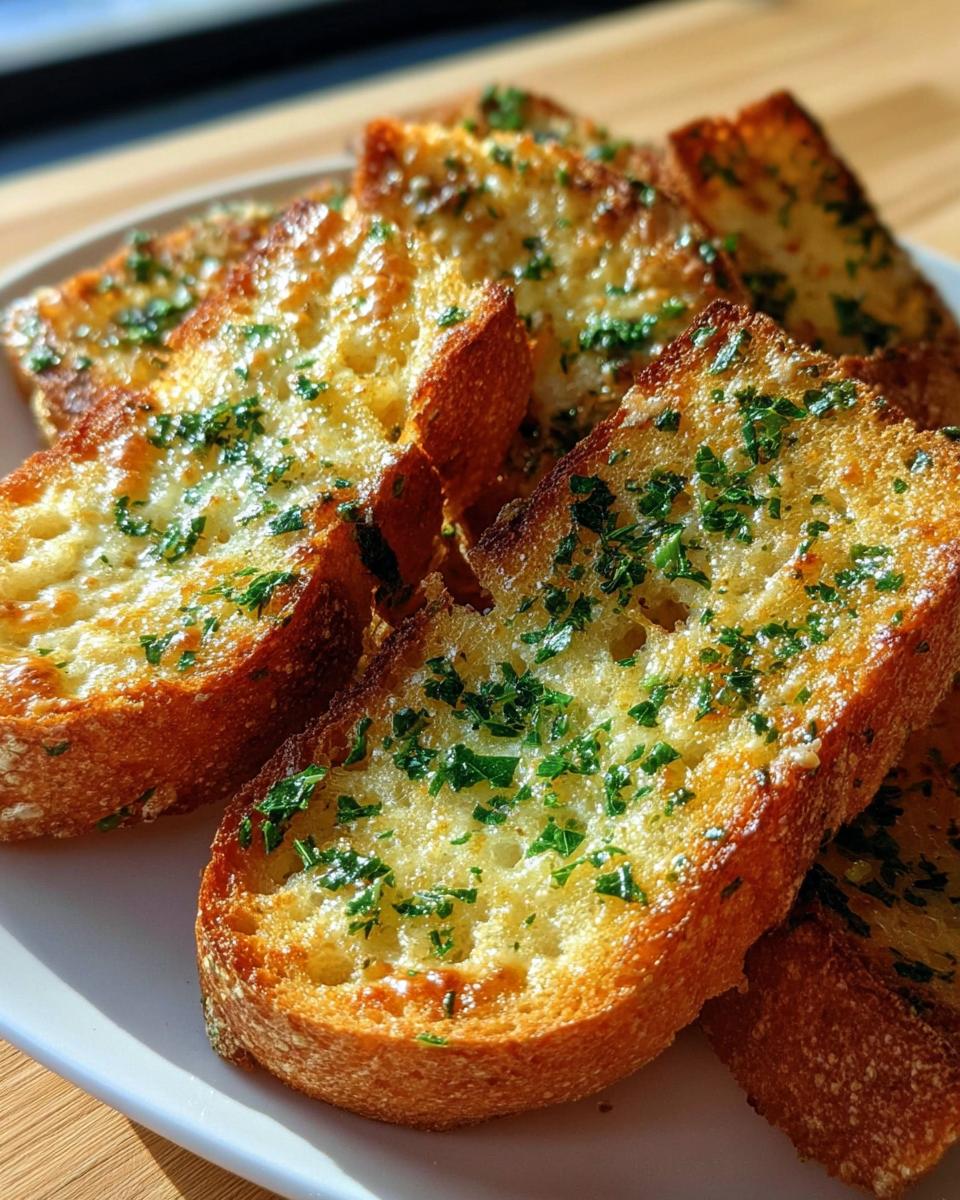
Cook these beauties for 4 to 5 minutes. Keep a close eye on them after the 4-minute mark! You are looking for the edges to be visibly golden brown and the Parmesan cheese (if you used it) to be melted and bubbly. Because air fryers vary so much, you might need to pull them a minute sooner or later. Once they look perfect, pull them out immediately and serve them while they are piping hot!
Tips for Achieving Maximum Crispness in Your Air Fryer Garlic Bread with Melty Cheese
We want that perfect textural payoff, right? Crispy edges that shatter a little when you bite into them, but still soft enough inside that it doesn’t feel like chewing on a crouton. Achieving that perfect crunch in an air fryer takes just a couple of little habits that I picked up experimenting in the kitchen while trying to keep my comfort food aligned with my wellness focus. Trust me, these small tweaks make the experience 100 times better!
Here are my top tips for making sure your Air Fryer Garlic Bread with Melty Cheese sings with crispness:
- Don’t Go Too Thick on the Bread: I know a thick slice feels more substantial, but if your baguette pieces are much thicker than 1 inch—say, 1.5 inches—the moisture gets trapped in the middle. The outside will burn slightly before the inside gets that necessary toasting. Stick to the 1-inch mark for even cooking; it really helps with the final texture.
- Brush, Don’t Soak: Be generous with that beautiful garlic butter, but you want coverage, not a puddle! If you use so much butter that it’s pooling in the air fryer drawer, that moisture will create steam, which is the enemy of crispness. Make sure the butter is spread right to the edges, but you shouldn’t see extra pools of liquid fat left in your mixing bowl.
- Single Layer is Non-Negotiable: I mentioned this before, but I’ll say it again because it’s the most common mistake. Air fryers work by rapidly circulating super-hot air. If your bread slices are overlapping, the air can’t reach the bottom halves, and you end up with soggy bottoms. Work in batches if you have to! A few extra minutes of cooking time is way better than scraping off wet bread dough from the basket after you were expecting perfect garlic bread. This is just good sense when preparing healthy comfort food!
- A Note on Parchment: Some modern air fryer trays have parchment paper liners available. If you are worried about the cheese perhaps melting down into the basket elements, you can use a small, hole-punched parchment liner *under* the slices. However, be aware that the parchment will block the air from the bottom, so you might need to check the crispness on the undersides a minute sooner than normal. It’s a trade-off between easy cleanup and maximum bottom crisp!
Serving Suggestions for Air Fryer Garlic Bread with Melty Cheese
You’ve just pulled out the most amazing, cheesy, fragrant garlic bread ever. Now what? You can’t just eat this on its own (well, you totally could, no judgment here!), but it truly shines as the perfect sidekick to meals that are equally satisfying but still built around intentional, nourishing habits.
Because this appetizer is so rich and flavorful, it pairs beautifully with lighter mains or simple weeknight staples. We’re talking about meals that don’t weigh you down but still feel like a treat. Here are a few of my go-to pairings that always make dinner feel complete:
- Simple Tomato Soup: Forget the canned stuff! A rustic, blended tomato soup is so clean and bright. Dipping that crispy air fryer garlic bread into the warm soup is pure culinary heaven. It brings me right back to childhood, but now my version is full of better ingredients.
- A Big, Bright Salad: Sometimes the best pairing is contrast! Serve it alongside a massive salad loaded with fresh greens, maybe some grilled chicken or chickpeas for protein, and a simple vinaigrette. The bread covers your comforting carb craving, while the greens keep you feeling energized for the evening.
- Weeknight Lasagna Bake: If you’re feeling a little more project-oriented, you absolutely need a substantial main dish. This garlic bread is the perfect scoop-up vehicle for extra sauce when you make a delicious easy weeknight lasagna bake. It makes that delicious meaty sauce feel even more decadent without having to make a second, heavy carb component.
Honestly, even serving it alone with some fresh marinara for dipping makes for an excellent, quick appetizer before dinner, or maybe even a lazy Friday night dinner when you just need something easy and comforting that fits your schedule.
Storage and Reheating Your Air Fryer Garlic Bread with Melty Cheese
Okay, confession time: it’s rare that I have leftovers when I make this! The smell alone usually tempts everyone in the house to grab an extra slice the minute they come out of the air fryer. But life happens, right? Maybe you made a huge loaf for game day, or perhaps you were just incredibly disciplined with your portions.
If you do manage to save any of this crispy goodness, the most important thing to remember is that traditional reheating methods—like the microwave—will turn this magnificent crispness into sad, chewy bread again. We absolutely cannot have that!
Since we’re focused on intentional habits, let’s keep this storage phase clean and efficient. As noted in the recipe, you can store your leftover Air Fryer Garlic Bread with Melty Cheese in an airtight container for up to 2 days.
The key to success for day two is simply going right back to the appliance that made it perfect in the first place. Don’t even think about the toaster oven unless you absolutely have to!
- Airtight is Key: Pop the remaining slices into a good quality airtight container. If you’re worried about the cheese sticking together, you can place small squares of parchment paper between the slices. This stops any moisture transfer and keeps the texture separation intact.
- Reheating for Supreme Crispness: When you’re ready to enjoy them again, reheat them in the air fryer. Set the temperature slightly lower, maybe around 325°F (160°C). Start with just 2 to 3 minutes. You aren’t cooking them; you are just gently warming the centers and waking up that toasted exterior.
- Watch Closely: Because they have butter and cheese, they can go from perfect to too dark really fast during reheating. Check them at the 2-minute mark. If the cheese starts sizzling nicely and the edges are firm again, they are done!
This method ensures that your leftovers taste almost as good as the first batch, which is a huge win when you’re trying to keep your routine intentional and waste-free. Enjoy that second round!
Frequently Asked Questions About Making This Recipe
I get so many questions when people try this amazing recipe for the first time, and honestly, I love hearing from you! It means you’re taking intentional steps toward making delicious food that supports your wellness journey without all the fuss. Some questions pop up more often than others, so I thought I’d save you some time and answer the top ones right here. Remember, simple changes often mean big flavor payoffs, and that’s what we want!
Can I use frozen bread for my Air Fryer Garlic Bread with Melty Cheese?
Oh, that’s a great thought when you’re looking at speedy healthy meal prep options! My answer is, technically yes, but you have to adjust your plan. If you put completely frozen bread straight into the air fryer, you’ll end up with burnt garlic butter and a very chilly, doughy center. That’s not the texture we’re aiming for!
If your bread is frozen, you must thaw it first. Leave the slices on the counter for about 30 minutes to come to room temperature, or you can even pop them in the microwave for just 10 seconds—watch them closely! Once thawed, apply the butter as normal. You might need an extra minute or two in the air fryer since the internal temperature will be lower, but always check often so you don’t ruin that delicious garlic coating.
What cheese works best besides Parmesan for that melty texture?
Parmesan is brilliant for flavor and that tiny crispy texture it gets when baked, but if you’re chasing that real *pull* and beautiful stretch in your Air Fryer Garlic Bread with Melty Cheese, you definitely need a soft, melty cheese! Dairy choice matters here for that gooey factor.
My top recommendation (besides Parmesan) is a 50/50 mix of Mozzarella and Provolone. Mozzarella melts beautifully and has that creamy texture, while Provolone has a slightly sharper bite to cut through the richness of the butter. Low-moisture mozzarella works best, as too much moisture can steam the bread instead of crisping it. If you are feeling extra adventurous, a little sprinkle of Monterey Jack melts like a dream, too!
Can I make the garlic butter ahead of time?
Absolutely, yes! This is one of my favorite prep hacks. Making the butter ahead of time saves you those precious few minutes when you’re rushing dinner out the door. You can mix that butter, garlic, parsley, salt, and pepper mixture together completely—just make sure your butter is nicely softened before you start mixing.
Store the seasoned butter in a small, sealed container in the refrigerator for up to five days. When you’re ready to use it, just take it out about 30 minutes before you plan to assemble the bread so it softens up again. You want it spreadable, not liquid, remember? This little bit of planning is exactly what intentional, clean living is all about!
If I want my bread extra garlicky, how much more fresh garlic can I add?
I love that you’re dedicated to maximum flavor! If you want to dial up the garlic power in your Air Fryer Garlic Bread with Melty Cheese, you can definitely go beyond 4 cloves. Since the recipe calls for 1/2 cup of butter, you can safely push that to 5 or even 6 cloves of fresh, minced garlic without making the butter greasy or overpowering everything.
Just make sure you chop that garlic finely! Larger chunks might brown too quickly in the hot air fryer basket before the bread is fully toasted, leading to slightly bitter, crispy garlic bits instead of flavorful ones. Finely minced or grated is the secret here for even distribution of that potent flavor!
Understanding the Nutrition of This Quick Appetizer
When we talk about real wellness and supporting the body, we approach food consciously, right? That doesn’t mean we banish every delicious treat, but we certainly want to know what we’re enjoying! Making this Air Fryer Garlic Bread with Melty Cheese is fantastic because it’s built on simple, recognizable ingredients—butter, bread, garlic—which makes estimating the nutritional impact much easier than with highly processed snacks.
I want to be super clear here: since this recipe is small-batch and depends heavily on the exact brand/size of your loaf and the specific type of cheese you use, these numbers are a solid **estimate** based on 6 average slices made with standard French bread and mozzarella/Parmesan mix. Use your best judgment as you prepare it!
Here is a rough breakdown per serving (assuming 1/6th of the loaf):
- Estimated Calories: Approximately 220-250 kcal
- Total Fat: Around 12g (This is where the butter and cheese sit, it’s a comfort food, after all!)
- Protein: Approximately 7g (Mostly thanks to the cheese topping!)
- Total Carbohydrates: Roughly 20g (Largely from the French bread base)
See? It’s nothing too crazy for a satisfying appetizer or side dish! Knowing these numbers means you can easily slot this into a balanced meals plan. Enjoy the indulgence, know what you’re eating, and appreciate how fast you were able to pull this off. That’s intentional living, my friends!
Share Your Results
I’ve shared all my favorite tricks for getting that perfect crunch and maximum cheese melt on your Air Fryer Garlic Bread with Melty Cheese, but now I really want to hear from you!
Cooking is all about community and sharing what works, right? When you take the time to try a new recipe, especially one designed to bring you quick joy without derailing your wellness habits, it means the world to me when you let me know how it turned out.
Did you stick to the fresh parsley, or did you sneak in some chives? Did you manage to get it crisp in four minutes flat, or did your air fryer need that extra minute? Don’t be shy!
- Please take a moment to leave a rating for this recipe right below the instructions. Five stars for maximum crispness, obviously!
- Drop a comment and tell me what you served it with. Were you dipping it in soup, or was it accompanying a big salad? I’m always looking for new pairing ideas to keep my weeknight meals interesting.
- If you snapped a photo of your perfectly golden, cheesy slices, tag me on social media! Seeing your creations is the absolute best part of running MeltItClean.com. I love knowing that these simple, powerful recipes are fitting into your real, busy lives and bringing you that clean, comforting satisfaction.
Happy cooking, everyone! Drop those comments below!
By EMILIA, Founder of MeltItClean.com
There you have it! My complete guide to making the dreamiest, crispiest Air Fryer Garlic Bread with Melty Cheese—all while keeping our commitment to real wellness and intentional eating front and center. We proved that incredible comfort food doesn’t require massive effort or a sink full of dishes. It just requires knowing the right tricks!
I truly hope this recipe becomes one of your new go-to snacks or side dishes. It’s proof that eating clean doesn’t mean sacrificing joy; it means finding smarter, quicker ways to make the things you love. If you nailed that 350°F temperature and got those perfect golden edges, be proud of yourself!
If you want to dive deeper into finding powerful habits that support lasting energy and mental clarity without relying on crazy restrictive fads, please come say hello over at the main site. I’d love to connect with you there!
Find more clean-living inspiration and wellness habits right here.
Air Fryer Garlic Bread with Melty Cheese
Ingredients
Equipment
Method
- Slice the bread into 1-inch thick pieces.
- Mix butter, garlic, parsley, salt, and pepper in a bowl.
- Spread the garlic butter evenly on each bread slice.
- Sprinkle Parmesan cheese on top if using.
- Preheat air fryer to 350°F (175°C).
- Place bread slices in the air fryer basket in a single layer.
- Cook for 4-5 minutes until golden and crispy.
- Serve immediately.