
Oh my goodness, have you ever wanted a super cute AND ridiculously easy treat for Halloween? Because I totally have! Every year, I search for something that screams fun without taking up my entire afternoon in the kitchen. That’s where these adorable Strawberry “Pumpkins” (Chocolate-Dipped) came in years ago, and they’ve been a total hit ever since. They’re just so charming and, honestly, they taste fantastic. My kids love helping me draw the little faces, and it always turns into a sweet memory of us getting ready for spooky season together. Trust me, these little guys are going to be your new go-to!

Why You'll Love These Strawberry "Pumpkins" (Chocolate-Dipped)
Seriously, these little gems are a no-brainer for so many reasons:
- Super Easy! You only need a few ingredients and they come together in a flash. Perfect for last-minute party prep.
- Sooo Cute! They look like they came from a fancy bakery, but nope, you made ’em! The orange and green candy melts just pop.
- Deliciously Fruity: You get that lovely fresh strawberry taste with a sweet chocolatey shell. It’s a winning combo, every single time.
- Festive Fun: These Strawberry “Pumpkins” (Chocolate-Dipped) are an absolute must for Halloween parties, school treats, or just a fun afternoon activity with the kids.

Gather Your Ingredients for Strawberry “Pumpkins”
Okay, let’s get down to business! For these super cute Strawberry “Pumpkins” (Chocolate-Dipped), you really don’t need much, which is part of why I love them so much. Just make sure you’ve got:
- About a pound of fresh strawberries – you want them nice and plump! Make sure they’re washed thoroughly and, super important, completely dried before we start dipping.
- One cup of orange candy melts. This is what gives our little pumpkins their awesome color!
- A quarter cup of green candy melts for those cute little stems.
- And finally, a quarter cup of black decorating icing. This is perfect for drawing on those fun little pumpkin faces!

Step-by-Step Guide to Making Strawberry "Pumpkins" (Chocolate-Dipped)
Alright, get ready to make some magic! Following these steps will give you adorable little Strawberry “Pumpkins” (Chocolate-Dipped) that everyone will rave about. It’s really quite simple, just take it one step at a time and you’ll be golden! If you’re looking for more simple sweet ideas, check out my easy dessert recipes too!
Prepare the Orange Coating
First things first, melt your orange candy melts according to the package instructions. I usually pop them in the microwave for 30-second intervals, stirring in between, until they’re nice and smooth. Then, grab your super-dry strawberries and dip each one into the melted orange coating, coming most of the way up. Pop ’em onto some wax paper and let them set completely.
Add the Green Stems
Once your orange coating is firm, it’s time for the stems! Melt your green candy melts the same way you did the orange ones. Now, carefully dip just the very tip of each strawberry into the green melts to create a little stem. Back onto the wax paper they go to harden up!
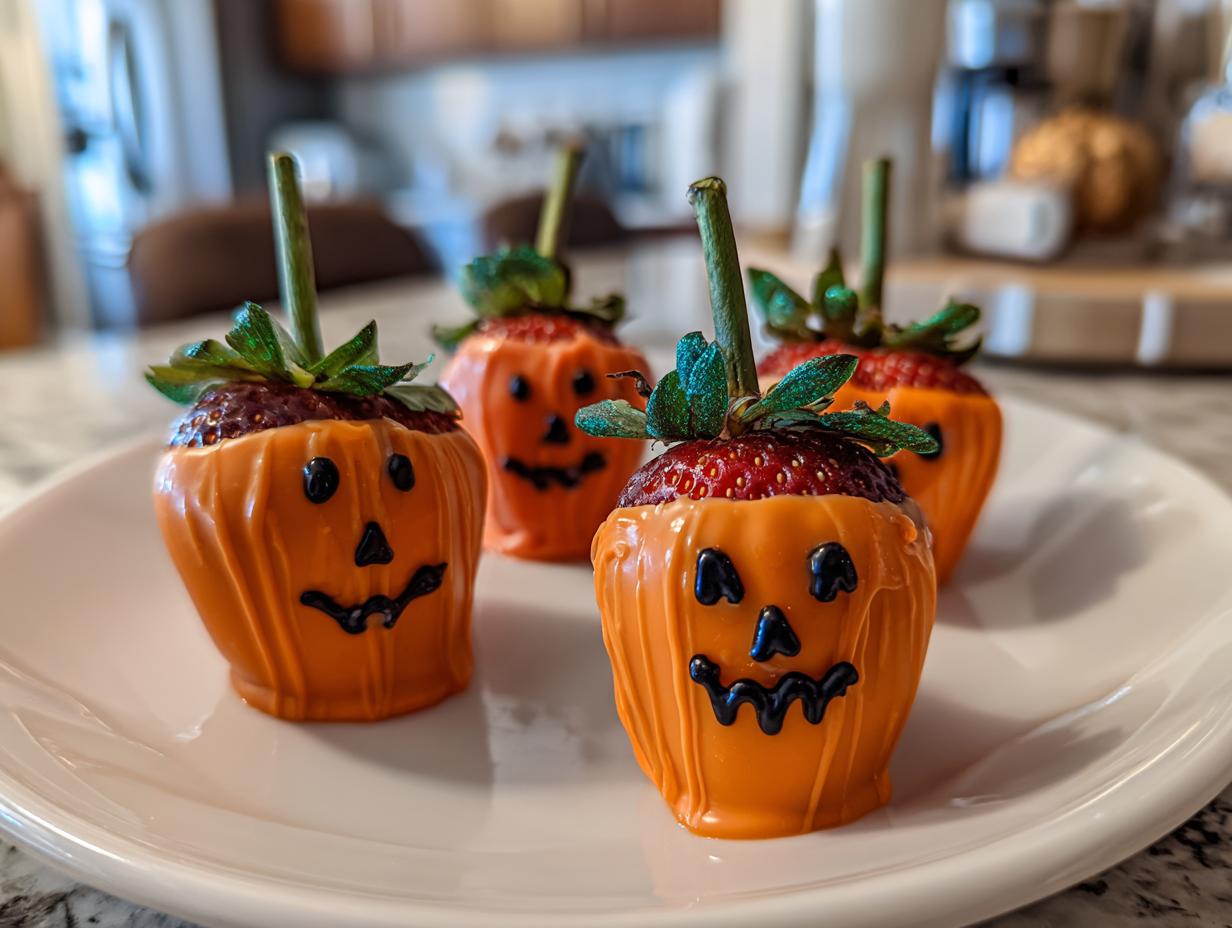
Create the Pumpkin Faces
This is where they really turn into pumpkins! Grab your black decorating icing – I love using the kind in a little tube for precision. Just draw on cute little faces – think simple triangles for eyes and a little triangle nose, maybe a zig-zag mouth. You can give them happy faces, silly faces, whatever you like! These Strawberry “Pumpkins” (Chocolate-Dipped) are going to look so impressive!

Tips for Perfect Strawberry "Pumpkins"
Alright, let’s make sure these little Strawberry “Pumpkins” (Chocolate-Dipped) turn out absolutely perfect every single time! It’s all about a few tiny tricks. First off, those strawberries NEED to be bone dry after washing. I mean, totally, completely dry – even a speck of water and that candy melt will seize up on you! Pat them gently with paper towels, or even let them air dry for a bit. Also, make sure your candy melts are super smooth; if they get a little thick, just pop them back in the microwave for a few seconds. And when you’re drawing those faces, go light and steady – you can always add more detail, but it’s tricky to take black icing off!
Storage and Reheating Instructions
Now, you want to keep those adorable Strawberry “Pumpkins” (Chocolate-Dipped) looking their best, right? It’s pretty simple! Just pop them into an airtight container and store them in a cool, dry place. Avoid the fridge if you can, because condensation can make the chocolate a little dull or even fuzzy. They’re best enjoyed within a day or two, but honestly, they usually disappear way faster than that! Reheating isn’t really a thing here; they’re perfect served just as they are.
Frequently Asked Questions about Strawberry "Pumpkins"
Got questions about these fun little Strawberry “Pumpkins” (Chocolate-Dipped)? I’ve got answers! If you love these, you’ll totally want to check out more of my other Halloween treat ideas too!
Can I use real chocolate instead of candy melts?
You sure can, but it’s a bit trickier! Real chocolate needs to be tempered correctly so it sets nice and shiny, otherwise, it can get dull or greasy. Candy melts are way more forgiving and generally easier for this kind of simple dipping.
How do I ensure the coating sticks to the strawberries?
The absolute biggest secret is making sure your strawberries are perfectly dry before you dip them! Any water will make the candy melts seize up. Also, melting your candy melts nice and smooth, not too thick, helps everything stick beautifully.
How long do these Strawberry "Pumpkins" last?
These little guys are best enjoyed within about 1 to 2 days. You’ll want to store them in an airtight container at cool room temperature, not in the fridge, to keep their shiny shells looking fabulous. Check out my storage tips above!
Estimated Nutritional Information
Alright, let’s talk numbers for our cute little Strawberry “Pumpkins” (Chocolate-Dipped)! These are just estimates, of course, since fruit sizes can vary and brands of candy melts can be a little different. But generally, one of these yummy treats comes in around 75 calories, with about 10g of carbohydrates and 10g of sugar. You also get around 4g of fat. They’re a fun little indulgence!
Share Your Strawberry "Pumpkins" Creation!
I just love hearing from you all! Have you made these easy Strawberry “Pumpkins” (Chocolate-Dipped) yet? Drop a comment below and tell me how they turned out or if you tried any fun face variations! I’d also love it if you could share a pic on social media and tag me – seeing your sweet creations makes my day!


