
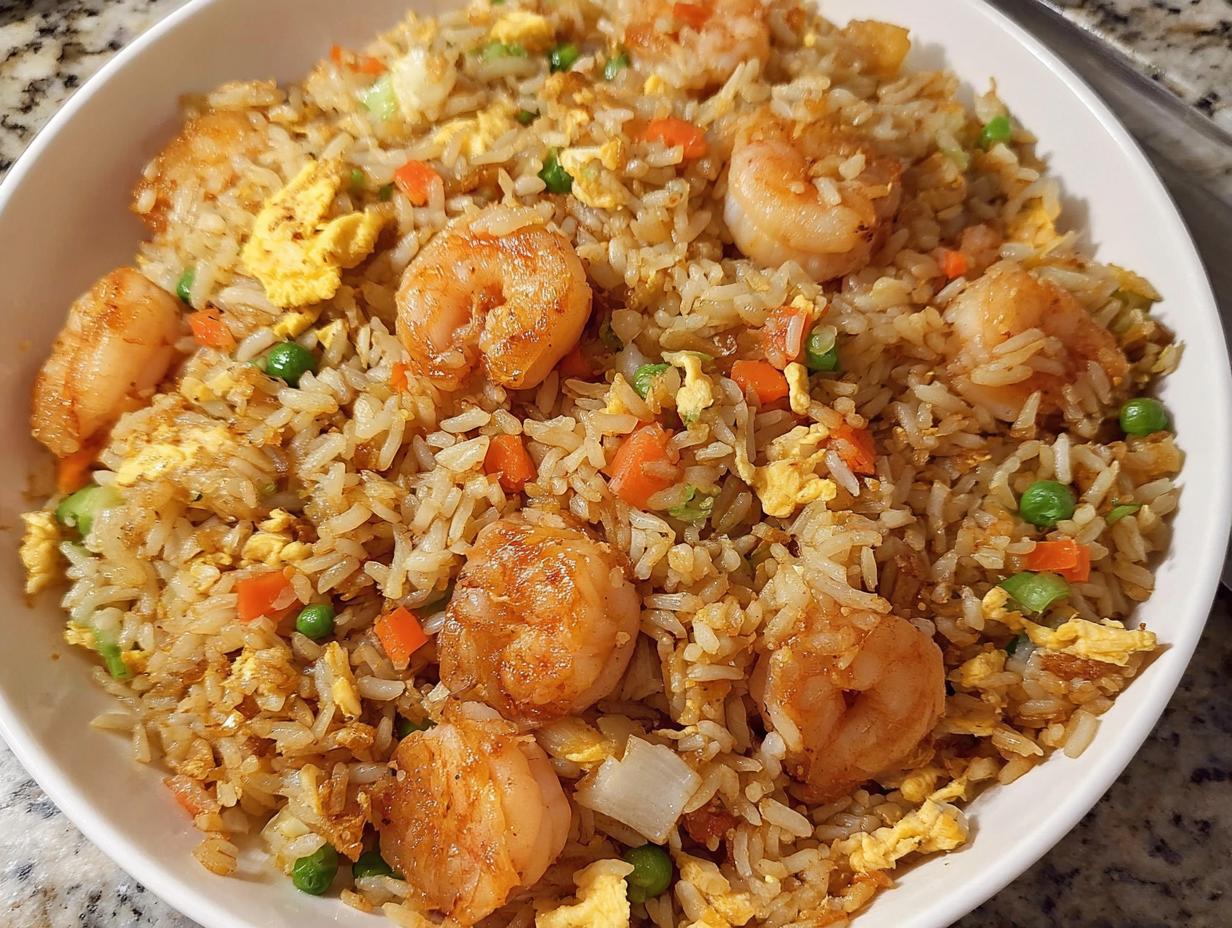
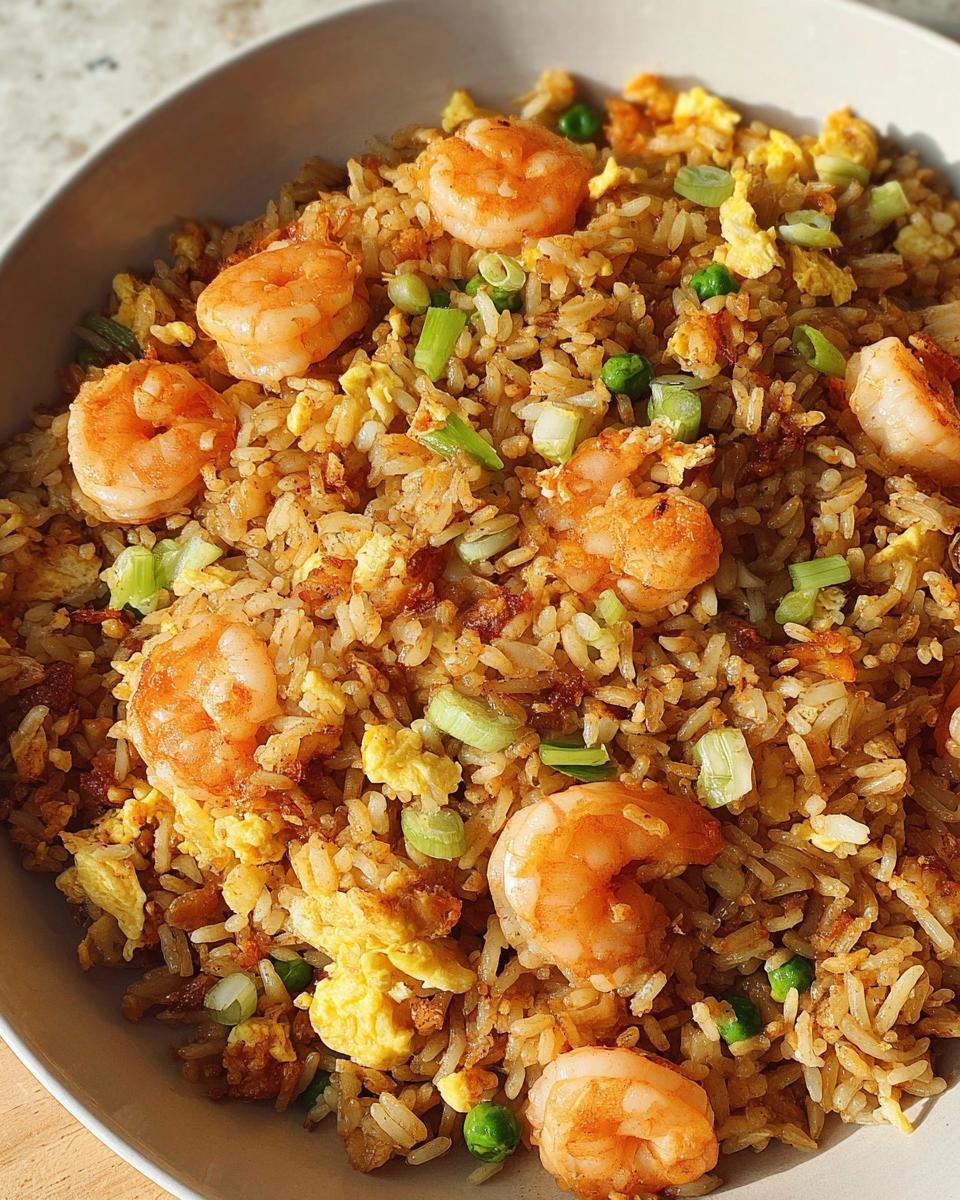
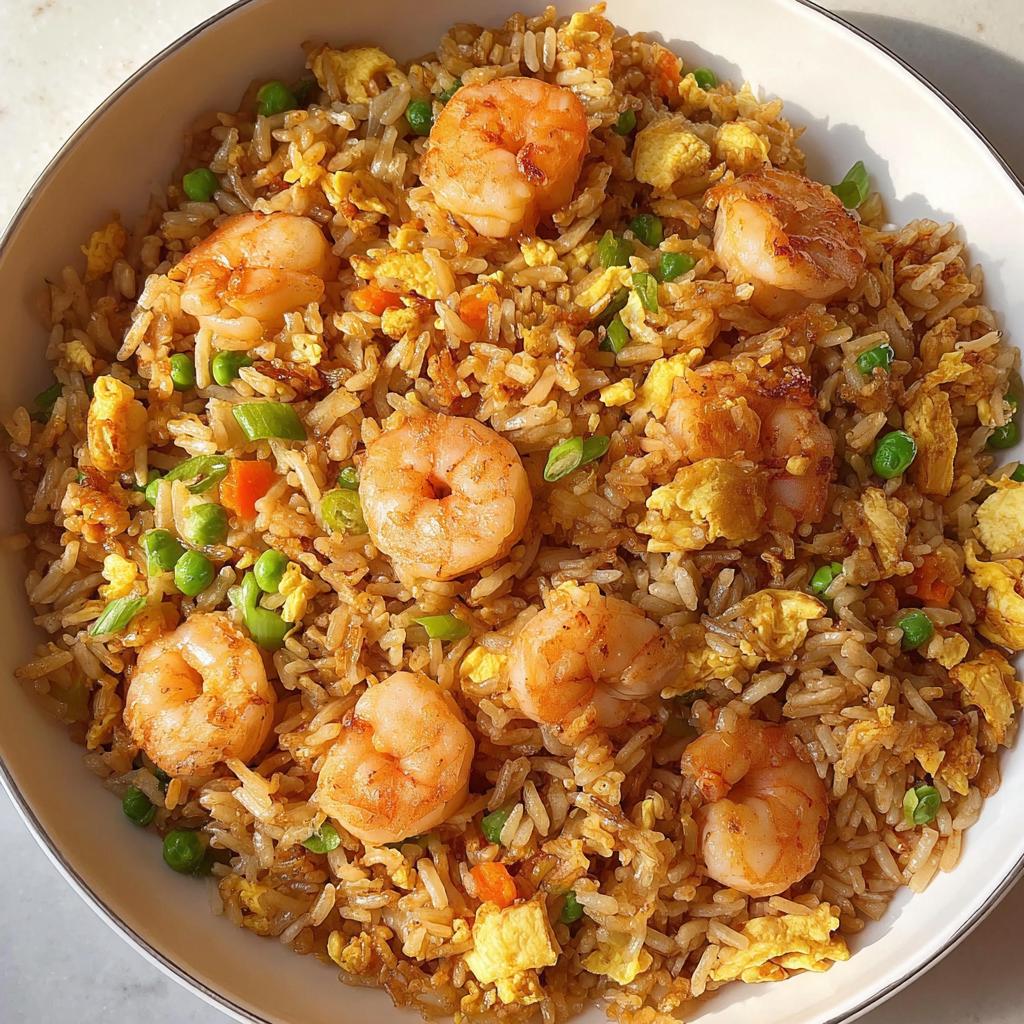
I don’t know about you, but sometimes I just *need* that perfect take-out flavor, that salty, savory comfort food hug. The problem is, takeout often leaves me feeling heavy and bloated later on, which totally clashes with all the clean habits I’m building! That’s why I spent serious time perfecting this Shrimp Fried Rice with Extra Crispy Bits. Seriously, forget soggy rice; this recipe is all about that high-heat texture and deep, authentic flavor you just can’t get when you stir everything together in one go.
We’re keeping it quick—under 30 minutes, promise—because clean living should never mean sacrificing joy! The crispier the bits, the better, truly. Getting that restaurant-quality sear and smoky flavor at home feels like such a win, and it proves you can support your wellness goals without giving up your favorite comfort meals. Digging into this makes me feel totally connected to the food, knowing I controlled every clean, intentional ingredient that goes in.
If you’re looking for amazing shrimp recipes perfect for meal prep, this one will be your new weeknight go-to.
Why You Will Love This Shrimp Fried Rice with Extra Crispy Bits
Honestly, this recipe is my go-to when I need comfort food guilt-free. Here’s why it belongs in your rotation:
- Lightning Fast: We are talking **under 30 minutes** start to finish. Who needs takeout wait times?
- Flavor Bomb: That dark soy, the butter—it all comes together for that authentic, deeply savory, restaurant-style punch.
- Texture is Everything: The whole point is those little crispy pieces we create by cooking separately. No soggy messes here!
- Real Habits, Real Food: It fits perfectly into our philosophy—nourishing, intentional meals that don’t restrict your joy. See more quick 30-minute healthy dinner recipes on the blog.
Essential Equipment for Perfect Shrimp Fried Rice with Extra Crispy Bits
To nail that restaurant texture, you can’t just use any old pot, trust me! You probably have most of this stuff already, but having the right pan is non-negotiable for getting those crispy edges.
You absolutely need a large bowl for mixing everything up. But the real star is your pan.
Key Tools for High-Heat Cooking
For this Shrimp Fried Rice with Extra Crispy Bits, you want either a proper wok or the largest, heavy-bottomed skillet you own. Why? Because we are cooking fast and high! You need surfaces that can handle the heat and keep that temperature up so the rice actually fries, not steams. If you try to cram this into a small pan, moisture gets trapped, and those beautiful crispy bits simply won’t form. It needs space to breathe and toss!
Ingredient Notes and Substitutions for Shrimp Fried Rice with Extra Crispy Bits
Okay, let’s talk about the ingredients, because this is where we turn “meh” rice into restaurant-worthy magic. I know we’re aiming for clean habits, but sometimes comfort food needs a little flavor boost, and that comes down to specific components. You won’t believe the depth that just a touch of butter adds, even more than regular oil! For more quick weeknight inspiration, check out my 12-minute shrimp recipes.
The Secret to Perfect Rice Texture
If I could only stress one thing for this Shrimp Fried Rice with Extra Crispy Bits, it’s this: Use cold, day-old rice! I mean it. Cook it the night before and stick it right in the fridge. Freshly cooked rice is too moist; it steams when it hits the hot pan, and then poof—you get a sticky, gummy mess, not crispy grains.
Making Substitutions in Your Sauce Mix
I developed this sauce mix to be robust, but I totally get that pantry stock varies—we all have different journeys! If you’re avoiding oysters, you can absolutely swap the Oyster Sauce for Coconut Aminos, which gives a similar savory depth. For the Dark Soy Sauce, if gluten is an issue for you or your family, simply use a certified Gluten-Free Tamari instead. It keeps that rich color and saltiness we need for that takeout vibe!
Step-by-Step Instructions for Shrimp Fried Rice with Extra Crispy Bits
This is where the magic happens! Remember our rule: we cook things in stages to maximize flavor and texture. We aren’t just stirring everything together and hoping for the best. We want those beautiful, distinct pieces we call the ‘Extra Crispy Bits’ in our Shrimp Fried Rice with Extra Crispy Bits. Get your pan screaming hot—like, ready to smoke hot—before anything touches it!
Preparing Components: Sauce, Eggs, and Shrimp
First things first, whisk your eggs with a little salt, pepper, and that splash of vinegar from the recipe card. Set those aside. Then, mix up your sauce blend in a little bowl—that dark soy sauce and oyster sauce are powerhouses! Now, for the shrimp: toss those babies in a tiny bit of the sauce mix and salt, and toss them into your hot pan with just a tablespoon of butter. Cook them fast until they turn pink and are just done—don’t let them get rubbery! Pull them out and set them aside.
Next, scramble those whisked eggs until they look like tiny, fluffy golden bits. Take them out too! Keeping these components separate until the end is your secret weapon for restaurant quality.
Building Flavor: Aromatics and Vegetables
Wipe your pan quickly if you need to, then drop in your last tablespoon of butter along with your vegetable or sesame oil. We need that fat content! As soon as it shimmers, toss in that minced ginger and garlic. They should smell incredible—fragrant, but not burnt—in about 30 seconds. Immediately follow those with your chopped red onion and frozen peas and carrots. Cook these just until they start to soften up. That delicious, flavored fat is now ready to coat the rice!
The Final Toss: Combining for Shrimp Fried Rice with Extra Crispy Bits
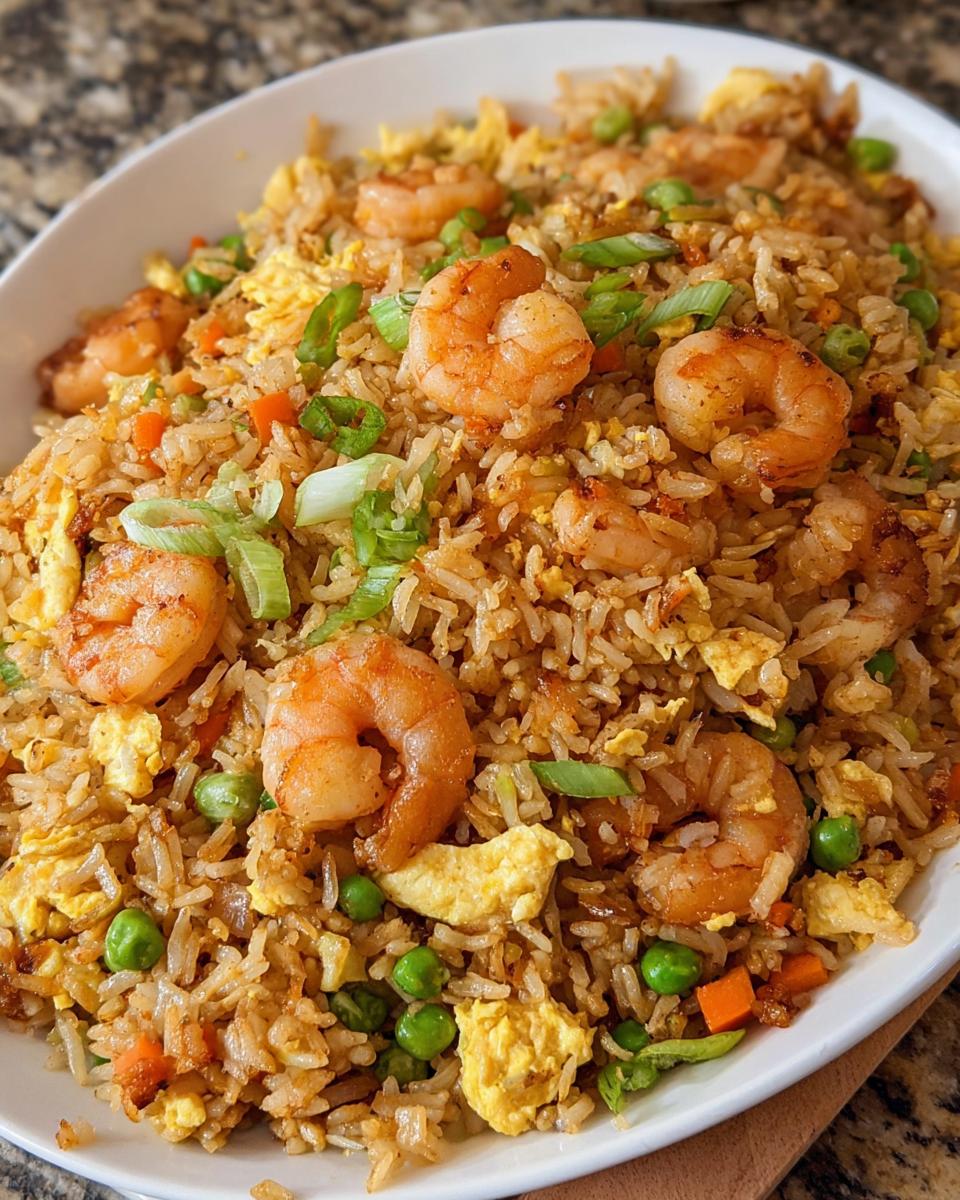
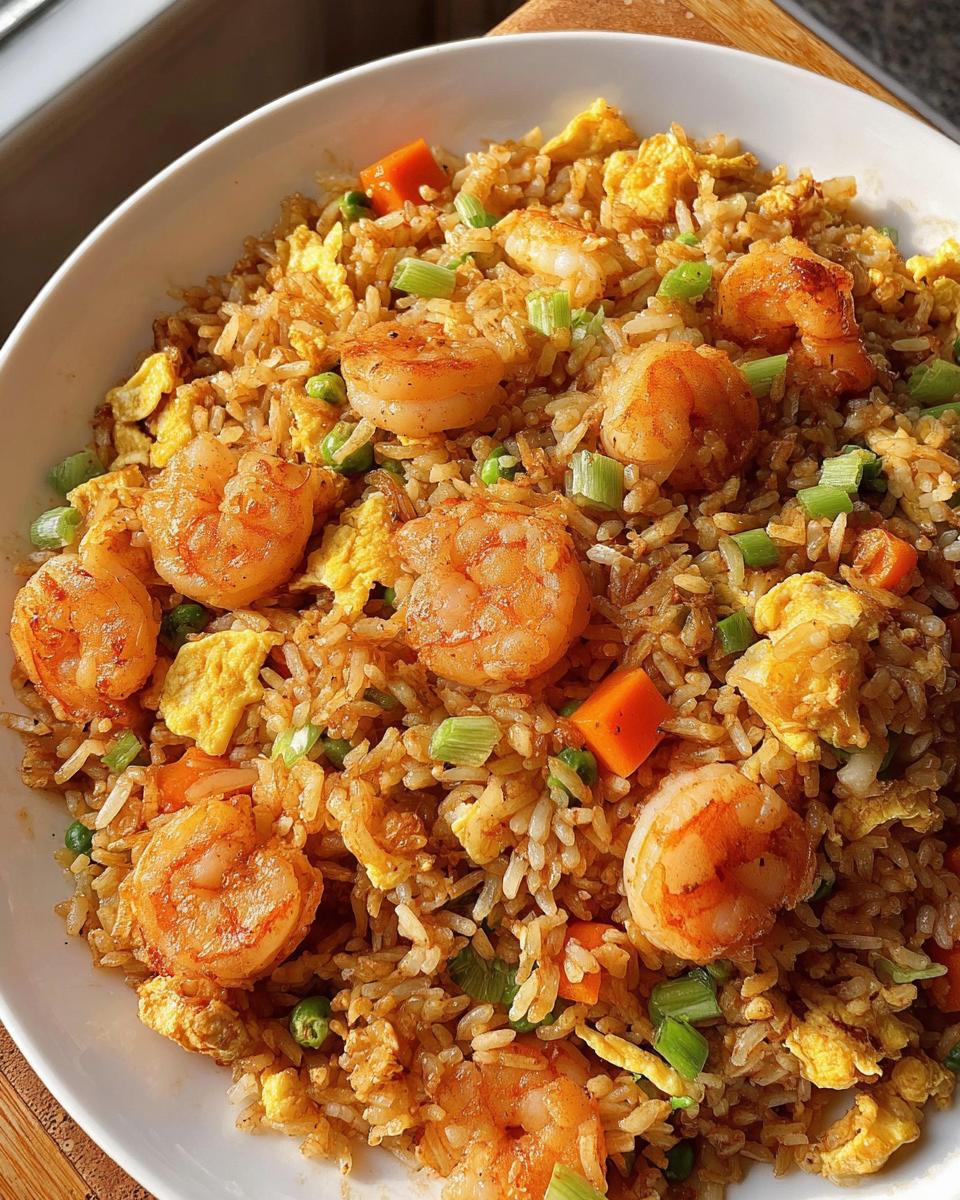
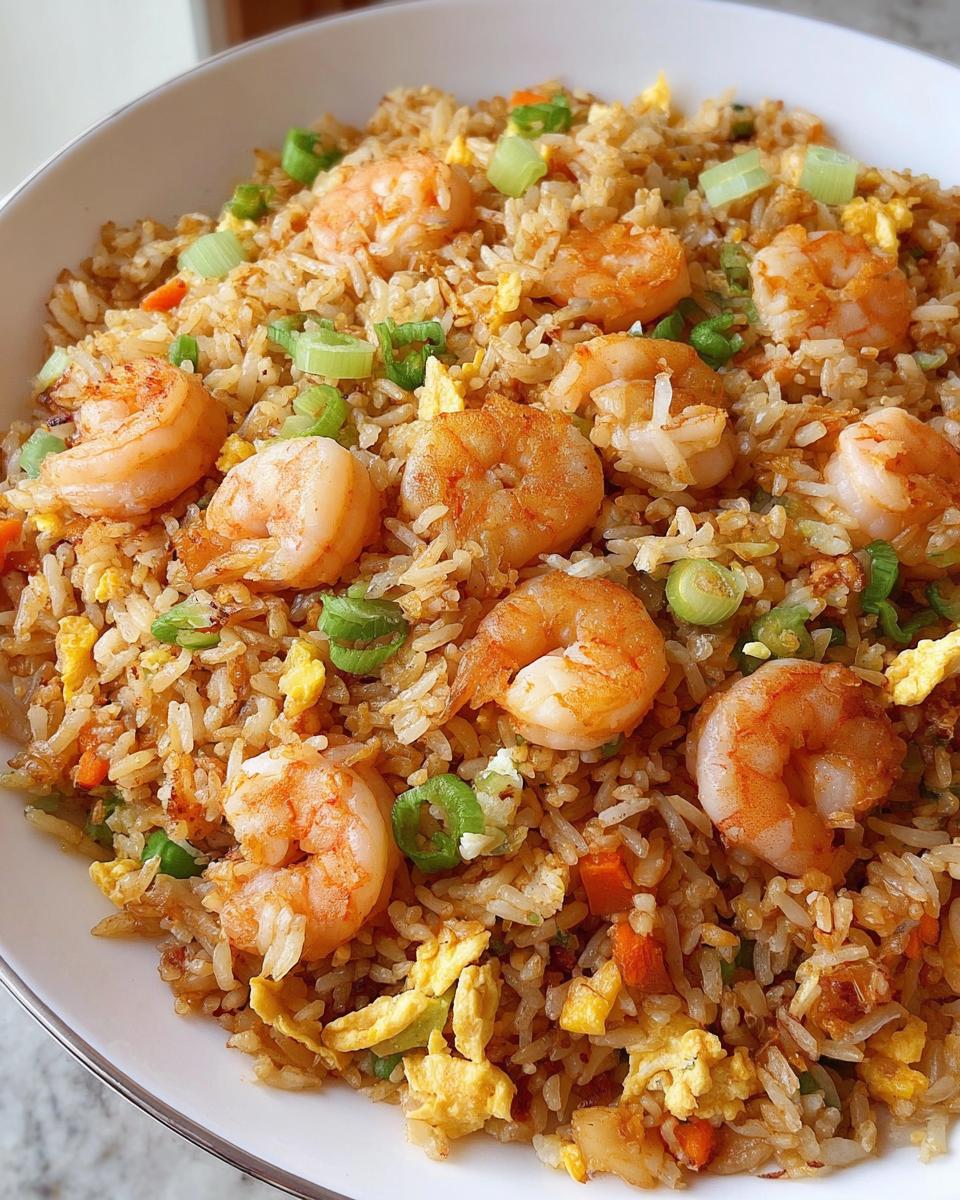
In goes the cold, refrigerated rice! If it’s clumped, use your spatula gently to break up those lumps, but don’t crush the grains—we want integrity! Toss that rice vigorously. It should start popping! Now, throw the cooked shrimp and the scrambled eggs back in. Pour that rich sauce mix all over everything and keep tossing, tossing, tossing. For that final smoky depth, if you want that incredible sear, sprinkle a tiny bit of water over the top, cover the pan for a minute so it steams slightly, and then uncover and hit it with high heat again until everything is perfectly coated. Finish with those gorgeous scallion greens. You nailed it! Check out more restaurant-style shrimp recipes online for more inspiration.
Tips for Achieving Restaurant-Style Shrimp Fried Rice with Extra Crispy Bits
Getting that true wok flavor—that ‘wok hei’ everyone talks about—isn’t about having a fancy stove; it’s about technique. Since we’re focused on developing those beautiful, flavorful ‘Extra Crispy Bits’ in this Shrimp Fried Rice with Extra Crispy Bits, you need to commit to high heat.
I learned this through trial and error: if your pan looks crowded, it means the temperature is dropping too low, and you’ll end up stewing your ingredients instead of frying them. Cook in batches if you need to! It’s worth the extra second of effort.
Also, remember that crucial ingredient: butter! While vegetable oil has a high smoke point, you need the richness and specific flavor butter brings to cross the finish line into true takeout territory. Don’t skip it. When you toss everything together at the end, use a quick, sharp tossing motion rather than stirring constantly. Tossing lifts the rice slightly off the pan surface, allowing those high temperatures to give you the perfect chew and those desirable crispy bits. For some amazing inspiration on why people love these shrimp recipes, check out this post!
Serving Suggestions for Your Shrimp Fried Rice with Extra Crispy Bits
Since this Shrimp Fried Rice with Extra Crispy Bits is already so satisfying and rich with flavor, we keep the sides simple! You don’t want to overpower that perfect sear we worked so hard to achieve. A light, palate-cleansing side is perfect.
I usually pair it with quickly steamed broccoli or maybe a very light, clear broth soup. This keeps the meal balanced and totally clean-living approved. And please, don’t forget those fresh, chopped scallion greens right on top at the very end—it brightens up every single bite perfectly. For more ideas on quick, colorful sides, take a peek at my thoughts on easy chicken stir-fry with colorful veggies!
Storage and Reheating for Leftover Shrimp Fried Rice with Extra Crispy Bits
Listen, if you even *have* leftovers of this amazing Shrimp Fried Rice with Extra Crispy Bits, you’re doing great! Since we used day-old rice and kept everything high and hot, it actually reheats pretty well, which is a huge win.
Pop any leftovers into a shallow, airtight container. You want the container shallow so the rice cools down quickly—this is key for food safety, which aligns perfectly with our clean-living habits! Don’t just leave it sweating on the counter!
When you’re ready to eat it the next day, skip the microwave if you can. Reheating in a non-stick pan over medium heat is the secret. Add just a tiny splash of water or maybe a few drops of sesame oil to create a little steam bath. This helps loosen up the rice grains without making them soggy again. Toss it gently for just a minute or two until it’s steaming hot. This brings back most of that texture we worked so hard for. For more meal prep tips, check out my guide on healthy meals you can prep in under 1 hour!
Frequently Asked Questions About Making Shrimp Fried Rice with Extra Crispy Bits
I get so many questions about getting this right, especially concerning texture! It’s all about respecting the high-heat technique. Don’t worry if your first batch isn’t perfect; we all start somewhere on our clean-living journey!
Can I use fresh rice instead of cold, refrigerated rice for this Shrimp Fried Rice with Extra Crispy Bits?
Oh, please, don’t! This is the number one mistake people make. Fresh rice has way too much moisture, and when it hits that hot pan, it steams itself into mush. We are aiming for that perfect, slightly chewy grain that fries up beautifully—that only happens when your rice is rock hard and cold from the fridge. It keeps the individual grains separated so you get those crispy bits, not a clump!
How do I ensure the shrimp stay tender and don’t overcook?
This is where cooking separately saves the day! You cook the shrimp in a tiny bit of butter and oil *first*, just until they turn pink and are cooked through, and then you pull them out immediately and set them aside. They go back into the pan only at the very end with the sauce and the rice. That short burst of heat at the end warms them up perfectly without turning them into tiny pink rubber balls.
If you want to make sure you’re cooking shrimp like a pro, I deep-dive into all those little methods over here!
Share Your Takeout-Style Success
Seriously, I want to hear everything! Did you nail those extra crispy bits? Were you able to get that smoky, authentic flavor right in your own kitchen? I spend so much time testing recipes to make sure they fit into our clean-living framework without feeling like a sacrifice, and your feedback is what keeps me going!
Please, take a moment to rate this Shrimp Fried Rice with Extra Crispy Bits recipe down below. If you have questions, or just want to share a photo of your beautiful pan of rice, drop a comment! Connecting with you helps me support your journey toward real wellness habits that actually fit your life.
Remember, focusing on intentional eating doesn’t mean boring food; it means making smart choices about how we enjoy our favorite comfort meals. Head over to my contact page if you have any specific questions for me. Happy cooking—I hope this becomes your new favorite weeknight staple!
Disclaimer on Nutritional Values
I write this blog to inspire habit changes, clean living, and real wellness without restriction, which means I focus heavily on whole ingredients and intentional eating. Because of that focus, you won’t find specific, calculated calorie counts or macronutrient breakdowns listed here for my Shrimp Fried Rice with Extra Crispy Bits.
Honestly, trying to nail down precise nutrition for a dish like this feels a bit overwhelming, and frankly, it takes the joy out of cooking! The values here can change so much based on what brand of oyster sauce you use, the exact size of your shrimp, or if you decide to sneak in an extra spoonful of that tasty butter.
My goal is to empower you to prepare nourishing food that fits your life, not to create rules around numbers. If tracking specific nutrients is important to your wellness path, I totally encourage you to plug the ingredient amounts into your favorite tracking app. For a deeper dive into my philosophy on nutrition tracking versus intuitive eating, you can always read more on my official disclaimer page. Focus on those amazing, fresh ingredients—that’s the real fuel!
By Emilia, Founder of MeltItClean.com
Hi, I’m EMILIA, the founder of MeltItClean.com – your digital space for natural weight loss, real wellness habits, and clean-living inspiration that actually fits your life.
For years, I struggled with the ups and downs of dieting. I tried everything — juice cleanses, low-carb crazes, fitness challenges — but I always ended up back where I started: tired, bloated, and frustrated. I didn’t just want to “lose weight” — I wanted energy, mental clarity, glowing skin, and confidence without sacrificing my joy or sanity.
After years of experimenting, learning, and unlearning, I discovered a simple truth: your body is already powerful — it just needs support, not restriction. That’s when I created Melt It Clean — a site dedicated to real transformation through clean, intentional, and nourishing daily habits that anyone can follow.
My goal was simple: build a place where people could feel informed, supported, and empowered without being overwhelmed by wellness fads. You can learn more about my story and philosophy right here on my About Me page!
Shrimp Fried Rice with Extra Crispy Bits
Ingredients
Equipment
Method
- Soak rice before cooking for at least an hour.
- Cook rice the night before the fried rice is prepared and refrigerate it.
- In a bowl, mix the ingredients to make the sauce mix.
- In another bowl, whisk eggs, salt, pepper powder, and rice wine vinegar.
- Marinate shrimp with salt, pepper powder, and the sauce mix.
- In a pan, add 1 Tbsp Butter, add the shrimp, and cook till pink and cooked. Keep aside.
- In the same pan, add the eggs and scramble to make tiny pieces. Keep aside.
- In the same pan, add another 1 Tbsp Butter and Vegetable Oil / Sesame Oil, add the ginger and garlic, and toss till they are fragrant.
- Add the onion and vegetables and cook till soft.
- Add the rice, shrimp, and eggs, and mix well.
- If the rice is cold and has formed lumps due to refrigeration, then lightly break the lumps without breaking the rice.
- Add the sauce mix and mix well.
- On high heat, toss well till rice is cooked well along with the rest of the ingredients.
- Sprinkle some water over the rice, cover, and cook for some time.
- Finally, add some more oil if you need, and top with spring onion greens. Serve!


