

Oh my gosh, I’m so excited you clicked on this! Forget those tubs of hummus you buy—they just don’t compare to the real deal, especially when they’re fresh. We’re talking about going from zero to perfectly creamy dip in under fifteen minutes. Seriously, this Homemade Hummus Recipe is my absolute favorite because texture matters more than anything, right?

I used to struggle; mine always came out grainy or too loose. But after experimenting with tons of chickpeas and way too much tahini, I finally cracked the code for that velvety, restaurant-quality smoothness that sticks perfectly to a pita chip. You can trust me on this one; this is the easiest, creamiest dip you’ll ever pull out of your own food processor. If you love learning more kitchen secrets, you should check out my general tips over at my baking adventure spot at the blog! Ready to see some magic happen?
Why This Homemade Hummus Recipe Stands Out (Expert Tips)
So, what makes my recipe the one you should stick to? First, we’re talking speed—you won’t believe how fast this comes together; we are done in under 15 minutes, total! Second, the flavor is just pure, authentic Middle Eastern brightness. But honestly, the real reason this stands out is that rich, velvety texture.
- Superior creaminess every single time.
- Ready faster than running to the store!
- Flavor that tastes like you ground everything by hand for an hour.
Achieving the Creamiest Homemade Hummus Recipe Texture
Texture is my obsession, and it all comes down to two things. Always grab the best tahini you can find—a runny, good-quality tahini blends beautifully. Then, instead of plain water, always use ice-cold water or, even better, the liquid reserved from the can of chickpeas—that aquafaba is liquid gold for making it unbelievably smooth!
Essential Ingredients for Your Homemade Hummus Recipe
You don’t need a ton of fancy spices or things you can’t pronounce for amazing hummus. It’s about having the right staples and treating them right. If you’re looking for a few other ways to use up chickpeas, I have this fantastic recipe for a Chickpea Beet Feta Salad that’s so colorful for picnics!
Ingredient Breakdown for the Homemade Hummus Recipe
Keep everything measured out before you start because the blending goes fast. Here is what you’ll need for about six servings of dip magic:
- Canned chickpeas (that’s 15 oz), make sure you rinse them well, but seriously, save that liquid—that’s our secret weapon!
- Tahini (1/4 cup). This is your sesame goodness, so find a jar that pours nicely.
- Fresh lemon juice (2 tablespoons) for that essential brightness.
- Just one clove of garlic to start; you can always add more later if you’re feeling feisty.
- Ice water or reserved chickpea liquid (2 tablespoons) for smoothing things out.
- Salt (about 1/2 teaspoon, taste test later!).
- Good quality olive oil (2 tablespoons for blending, plus extra for drizzling when we serve it).
Step-by-Step Instructions for the Homemade Hummus Recipe
Okay, get your food processor ready because this part flies by! If you want that next-level smoothness that makes people gasp, now is the time to peel those chickpeas. Yep, it’s tedious, but honestly, removing the papery skins makes a huge difference. If you’re in a rush, don’t stress, skip the peeling—this recipe is still wonderful—but for the absolute best results, take the ten minutes to peel them. We’ve got a fantastic Lemon Herb Chicken Orzo Skillet recipe that’s just as fast if you need a quick dinner idea later!
Blending the Homemade Hummus Recipe Base
First things first: dump the rinsed chickpeas, the smooth tahini, your fresh lemon juice, that clove (or two!) of garlic, and the salt right into the food processor bowl. Turn the machine on and let it go for a full minute. You gotta trust the power of the machine here. When that minute is up, stop it, scrape down every bit of mixture that’s stuck to the sides and the blade, and give it a quick stir.
Achieving Perfect Smoothness in Your Homemade Hummus Recipe
This is the crucial moment where the magic happens! With the motor running—don’t turn it off!—start drizzling in that ice water or reserved aquafaba slowly, slowly, slowly. It might look like it’s separating at first, but keep pouring that liquid in a thin stream. You’ll watch it suddenly transform from thick paste into a gorgeous, flowing, creamy silk. Once it looks perfectly smooth and pale, taste it, add more salt or lemon if you think it needs a little zip, and then transfer it right out to your pretty serving bowl!
Tips for the Best Homemade Hummus Recipe Results
Okay, so you nailed the blending, but I have a couple of little tricks to make this the absolute best hummus you’ll ever eat. Remember I mentioned peeling those chickpeas? If you have the patience, do it! It takes a few minutes but guarantees that cloud-like texture you dream about. Also, pay attention to your tahini!
If your tahini is sitting in the fridge and feels super thick and stiff, warm it up just a tiny bit first. You can set the jar in a bowl of warm water for five minutes. Cold, stiff tahini won’t blend as easily, but nice and fluid? It emulsifies perfectly. I always share my favorite kitchen hacks over at the blog if you want more simple tricks!
Serving Suggestions for Your Homemade Hummus Recipe
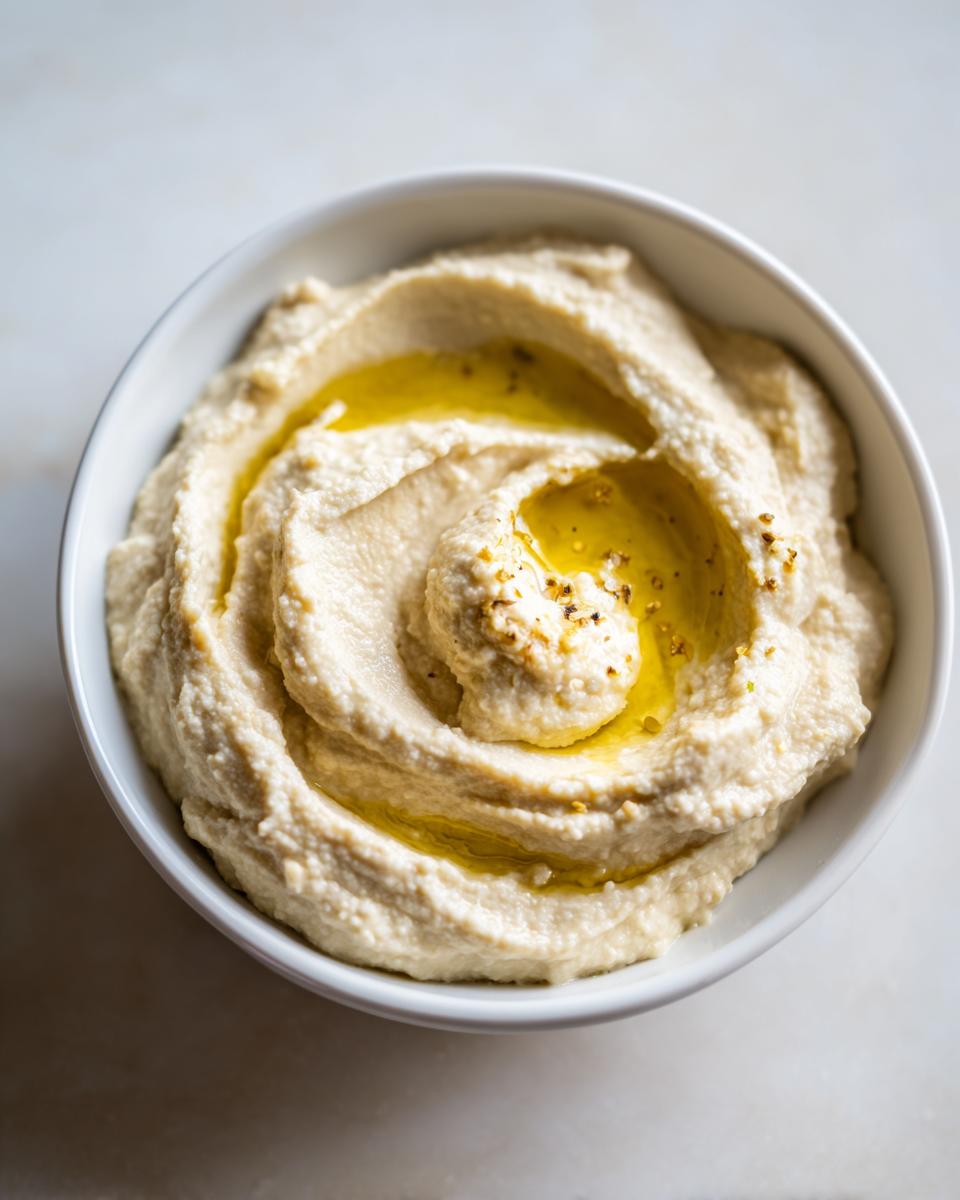
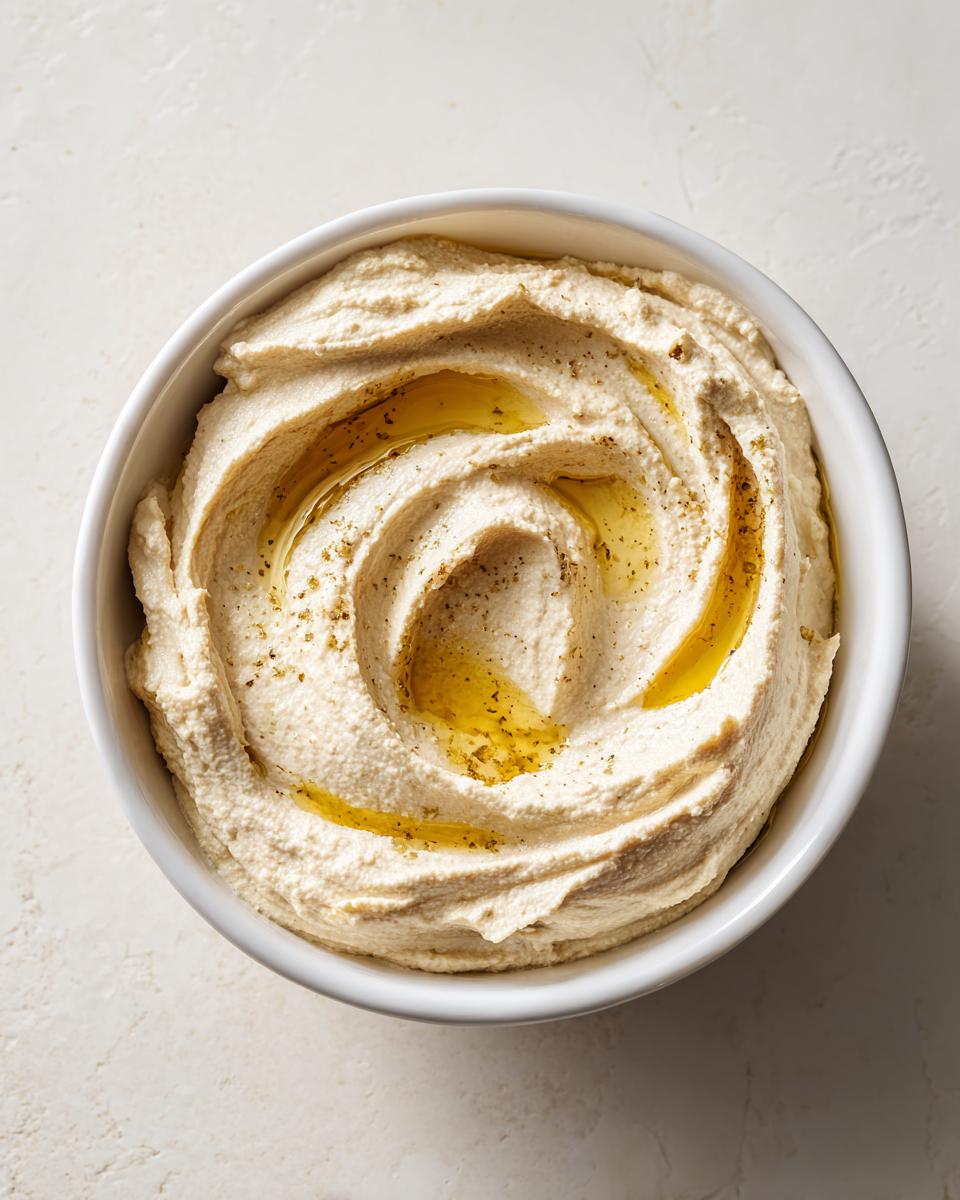
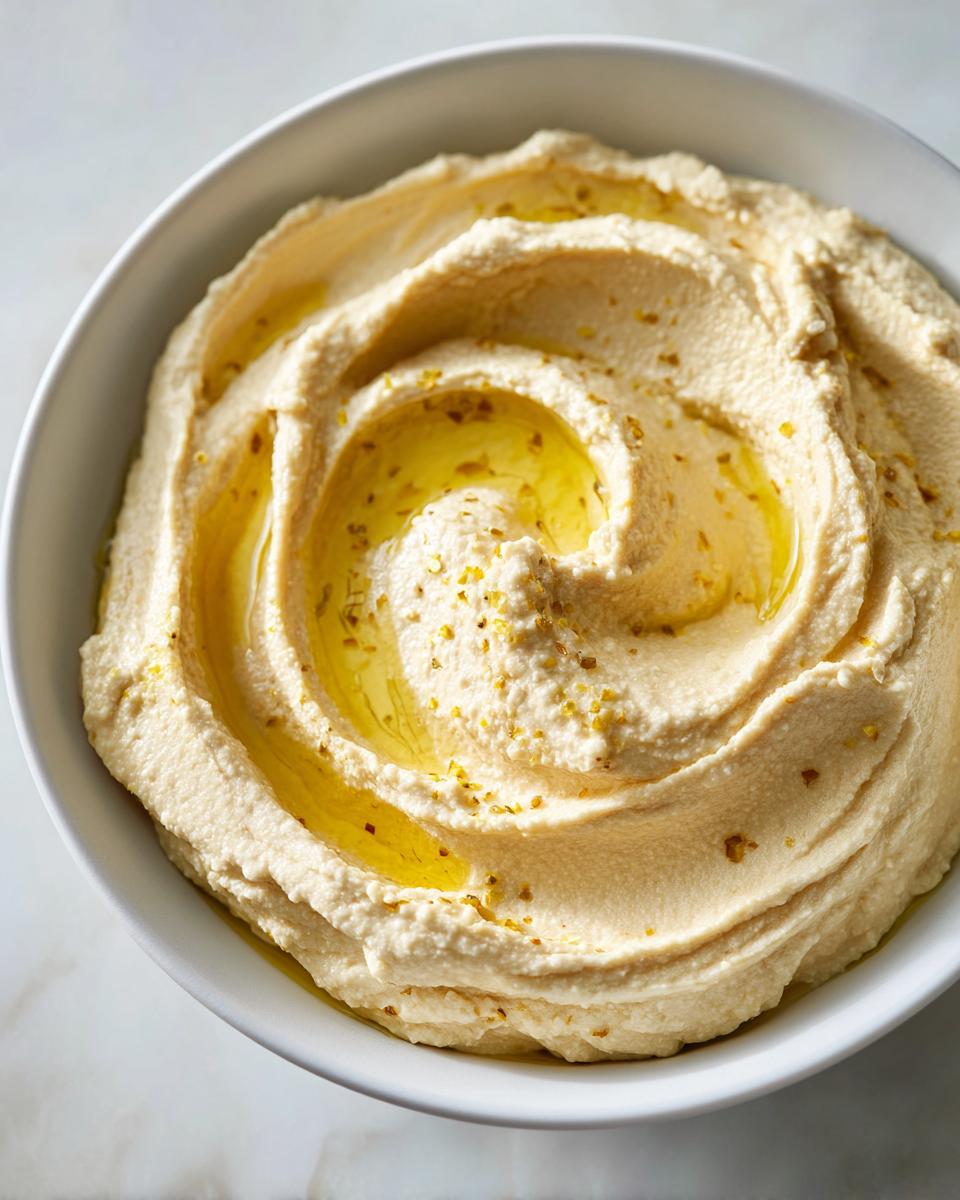
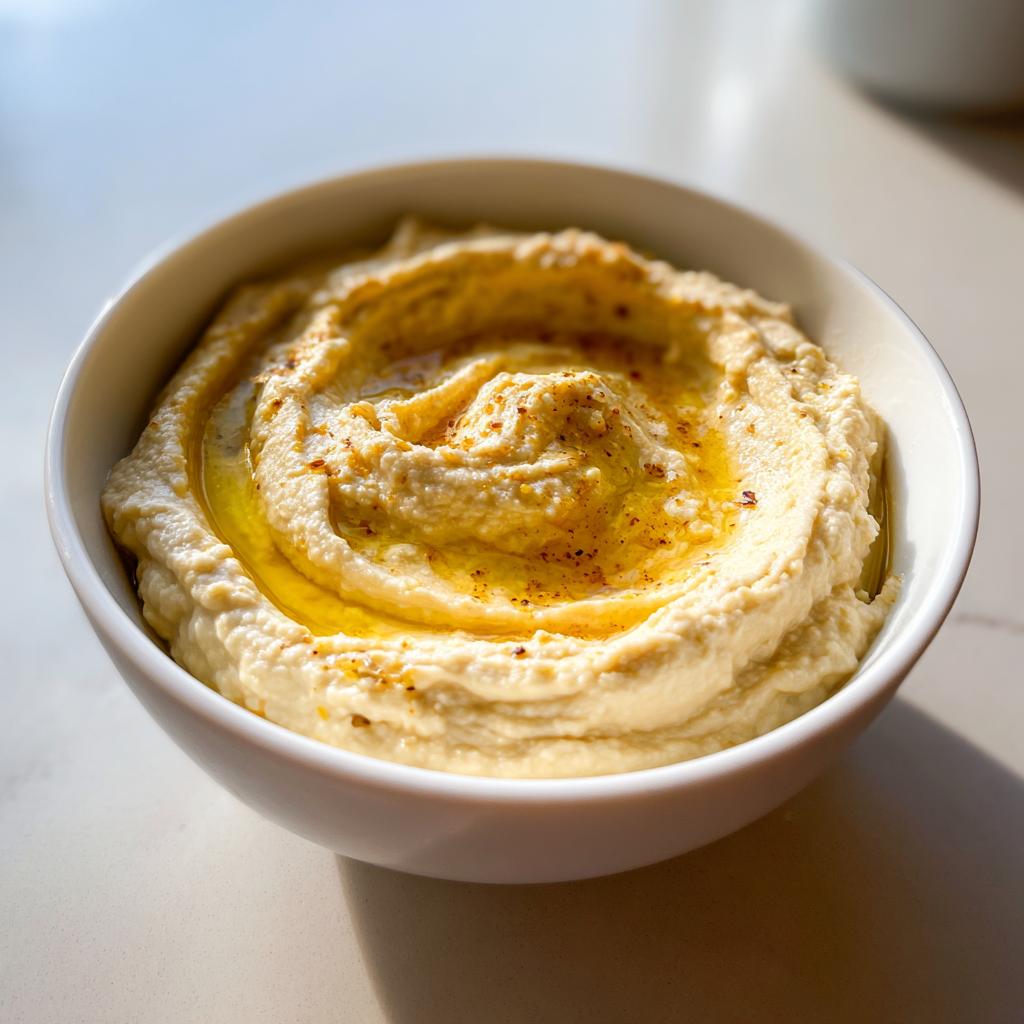
Presentation is everything, especially with something as gorgeous as fresh hummus! Once you’ve got it swirled into a nice shallow bowl, make a deep well right in the center with the back of a spoon—this is where the good stuff goes!
Drizzle a generous amount of your best, fruity olive oil right into that well. Then, a little sprinkle of smoked paprika or maybe some bright green chopped fresh parsley makes it pop visually. Serve it straight away with warm pita or alongside some amazing veggies. If you want to turn this into a meal, try serving it next to my Spicy Chickpea Bowls!
Storage and Reheating for Homemade Hummus Recipe Leftovers
Don’t worry if you have leftovers because homemade hummus is the gift that keeps on giving! You can keep this totally fresh in an airtight container in the fridge for about four or five days—it tastes best within the first couple of days, though. When it cools down, it always stiffens up a bit, which can be annoying.
If yours gets too firm, don’t panic and don’t toss it! Just stir in a tiny splash—I mean just half a teaspoon—of cold water or a squeeze of fresh lemon juice while you mix it. Give it a good whisk, and bam, that creamy texture comes right back! It’s almost as good as when it was first made. For things you can make ahead of time like this, I always look for tips on how to store other foods too; check out my notes on make-ahead mashed potatoes—same principle applies!
Common Questions About the Homemade Hummus Recipe
I totally get it; when you’re making your very first batch of Homemade Hummus Recipe, your mind floods with questions! People always ask me about texture—especially if they don’t have the exact setup I used. And yes, using canned chickpeas is perfectly fine; that’s what I default to most Wednesdays when I need a quick dip!
If you’re whipping this up for a party, you might also wonder how long it lasts. While I’ve never had any hang around past day two, I can give you the storage intel. Speaking of adapting things, if you want to try making something hearty afterward, you should check out the Spicy Chickpea Bowls recipe—it uses chickpeas too!
Can I make this Homemade Hummus Recipe without a food processor?
Honestly, the food processor is the best tool here because it handles the grit of the chickpeas so well. If you absolutely don’t have one, you can try a high-powered blender, but you’ll have to work in small batches, and I promise you, it won’t get quite as satiny smooth as the processor manages. You’ll definitely need to add extra liquid during blending!
How long does this Homemade Hummus Recipe last?
Because we aren’t using any weird preservatives, this homemade version is best eaten within three to four days, tops. Keep it sealed tight in the fridge! If it starts feeling stiff after day three, just give it a good stir with a teaspoon of water, and it will loosen right back up and taste fresh again.
Nutritional Estimates for This Homemade Hummus Recipe
Alright, let’s talk fuel! I know that when I make a huge batch of hummus, I tend to eat half of it myself with a spoon (don’t judge!), so I like to have a general idea of what I’m diving into. Remember, since this is all made from scratch and we use real olive oil, these numbers are just estimates based on the ingredients listed here. Things like how much oil you drizzle on top at the end can change things fast!
For about one serving size, based on six servings total, here’s what you’re looking at:
- Calories: Hang in there, about 150! Not bad for something so delicious.
- Fat: Around 8 grams—that’s mostly the healthy fats from the tahini and olive oil.
- Protein: We get a nice punch of about 6 grams.
- Carbohydrates: Roughly 15 grams.
- Fiber: A respectable 5 grams, thanks to those wonderful chickpeas!
It really is a satisfying little dip, packed with good stuff. If you’re tracking macros, you can see how easily this fits into things! For some other great nutrition breakdowns for satisfying meals, take a peek at the numbers for my Bang Bang Chicken Bowl—that one’s a real winner too!
Share Your Homemade Hummus Recipe Experience
Whew, we made it! Now that you’ve got the best, creamiest dip on your counter, I’m dying to know what you think. Did you try peeling the chickpeas? Tell me how much smoother it felt! Honestly, seeing your results is the best part of sharing these recipes.
Did you add extra garlic, or maybe whirl in some roasted red pepper at the end? I love when you guys get creative with my core recipes and make them your own. Don’t be shy—drop a star rating right here on the recipe card and tell me all about your blending session in the comments below. Happy dipping!
Homemade Hummus Recipe
Ingredients
Equipment
Method
- Place the chickpeas, tahini, lemon juice, garlic, and salt into the bowl of a food processor.
- Process the mixture for 1 minute. Stop and scrape down the sides of the bowl.
- With the motor running, slowly drizzle in the ice water (or reserved chickpea liquid) until the hummus becomes smooth and creamy.
- Taste the hummus and adjust salt or lemon juice as needed.
- Transfer the hummus to a serving bowl. Drizzle with olive oil before serving.


