
Has anyone else fought a lifelong battle against sad, soggy roasted potatoes? I swear, for years, every time I tried to make them, the outside looked pale and the inside was somehow still crunchy. It was so frustrating! I wanted that glorious, shatteringly crisp exterior hugging a fluffy, almost creamy center worthy of a Sunday roast centerpiece. Well, stop worrying about sunken spuds right now, because I finally cracked the code. This method for **Crispy Roasted Potatoes (Perfect Every Time)** uses one crucial extra step that changes everything. It’s all about preparing the potatoes so they absorb the fat perfectly and can achieve that deep golden brown crust you dream about. Trust me, this technique is simple, deeply reliable, and fits right into my philosophy: real wellness comes from habits that actually fit your busy life, not from overly complicated cooking steps.
Why You’ll Love These Crispy Roasted Potatoes (Perfect Every Time)
There’s really no turning back once you try these! They are my absolute go-to when I need a show-stopping side dish without spending hours in the kitchen.
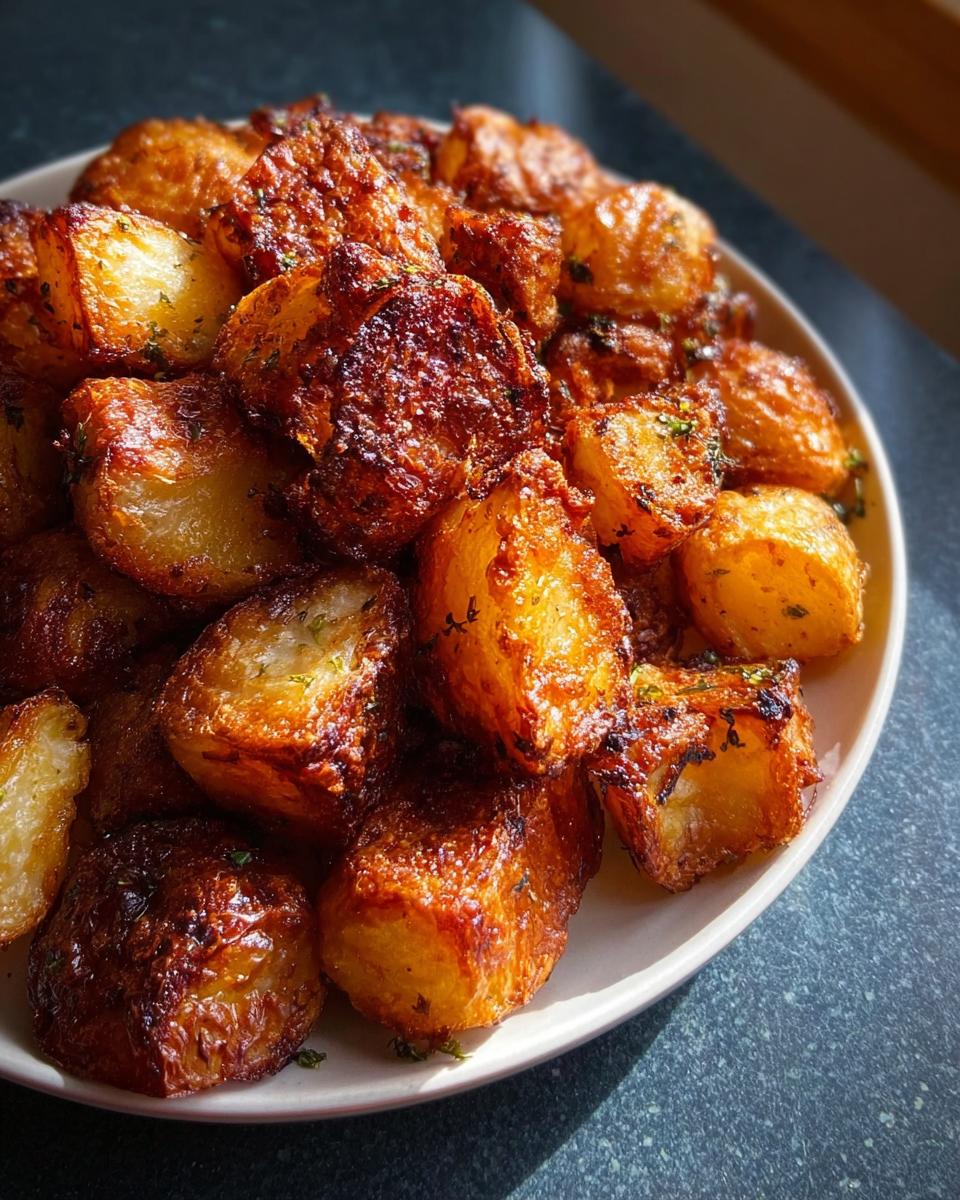
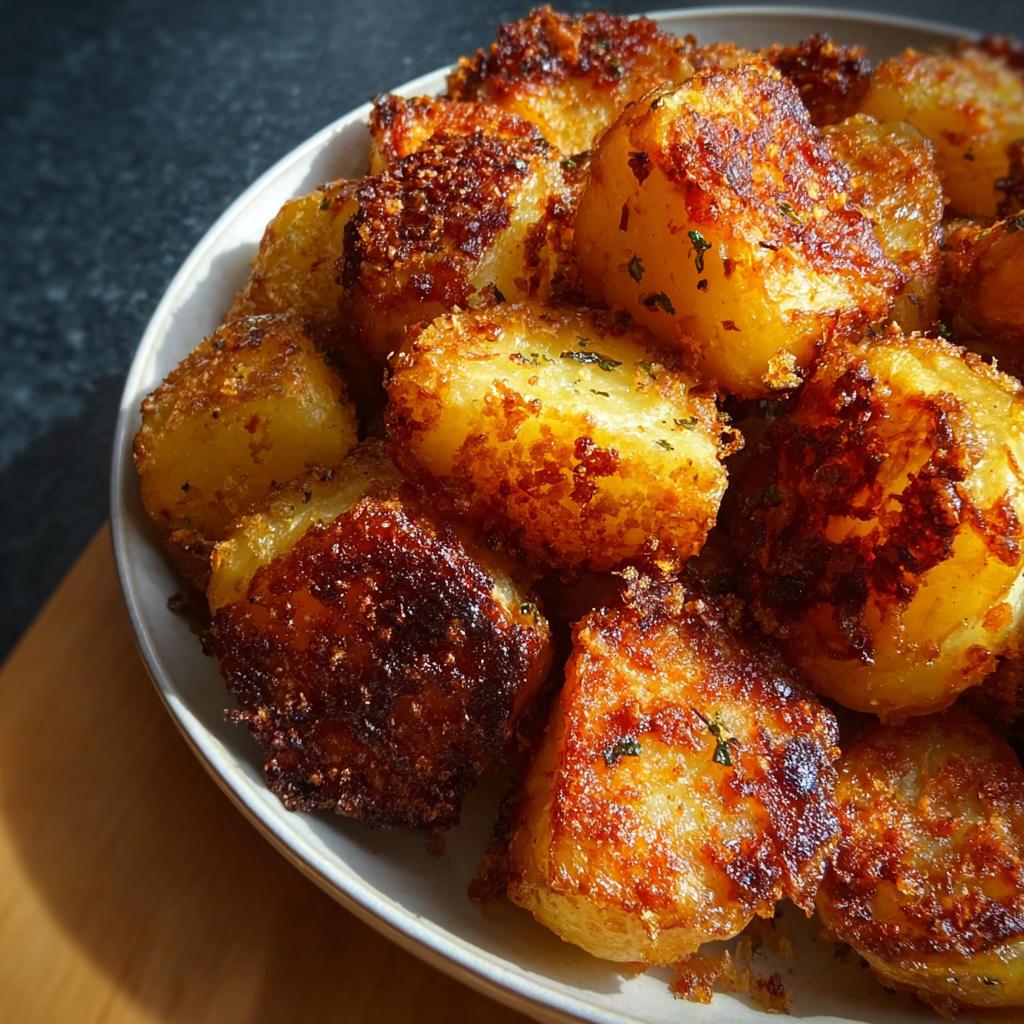
- The texture is unmatched: Seriously shatteringly crisp shell, cloud-like interior.
- This is a true Sheet Pan Side that uses simple ingredients you likely already own.
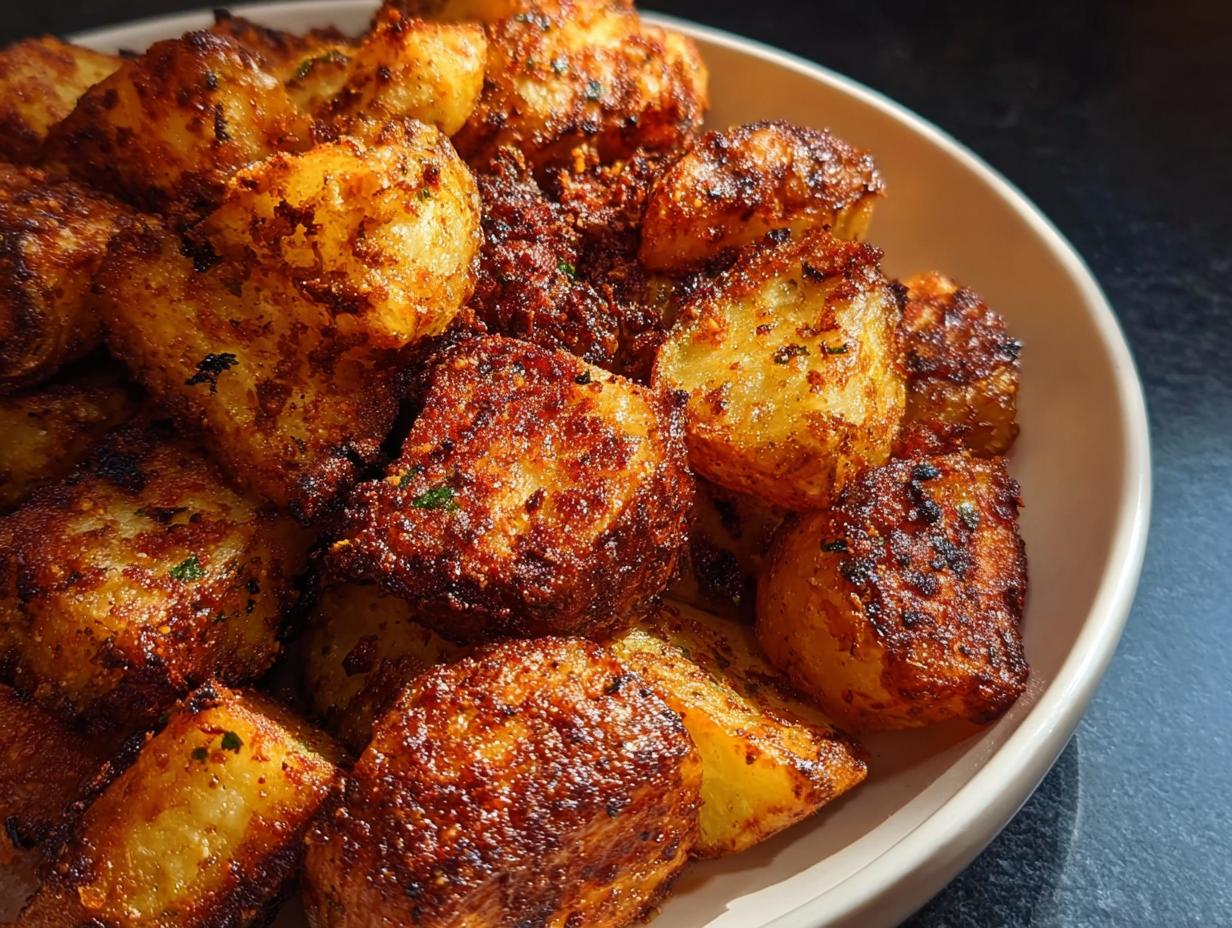
- The flavor payoff is huge—they develop this gorgeous, deep Golden Brown color.
- Using infused oil means you get pops of garlic and rosemary in every bite!
Essential Equipment for Perfect Crispy Roasted Potatoes (Perfect Every Time)
Okay, let’s talk gear for a second. You don’t need fancy gadgets for this, but having the right base tools makes achieving that perfect crisp so much easier. I always lay out my tools before I even start peeling the spuds—it keeps me organized!
The most important item here, besides a good knife, is that baking sheet. Believe me, you need a large rimmed baking sheet. If you crowd the potatoes, they steam instead of roast, which leads right back to soggy territory. We want space! You need plenty of room for them to breathe and brown up.
Here’s the list of what you’ll need to pull this off:
- Large pot: This is for the boiling step where we get those fluffy centers going.
- Large rimmed baking sheet: Seriously, ensure it’s big enough for all the potatoes to fit in a single layer!
- Small saucepan: We use this for quickly infusing our oil with the rosemary and garlic—totally worth the extra pan cleanup!
- Fine-mesh strainer: Essential for cleanly straining out all that garlicky rosemary oil so you can use it later.
Ingredient Breakdown for Crispy Roasted Potatoes (Perfect Every Time)
The ingredient list for these incredible potatoes is surprisingly short, but every single item plays a vital role in getting that amazing texture. My focus, as always, is on quality ingredients that make the final dish taste clean and vibrant. Don’t skip the baking soda, please—it’s the secret ingredient that lets the starches reorganize on the outside of the potato while boiling, leading directly to that fantastic crust!
Let’s look at what you need for the main event:
For Roasting
- Baking soda: You need just 1/2 teaspoon (that’s about 4 grams). This alkaline ingredient is magic for roughing up the edges!
- Potatoes: Grab about 4 pounds of Russet or Yukon Golds. Make sure they get peeled and cut into quarters, sixths, or eighths, depending on how big they are. We want chunky pieces!
- Your Fat Source: You’ll need 5 tablespoons (75 ml) of fat. I love using duck fat if I have it, but EVOO works great too!
- Water Seasoning: 2 tablespoons of kosher salt for the boiling water—don’t be shy here; the potatoes absorb this flavor.
- Aromatics: A small handful of finely chopped fresh rosemary leaves and 3 minced medium cloves of garlic.
- Seasoning: Salt and pepper to taste, used both before and after boiling.
And finally, for that pop of fresh color right at the end before serving:
For Finishing
- A small handful of freshly minced parsley leaves. That bright green dash really makes the golden brown shine!
Mastering the Technique: Instructions for Crispy Roasted Potatoes (Perfect Every Time)
This is where the magic happens, friend! Seriously, follow these steps closely, especially getting that initial oil infusion right, and you’ll be amazed at the results. We’re building flavor right from the start, which is key to any great Sheet Pan Side dish. It might feel like a few extra steps, but trust me, these create the foundation for those perfectly crispy exteriors. If you love the flavor combinations here, you have to check out my favorite garlic and herb roasted potato variation!
Preheat and Prepare the Flavor Infusion
First things first: get your oven screaming hot! Pop that oven rack into the center position and preheat it to 450°F (230°C). If you are using convection, you can actually drop it down a touch to 400°F (200°C). Consistency is everything here.
While that’s heating up, we need to create our flavor base. In a small saucepan, mix your oil (or glorious duck fat!), the chopped rosemary, minced garlic, and just a turn or two of black pepper. Heat this over medium heat. You have to watch it like a hawk! Stir and shake the pan constantly until the garlic just starts smelling fragrant and turns *lightly* golden—about 3 minutes. The second it looks golden, immediately yank it off the heat and strain that beautiful, infused oil through a fine-mesh strainer into a large bowl. Scoop out all those little reserved garlic and rosemary bits and set them aside separately, okay? We need that delicious seasoned oil clean for coating the potatoes later.
The Secret to Fluffy Centers: Boiling and Roughing Up the Crispy Roasted Potatoes (Perfect Every Time)
Now for the main event with the potatoes. Get about 2 quarts (2L) of water boiling hard in a big pot. Once it’s roiling, drop in the 2 tablespoons of kosher salt we saved for boiling and that crucial 1/2 teaspoon of baking soda. Stir, then add your chopped potatoes. Bring the water back up to a boil, then settle it down into a firm simmer. You want to cook these until a knife goes in with very little resistance—about 10 minutes after the rolling boil returns. This softens the insides perfectly!
When they’re tender, drain them really well, okay? Let them sit right there in the drained pot for maybe 30 seconds to let some steam escape; we don’t want excess moisture.
Next comes the roughing up! Pour them into your bowl with the strained, infused oil. Add a little extra salt and pepper here. Now, grab the bowl, put the lid on (or use your hands to cup the opening tightly), and shake, shake, shake! Shake them vigorously until you see a thick, lovely, mashed potato-like paste coat the outsides of those chunks. This rough texture is precisely what turns into that amazing crust later! It’s one of the best Simple Spices secrets I learned.

Roasting for Maximum Crispiness
Transfer those roughed-up potatoes onto your large baking sheet. Make sure they aren’t piled on top of each other; give them space to breathe! Now, slide them into that hot oven and do not touch them for 20 minutes. This lets the bottom crust set up without getting messed around.
After that first 20 minutes, use a thin, flexible metal spatula to gently scrape up anything sticking and then toss them around. Continue roasting for another 30 to 40 minutes. You’ll need to turn and shake them a few times during this last stretch until they hit that deep brown, super crisp exterior. Remember, we’re aiming for maximum crisp, not pale gold! If you love easy cleanup with your sides, check out my tips on making one-pan wonders!

Expert Tips for Truly Crispy Potatoes (Perfect Every Time)
I get so many questions about which potato to use, and honestly, the potato choice makes a huge difference in your final results! Please don’t just grab any bag off the shelf if you’re aiming for that absolute, textbook crispiness. I’ve dug through my notes on potato growing tips and recipe testing over the years to figure out the best picks.
The power here is in the starch content. If you want that super crunchy shell and a center that melts in your mouth like a cloud, you absolutely need to reach for the Russets. Russets have a higher starch content which helps them fluff up beautifully after boiling and creates that wonderful, almost shattered crust when roasted.
Now, Yukon Golds are fantastic too, and I include them often because they have such a naturally buttery flavor. But be warned: Yukon Golds are creamier overall, so they won’t get that razor-sharp crust that Russets achieve. If you use Yukon Golds alone, expect a richer, slightly less aggressively crispy potato. I often use a mix of both! A slight color variation at the end just reminds me of all the experimenting I did.
Let’s talk size, because this is where people often go wrong. You need large chunks! Don’t cut them too small unless you’re planning on roasting them for only 20 minutes. For this recipe, you want those pieces to be substantial—think at least 2 to 3 inches across. For medium Yukon Golds, cutting them in half lengthwise and then halving those pieces again (quarters) is often perfect. If the potatoes are huge, go for sixths or even eighths, but keep them chunky! This size allows the outside to crisp up deeply before the inside overcooks.
Storing and Reheating Your Crispy Roasted Potatoes (Perfect Every Time)
Listen, if you have leftovers—which honestly rarely happens at my house—you need to store them right to keep that beautiful crisp factor alive. Never put hot potatoes straight into a sealed container; let them cool down completely on the counter first. Then, transfer them to an airtight container.
The next day, we aren’t messing around with the microwave! That’s the enemy of crispiness. To revive these beauties, spread them back out on a baking sheet and slip them into a hot oven—say, 400°F—for about 5 to 8 minutes. They’ll come right back to that amazing texture we worked so hard for. It’s the only way to eat leftover Roasted Potatoes and still feel like you’re having a treat!
Frequently Asked Questions About Roasted Potatoes
I get questions every week about these potatoes, so I figured I’d lump the most common ones right here at the end. I want every batch of Crispy Potatoes you make to be an absolute win!
Can I skip the boiling step for these Crispy Roasted Potatoes (Perfect Every Time)?
Oh, please don’t! This is the most common mistake people try to make to save time, but skipping the boil is why your roast yields pale, sad sticks instead of the fluffy interior we are aiming for. The boiling, especially with that dash of baking soda, is what pre-cooks the inside and roughens up the outside starch layer so it transforms into that perfect crust in the oven. It’s non-negotiable for that ultimate texture!
What other fats work best for roasting besides oil or duck fat?
I absolutely adore duck fat, but since it’s not an everyday item for most people, you have great options. Goose fat is amazing and gives a rich flavor, similar to duck fat. If you’re keeping things simpler, even bacon grease will work wonders and add a smoky note! For serious Roasted Potatoes enthusiasts, some people even swear by beef fat or tallow for depth. Just ensure whatever you use is heated first to infuse those lovely herbs, as instructed.
Can I use different herbs besides rosemary and garlic?
You totally can! The rosemary and garlic combo is classic, but this recipe is fantastic for mixing it up. Try infusing your oil with fresh thyme, or maybe even some sage for a wintery flavor. If you’re into heat, skip the herbs entirely for this batch and toss in some smoked paprika and a pinch of cayenne pepper along with the garlic. For more ideas on which spuds to choose when experimenting, check out my guide on potato varieties!
How can I ensure my potatoes stay crispy if I have to wait to put them in the oven?
The enemy of crispiness waiting around is steam! If you have to boil ahead of time, drain them perfectly, let them steam dry for those 30 seconds, and then toss them with the oil *but place them on the baking sheet uncovered in the fridge*. Do not put them in a bowl covered with plastic! Chilling them uncovered allows any surface moisture to evaporate, setting you up for crispy success when you finally blast them in that hot oven.
Share Your Perfect Crispy Roasted Potatoes (Perfect Every Time)
I poured my heart into perfecting this technique for you because I truly believe everyone deserves amazing Crispy Roasted Potatoes (Perfect Every Time) on their dinner table. Now that you’ve conquered the boiling, the roughing up, and the perfect roast, I really want to know how they turned out!
Did you manage to get that shatteringly crisp crust? Did your kitchen smell amazing with that garlic and rosemary fusion? Please let me know in the comments below! Rate the recipe five stars if these have officially kicked your old potato recipe to the curb. And if you snapped a picture of your gorgeous Golden Brown beauties, tag me on social media—I absolutely love celebrating your kitchen wins!

By EMILIA, the founder of MeltItClean.com – your digital space for natural weight loss, real wellness habits, and clean-living inspiration that actually fits your life.
For years, I struggled with the ups and downs of dieting. I tried everything — juice cleanses, low-carb crazes, fitness challenges — but I always ended up back where I started: tired, bloated, and frustrated. I didn’t just want to “lose weight” — I wanted energy, mental clarity, glowing skin, and confidence without sacrificing my joy or sanity.
After years of experimenting, learning, and unlearning, I discovered a simple truth: your body is already powerful — it just needs support, not restriction. That’s when I created Melt It Clean — a site dedicated to real transformation through clean, intentional, and nourishing daily habits that anyone can follow. My goal was simple: build a place where people could feel informed, supported, and empowered without being overwhelmed by wellness fads. You can read more about my clean-living philosophy on my ‘About Me’ page!
Crispy Roasted Potatoes (Perfect Every Time)
Ingredients
Equipment
Method
- Adjust the oven rack to the center position and preheat your oven to 450°F (230°C) or 400°F (200°C) if you are using convection.
- Heat 2 quarts (2L) of water in a large pot over high heat until it boils. Add 2 tablespoons of kosher salt, the baking soda, and the potatoes. Stir them together. Return the water to a boil, then reduce the heat to a simmer. Cook until a knife meets little resistance when you insert it into a potato chunk, about 10 minutes after the water returns to a boil.
- While the potatoes cook, combine the oil (or fat), rosemary, garlic, and a few grinds of black pepper in a small saucepan. Heat this mixture over medium heat. Stir and shake the pan constantly until the garlic just begins to turn golden, about 3 minutes. Immediately strain the oil through a fine-mesh strainer set into a large bowl. Set the reserved garlic and rosemary mixture aside separately.
- When the potatoes are cooked, drain them carefully and let them rest in the pot for about 30 seconds to let excess moisture evaporate. Transfer the potatoes to the bowl with the infused oil. Season them to taste with a little more salt and pepper. Toss the potatoes, shaking the bowl roughly, until a thick layer of mashed potato-like paste has built up on the potato chunks.
- Transfer the roughed-up potatoes to a large rimmed baking sheet and separate them, spreading them out evenly. Place the sheet in the oven and roast without moving for 20 minutes.
- Use a thin, flexible metal spatula to release any potatoes that stick. Shake the pan and turn the potatoes. Continue roasting until the potatoes are deep brown and crisp all over, turning and shaking them a few times during this cooking period, which should take 30 to 40 minutes longer.
- Transfer the potatoes to a large bowl. Add the reserved garlic/rosemary mixture and the minced parsley. Toss to coat and season with more salt and pepper to taste. Serve immediately.


