Oh, Thanksgiving weeknights. The house is a whirlwind of activity, right? Between the grocery runs, the table setting, and trying to remember where you put that ancient turkey baster, the last thing you want is to be stressed about dessert. I swear, one year I was up way too late trying to whip up a pie crust while also fielding calls about Aunt Carol’s dietary needs. It was chaos! That’s exactly why I fell head over heels for this idea of Thanksgiving Desserts for Busy Weeknights (Meal-Prep Friendly). These little gems came to my rescue and honestly, they’re so darn easy and delicious, you’ll wonder why you ever bothered with the last-minute panic. Trust me, having something sweet ready to go makes all the difference.
Why You’ll Love These Thanksgiving Desserts for Busy Weeknights (Meal-Prep Friendly)
Seriously, who has time for fuss during Thanksgiving week? These little treats are a lifesaver because they are:
- Super Speedy: You can have them mixed and in the oven in about 15 minutes!
- Effortlessly Easy: No fancy techniques needed, just mix and bake.
- Make-Ahead Masters: Bake them a few days BEFORE the big day and just grab and serve.
- Deliciously Festive: They taste like pure holiday magic, perfect for any Thanksgiving table.
Gather Your Ingredients for Thanksgiving Desserts for Busy Weeknights (Meal-Prep Friendly)
Alright, let’s get our kitchen ready! You’ll need just a few simple things for these amazing cookies. I always like to pull my butter out a little ahead of time so it’s perfectly softened – you know, soft enough to dent with your finger but not melted and greasy!
Here’s what you’ll need to have on hand:
- 1 cup all-purpose flour
- 1/2 teaspoon baking soda
- 1/4 teaspoon salt
- 1/2 cup unsalted butter, softened
- 1/2 cup granulated sugar
- 1/4 cup packed brown sugar
- 1 large egg
- 1 teaspoon vanilla extract
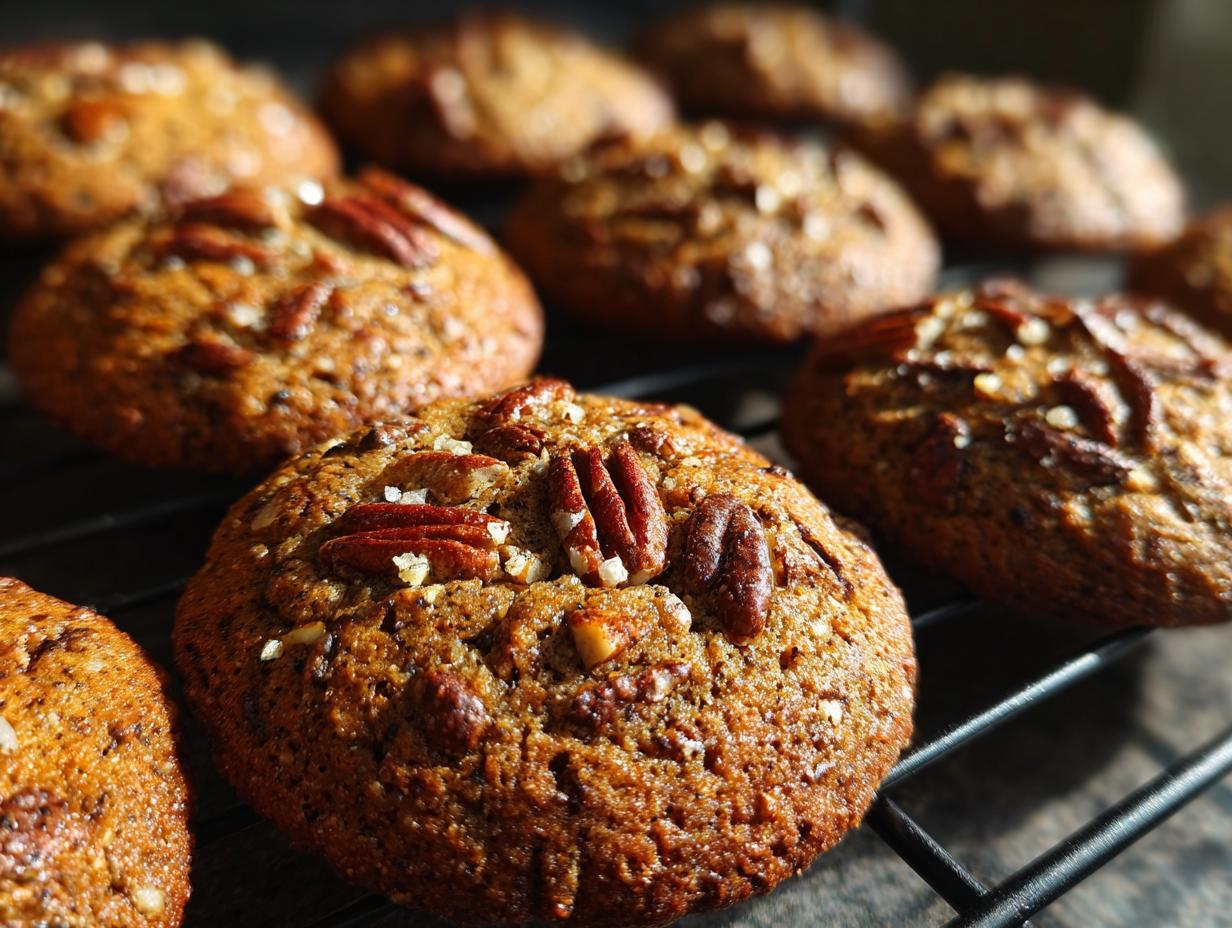
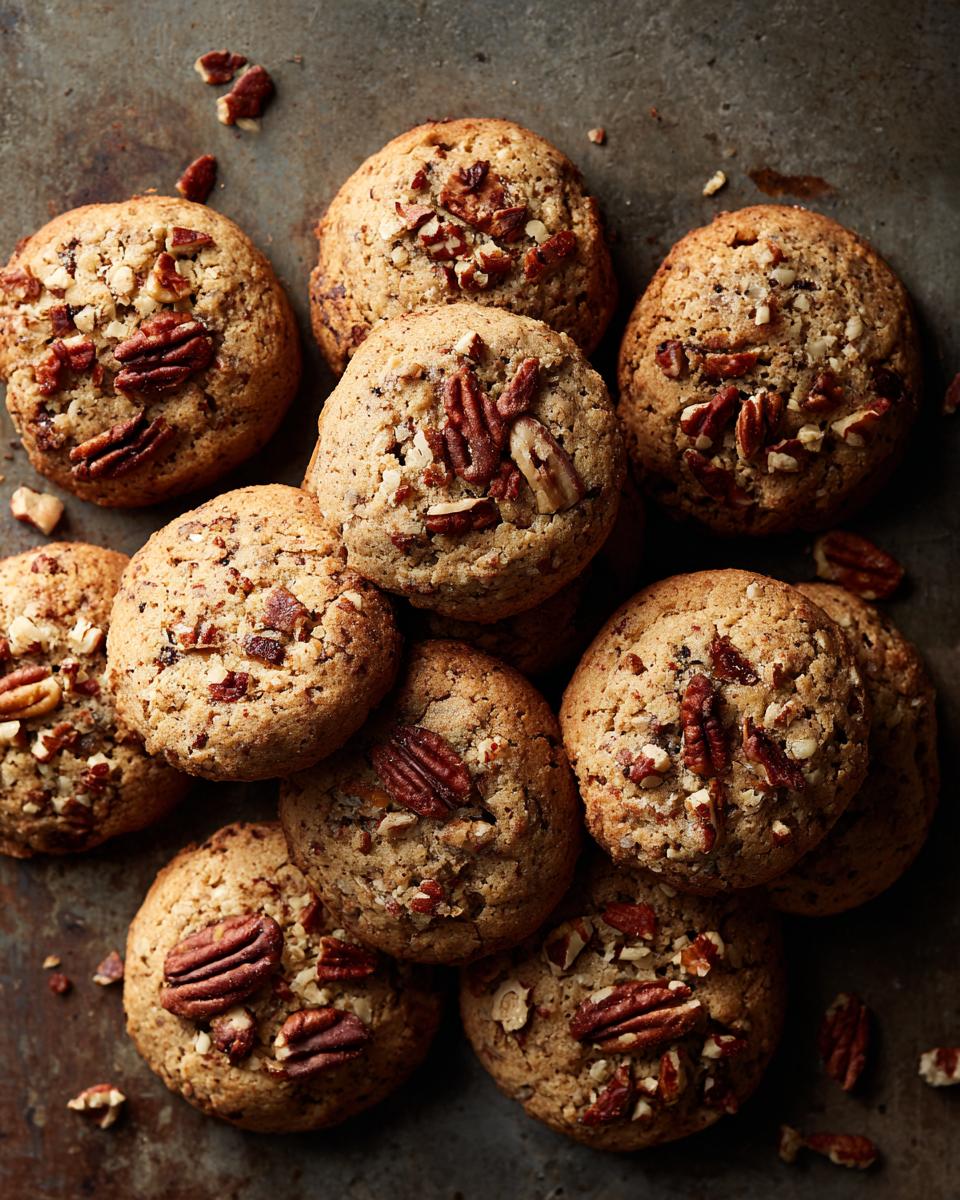
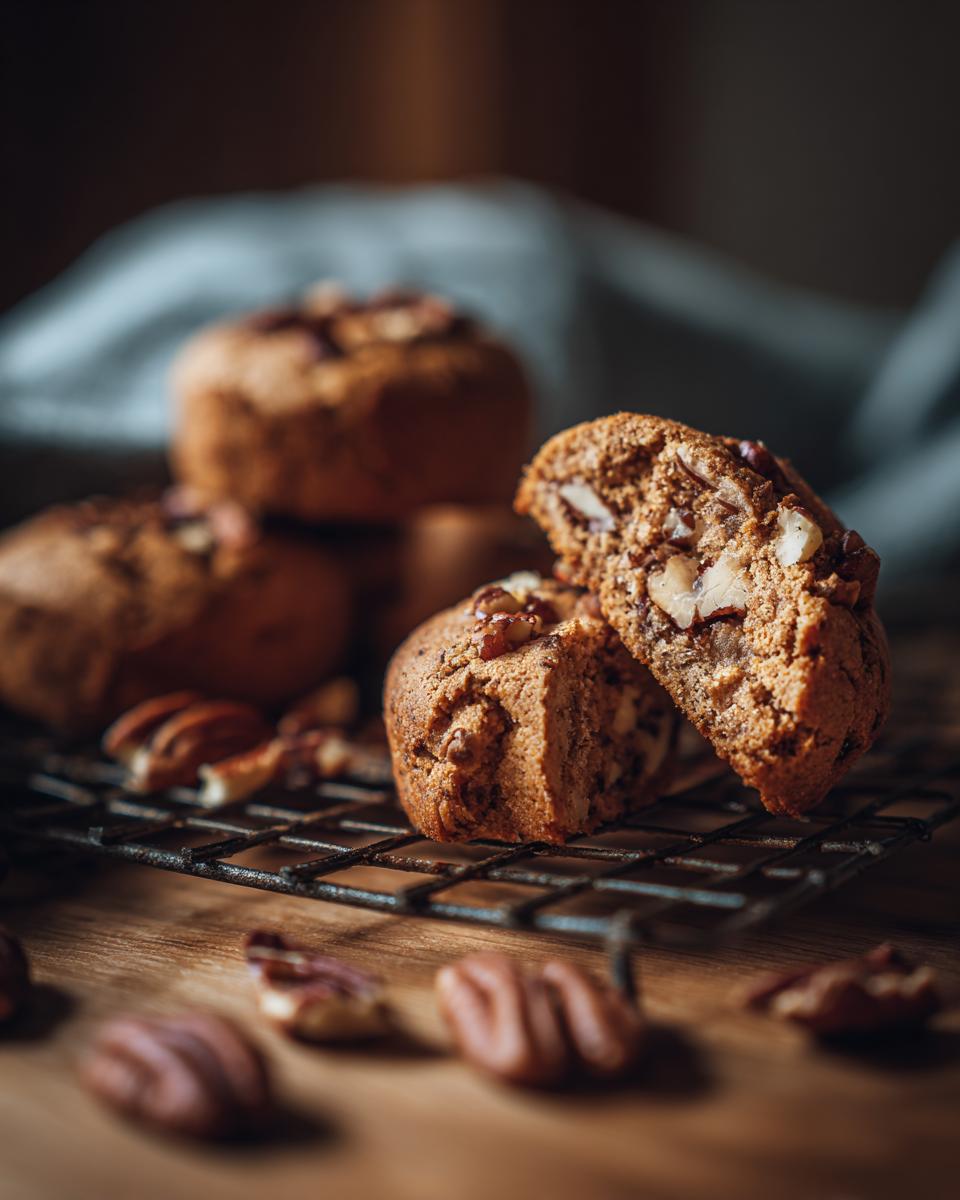
- 1 cup chopped pecans or walnuts (if you’re feeling nutty!)

Step-by-Step Guide to Making Thanksgiving Desserts for Busy Weeknights (Meal-Prep Friendly)
Okay, let’s get these amazing cookies into your oven! It’s honestly so simple, you’ll have them ready in no time. I always like to get everything prepped first, so I can just go, go, go. It makes the whole process feel like a breeze! If you’re looking for more make-ahead magic, you might want to check out these blender pumpkin waffles – they’re a holiday game-changer too!
Preheating and Preparation
First things first, crank that oven up to 350°F (that’s 175°C). While it’s heating, grab your baking sheets and line them with parchment paper. Trust me, this makes cleanup so much easier – no scrubbing stuck-on bits later!
Combining Dry Ingredients
In a medium bowl, just whisk together your flour, baking soda, and salt. Give it a little swirl until everything’s nicely combined. Easy peasy!
Creaming Butter and Sugars
Now for the magic! In a bigger bowl, take that softened butter and both the granulated and brown sugars. Beat them together until it looks light and fluffy, almost like a light yellow cloud. This step is crucial for getting that perfect cookie texture, so don’t rush it!
Adding Wet Ingredients
Next, beat in your egg and that splash of vanilla extract until it’s all smooth and blended. Make sure it’s all incorporated well before moving on to the next step.
Combining Wet and Dry Mixtures
Here’s where it all comes together! Gradually add the dry stuff to your wet mixture. Mix it until it’s *just* combined – seriously, don’t overmix! Overmixing can make cookies tough, and nobody wants that. If you’re using nuts, now’s the time to gently stir them in until they’re nicely distributed.
Shaping and Baking
Grab a spoon, scoop out about a tablespoon of dough for each cookie, and drop them onto your prepared baking sheets. Leave about two inches between them so they have room to spread. Pop them into the oven for about 10-12 minutes. You’re looking for the edges to be nicely golden brown.

Cooling and Storing
Once they’re out, let them hang out on the baking sheets for a couple of minutes – it helps them firm up. Then, carefully transfer them to a wire rack to cool completely. Once they’re totally cool, you can pop them into an airtight container. That’s it! So simple, right? I love that I can just whip these up on a Sunday and have delicious desserts ready for any weeknight craving that pops up. You might even find them useful for when unexpected guests drop by!
Tips for Perfect Thanksgiving Desserts for Busy Weeknights (Meal-Prep Friendly)
Okay, so you’ve got the basic idea, but let’s talk about how to make these little guys absolutely *perfect* every single time. I’ve learned a few tricks along the way, and honestly, they make a huge difference. Forget any worries about them turning out dry or bland – these tips will ensure they’re just right!
First off, that butter temperature is key. Make sure it’s *truly* softened, but not melty. If it’s too cold, you won’t get that light, fluffy texture when you cream it with the sugar, and your cookies might be a bit dense. On the other hand, if it’s melted, they’ll spread way too much and can get greasy. I usually pull mine out of the fridge about an hour before I plan to start mixing. It’s the sweet spot!
Also, don’t overmix after you add the flour! I know I mentioned it in the steps, but it bears repeating. Seriously, just mix until you don’t see any dry streaks of flour. Overmixing develops the gluten too much, and you’ll end up with tough cookies instead of chewy, delightful ones. It’s like when you’re making banana oatmeal muffins – you want them tender! A little gentle stirring goes a long, long way.
And for a little extra holiday flair, don’t be afraid to add a pinch of cinnamon or nutmeg to the dry ingredients. It just gives them that extra cozy hug that screams Thanksgiving. It’s a small thing, but it really elevates the flavor profile and makes them feel extra special for the season!
Ingredient Notes and Substitutions
So, about these ingredients – they’re pretty straightforward, but there are a couple of things worth chatting about. The butter is a big one; like I said, make sure it’s softened but not melty. If you forget to take it out, you can *very carefully* microwave it for just a few seconds, like, literally 5-second bursts, checking each time. But honest-to-goodness softened is best!
And for the nuts? Pecans or walnuts are awesome, but you can totally skip them if you have nut allergies or just don’t have them on hand. The cookies are still fantastic without them! If you want to try a variation, maybe some mini chocolate chips or dried cranberries could be fun additions in place of the nuts. Just a cup or so stirred in with the nuts would be perfect.
If you ever need to swap out the egg, sadly, this recipe isn’t the best candidate for a flax egg or commercial egg replacer because it’s a bit delicate and relies on those specific binding properties. It’s one of those times where sticking to the original is really your best bet for that perfect cookie texture.
Make-Ahead and Storage Instructions
This is where the “meal-prep friendly” magic really shines! The best part about these cookies is that you can totally get ahead of the game. I usually bake them up to 3 days in advance. Just let them cool completely, then pop them into an airtight container. They’ll stay perfectly fresh and delicious, ready for you whenever you need a little something sweet. Honestly, sometimes they disappear before Thanksgiving even gets here because they’re just too good!
If you need to stash them even longer, you can totally freeze them! Once they’re cooled, arrange them in a single layer on a baking sheet and freeze until solid. Then, transfer them to a freezer-safe bag or container. They’ll keep for a good month or so. When you’re ready for a cookie, just let them thaw at room temperature. It’s like having a little bit of Thanksgiving cheer ready to go anytime. Looking for more make-ahead ideas? These banana oatmeal muffins are another fantastic option to prep ahead for busy weeks!
Frequently Asked Questions About Thanksgiving Desserts for Busy Weeknights (Meal-Prep Friendly)
Got questions about these super handy holiday treats? I’ve got answers! These are the things I get asked most, especially when people are trying to get ahead of the game for Thanksgiving.
Can I make these Thanksgiving desserts even faster?
Absolutely! Try measuring out your dry ingredients the night before, or even a week ahead, and storing them in a little baggie. You can also have your softened butter and egg ready to go. It shaves off precious minutes when you’re in a rush!
How do I store these desserts if I don’t eat them all at once?
Just pop them into an airtight container at room temperature! They stay delicious for about 3 days. This is why they’re the perfect make-ahead dessert. You can find more diet recipes for storing make-ahead goodies over here!
Are there any variations for different tastes?
Definitely! While the nuts are great, you could totally swap them for mini chocolate chips or some dried cranberries for a different flavor. A little pinch of cinnamon or nutmeg in the dough also gives them an extra cozy, festive kick!
Can these be made gluten-free?
Making these gluten-free can be a little tricky because of the flour structure. While you *could* try a good quality gluten-free all-purpose flour blend, the texture might change a bit. It’s not my go-to adaptation for this particular recipe, but let me know if you experiment!
Estimated Nutritional Information
Just a heads-up, the numbers below are just estimates, okay? They can totally change depending on the brands you use and exactly how big you make those cookies. But generally, you’re looking at around 150 calories per cookie, with about 9g of fat and 10g of sugar. They’ve got a little bit of protein and carbs too. For more healthy recipe ideas, this is a great spot to check out!
Share Your Thanksgiving Desserts for Busy Weeknights (Meal-Prep Friendly) Creations!
I’d absolutely LOVE to hear how your Thanksgiving cookies turned out! Did you make them ahead of time? Did you add any fun twists? Please share your experience in the comments below, or even better, rate the recipe! If you snap any pics, tag me – I can’t wait to see your delicious creations making your busy weeknights so much sweeter! If you have any questions at all, feel free to reach out via my contact page too!