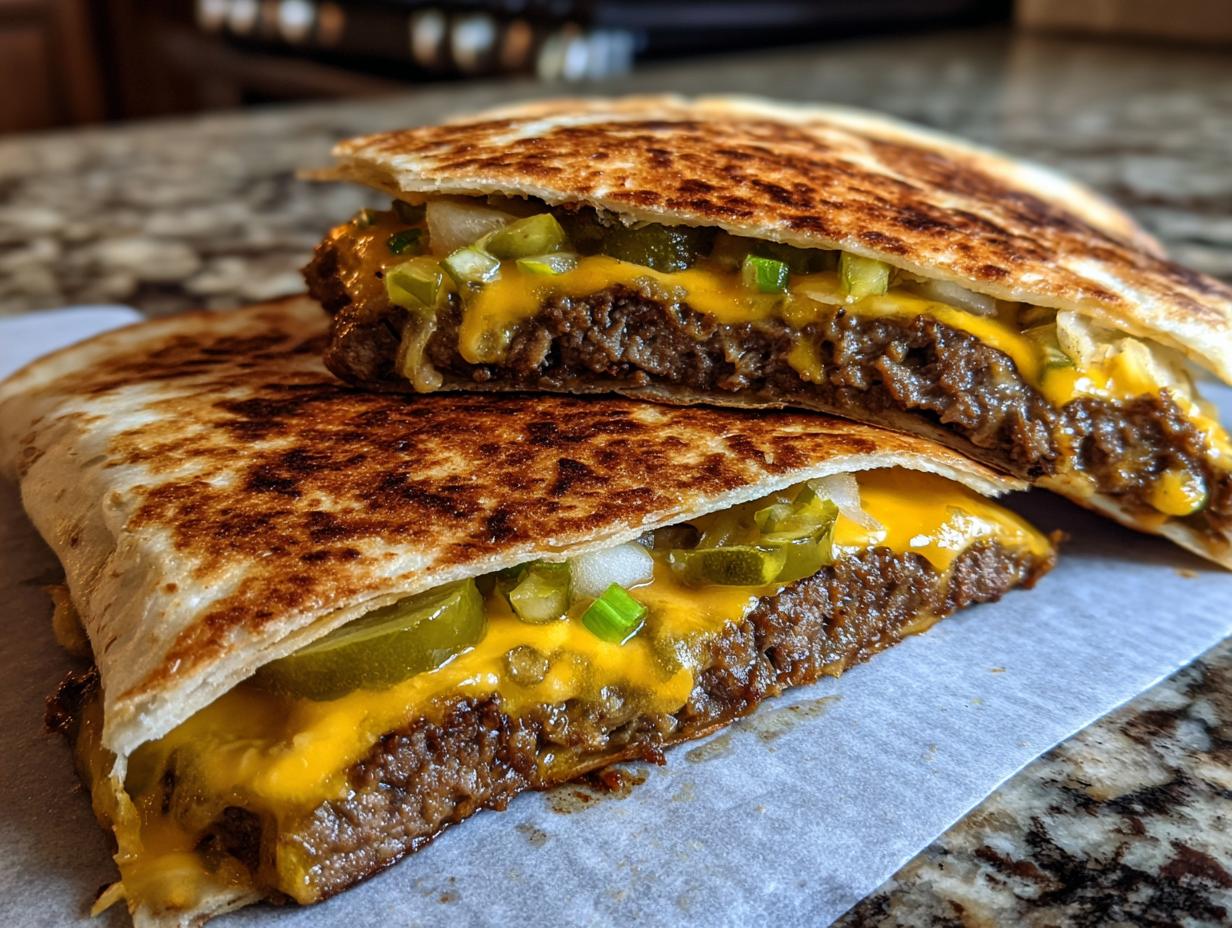
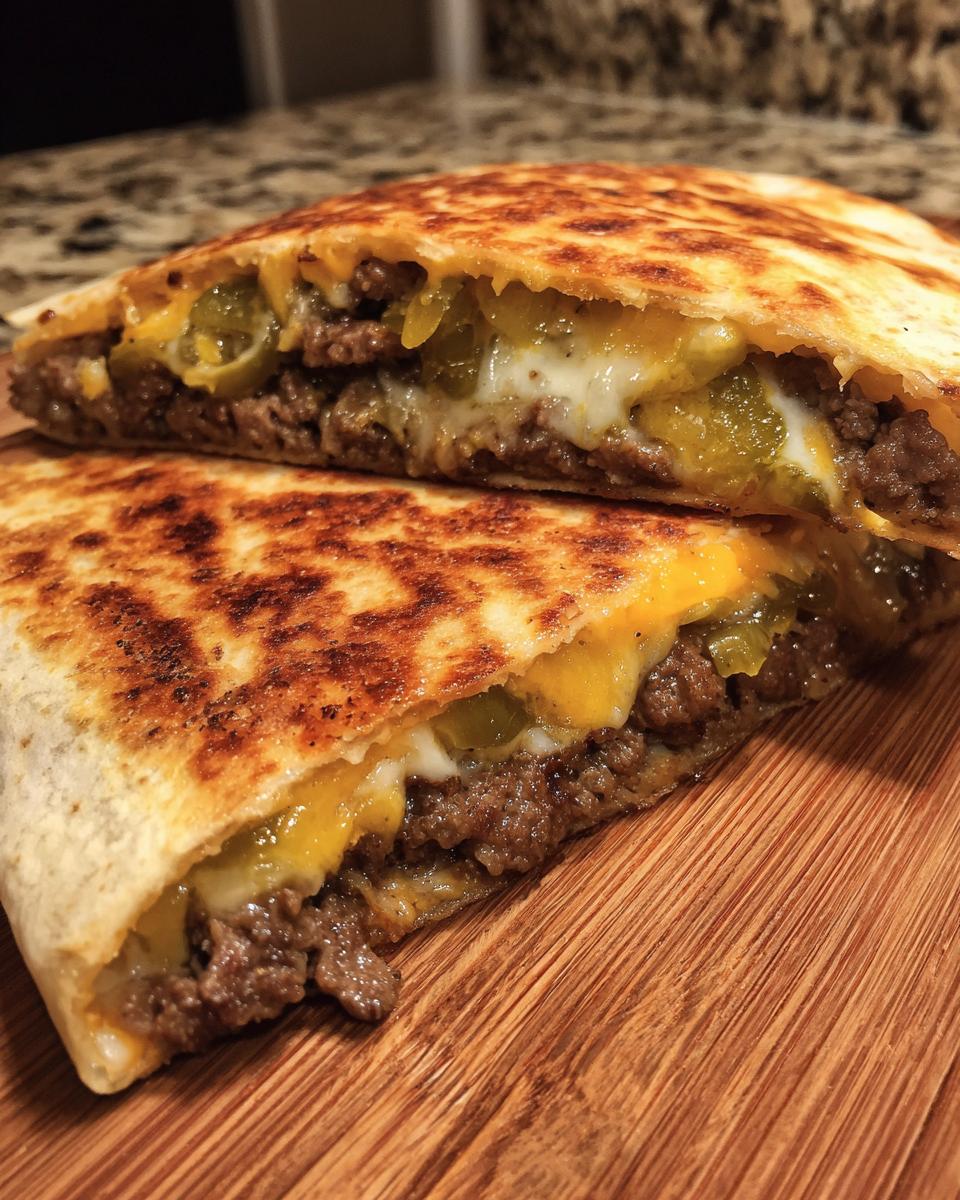
Okay, I have to tell you about the absolute chaos-slayer I invented last week: Smashburger Quesadillas. Seriously, you know those nights where you want the greasy, comforting flavor of a perfectly seared burger but you just don’t have the time to grill or load up on buns and toppings? I was there, staring into the fridge, and this concept just clicked. Why choose between two perfect comfort foods when you can mash them together?
This recipe is pure Mini kitchen magic. In under 25 minutes, you get that deeply caramelized crust from smashing the beef, locked in with gooey cheese, all tucked inside a crispy tortilla shell. It’s genius, I swear. I only used ingredients I always have on hand, proving once again that the best flavor combinations are often the simplest ones we already know and love. Trust me; this saves dinner when you’re running on fumes.

Why You Will Love These Smashburger Quesadillas – Mini kitchen magic
I know, I know—another twist on a classic. But honestly, this one just hits different. When I first tested this creation, my kids went totally silent, which is usually a good sign that something truly special happened in the pan. Here’s why you absolutely need to try these Smashburger Quesadillas this week:
- Insanely Fast: We’re talking 25 minutes total time! That’s faster than a drive-thru run, truly. You can whip these up right after work, which is why I consider them ultimate Mini kitchen magic. See my guide on quick meals here: quick dinner recipes.
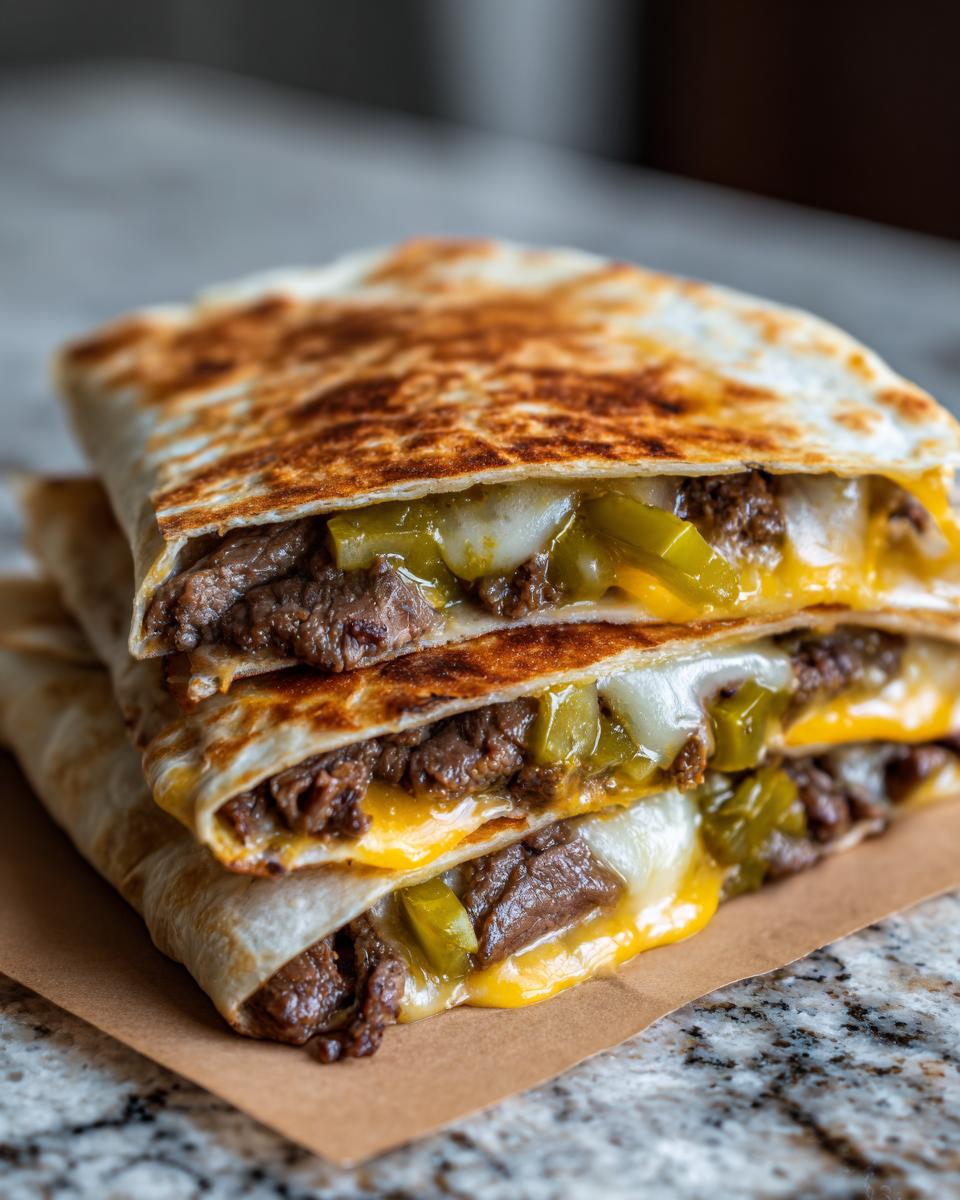
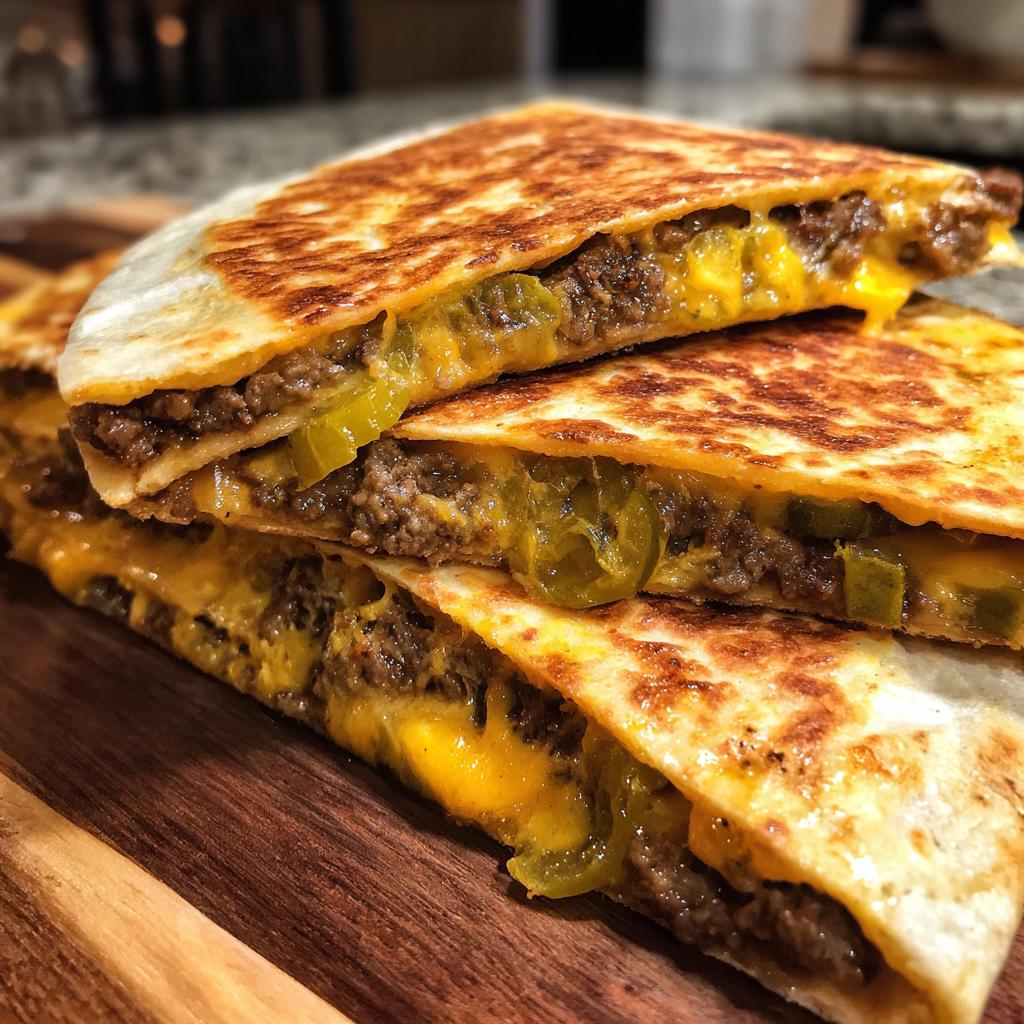
- Flavor Explosion: We aren’t messing around with fancy toppings here. We are locking in that classic burger flavor—tangy pickle, sharp mustard, and sweet ketchup—directly into the cheesy tortilla. It tastes exactly like your favorite burger joint, only crispy!
- Perfect Portion Control: Since we’re using small tortillas and making individual patties, these are naturally portioned. They are mini, satisfying, and easy to hold. No giant plate of food stress here.
- Minimal Cleanup, Maximum Impact: Since the smashing happens right on the griddle and the assembly is quick, you are mostly just washing one large skillet or griddle. Huge win over dealing with pots and pans.
- The Crust, Oh My Goodness: The buttered tortilla gets so golden brown and crisp against the meat. That crunch combined with the gooey cheese and seasoned beef? It’s textural perfection that a standard hamburger bun could never compete with.
Essential Equipment for Perfect Smashburger Quesadillas
You don’t need a million fancy things for this recipe to work its magic. I deliberately kept the equipment list short because I want you to make these even when you’re exhausted and there’s dish soap low. Sometimes, the best food comes from focusing on just one or two high-quality cooking steps, and that starts with having the right surface to work on.
Key Tools for Making Smashburger Quesadillas
For these Smashburger Quesadillas, we need precision in both smashing and folding. Don’t skip these simple items; they make the difference between a loosely packed tortilla and a masterpiece.
- Large skillet or griddle: This is non-negotiable! You need a large, flat surface—a cast-iron skillet is my absolute favorite here because it holds heat perfectly, which is what gives you that incredible crust when you smash the meat. If you have a flat top griddle, use that!
- Sturdy Spatula: You’ll need something strong to scoop up those delicate smashed patties after flipping them, and you definitely need it to press the meat down initially. Don’t try this with a flimsy plastic flipper; it will just tear the beef apart.
- Small Bowl: We just need this for mixing our simple burger seasonings together before we hit the heat. Very straightforward stuff.
Now for my little secret here, building on that great piece of equipment. If you absolutely do not have a dedicated burger press—and honestly, who has time to store those things?—you need something flat and heavy for the smash. I grab the bottom of a small, heavy saucepan, or even a small, flat meat tenderizer tool, placing it between a piece of parchment paper and the patty. It has to be flat! You want direct, strong pressure to get that thin layer of caramelized beef. That intense contact with the hot metal is what pulls the burger flavor into the whole quesadilla experience.
Gathering Ingredients for Your Smashburger Quesadillas – Mini kitchen magic
Okay, getting organized is half the battle when you’re whipping up something this fast. I laid everything out on the counter before I even turned the stove on—that’s my golden rule for any quick recipe! Since these Smashburger Quesadillas use classic burger components, you probably have most of this stuff already stashed away. It’s shockingly simple, but the details are what make this Mini kitchen magic really shine.
When you gather your items, take a peek at my tips for making weeknight ground beef recipes easier; you can find some great prep ideas here: ground beef recipes for busy weeknights. It makes the process even smoother!
For the Burger Filling Components
This is where the flavor base comes from. We need standard burger stuff, but trust me on the fat content here!
- Ground Beef: You need one full pound. I will always, always tell you to use 80/20 ground beef. If you go too lean, it dries out instantly when you smash it thin, and we want that rich flavor from the rendered fat, which helps crisp up the crust. Seriously, don’t skimp here!
- Seasoning: Keep it simple: one teaspoon of salt and half a teaspoon of black pepper. We season the meat *before* it hits the hot pan.
- Cheese: Four slices is what the recipe calls for, one for each of our final four quesadillas. I specified American cheese because, honestly, nothing melts quite like it for that beautiful, gooey pull. But if you prefer cheddar, go for it—just know it might be slightly less stretchy.
For Assembly of the Smashburger Quesadillas
This is the fun part where we turn meat and cheese into handheld deliciousness. Pay close attention to the pickle size—texture matters!
- Flour Tortillas: Grab eight small ones. I mean those 6-inch street-taco sized ones, not the giant burrito ones. We are making compact, happy little pockets of joy here, not giant folded messy plates.
- Dill Pickle Chips: This requires a little prep! You need a quarter cup, but make sure they are finely chopped. We want the zing of the pickle throughout the quesadilla, not one giant slice ruining the crisp layer.
- The Sauces: Two tablespoons each of classic yellow mustard and ketchup. These are the bright flavors that mimic that amazing burger truck sauce.
- Melted Butter: Just one tablespoon, melted, for brushing the outside of the tortillas. This is what guarantees that beautiful golden-brown, crispy exterior on your Smashburger Quesadillas.
Pro Tip: Before you start cooking, take a minute to mix that chopped pickle, mustard, and ketchup together in that little bowl I mentioned earlier. It creates a super-tasty, cohesive sauce that spreads so much more evenly than dolloping everything on separately!
Step-by-Step Instructions for Your Smashburger Quesadillas
Alright, once your ingredients are all prepped—and I hope you mixed those condiments like I suggested!—it’s time for the real action. We have two main phases here: getting that amazing, crispy burger crust and then locking it all into the quesadilla magic. Follow these steps closely, especially when handling the beef, because smashing is a technique!
If you need a refresher on how to handle ground beef perfectly to avoid tough results, check out my fool-proof guide here: foolproof ground beef handling. Now, let’s get cooking!
Preparing and Cooking the Smashed Patties
This is where the “Smashburger” part of our Smashburger Quesadillas comes alive. Remember, we are making eight teeny-tiny patties because we are sandwiching two into each quesadilla.
- First, take that pound of beef and gently divide it into eight equal portions. Don’t overwork it; just pinch off the portions. Season them lightly on both sides with your salt and pepper mixture.
- Get your big skillet or griddle heating up over medium-high heat. You want it hot, but not so blazing that the meat burns instantly.
- Toss two seasoned portions onto that hot metal. Now, immediately grab your sturdy spatula or press and go to town! You have to press them down hard and fast until they are super thin—like almost paper-thin. This squeezes out the fat and creates that gorgeous, deep brown crust.
- Let those patties cook—you need about 2 minutes on this first side. It cooks fast because it’s so thin!
- Flip them over gently. Put that slice of cheese right on top of each one. Cook for just one more minute until the cheese is totally melted and gooey. The beef should be done by now, especially since they are so thin.
- Carefully take those cheesy, crusted little patties off the heat and set them aside while we build the tortilla base.
Assembling and Grilling the Smashburger Quesadillas
Now we turn these burger components into something portable and cheesy! Make sure your skillet isn’t smoking hot anymore; we want medium heat for this assembly part so the tortillas crisp up without burning before the cheese inside melts.
- Give your skillet a quick wipe if there’s a ton of burnt bits stuck on, otherwise, just leave the residual heat. Brush one side of all eight tortillas with that melted butter.
- Place four of those tortillas, butter-side down, onto your medium-heated skillet.
- Now we layer! On each of those four tortillas, spoon a little bit of your pre-mixed pickle/ketchup/mustard sauce. You don’t need much for flavor.
- Layer one of your cooked, cheesy burger patties directly on top of the sauce on each tortilla.
- Take your remaining four tortillas and place them on top, making sure the butter-side is facing up. You’ve basically made four giant, un-grilled sandwiches now.
- Cook these beauties for about 2 to 3 minutes. You are waiting for that bottom tortilla to get beautifully golden brown and crispy.
- Use your strong spatula to carefully flip the entire thing—yes, the whole sandwich! Cook the second side for another 2 to 3 minutes until it matches the first side in color and the cheese inside is absolutely oozing. That’s what seals the deal for perfect Smashburger Quesadillas.
- Once they are done, slide them onto a cutting board. Let them rest for just a minute—this helps the cheese set slightly—then slice each quesadilla in half. Serve them right away while they are scorching hot!
Expert Tips for Next-Level Smashburger Quesadillas
I always say that the recipe is just the blueprint; the real magic happens when you start trusting your instincts in the kitchen. These Smashburger Quesadillas are simple, but a few small tweaks can make them taste like they came from a famous diner. I’ve learned a lot about thin patties and crispy tortilla crusts over the years, and I want to share my favorite little hacks with you so your results are consistently amazing.
I really hope you checked out my thoughts on what makes the best easy dinners; sometimes those little insights are the difference between a good meal and a legendary one. You can find more inspiration about perfecting simple recipes right here: what makes perfect easy dinner recipes.
First up, let’s talk about maximizing flavor:
- Make It a Single Sauce: I mentioned this briefly, but I’m going to hammer it home because it’s worth the 30 seconds of extra work. Don’t just drizzle the ketchup, mustard, and pickles separately. Mix that quarter cup of finely chopped pickles with the 2 tablespoons each of ketchup and mustard in your small bowl. When you spread this unified sauce onto the tortilla before topping it with the patty, you get an even distribution of tang and sweetness in every single bite. It stops the sandwich from being squishy in one spot and dry in another. Perfection!
- Butter Control for The Crust: When brushing the outside of your tortillas with melted butter, you want coverage, not drowning. If you use too much butter, the tortillas will soak it up and end up floppy instead of crispy. You want just enough to lightly glisten the entire surface. Think of it like painting the tortilla; you want a thin, even coat. This ensures the tortilla crisps up beautifully on the griddle, catching that wonderful, smoky flavor from the beef drippings underneath it.
- The Double-Patty Secret: The recipe calls for making 8 thin patties to stack two per quesadilla, and please stick to that! If you try to smash one giant (quarter-pound) patty thinly enough to fit comfortably inside a 6-inch tortilla, you’ll just end up with a massive, slightly uneven disc that flops out the sides. Using two thinner, perfectly round patties ensures evenness and great cheese distribution around the edges when they melt together.
Trust me on these little details. They take zero extra time but make these Smashburger Quesadillas feel like a gourmet, carefully constructed meal, even though they are pure weeknight speed!
Storage and Reheating Tips for Leftover Smashburger Quesadillas – Mini kitchen magic
Okay, so you managed to have leftovers? Wow! That’s rare around my house because these Smashburger Quesadillas tend to disappear instantly, but if you do happen to have some extra portions floating around, storing and reheating them correctly is crucial. We do *not* want sad, soggy quesadillas the next day. The goal is to bring back that crispy tortilla shell we worked so hard to achieve!
When it comes to storing these little morsels of Mini kitchen magic, make sure they are completely cooled down before you try to seal them up. Putting warm food into an airtight container traps condensation, and condensation is the enemy of crispy food!
- Container Choice: Wrap each quesadilla tightly in plastic wrap first, then tuck them into a heavy-duty zip-top bag or an airtight container. This double-layer protection prevents the cardboardy taste of the fridge from getting into your beef and keeps the tortillas from absorbing odors. They should last happily in the fridge for about three days.
Now, the reheating part—this is where most people go wrong. If you toss these into the microwave, you are essentially steaming them, and you’ll end up with a chewy, unpleasant texture. We need heat that focuses on the outside to crisp it up again.
The Skillet Method (Highly Recommended)
This is my preferred way because it mimics the original cooking process. Grab that same big skillet or griddle you used before. You don’t even need much butter, maybe just a tiny scrape, or none at all if you’re feeling healthy! Heat the pan over medium heat. Place the quesadilla down and press gently with your spatula for about 2 to 3 minutes per side. This re-crisps the tortilla beautifully while gently melting the cheese inside again. Ah, instant fresh flavor, right?
Oven or Air Fryer Quick Fix
If you have a batch, the oven or air fryer is faster than standing over the skillet for multiple rounds. Preheat your oven to 350°F (or set your air fryer to that temperature). Place the slightly cooled Smashburger Quesadillas directly on the rack or in the basket. Heat for about 6 to 8 minutes. This warms them evenly and dries out the exterior just enough to regain some crispness. You might lose a tiny bit of the initial fresh-off-the-griddle crunch, but it’s miles better than the microwave!
See? Even reheated, these little flavor bombs are totally worth it. Enjoy your quick lunch tomorrow!
Serving Suggestions for Your Mini kitchen magic Smashburger Quesadillas
So, you’ve mastered the art of the Smashburger Quesadillas, and they are coming off the griddle picture-perfect. What now? While these little flavor bombs are totally satisfying all on their own, sometimes you want to turn them into a full dinner spread, right? I love keeping the sides simple because, let’s be honest, the quesadilla is the star of the show!
Since these are already packed with beef, cheese, and all those tangy burger fixings, you don’t want to weigh things down with heavy starches. To maximize that feeling of delicious Mini kitchen magic, I lean toward sides that give you a nice crunch or a fresh, clean contrast.
If you are looking for something green to balance out the richness, I highly recommend my method for Roasted Asparagus with Parmesan—it’s bright and salty! But here are my go-to pairings when I’m making these tiny titans:
- The Classic Fry Upgrade: Forget the soggy drive-thru fries! If you have an air fryer, dust some thin-cut sweet potato fries with a tiny bit of paprika and salt, and air-fry them until crispy. The slight sweetness of the potato is an amazing counterpoint to the savory, salty beef inside the quesadilla.
- Quick Dill Pickle Spears: Lean into the flavor already happening inside! Serve a few crisp dill pickle spears on the side. It’s zero effort and offers that satisfying crunch and sour punch for when you need an extra hit of that classic burger tang.
- Simple Side Salad with Vinaigrette: This is my go-to when I’m trying to feel *healthy*. Keep the salad simple: crisp romaine lettuce, maybe a few sliced red onions and tomatoes. The secret is skip the creamy ranch; make a super light, bright vinaigrette—just olive oil, white vinegar, a tiny bit of Dijon, salt, and pepper. It cleanses the palate between bites of cheesy goodness.
- Crunchy Carrot Sticks: If you don’t want a full salad, just slice up some carrots and celery into sticks. They provide that essential raw crunch that feels so good next to the hot, gooey cheese. Plus, they look bright and colorful on the plate!
Honestly, for a busy night, I usually just make the sweet potato fries in the air fryer while the quesadillas are resting, and we’re done. You get your salty, your savory, your crunch, and your tang, all wrapped up perfectly! It’s the simplest way to make these Smashburger Quesadillas feel like a complete meal.
Frequently Asked Questions About Smashburger Quesadillas
It’s funny how a recipe this simple can stir up so many good questions! When I first started messing around with turning burgers into quesadillas, I had a few hang-ups too. People always want to know how to customize things or if they can prep ahead. Because we are aiming for that perfect texture and amazing flavor in our burgers, substitutions need to be handled carefully.
If you’re curious about making these a little lighter or trying different cheese blends, definitely take a look at my collection of quick, low-carb lunch ideas over here for more inspiration: quick low carb lunches.
Can I use ground turkey instead of beef in these Smashburger Quesadillas?
Yes, you absolutely can swap it out! However, I have to warn you—it won’t taste exactly the same, and you need to adjust your technique slightly. Remember how I was so insistent on using 80/20 ground beef? That high fat content is crucial for that signature smoky crust when you smash the meat thinly. Ground turkey, especially leaner cuts, tends to seize up and dry out much faster on the hot griddle, and you won’t get that deep caramelization.
If you use ground turkey, I highly recommend opting for 85/15 at the very leanest. Also, be extra fast with the smash and don’t cook it quite as long after the flip, or you’ll end up with dry crumbles instead of a crispy patty.
What is the best cheese for making these Mini kitchen magic quesadillas?
For pure, unadulterated, gooey, restaurant-style melt? Nothing beats the humble slice of American cheese. I know people turn their noses up at it sometimes, but for the purpose of a Smashburger Quesadilla, it’s unparalleled in consistency and flavor when blended with that seasoned beef. It stretches perfectly and doesn’t get oily.
But if you are looking for something with a bit more earthy sharpness, Monterey Jack melts beautifully too—it’s creamy and stretches really nicely, making it a fantastic substitute. Mild cheddar is okay, but watch it closely because when cheddar melts, the oils tend to separate faster than American cheese. My advice for the best, most reliable pocket of melted goodness is definitely American or Jack!

Nutritional Snapshot of These Smashburger Quesadillas – Mini kitchen magic
Now, I know most of us who are craving comfort food like these Smashburger Quesadillas aren’t looking for a strict breakdown, but I always feel I owe it to you all to give a general idea of what’s in this delicious pile of Mini kitchen magic. Since we are combining ground beef, cheese, and tortillas, this is certainly a satisfying, hearty meal—perfect for a big lunch or a rewarding dinner after a long day.
I ran this recipe through the calculator based on the 80/20 beef and standard white flour tortillas. Keep in mind, these numbers are estimates, and they change based on the fat content of your specific ground beef and exactly how much mustard you choose to drizzle on! If you’re tracking macros closely, you might want to check out my general guide on calorie-smart recipes for more ideas on lighter swaps.
- Calories: Approximately 450 per quesadilla (Note: The recipe yields 4 total quesadillas, so the calculation below is based on one serving/one quesadilla).
- Fat: About 28g. That’s where the flavor comes in, thanks to that 80/20 beef and buttered tortilla!
- Protein: A solid 30g! These are surprisingly high in protein, which is great for keeping you full until the next meal.
- Carbohydrates: Around 25g, mostly coming from the flour tortillas.
Don’t forget that this count includes the classic burger sauce elements—the pickle, ketchup, and mustard—which really round out the flavor profile without adding too many empty calories. Even with the cheese and beef fat, these Smashburger Quesadillas are a fantastic way to get that burger fix without a messy bun situation!
Share Your Smashburger Quesadillas Creations
Well, that’s it! You now have the blueprint for creating your very own Smashburger Quesadillas. I truly hope this recipe brings some fast, fun Mini kitchen magic into your weeknights. There is nothing that makes me happier than hearing from you all after you’ve tried one of my experiments!
I spent so much time perfecting the smash-to-crisp ratio, and I really want to know how it turned out for you. Did you stick with the American cheese? Did you end up using that awesome mixed sauce I suggested? Don’t be shy!
- Rate and Review: If you loved the speed and flavor combo, please leave a star rating right below this post! Those little ratings help other busy cooks find easy solutions.
- Tell Me Everything in the Comments: Seriously, drop a comment below. What side dish did you pair with your Smashburger Quesadillas? Any variations you tried? I read every single one and love getting little tips from my readers, too!
- Show Me the Magic: If you snap a picture of your crispy, cheesy creations, please tag me on social media! Seeing those golden-brown tortillas makes my day. It’s proof that fast food doesn’t have to be *fast food*.
If you need to send me a private note—maybe you have a general cooking question or just want to share a major success story—you can always reach out directly through the contact page here: Get in touch with me.
Happy cooking, and enjoy every messy, cheesy bite of your ultimate Mini kitchen magic!
Smashburger Quesadillas
Ingredients
Equipment
Method
- Divide the ground beef into 8 equal portions. Season each portion lightly with salt and pepper.
- Heat your skillet or griddle over medium-high heat. Place two portions of beef onto the hot surface. Immediately use a sturdy spatula or burger press to smash the meat thinly onto the surface. Cook for 2 minutes.
- Flip the smashed patties. Place one slice of cheese on top of each patty. Cook for 1 more minute until the cheese is melted and the beef is cooked through.
- Remove the cheeseburger patties from the skillet and set them aside.
- Wipe out the skillet if necessary. Brush one side of each tortilla lightly with melted butter.
- Place four tortillas, butter-side down, in the skillet over medium heat. On top of each tortilla, layer a small amount of chopped pickles, a drizzle of mustard and ketchup, and one cheeseburger patty.
- Top each assembly with a second tortilla, butter-side up. Cook for 2 to 3 minutes until the bottom tortilla is golden brown. Carefully flip the quesadillas and cook the other side for 2 to 3 minutes until golden and the cheese inside is fully melted.
- Remove from the skillet, slice each quesadilla in half, and serve immediately.