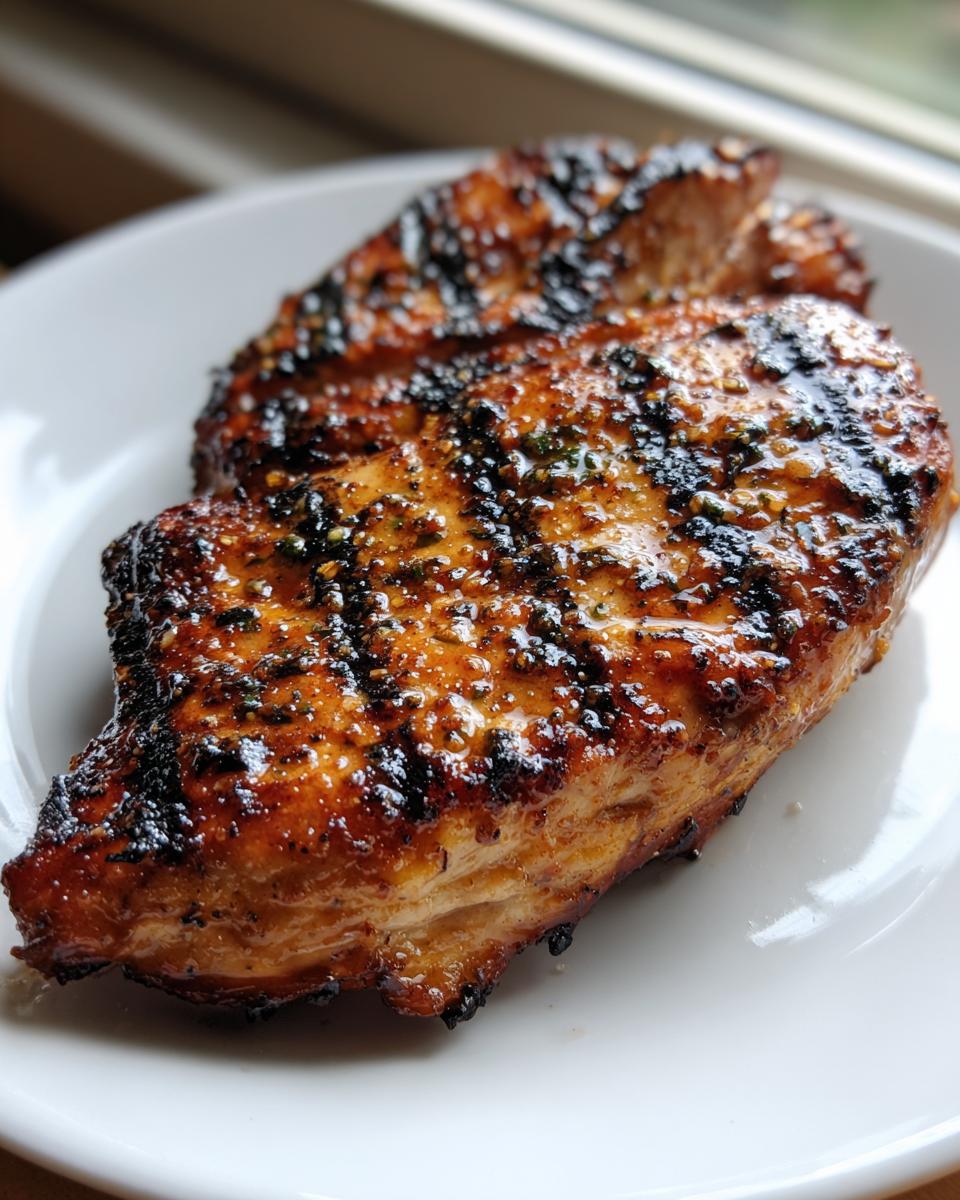
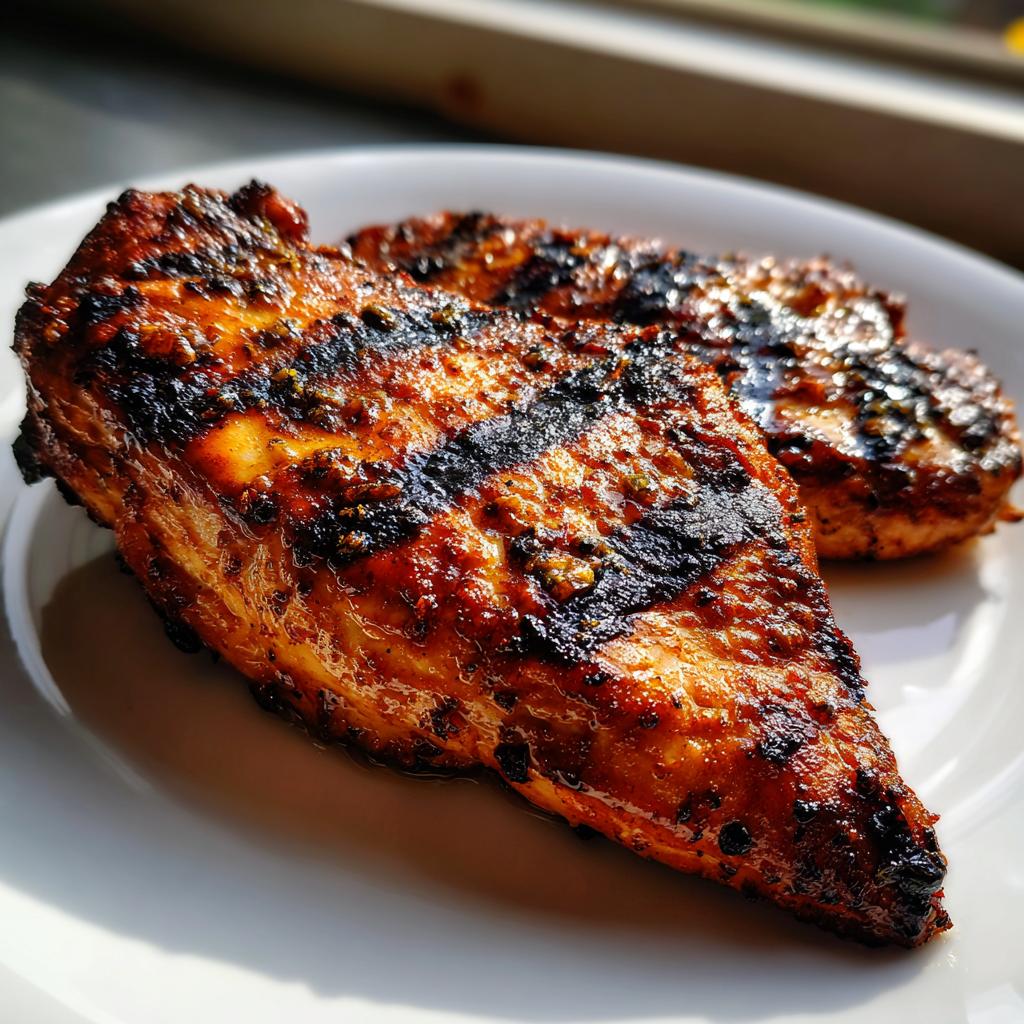
You know that moment when you bite into something so perfectly seasoned and tender, you vow to never pay restaurant prices for it again? Me too! I spent what felt like ages trying to crack the code on that smoky, flavorful grilled chicken they serve up—the kind that makes you reach for extra napkins. It’s all about that marinade balance, trust me. After batch after batch, I finally hit the jackpot, and I’m so excited to share my definitive guide on How to Make the Best Texas Roadhouse Chicken at Home (chicken Recipe, 2025 Edition). This 2025 version is the closest you’ll get outside of their dining room, and it’s astonishingly easy!
Why You’ll Love This How to Make the Best Texas Roadhouse Chicken at Home (chicken Recipe, 2025 Edition)
Seriously, once you nail this at home, you’re gonna wonder why you ever waited for a reservation! This isn’t just another grilled chicken recipe; it’s that specific, craveable flavor profile we all look for. Trust me on this one—it beats takeout every time.
- It’s shockingly fast! With just 15 minutes of prep and about 20 minutes on the heat, you can have dinner done in under 40 minutes (not counting marinating time, of course).
- The marinade is the real deal. That buttermilk bath works wonders, tenderizing the chicken so it ends up juicy and never dry. It’s the secret weapon for replicating that signature texture.
- You get amazing flavor without needing a massive smoker or a bonfire. The seasoning blend is robust and smoky, perfect for a standard grill or even a hot grill pan indoors.
- This version of How to Make the Best Texas Roadhouse Chicken at Home (chicken Recipe, 2025 Edition) is foolproof. I’ve tested it with thick and thin breasts, and as long as you pound them evenly, you get perfect results.
- It’s versatile! This chicken is amazing as the main event, sliced over salads, or tucked into wraps. It’s a workhorse recipe!
Essential Equipment for How to Make the Best Texas Roadhouse Chicken at Home (chicken Recipe, 2025 Edition)
Okay, gather ’round, because you don’t need a whole outdoor kitchen to pull this off, but you do need the right tools to get that authentic char. Texas Roadhouse is all about a high-heat sear, so we have to replicate that environment as best we can!
For this recipe, you only need a couple of key pieces of gear. Don’t get overwhelmed; most of this you probably already have waiting in a drawer somewhere.
- A Grill or a Sturdy Grill Pan: This is non-negotiable if you want those beautiful, dark grill marks. If you’re stuck inside because of the weather, a heavy cast-iron grill pan on the stovetop works like a charm. Just make sure it gets screaming hot!
- A Large Bowl: We need space for all four chicken breasts to bathe happily in that buttermilk magic. I always grab the biggest, shallowest one I own just so I can really turn and coat everything evenly.
- Tongs: Obviously! You need reliable tongs to flip those hot pieces without stabbing them—stabbing them lets all those lovely juices escape before resting, and we can’t have that.
Now for the pro tip that takes this from just grilled chicken to official copycat status: When you’re setting up your heat, if you’re using an outdoor propane grill, make sure you get two zones going. You want one side *really* hot—medium-high to high—for those initial sear marks, and the other side on medium or even low. You’ll start the chicken on the high heat side to get those gorgeous lines, and then move them over to the cooler side to finish cooking through gently. That way, the outside doesn’t burn before the inside hits 165°F. Trust me, that two-zone setup is the real game-changer for keeping your How to Make the Best Texas Roadhouse Chicken at Home (chicken Recipe, 2025 Edition) juicy!
Ingredients for How to Make the Best Texas Roadhouse Chicken at Home (chicken Recipe, 2025 Edition)
Listen, replicating that vibrant flavor profile at home hinges entirely on getting these ratios right. The real payoff here is the marinade—it’s what makes this chicken Recipe so incredibly tender. You’re going to need about four cuts of meat, and I always tell people to aim for uniform pieces, about six to eight ounces each.
If your chicken breasts look like giant, uneven footballs when you buy them, you must pound them down slightly. We need them roughly 3/4 inch thick for even cooking—trust me, uneven cooking leads to dry edges on one side and raw centers on the other!
Everything else goes straight into the buttermilk bath. Remember, this isn’t just about flavoring; the buttermilk actually helps break down those muscle fibers, giving you that signature soft bite we’re aiming for.
For the Marinade and Chicken
- Boneless, Skinless Chicken Breasts: You need 4 of these, aiming for 6 to 8 ounces each.
- Buttermilk: Half a cup is what the recipe calls for, and it makes all the difference in tenderness.
- Salt and Black Pepper: 1 teaspoon of each. Don’t skimp, this is where a lot of the savory flavor comes from!
- Garlic Powder and Onion Powder: 1 teaspoon of both powders builds that essential background savoriness.
- Paprika: 1 teaspoon for color and a hint of smokiness.
- Cayenne Pepper: 1 teaspoon, but hey, this is optional if you prefer zero heat. I usually toss it in there just to give it a little kick on the back end!
Step-by-Step Instructions: How to Make the Best Texas Roadhouse Chicken at Home (chicken Recipe, 2025 Edition)
Alright, this is where the magic really happens! Cooking restaurant-quality grilled chicken at home just requires us to be a little systematic. We want juicy, perfectly seasoned meat, not dry frisbees! I promise, if you follow the order here, your result will be fantastic. You’ve got your ingredients ready, so let’s jump right into the process. Remember, even cooking is key, so don’t skip the initial prep work!
Preparing the Chicken and Marinade
First things first, we need to make sure our meat is ready to absorb all that amazing flavor we mixed up. Take your four chicken breasts and check them out. Are they super thick on one end and thin on the other? If so, you absolutely must pound them down. I place them between two sheets of plastic wrap and use the flat side of a meat mallet—or honestly, even the bottom of a heavy skillet works in a pinch—until they are all about 3/4 inch thick. This ensures they are all going to cook at the exact same rate!
Next, whip up that marinade in a shallow, large bowl. Get that buttermilk mixed with all your powders and spices until it looks uniform—no dry clumps of paprika allowed! Pour that glorious bath over your flattened chicken pieces, turning them over until they are completely coated. Now, cover that bowl TIGHTLY and slide it into the fridge. You need a minimum of 15 minutes to get any flavor infusion, but if you can let it sit for 2 to 4 hours? Wow. That’s when the buttermilk really gets to tenderizing.
Grilling for Perfect Texture
Once your chicken has had its spa treatment time, it’s time to get that grill fired up. Preheat whatever you’re using—your outdoor grill grates or your cast-iron pan—to medium-high heat. We need that direct heat for the sear marks.
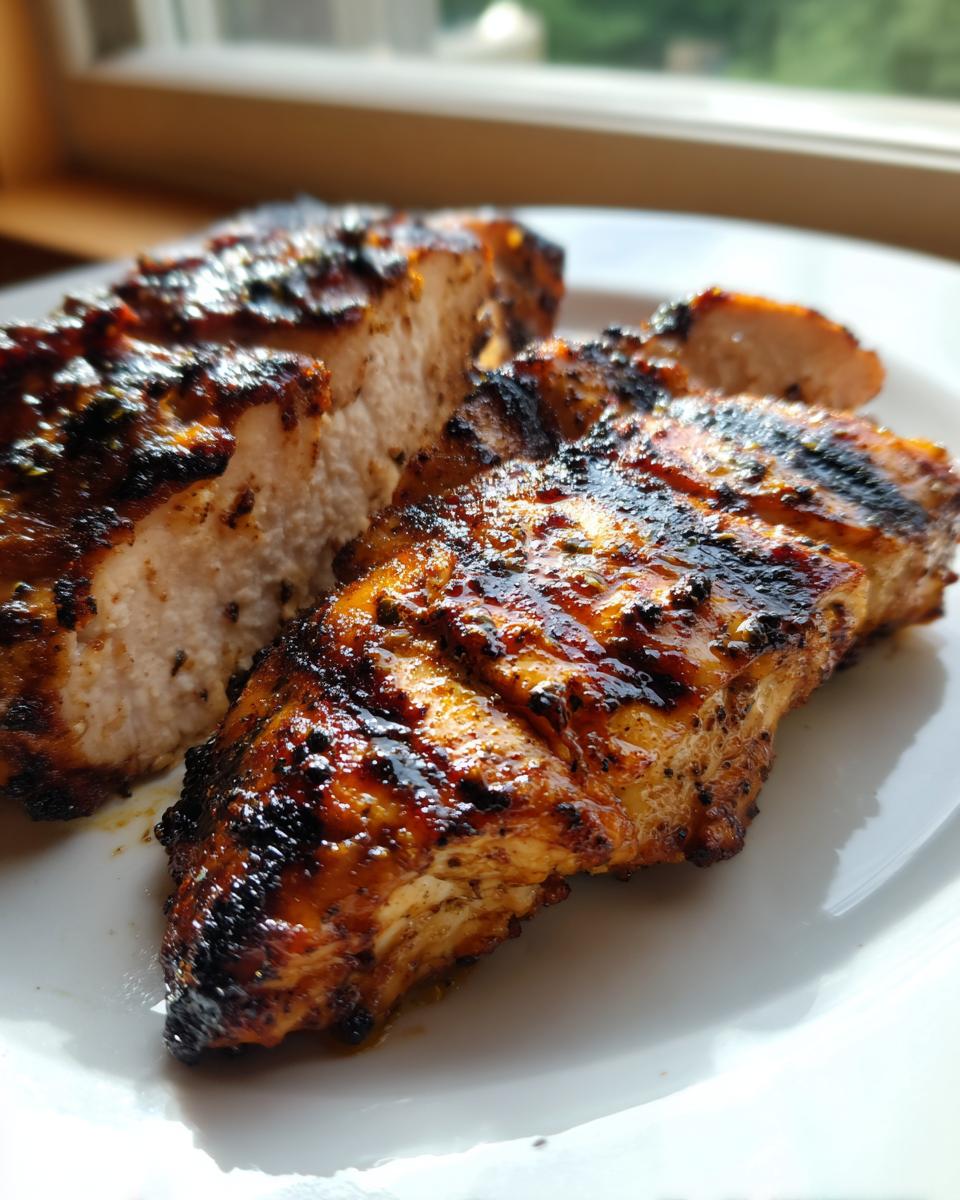
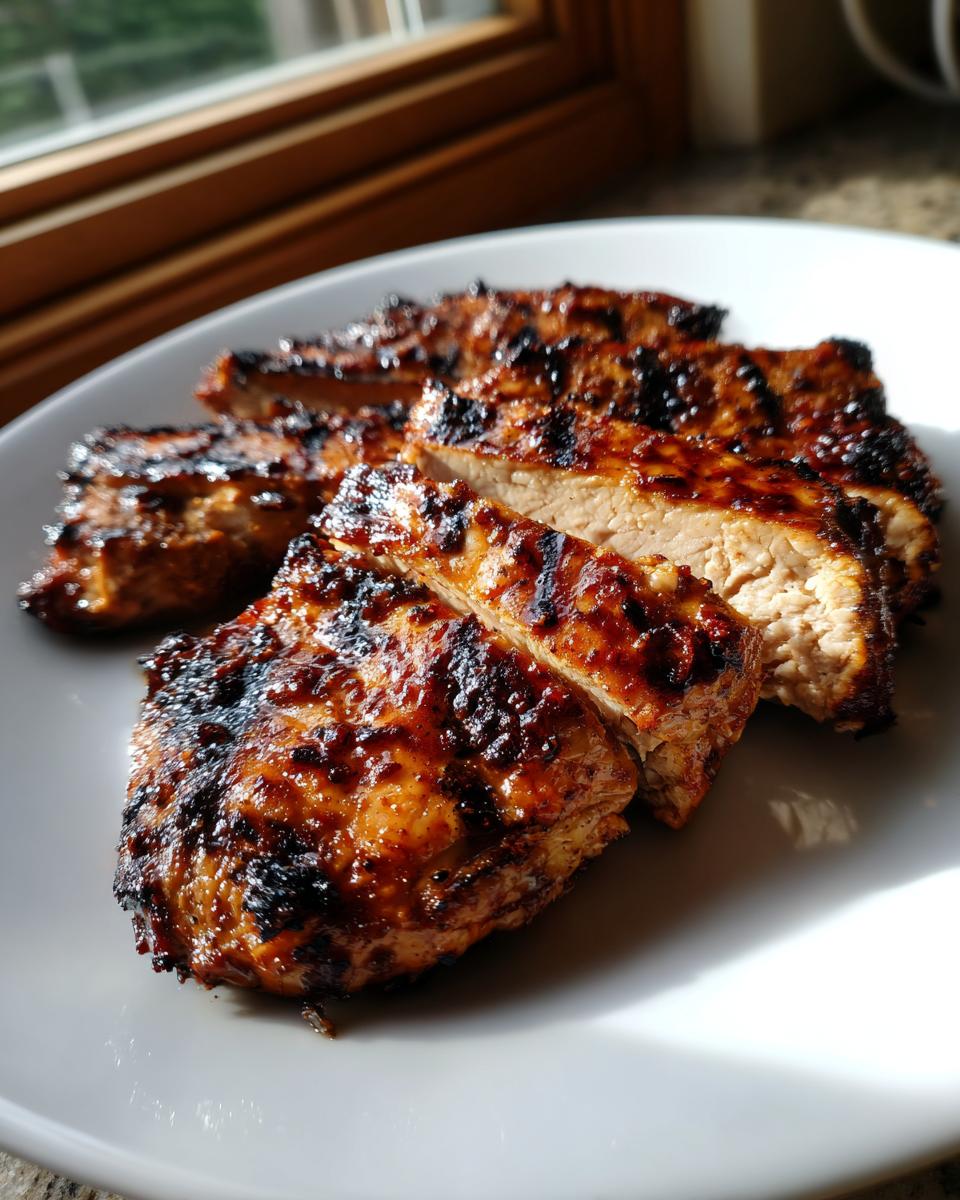
Take the chicken right out of the fridge and let the excess buttermilk drip right back into the bowl—we don’t want drippy chicken flaming up our grill! Place the breasts on the hot surface. You’re going to cook them for about 6 to 8 minutes on the first side. Resist the urge to lift them up too early, because those beautiful grill marks need time to set!
Flip them gently and cook the second side for another 6 to 8 minutes.
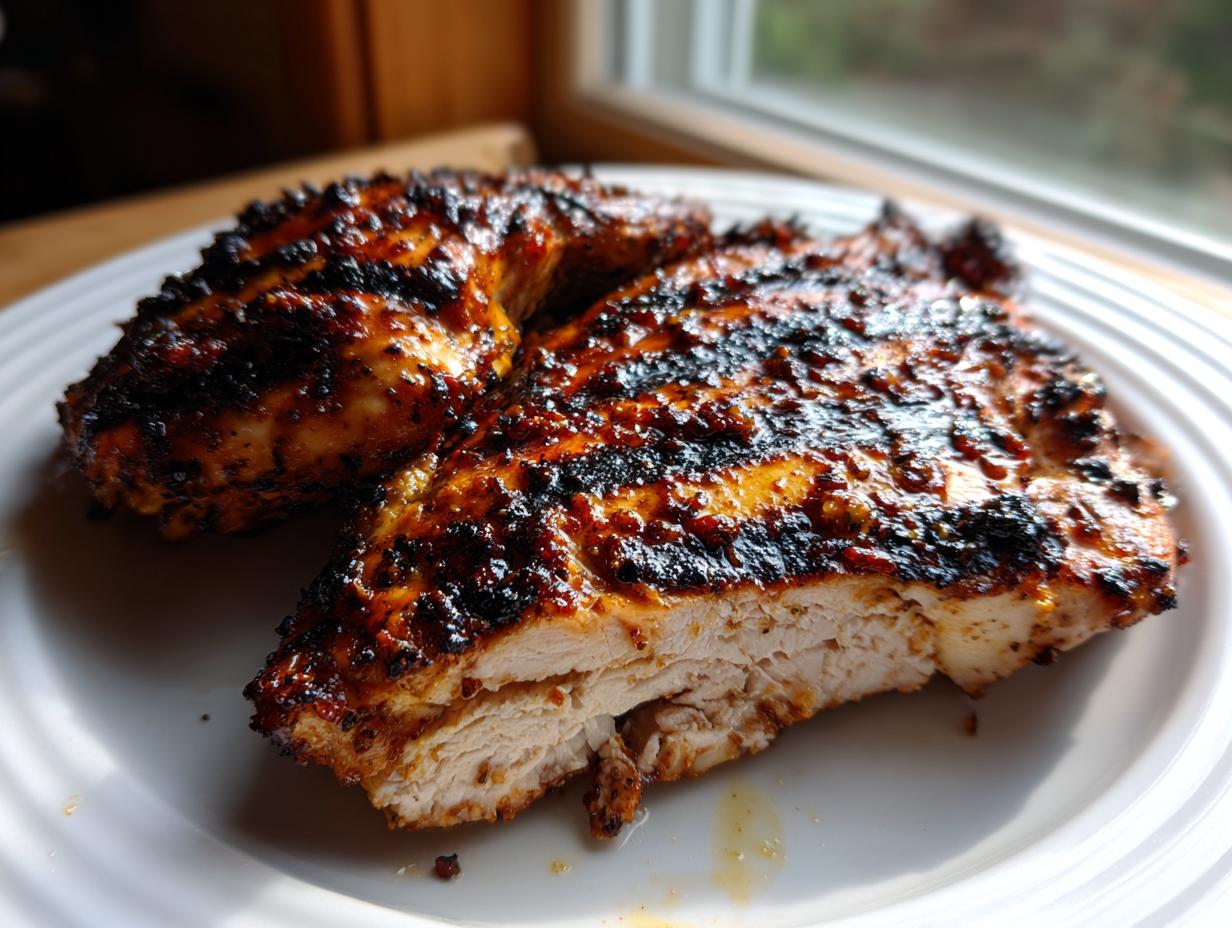
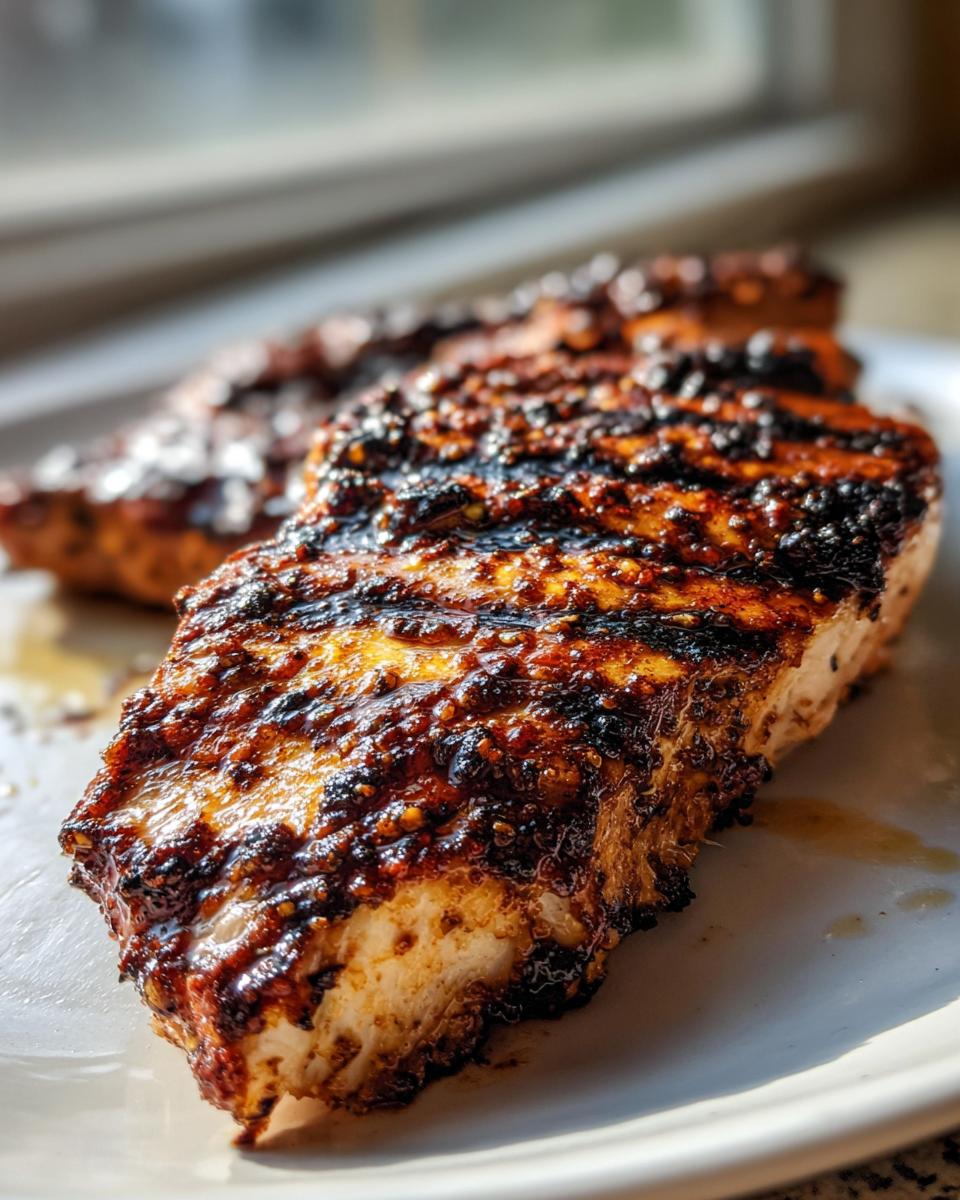
Here’s where we prioritize food safety and get the perfect internal temperature. Use a meat thermometer! You are looking for that magical 165 degrees Fahrenheit (or 74 Celsius). If they hit that temp and are still a little pale, remember the melted butter trick to brush on while they finish the last minute or two. Pull them off the heat immediately when they hit the mark.
And this last instruction is crucial, just like in my how to make chicken foolproof guide: let the chicken rest! Five minutes on a clean cutting board, tented loosely with foil. This lets all those juices redistribute back into the meat. If you slice it now, all that hard work drains onto the plate. Don’t you dare skip the resting phase! For other fast cooking methods that lock flavor in, check out my advice on the easy lemon garlic chicken skillet—same principle of fast cooking, different presentation!
Tips for Success When Making How to Make the Best Texas Roadhouse Chicken at Home (chicken Recipe, 2025 Edition)
You want that restaurant quality, right? That amazing, slightly sweet, savory crust that makes you close your eyes when you chew? I picked up a few tricks over the years that take this from just ‘good’ chicken to ‘I can’t believe I made this at home’ chicken. Honestly, these three things make all the difference when you’re aiming for that signature flavor profile featured in my advice on restaurant-style chicken at home.
Here are the three habits I insist on when I make my copycat Texas Roadhouse chicken:
- Don’t Crowd the Grill (or Pan!): This is my number one rule for any searing project. If you pack too much chicken onto your hot surface, the temperature dips immediately. Instead of searing and getting those dark, beautiful caramelized grill marks, the chicken just starts steaming in its own juices. That’s not what we want! If you’re making a double batch, do it in shifts. Those high heat zones need personal space to work their magic.
- The Melted Butter Finish is Mandatory: You know how the meat looks slightly glossy and intensely flavorful when you get it fresh? That’s often a final brush of fat. During the last minute or two of cooking—right before you pull it off the heat once it hits 165°F—take about 2 tablespoons of melted unsalted butter and brush it lightly over the top of each piece. It doesn’t soak in like a marinade, but it melts onto that hot surface, picking up some of the seasoning crust and adding that incredible richness right at the end. It seals in the freshness and totally nails the authentic flavor profile.
- Pat It Dry After Marinating (Seriously!): Before the chicken hits the grill, you *must* gently remove the excess surface liquid. I don’t mean wiping off every drop of buttermilk, but give it a quick, gentle pat down with a paper towel. If the surface is too wet, the heat has to spend precious seconds boiling off that moisture instead of creating that crust. A little dampness is good for flavor transfer, but too much stops the sear dead in its tracks.
Follow those three steps, and I promise you’ll be amazed at how close you get to the real deal!
Ingredient Notes and Substitutions for Your Chicken Recipe
We’ve all been there, staring into the fridge thinking, “I have everything *but* buttermilk!” Don’t let a missing ingredient ruin your plans to make How to Make the Best Texas Roadhouse Chicken at Home (chicken Recipe, 2025 Edition). Good news: this robust marinade mix is pretty forgiving, but you definitely need that acid component to start the tenderizing process!
If you run out of the real stuff, don’t panic. You can whip up a stand-in buttermilk substitute in about five minutes. Just measure out your required half-cup of regular milk—whole milk works best for richness, but whatever you have is fine. Then, stir in about a tablespoon of white vinegar or fresh lemon juice. Give it a quick stir and let it sit on the counter for five minutes. You’ll see it start to curdle slightly; that’s exactly the texture we need to mimic the real thing!
As for the spices, which really make this chicken Recipe shine, try to stick to the exact measurements, especially the savory powders like garlic and onion. But if you’re slightly short on one, it’s okay! The cayenne is purely optional, so feel free to leave that out if you’re not feeling the heat that day. Remember, the paprika provides essential color, so try not to skip that unless you have smoked paprika on hand, which would actually be a fantastic upgrade!
What if you don’t have fresh chicken breasts? You can totally use thighs, but the cooking time will need adjusting because they are fattier and thicker. Thighs might take closer to ten minutes per side to reach that safe internal temperature, so definitely rely on your thermometer rather than the clock if you swap proteins!
Serving Suggestions for This Chicken Recipe
So, you’ve got this knockout, perfectly seasoned, juicy grilled chicken, right? Awesome! But honestly, a masterpiece needs the right frame, and that means pairing it with sides that can stand up to that bold, savory flavor. This isn’t just about slapping the chicken on a plate; it’s about building a complete meal that screams “Steakhouse quality, but I cooked it in my backyard!”
When I serve up my take on How to Make the Best Texas Roadhouse Chicken at Home (chicken Recipe, 2025 Edition), I lean into the classic, comforting sides. Remember, the chicken is bold, so the sides should play nicely alongside it—either by soaking up any final juices or offering a cool, creamy contrast.
Here are my absolute go-to pairings to make this chicken dinner truly legendary:
- Creamy Dreamy Mashed Potatoes: This is a must. You need something soft, buttery, and ready to melt under that grilled chicken. My recipe for [creamy mashed potatoes](https://www.saltglowdiet.com/creamy-mashed-potatoes-make-ahead/) is perfect because they can often be made ahead of time, meaning you just have to reheat them while the chicken rests. Instant payoff!
- Sizzling Green Beans: You need a vegetable, obviously, but they can’t be boring steamed ones. I sauté fresh green beans quickly with a little garlic, a tiny splash of soy sauce for that savory depth, and maybe a sprinkle of bacon bits if I’m feeling decadent. They stay crisp-tender and offer a nice textural break from the soft chicken and potatoes.
- A Baked Potato Done Right: If you don’t want to mess with mashing, go for the classic loaded baked potato. Make sure you prick the skin thoroughly before baking so they don’t explode (oops!). Serve with sour cream, chives, and shredded cheddar. It’s hearty and totally satisfies that classic American dinner craving.
Honestly, you can serve this chicken with anything, but these three feel the most authentic to that satisfying, steakhouse-style meal experience. Enjoy building your plate!
Storing and Reheating Your Homemade Texas Roadhouse Chicken
One of the best parts about making a great batch of How to Make the Best Texas Roadhouse Chicken at Home (chicken Recipe, 2025 Edition) is knowing you have leftovers for lunch the next day! This chicken holds up really well, which is a huge win for meal prep.
For storage, you want to make sure the chicken cools down completely before you seal it up. Once it’s just warm to the touch, wrap the pieces individually tight in plastic wrap, or place them in an airtight container. You can keep this chicken safely tucked away in the refrigerator for about three to four days. Any longer than that, and you risk losing that beautiful juiciness we worked so hard to achieve with the buttermilk!
Now, reheating is the tricky part with any lean protein, right? You want it hot but you absolutely cannot dry it out. Forget the microwave if you can help it, unless you’re in a major rush. The microwave heats unevenly and can turn this tender meat chewy real fast.
My preferred method is the oven or toaster oven. Set your oven to a low temperature, maybe 300°F (150°C). Lay the chicken pieces on a baking sheet—I sometimes add a tiny splash of chicken broth or water to the bottom of the pan, just to create some steam in the oven environment. Pop it in for about 10 to 15 minutes, checking the temperature until it just reaches a safe temperature of 165°F again. That low, slow heat brings it back to life gently.
If you are in a real pinch, the skillet method works too! Heat a teaspoon of oil or butter over medium heat. Place the sliced chicken in the pan and only heat it for a minute or two per side until warmed through. It heats fast, so keep an eye on it! This way, you keep the residual smoky flavor intact and it manages to stay moist!
Frequently Asked Questions About How to Make the Best Texas Roadhouse Chicken at Home (chicken Recipe, 2025 Edition)
It’s totally normal to have questions when you are trying to nail a specific restaurant flavor! I sure did when I was figuring out the perfect levels of salt and spice for this amazing chicken Recipe. Here are the things folks ask me the most about getting this copycat recipe just right for their family dinner.
Can I bake this chicken instead of grilling it?
Oh, absolutely! Not everyone has the grill going, especially if you’re cooking in the dead of winter. You can definitely bake this! After marinating, place those seasoned breasts on a rack set over a foil-lined baking sheet—the rack helps air circulate so you don’t end up boiling the bottom of the chicken. Preheat your oven to 400°F (200°C). Since the heat is more indirect than a grill, they’ll probably need about 20 to 25 minutes total, sometimes a bit longer if they were thick cuts to begin with. You *must* check that internal temperature to make sure you hit that 165°F mark, but baking works great as a backup plan!
What if I don’t have buttermilk for the marinade?
This is the easiest fix, promise! Buttermilk is key because its acidity helps tenderize the meat quickly, and its thickness coats the chicken perfectly. If you run out, just grab whatever regular milk you have—even skim milk works in a pinch. For every one cup of buttermilk the recipe calls for, take one cup of milk and stir in one tablespoon of white vinegar or fresh lemon juice. Let that mixture sit on the counter for about five to ten minutes. You will see it start to glob up a little bit—that curdled look is totally what we need to mimic the thickness and reaction of real buttermilk!
This little trick has saved countless dinners for me over the years, especially when I realize I’m out of that one ingredient an hour before everyone expects dinner on the table. It keeps that essential tenderizing factor in our How to Make the Best Texas Roadhouse Chicken at Home (chicken Recipe, 2025 Edition)!
Texas Roadhouse Style Grilled Chicken
Ingredients
Equipment
Method
- Place the chicken breasts in a large bowl. If the breasts are very thick, pound them to an even thickness of about 3/4 inch.
- In a separate small bowl, whisk together the buttermilk, salt, black pepper, garlic powder, onion powder, paprika, and cayenne pepper, if using.
- Pour the marinade over the chicken, ensuring all pieces are coated. Cover the bowl and refrigerate for at least 15 minutes, or up to 4 hours.
- Preheat your grill or grill pan to medium-high heat.
- Remove the chicken from the marinade, letting excess drip off. Discard the remaining marinade.
- Grill the chicken for 6 to 8 minutes per side, depending on thickness, until the internal temperature reaches 165 degrees Fahrenheit (74 degrees Celsius).
- Remove the chicken from the heat and let it rest for 5 minutes before slicing or serving.