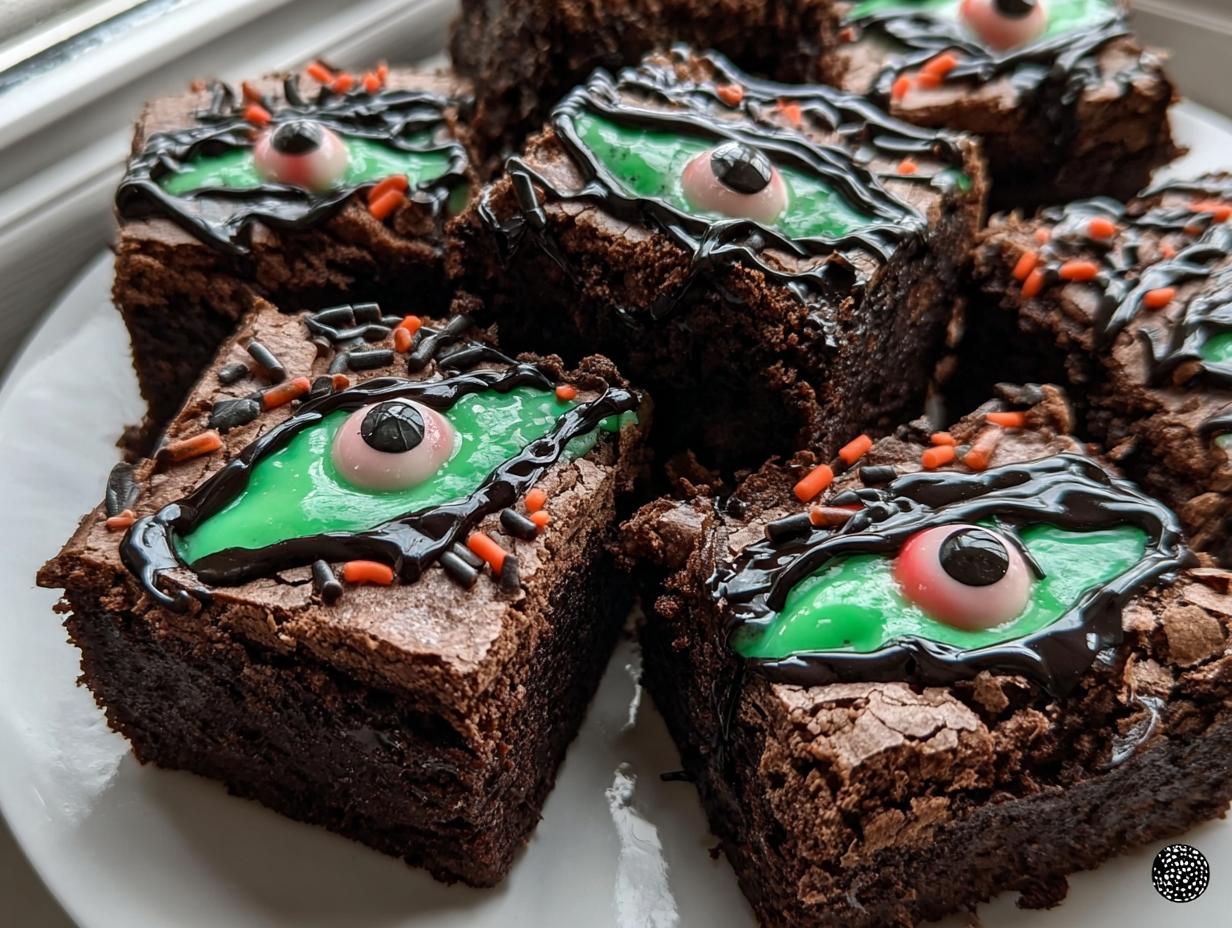
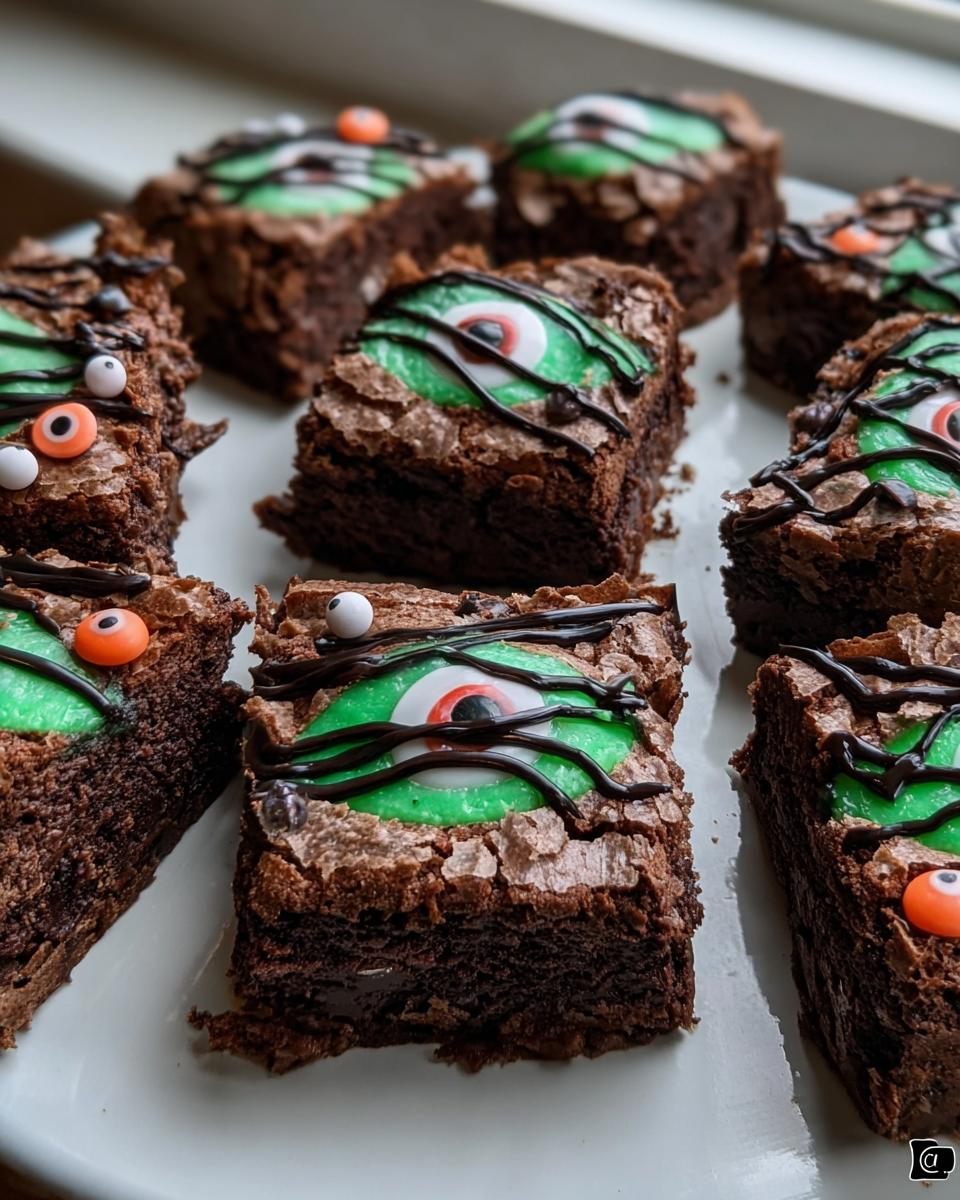
Oh, Halloween! My absolute favorite time of year for baking. The crisp air, the spooky decorations, and, of course, the treats! Growing up, my mom always whipped up some sort of Halloween brownies, and honestly, they were the highlight of our trick-or-treating fuel-ups. This year, I wanted to share my super-easy, totally festive version of Halloween brownies with you all. They use a simple box mix as the base, but we’re going to jazz them up with some spooky candy melt magic and fun decorations. Trust me, these are so much fun to make, and they look absolutely adorable on any Halloween dessert table!
Why You’ll Love These Easy Halloween Brownies
Honestly, these Halloween brownies are a total winner for so many reasons! If you’re looking for a treat that’s:
- Super Simple: We’re using a box mix, so the brownie part is a breeze. No stress cooking here!
- Festive & Fun: The green and black candy melts with sprinkles and eyeballs just scream Halloween. They look way more complicated than they are!
- Deliciously Chocolatey: Who doesn’t love a good, fudgy brownie? They taste amazing!
- Party Perfect: These are fantastic for school parties, neighborhood get-togethers, or just making a regular Tuesday feel a little more spooky.
They’re genuinely foolproof and guaranteed to add some holiday cheer to your kitchen!
Gather Your Halloween Brownies Ingredients
Okay, let’s get our spooky squad together! For these Halloween brownies, you really don’t need much, which is part of why I love them so much. Here’s the rundown of what you’ll need:
- 1 box brownie mix: Grab your favorite kind! Whether you like fudgy or cakey, it all works as our base. Just make sure you have the eggs, oil, and water that it calls for on the box – those are crucial! It’s kind of like how the type of salt you use can really make a difference in baking, even if it’s just a mix.
- 1 cup green candy melts, chopped: These are our main spooky color! Chopping them helps them melt super smooth.
- 1/2 cup black candy melts, chopped: For that perfect contrasting drizzle. You can totally swap green and black, or even add purple or orange if you’re feeling extra festive!
- Halloween sprinkles, for decorating: Any fun Halloween-themed sprinkles you have will be perfect.
- Candy eyeballs, for decorating: Because what’s a Halloween brownie without a few little spooky eyes staring back at you? You can never have too many!
Seriously, that’s it! So simple, right? It’s like magic is about to happen with just a few pantry staples and some colorful candy.
Step-by-Step Guide to Making Halloween Brownies
Alright, let’s get down to the fun part – making these spooky Halloween brownies! It’s really straightforward, especially because we’re starting with a mix. My kitchen always gets a little chaotic when I’m making these, but in the best way possible – there’s usually a sprinkle explosion at some point, but that’s part of the charm, right?
Preparing the Brownie Base
First things first, let’s get our brownie base ready. Preheat your oven according to the brownie mix box directions – usually around 350°F (175°C). While that’s heating up, grab a 9×13 inch baking pan. You’ll want to grease it really well so our brownies don’t stick. Sometimes I use that awesome homemade pan spray, but good old cooking spray or butter works too. Then, just whip up the brownie batter exactly like the box says. I usually go for the fudgier side, so I might add an extra egg yolk or a bit less water if the box gives options, but really, just follow the instructions! Pour that lovely chocolatey goodness into your prepared pan. Quick tip from my kitchen: make sure the batter is spread evenly so you get a nice, flat surface for decorating.
Cooling the Brownies for Decoration
This next step is super important, and it might test your patience a little, but trust me, it’s worth it! Once the brownies are baked (they’ll smell amazing, won’t they?), you HAVE to let them cool completely in the pan. I mean it, completely! If you try to put the candy melt topping on while they’re warm, it’ll just melt into a sad, brown mess. We want those spooky green and black layers to really pop. So, let them sit there, maybe in the fridge for a bit if you’re in a hurry, until they’re totally cool to the touch. This ensures our decorations stick perfectly.
Melting and Applying the Candy Coating for Halloween Brownies
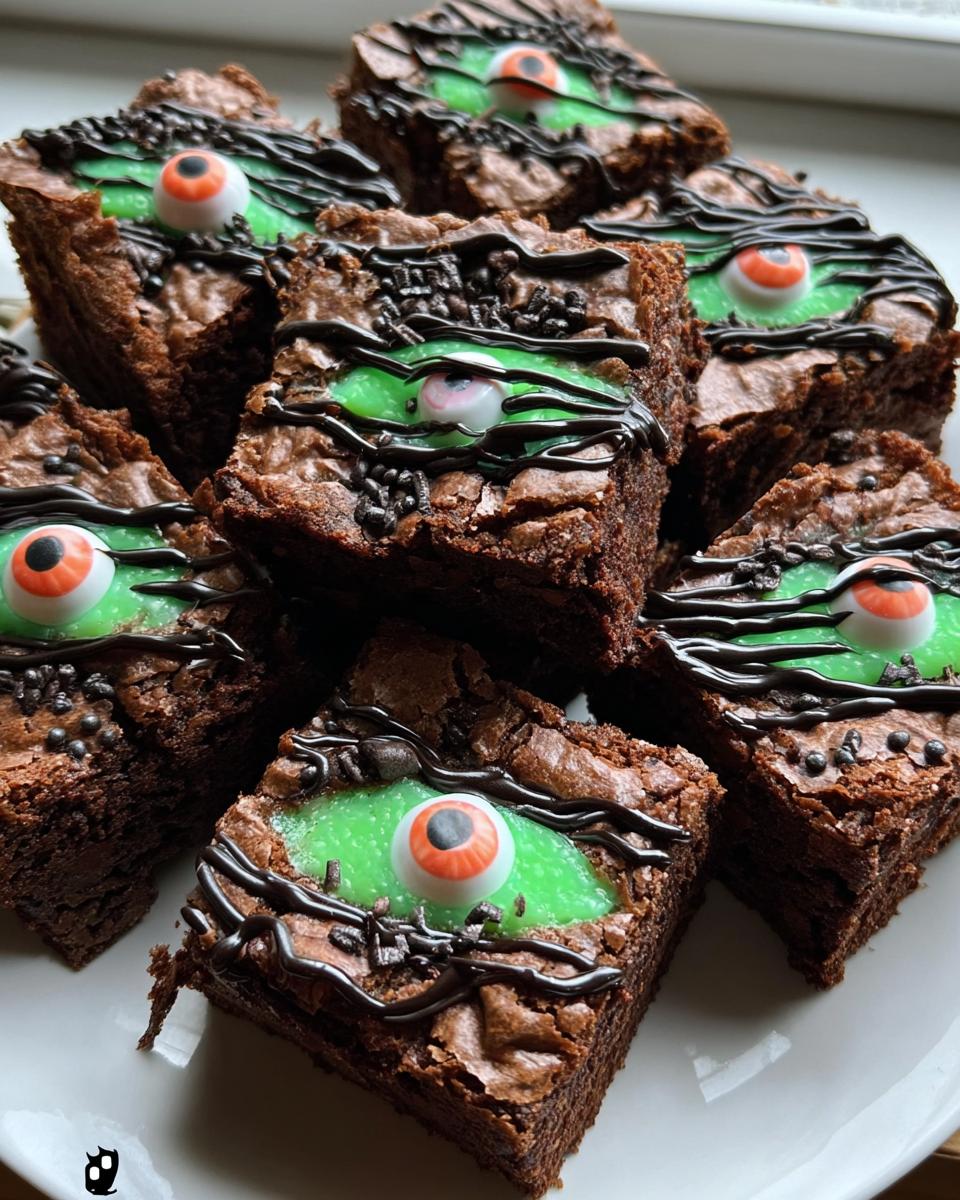
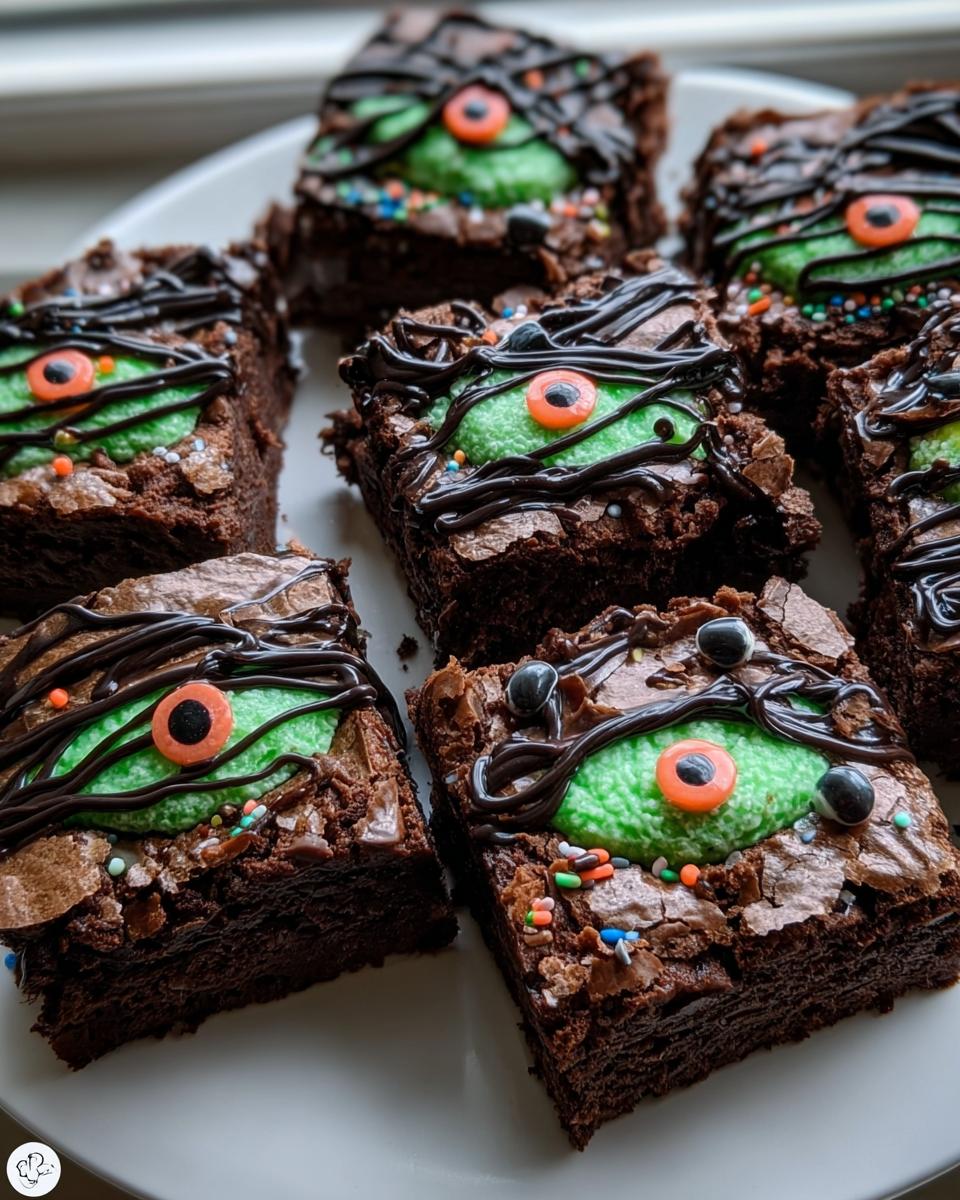
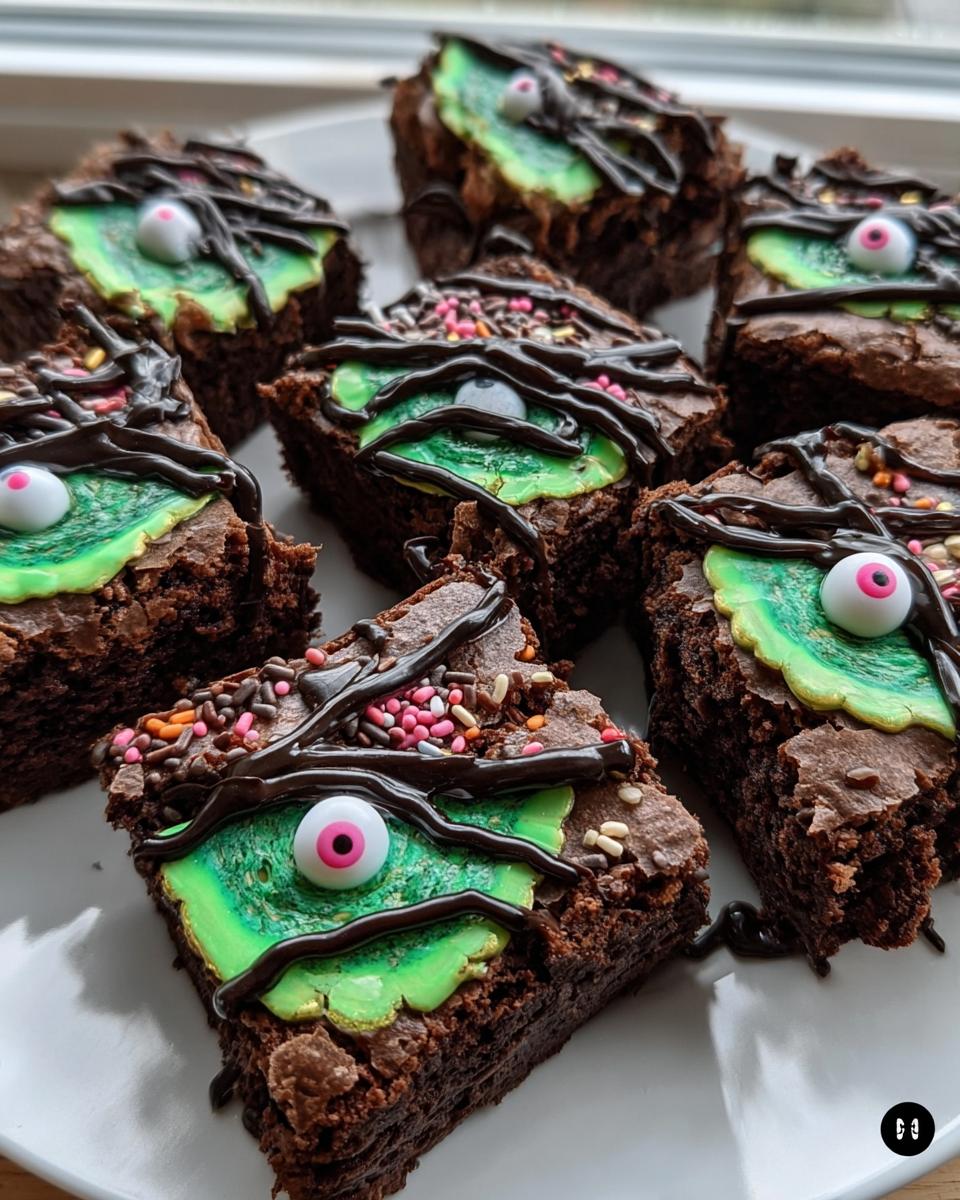
Now for the colorful magic! We’re going to melt our candy melts. I usually do this in the microwave. Put your green candy melts in a microwave-safe bowl and zap them in 30-second intervals, stirring really well after each one. Stop when they’re almost smooth and just stir the rest of the way. Be careful not to overcook them, or they can get thick and clumpy. Once your green is melted and smooth, spread it all over the cooled brownies. Work quickly but gently to get an even layer. Now, do the same thing with your black candy melts in a separate bowl. Once smooth, grab a spoon or a piping bag (I love using a small Ziploc bag with a tiny corner snipped off!) and drizzle the black candy melts back and forth over the green layer. Don’t overthink this part; a little chaos here makes for a cool, spooky look, almost like a marbled effect. It reminds me a bit of how I layer ingredients when making my Garlic Butter Chicken and Potatoes – just go for it!
Decorating Your Spooky Halloween Brownies
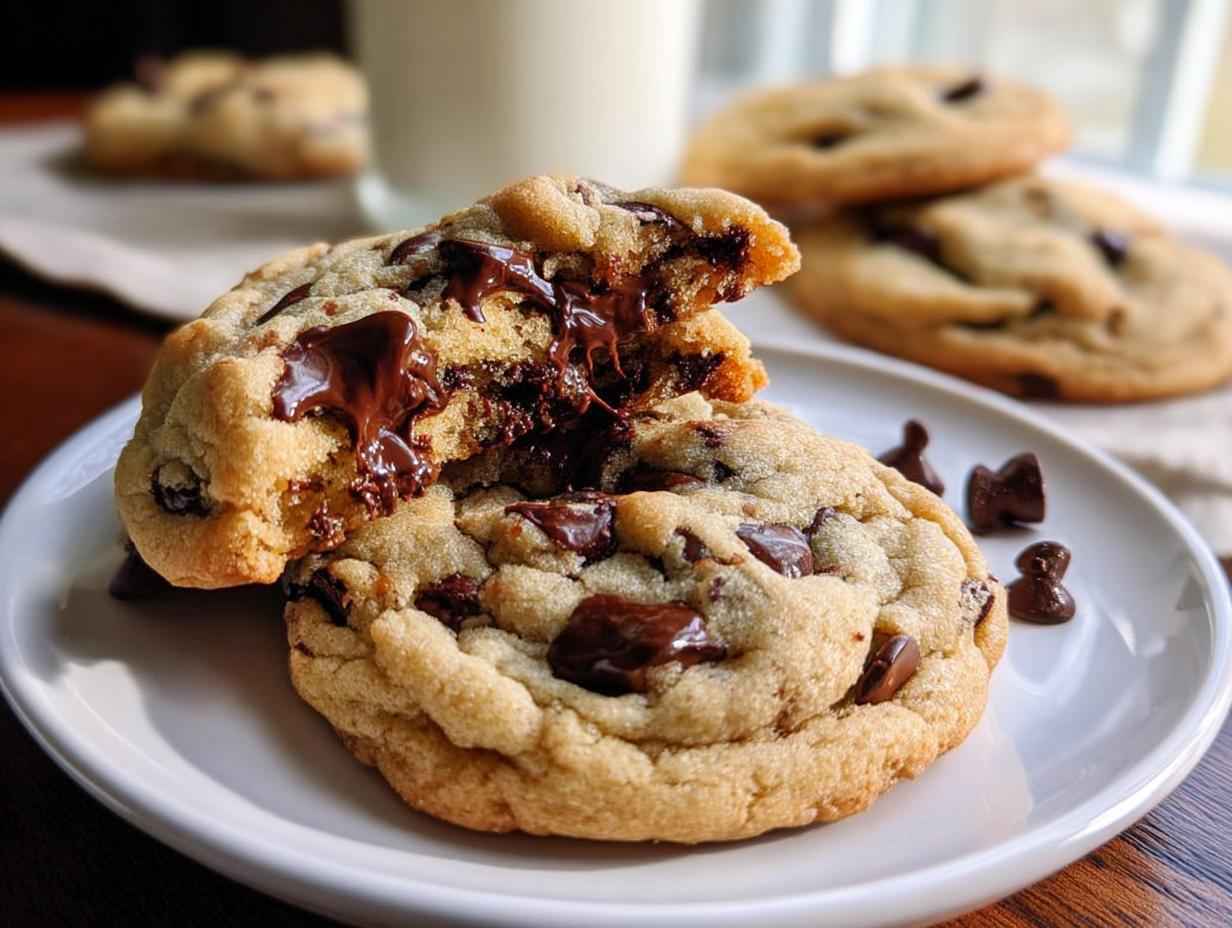
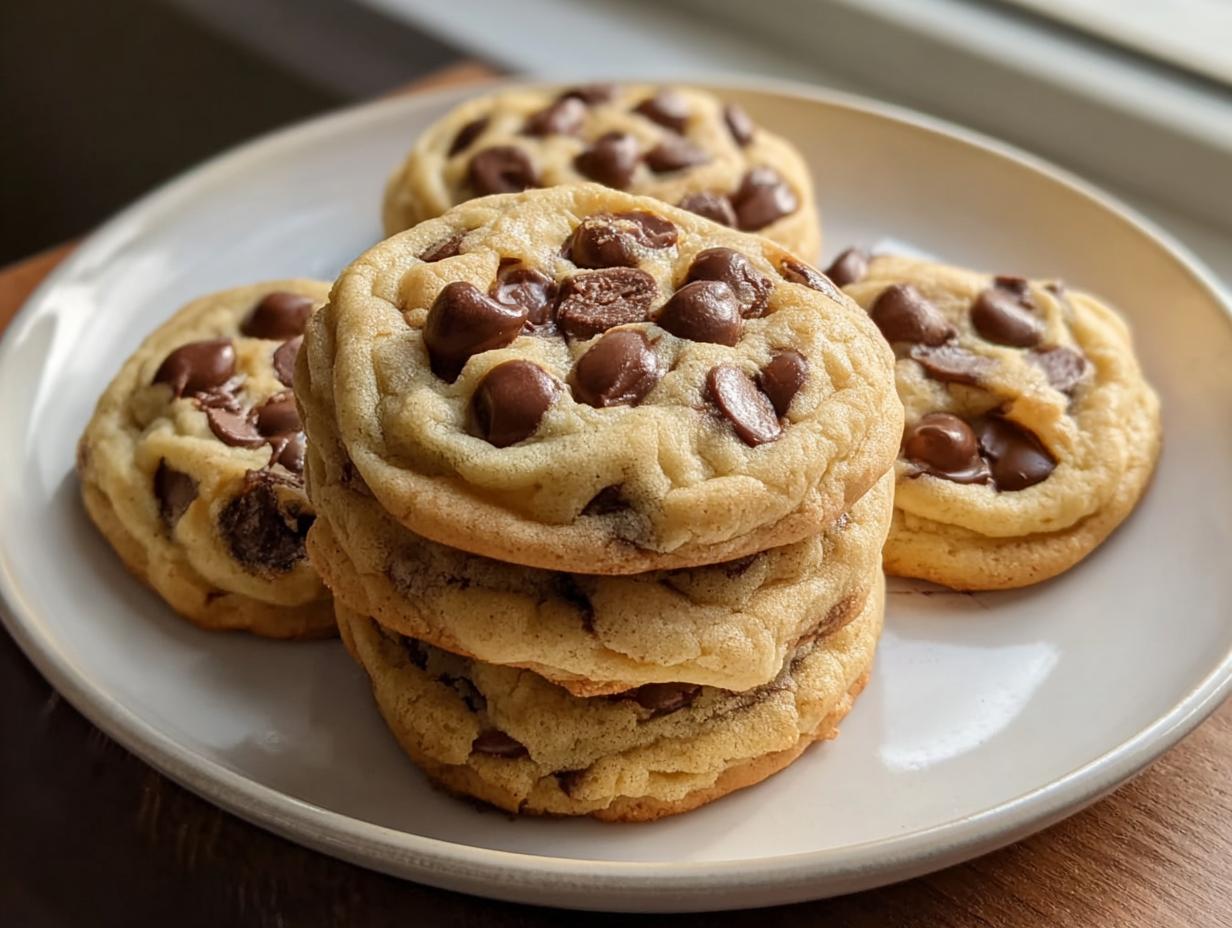
This is where your Halloween brownies really come to life! While the candy melts are still wet, go ahead and sprinkle on your Halloween sprinkles and strategically place those candy eyeballs. I love pressing the eyeballs into the candy before it hardens. You can make little ghost faces or monster clusters – get creative! Don’t be afraid to go a little wild with the sprinkles; they catch the light and add that extra festive sparkle. I usually have more sprinkles on my counter than on the brownies themselves, but hey, it’s Halloween! Just make sure everything is pressed down a little so it doesn’t fall off later.
Tips for Perfect Halloween Brownies Every Time
Okay, so we’ve made some seriously spooky and delicious Halloween brownies, but let’s chat about making sure they turn out just right every single time. A couple of little tricks really help! First, when you’re melting those candy melts, if they start to look a bit too thick and seize up, try adding just a *tiny* bit of vegetable oil – like, half a teaspoon at a time. Stir it in really well after each addition. It usually fixes them right up! Remember how you can use apple cider vinegar for all sorts of things? Well, a touch of oil is the magic trick for candy melts.
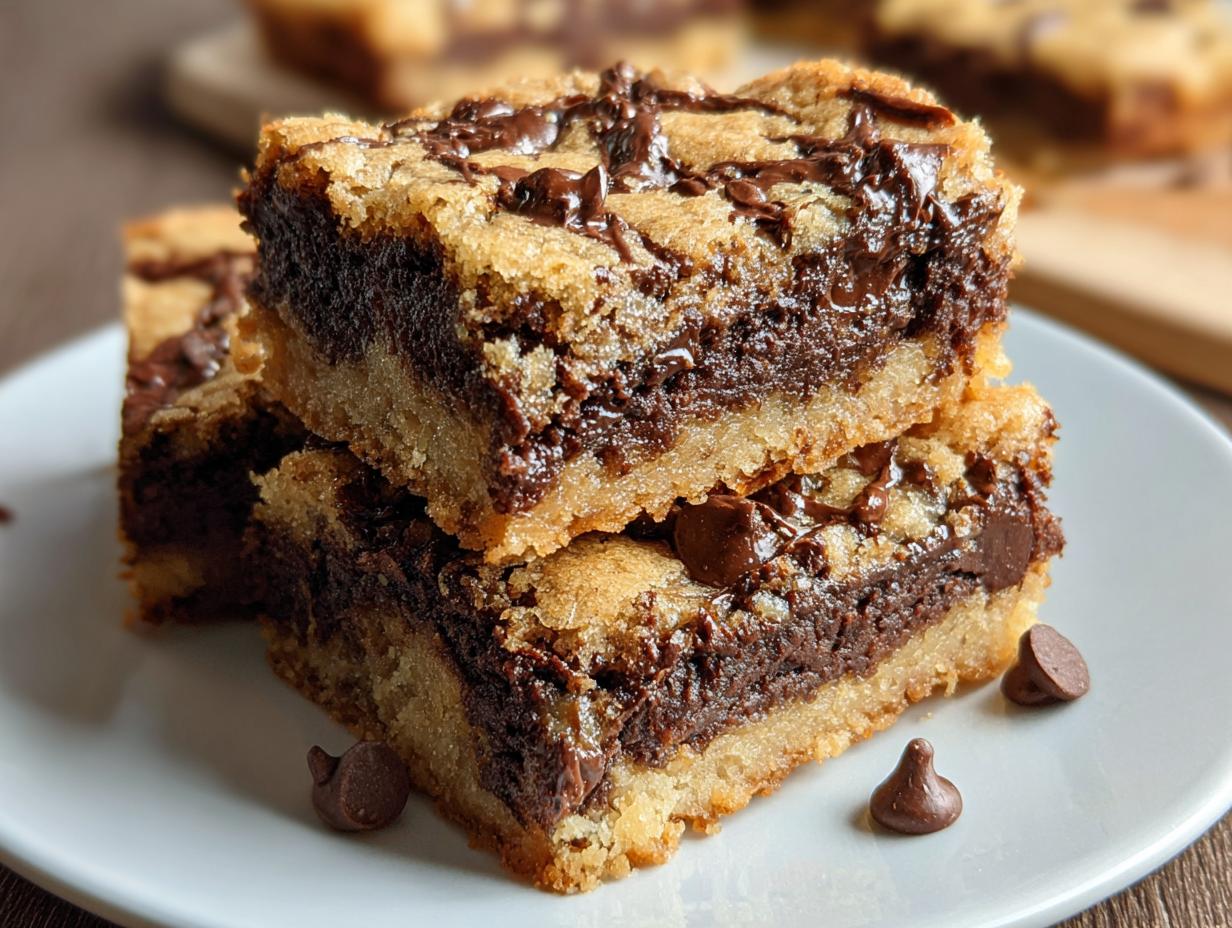
Another thing is getting those super clean cuts. This always happens when the candy coating is totally set – no rush! If it’s still a little soft, you’ll just smudge your awesome decorations. My personal trick? Use a big, sharp knife, and after each cut, wipe the blade clean with a paper towel. It makes such a difference! If your brownies are leaning towards being a bit soft after cooling, pop the whole pan in the fridge for about 15-20 minutes before you cut them. It firms everything up beautifully. Happy spookifying!
Ingredient Notes and Substitutions for Halloween Brownies
So we’ve got our go-to recipe for these fantastic Halloween brownies, but remember, baking is all about flexibility and having fun! Let’s talk about some ingredient swaps you can totally make. For the candy melts, you don’t *have* to stick to green and black. Feeling a bit more ghastly? Grab some purple or orange! Or maybe go for white and add a few drops of food-grade oil coloring to make your own spooky shades. Just remember, water-based food coloring can make candy melts seize up – no fun! If you can’t find candy melts, you could try using white chocolate and adding oil-based coloring, but candy melts are just so much easier for this kind of decorating.
And the sprinkles! Oh my goodness, the sprinkle possibilities are endless. Beyond the classic Halloween shapes, you could use black and orange sanding sugar for a sparkly effect, or even some chocolate jimmies. If you’re feeling super adventurous, you could even pipe little ghost shapes with white frosting after removing the candy eyes. We’re using a brownie mix here for ultimate ease, but if you have a favorite homemade brownie recipe, feel free to use that as your base! Just make sure it bakes up to a nice, firm layer for decorating. It’s similar to how a good base can influence something like a natural Mounjaro recipe – the foundation matters!
Make-Ahead and Storage for Your Halloween Brownies
Okay, so you want to get a head start on these spooky Halloween brownies? Smart move! You can totally bake the brownies themselves a day or two ahead of time. Just let them cool completely, and then cover the pan tightly with plastic wrap. If you’ve already added the candy coating and decorations, be extra careful so nothing gets smudged! For storing, once they’re fully decorated and the candy has hardened, just wrap the whole pan or the cut brownies snugly. I usually pop them into an airtight container. They’ll stay tasting great at room temperature for up to 3-4 days. If you need to freeze them, wrap them really well in a couple of layers of plastic wrap and then some foil to prevent freezer burn. Just let them thaw on the counter for a bit before serving!
Frequently Asked Questions About Halloween Brownies
Got questions about whipping up these spooky Halloween brownies? I totally get it! Sometimes these fun decorations can be a little tricky, but I’m here to help you nail them. Let’s dive into some common things people ask.
Can I use food coloring instead of colored candy melts for my Halloween brownies?
That’s a great question! For colored candy melts, it’s usually best to stick with them because they’re made to melt smoothly. If you try to add regular liquid food coloring to them, it can actually make them seize up and get super thick and lumpy – totally not what we want! If you really want to get fancy with your colors, you can look for oil-based candy coloring. Otherwise, just grab those pre-colored candy melts; they make the whole process so much easier and give you that nice, smooth finish!
How do I get clean cuts on my decorated brownies?
Oh, the dreaded messy cut! For the cleanest cuts on your Halloween brownies, patience is key. First, make sure that candy candy coating is completely hardened. Seriously, wait until it’s totally set! Then, grab a big, sharp knife. A long, thin knife works best. Before you make each cut, wipe your knife clean with a damp cloth or paper towel. This gets rid of any brownie crumbs or sticky candy residue that could make the next cut messy. If the brownies are still a little soft even after cooling, pop the whole pan in the fridge for about 15-20 minutes before you start cutting. It really firms things up and gives you super neat edges.
What other decorations can I use for Halloween brownies?
The decorating possibilities for these Halloween brownies are practically endless! Besides the candy eyeballs, which I just adore, you can totally switch things up. Sprinkle some candy corn right into the wet candy coating for a classic Halloween vibe. Chocolate chips can make great little accents or even eyes if you don’t have the googly ones. And if you’re feeling artistic, you can always grab some white or black frosting and pipe on spooky spiderwebs or little ghost shapes right on top of the candy layer. That connection you make through these treats, kind of like how you build flavor in a natural Mounjaro recipe, is really special!
Estimated Nutritional Information
Just a heads-up, these nutritional estimates are based on the ingredients listed and standard recipe sizes. Things like the specific brownie mix you use or how much candy you drizzle can change the numbers a bit! But generally, you’re looking at around 250 calories, 12g of fat, and 3g of protein per brownie. It’s always good to remember that homemade treats are estimates, just like the disclaimers you see on other sites!
Share Your Spooky Creations!
I absolutely love seeing your baking adventures! If you make these super fun Halloween brownies, please, please share them with me! Pop a comment below and tell me how they turned out, or even give the recipe a star rating if you enjoyed it. I’d also be thrilled if you shared photos of your spooky creations on social media – tag me so I can see all your amazing decorating skills! It’s genuinely the best part of my day seeing what you all make. Don’t forget you can always reach out through my contact page too!
For more recipes follow me on PINTEREST