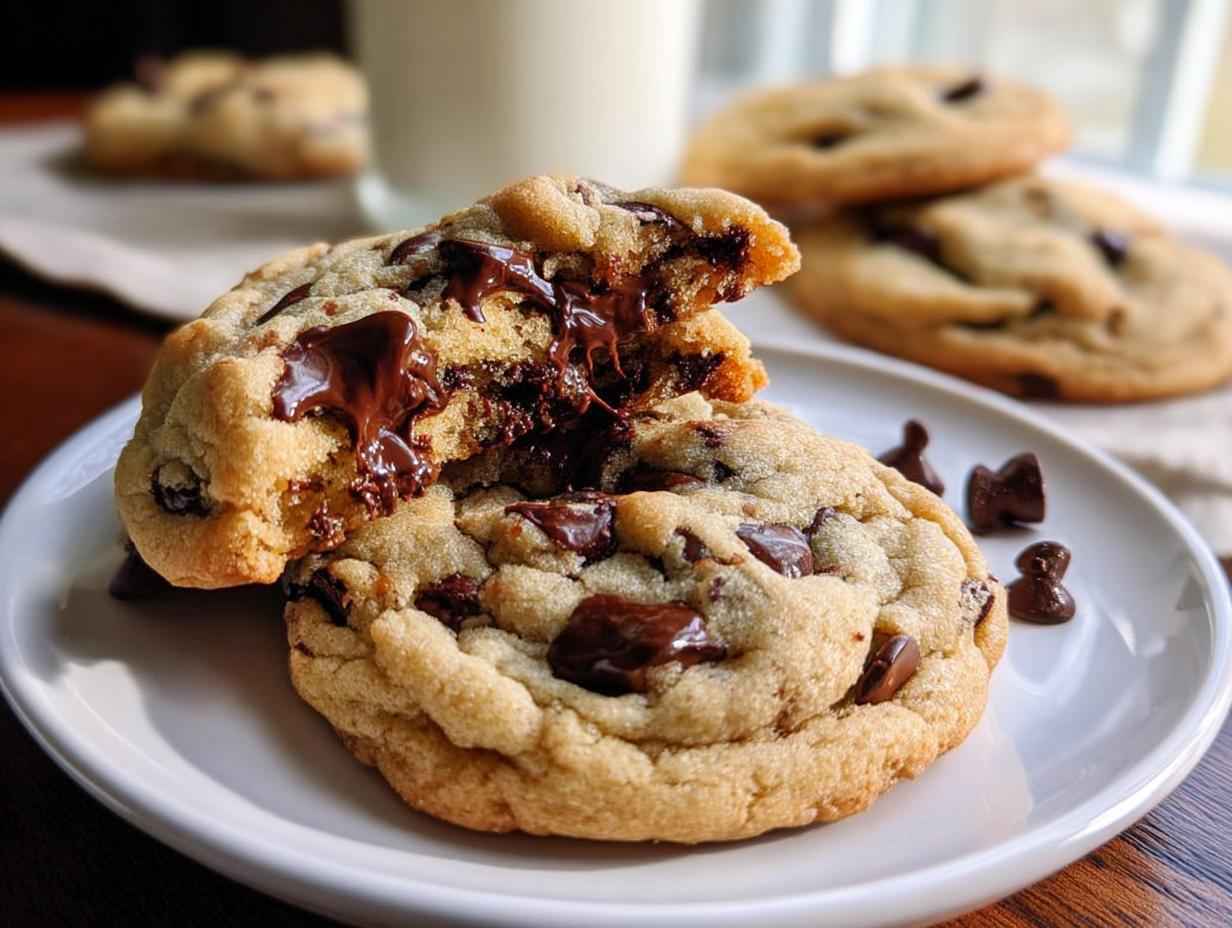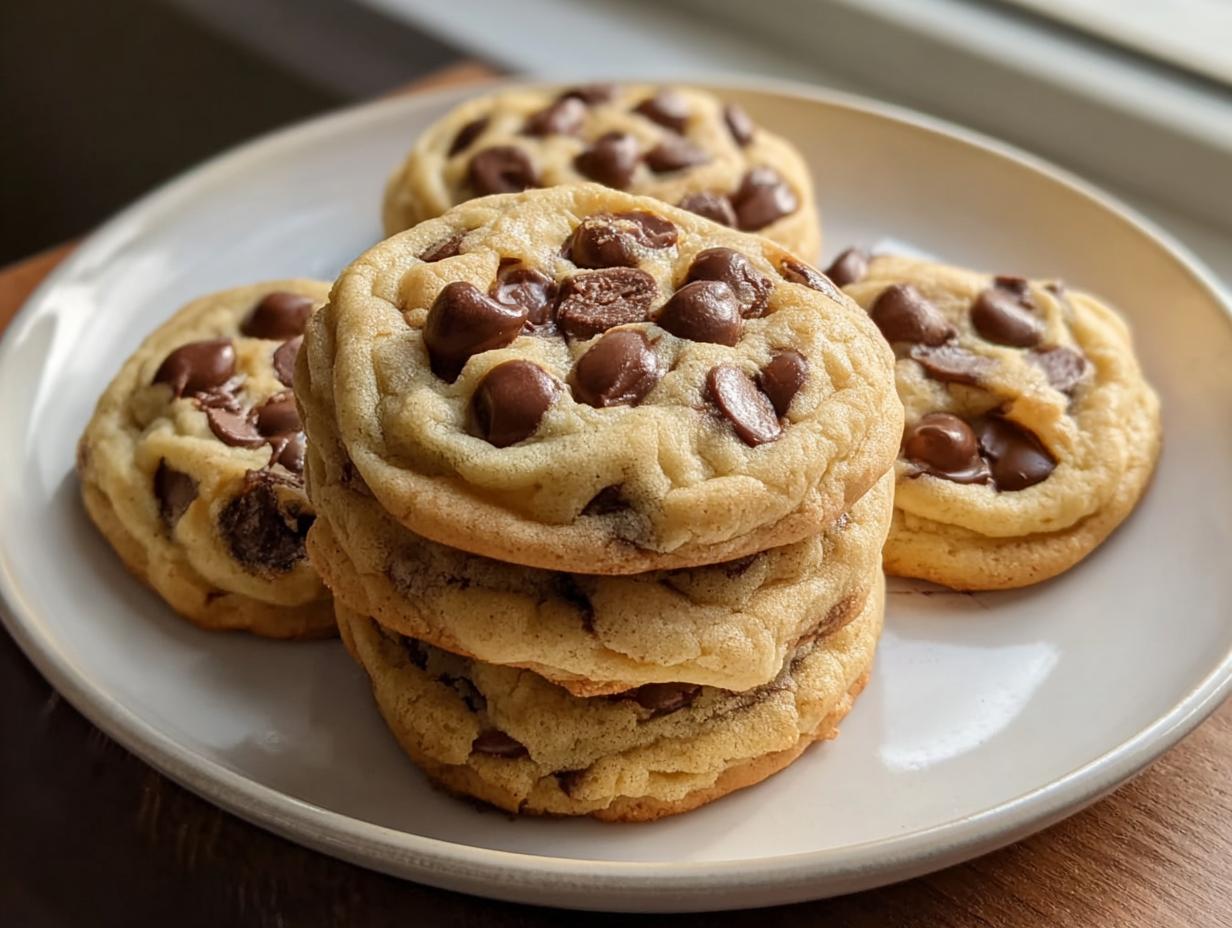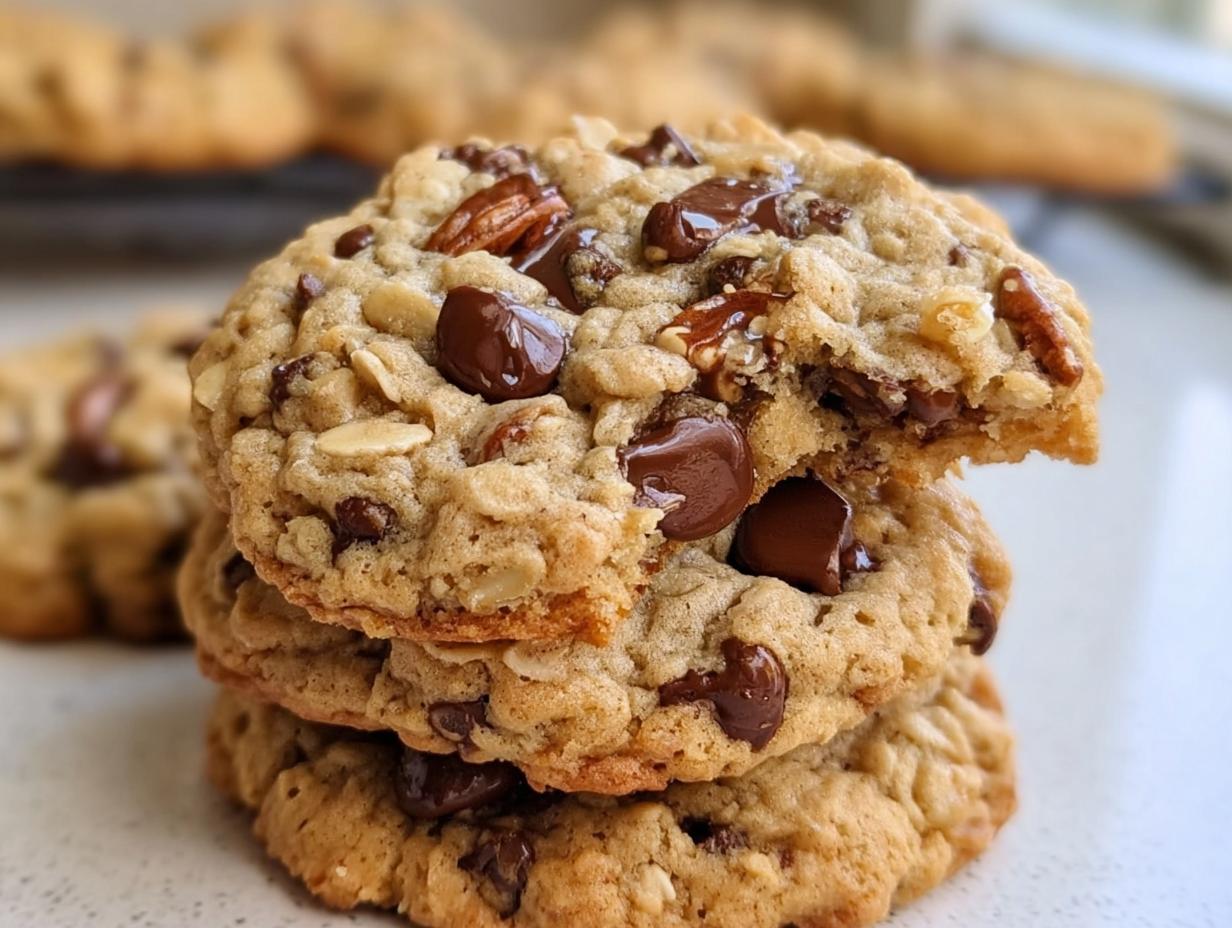
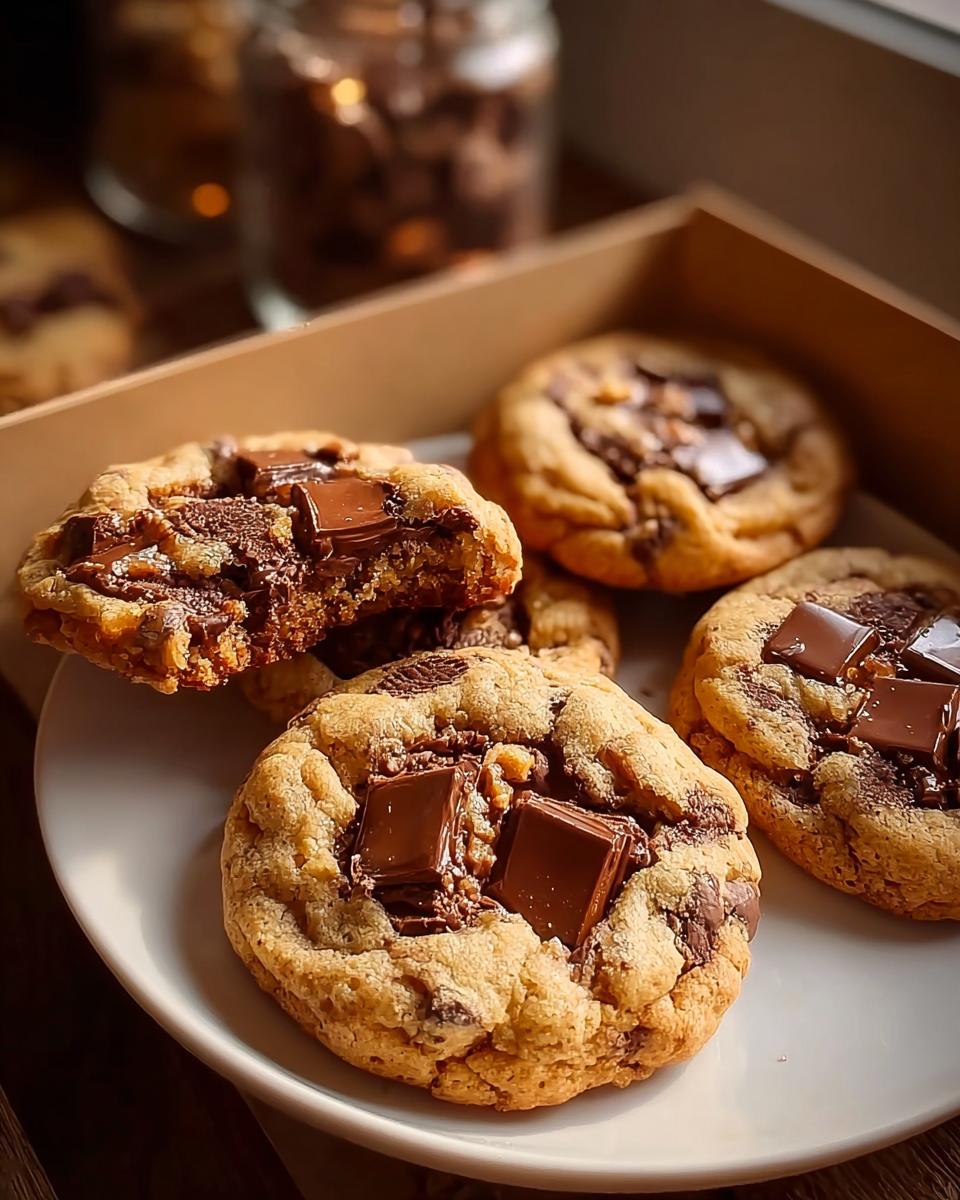
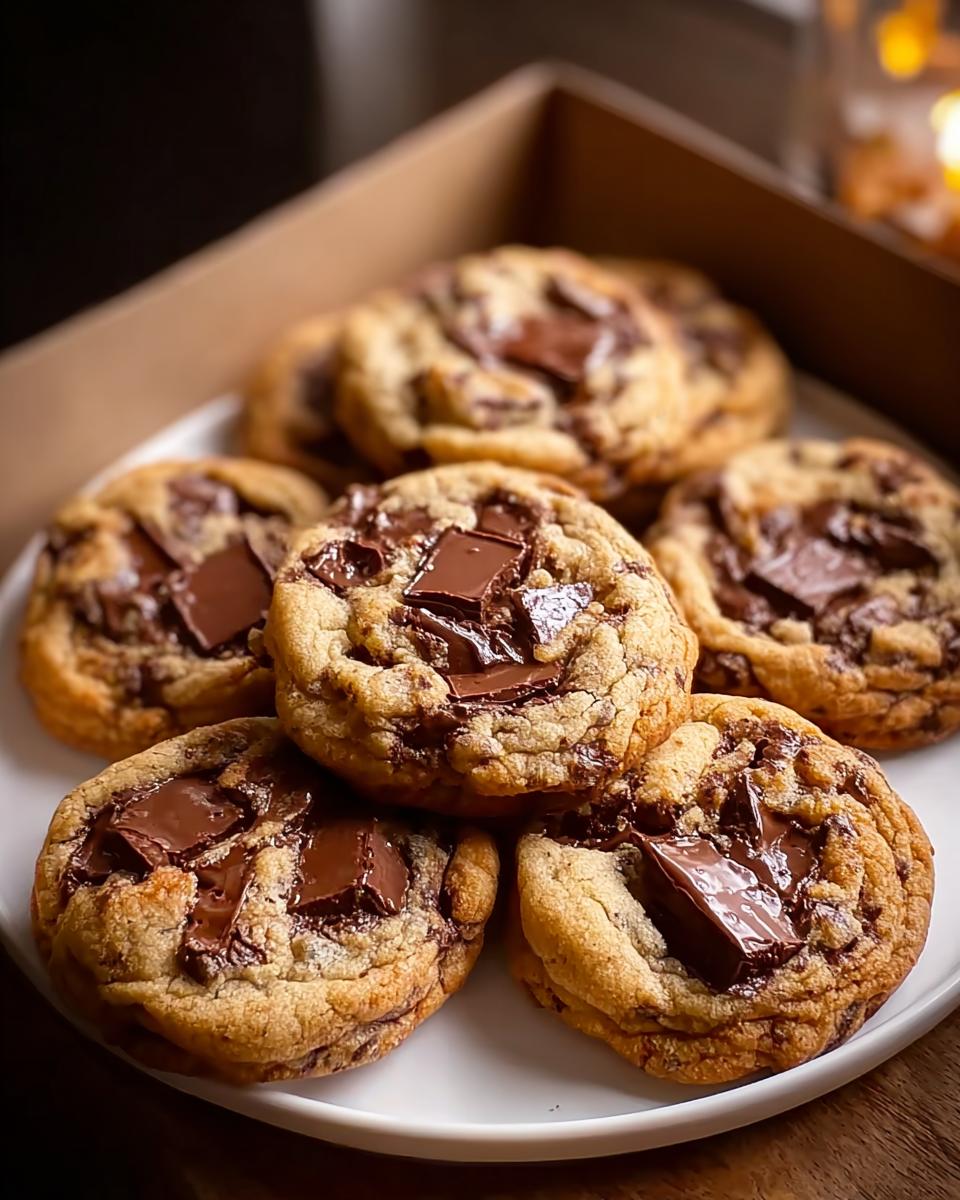
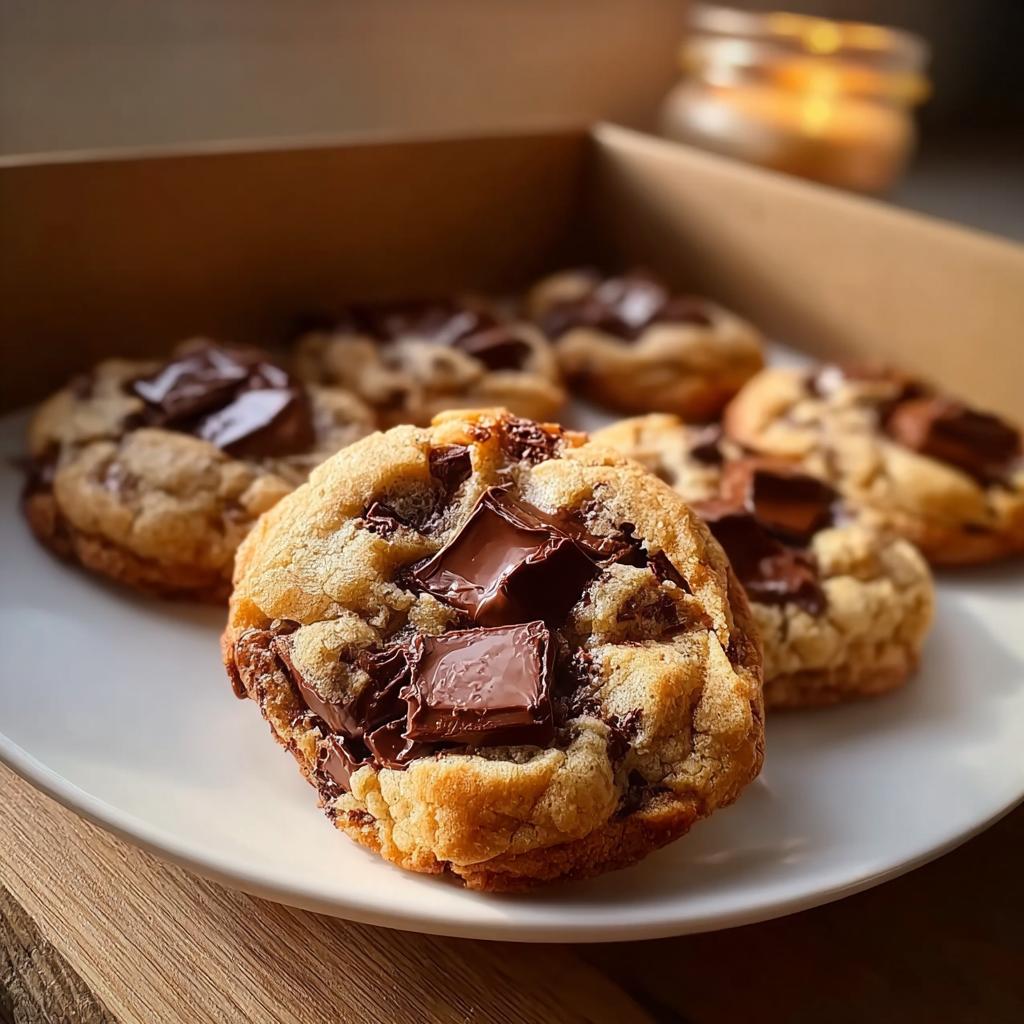
Oh, friends, let’s talk about the cookie that ruined all other cookies for me—in the best way possible! You know the one: crispy edges that give way to a center so soft it barely holds together, absolutely bursting with rivers of melted chocolate. Stop scrolling through those bakery windows, because we are making them right here, right now.
Forget those complicated chill times that last overnight or fussy ingredient swaps. My focus when I bake is always on joy and real results, not restriction. These Chocolate Chunk Cookies with Melty Pockets are designed to fit perfectly into a life where indulging mindfully is part of feeling good. We’re achieving that bakery magic with just simple creaming and the right chocolate choices. Trust me, once you bite into these, you won’t look back!
Who Needs These Chocolate Chunk Cookies with Melty Pockets?
If you’re anything like me, you want an absolutely indulgent treat sometimes, but you don’t want a recipe that feels like a science experiment. This recipe is for the home baker who needs guaranteed success—those chewy edges and gooey centers are non-negotiable!
You value using good ingredients, but you also need simplicity because life is busy. Knowing how to bake something this wonderful is part of living well, not restricting yourself. If you want a treat that supports your overall wellness goals because it’s made with intention, check out some of my foundational habit guides over at this spot while your dough chills!
The Tone and Style for Perfect Chocolate Chunk Cookies with Melty Pockets
When I write a recipe, I want you to feel like I’m standing right there in your kitchen with you! That means the tone is super friendly and encouraging, but I’m also not messing around when it comes to technique. We need to nail that chewy edge and the molten chocolate center.
The style is direct and clear—no fluff here because those cookies won’t wait! I promise to be authoritative on what works (like using good chunks!), but always supportive if your first batch spreads a little too much. Baking should be joyful, not stressful!
My Journey to the Ultimate Chocolate Chunk Cookies with Melty Pockets
I used to think the perfect cookie involved some kind of complicated overnight freeze or adding weird stabilizers. I remember one holiday baking session where I tried freezing the dough balls—they came out these sad, pale hockey pucks that didn’t spread at all. Total disaster!
That failure was actually a turning point. I realized that when I focus on clean, whole ingredients and proper technique—like using enough brown sugar and really good chocolate—I don’t need to torture the dough. The real joy isn’t in fighting the recipe; it’s in honoring the ingredients.
It took a few tries, but once I perfected the ratio of butter/sugar creaming and started chopping my own chocolate for those real melty pockets, I stopped stressing. These Chocolate Chunk Cookies with Melty Pockets are proof that mindful indulgence—enjoying a truly fantastic treat without the diet drama—is absolutely key to real wellness.
Essential Equipment for Baking Chocolate Chunk Cookies with Melty Pockets
Okay, you don’t need a commercial mixer for this, but having the right tools makes the process smoother! Grab your trusty baking sheets, a large mixing bowl, and of course, a wire rack for cooling. My absolute non-negotiable is parchment paper.
I swear by it! Parchment paper ensures phenomenal cleanup, but more importantly, it helps the cookies bake evenly on the bottom so you don’t end up with those dark, aggressively crisp edges. It really helps maintain that perfect texture we are aiming for. You can check out some of my favorite baking gadgets over at this collection!
Ingredient Deep Dive: Crafting Your Chocolate Chunk Cookies with Melty Pockets
This recipe is really built on intention, so let’s talk specifics because ingredient quality matters when you want those incredible texture results. You’ll want two and a quarter cups of all-purpose flour, measured carefully by spooning it into the cup, not dipping!
For the sugars, we need a mix: half a cup of standard granulated sugar, but the key is three-quarters of a cup of packed light brown sugar. That brown sugar brings the chewiness we crave! We’re using three-quarters of a cup of unsalted butter, and please make sure it’s only softened to room temperature—not melted, or we’ll ruin the creaming stage.
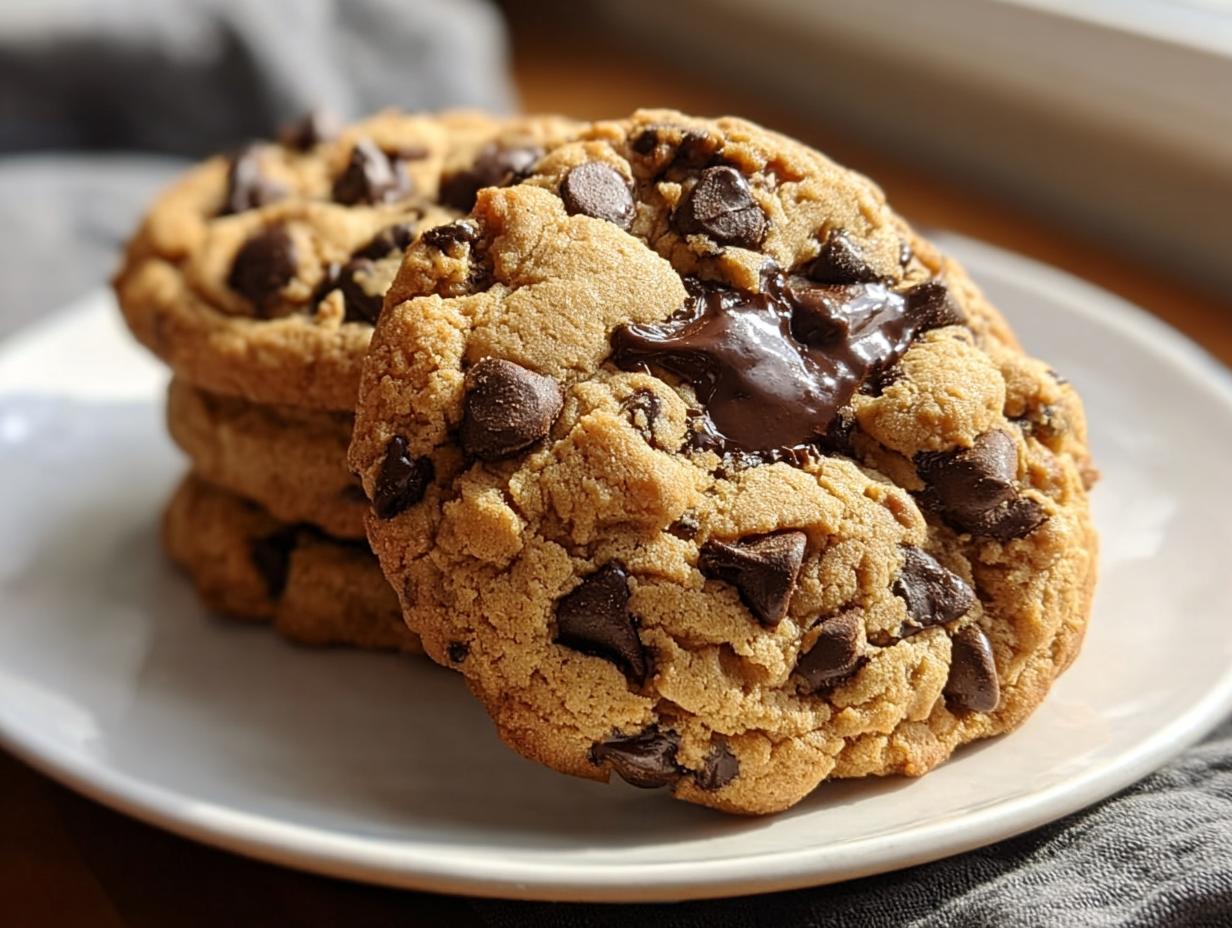
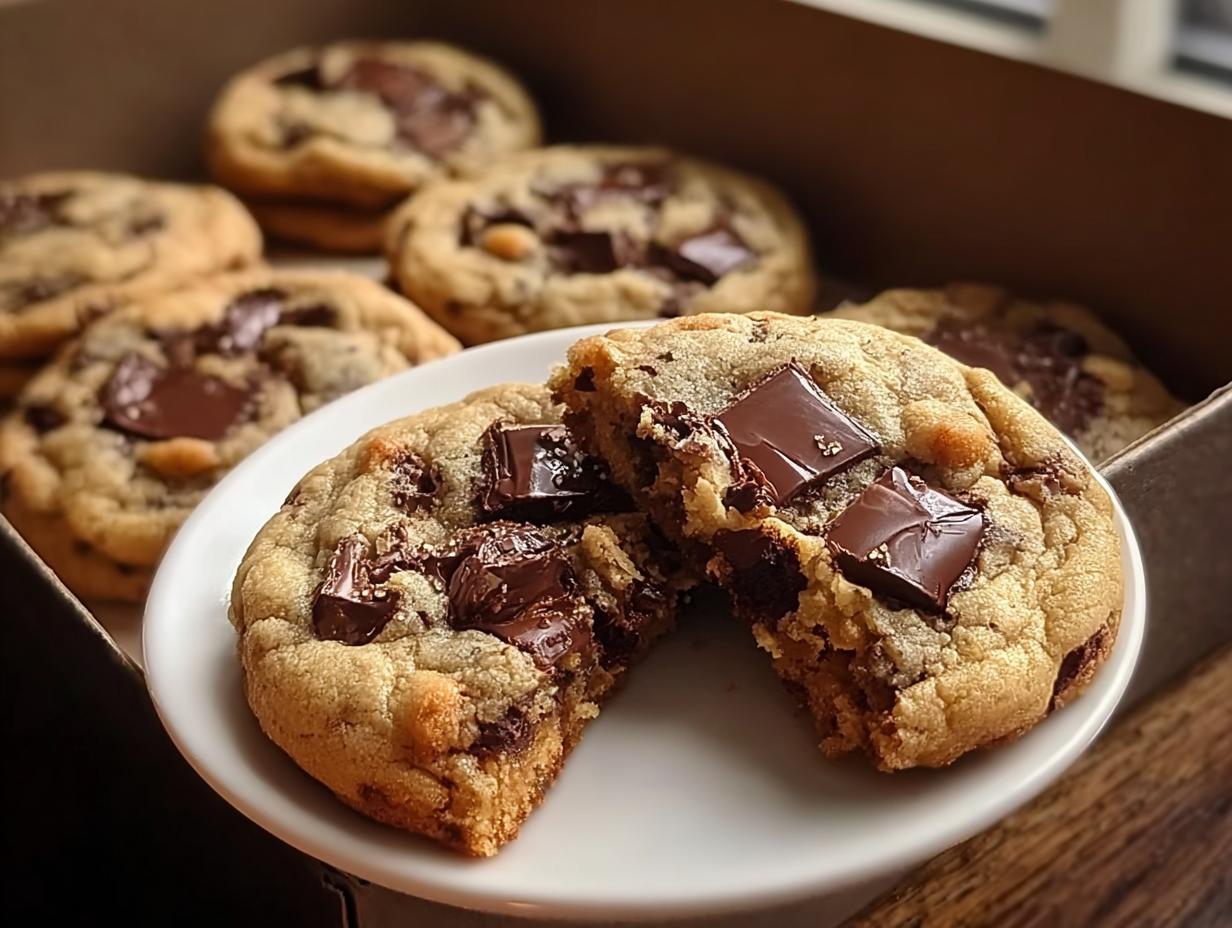
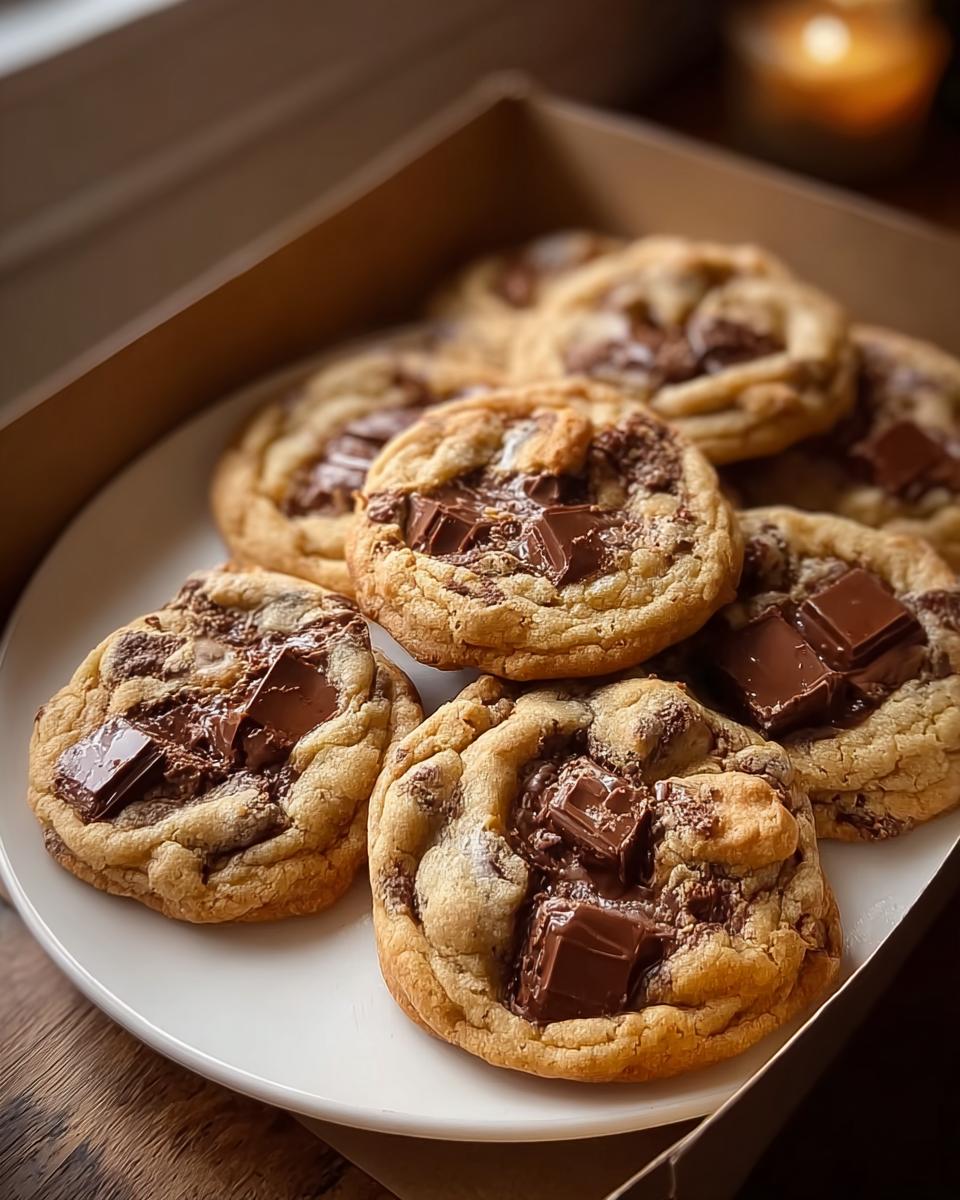
And finally, the star: two full cups of chocolate chunks, roughly chopped. Don’t skimp here! If you want those melty pockets, you need real chunks, not tiny chips.
Ingredient Notes and Substitution Wisdom
Listen, the butter and the single egg plus the extra yolk absolutely must be room temperature. Seriously! When they are cool, they don’t cream properly, and that creaming is what traps air for lift. For the best melty pools, I strongly suggest using a mix of high-quality dark chocolate (around 60-70%) and some good milk chocolate, chopped unevenly. The different melting points create texture magic!
If you skip chilling the dough, you’ll get thin, flat cookies, which we are trying to avoid. It’s totally worth the little wait time for structure!
Step-by-Step Instructions for Chocolate Chunk Cookies with Melty Pockets
Alright, let’s get these babies mixed! First things first, get your oven roaring to 350°F. Protect those pans immediately with parchment paper—it’s your ticket to easy removal later. Then, we start separating our dry from our wet ingredients.
My favorite part is when the dough starts coming together. We’re going to blend the flour, baking soda, and salt first. In your big bowl, beat that softened butter with both sugars until it looks pale and fluffy—this takes a minute or two, but it builds the texture!
Beat in that egg, the extra yolk, and the vanilla until everything is smooth. Then, and this is important: fold the dry stuff into the wet until you *just* see no more streaks of flour. Overmixing here makes your edges tough! Finally, gently fold in those gorgeous chocolate chunks and nuts if you’re using them. After that small chill time, you’re ready to bake some magic! Don’t forget to browse some quick holiday baking ideas over here if you need inspiration!
Mixing the Dough for Optimal Texture
That creaming step with the butter and the two kinds of sugar? That’s where the air gets trapped, yielding that beautiful chewy edge, so don’t rush it! When you add the flour mixture, you must stop mixing the second you see the last powdery bit disappear. If you stir too long, you develop gluten, and guess what? Tough cookies! Yuck!
When you fold in the chocolate chunks and nuts, be delicate—we want integrity in those dark pockets, not dust. Just fold until they are evenly distributed throughout the dough ball.
Baking and Achieving Perfect Edges
We chill the dough for 10 to 30 minutes—this brief rest stops the cookies from spreading too thinly while they bake in that hot oven. Scoop out about two tablespoons worth of dough for each one, and make absolutely certain they are spaced two and a half inches apart on the sheet.
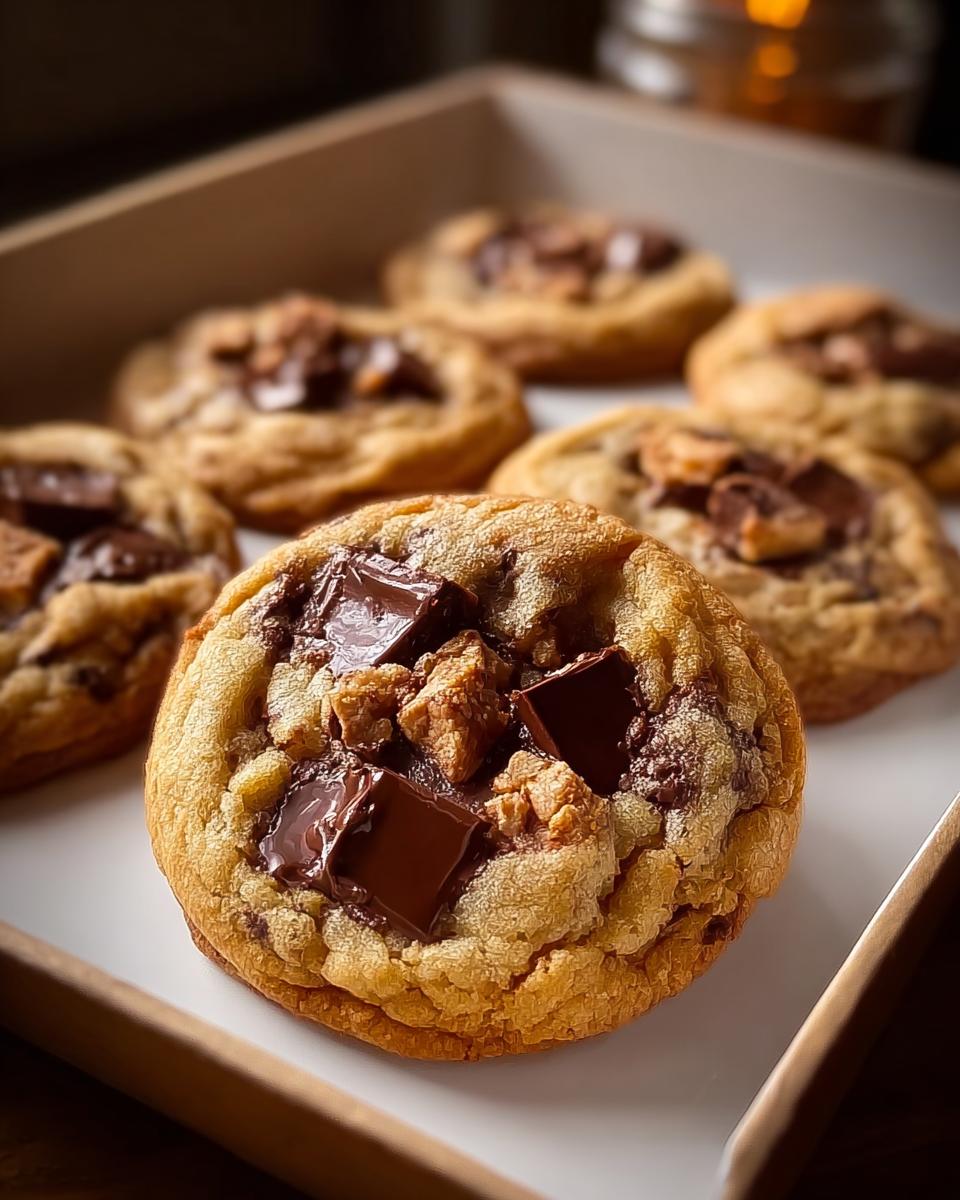
Bake them for about 10 to 12 minutes until they look set on the edges but slightly underdone in the very center. And here’s my little trick for that bakery finish: right before they go into the oven, take a few of those reserved chocolate chunks and gently press them onto the tops of the raw dough balls. It makes them look incredible when they come out!
Tips for Success with Your Chocolate Chunk Cookies with Melty Pockets
We are so close to warm, gooey perfection, but the cooling phase is almost as important as the mixing! Do NOT slide these cookies onto a wire rack immediately after pulling them out. They need five full minutes on that hot baking sheet to set their structure.
If you try to move them too soon, they’ll just fall apart because that center is still liquid gold! After five minutes, transfer them gently. If you’re feeling fancy, this is the moment to sprinkle just a tiny pinch of flaky sea salt over the still-warm tops. It really makes the chocolate pop!
If you want to make dough ahead of time, you can absolutely scoop the balls and freeze them on a tray before tossing them into a freezer bag. Just add a minute or two to the bake time later. You can grab some easy make-ahead inspiration right here!
Storage and Keeping Your Chocolate Chunk Cookies with Melty Pockets Fresh
The great news is that these Chocolate Chunk Cookies with Melty Pockets actually taste even better the next day—if they last that long, I know mine never do!
Store the finished cookies in a truly airtight container right on your counter, room temperature is perfect, and they stay tender for up to four days. If you’re a planner, double the batch and freeze the raw dough balls! Baked good dough freezes beautifully, and you can pop them straight onto a baking sheet whenever a chocolate craving hits.
Frequently Asked Questions About These Cookies
I always get so many questions when people try this recipe for the first time. It’s usually because the results are so different from the flat, dry cookies they used to make! Here are the things I hear most often when people bake these Chocolate Chunk Cookies with Melty Pockets.
Why did my cookies spread too much and get flat?
This almost always comes down to temperature! Either your butter was too soft (remember, room temperature, not melted!), or you skipped the essential 10-minute chill time. If you bake dough that’s too warm, the fats melt instantly in the oven, and poof—flat cookies. Chilling the dough lets those fats firm up so the cookies rise instead of spreading out.
Can I use chocolate chips instead of chunks?
You certainly can, but you won’t get those incredible ‘melty pockets’ quite as effectively. Chocolate chips are designed to hold their shape, which is great for muffins, but not ideal for gooey cookies. If chips are all you have, use them, but I really recommend grabbing a nice bar of quality chocolate and roughly chopping it yourself. It makes such a difference!
Do I really need to use the extra egg yolk?
Yes, please don’t skip that yolk! That extra yolk is pure fat and protein, and it’s what gives these cookies the richness and chewiness that sets them apart. It helps build that dense center while keeping the edges slightly crisp. It’s a small addition that delivers big texture results!
If you’re looking for other fun, less hands-on things to bake, check out some of my great bar cookie ideas for easy crowd-pleasing treats!
Understanding the Nutrition Estimate
Now, while these Chocolate Chunk Cookies with Melty Pockets are all about joyful indulgence, I know some of you track your macros. Based on the standard ingredient amounts listed, you’re looking at roughly—and I mean *roughly*—220 calories per cookie.
Expect about 12 grams of fat, 26 grams of carbs, and 3 grams of protein per serving. Please remember these are just estimates! Since we used high-quality chunks and specific sugars, your actual fat and carb counts will shift based on the brand of butter or the type of chocolate you decide to go overboard with. Bake it with love, and enjoy it!
Share Your Melty Pocket Creations
Okay, now you’ve tasted the magic! I am so excited for you to see what you’ve created. Did you get those perfect craggy edges? Are your chocolate chunks pooling just right?
I really, really want to hear about it! Don’t just leave with the recipe—come back and tell me how it went! Please take a moment to leave a quick star rating right below this section. Those ratings help other busy people know they can trust this recipe too.
If you managed to get a great photo of your stunning Chocolate Chunk Cookies with Melty Pockets, tag me on social media! Seeing your creations brighten my day and remind me why I love sharing these simple, clean habits with a delicious treat mixed in. Happy baking, everyone—go enjoy that glorious, melted chocolate!
By HI, I’M EMILIA, THE FOUNDER OF MELTITCLEAN.COM – YOUR DIGITAL SPACE FOR NATURAL WEIGHT LOSS, REAL WELLNESS HABITS, AND CLEAN-LIVING INSPIRATION THAT ACTUALLY FITS YOUR LIFE.
FOR YEARS, I STRUGGLED WITH THE UPS AND DOWNS OF DIETING. I TRIED EVERYTHING — JUICE CLEANSES, LOW-CARB CRAZES, FITNESS CHALLENGES — BUT I ALWAYS ENDED UP BACK WHERE I STARTED: TIRED, BLOATED, AND FRUSTRATED. I DIDN’T JUST WANT TO “LOSE WEIGHT” — I WANTED ENERGY, MENTAL CLARITY, GLOWING SKIN, AND CONFIDENCE WITHOUT SACRIFICING MY JOY OR SANITY.
AFTER YEARS OF EXPERIMENTING, LEARNING, AND UNLEARNING, I DISCOVERED A SIMPLE TRUTH: YOUR BODY IS ALREADY POWERFUL — IT JUST NEEDS SUPPORT, NOT RESTRICTION. THAT’S WHEN I CREATED MELT IT CLEAN — A SITE DEDICATED TO REAL TRANSFORMATION THROUGH CLEAN, INTENTIONAL, AND NOURISHING DAILY HABITS THAT ANYONE CAN FOLLOW.
MY GOAL WAS SIMPLE: BUILD A PLACE WHERE PEOPLE COULD FEEL INFORMED, SUPPORTED, AND EMPOWERED WITHOUT BEING OVERWHELMED BY WELLNESS FADS.
Chocolate Chunk Cookies with Melty Pockets
Ingredients
Equipment
Method
- Preheat the oven to 350°F and line two baking sheets with parchment paper.
- Whisk the flour, baking soda, and salt together in a bowl.
- In a separate large bowl, cream the softened butter with the granulated and brown sugars until light and fluffy.
- Beat in the egg, yolk, and vanilla until incorporated.
- Fold the dry ingredients into the wet mixture until just combined.
- Gently fold in the chocolate chunks and optional nuts.
- Chill the dough for 10-30 minutes.
- Scoop 2 tablespoon sized mounds onto the prepared sheets, spacing them 2 1/2 inches apart.
- Bake for 10-12 minutes until the edges are set and lightly golden.
- Let cookies cool on the baking sheet for 5 minutes, then transfer to a wire rack.