Oh my goodness, who doesn’t crave that incredibly rich, cheesy comfort food hit now and then? For the longest time, I thought enjoying classics like a decadent Chicken Alfredo Bake meant completely derailing any healthy habits I was trying to build. I’ve been there—scrubbing my kitchen after a diet failure, promising myself I’d only eat salads for a month. But honestly, the joy goes out of eating when you’re constantly restricted!
That’s why I developed this recipe. It takes that creamy, dreamy Italian-American favorite and gives it a satisfying baked texture that holds up beautifully. This isn’t just another pasta dish; it’s manageable, incredibly flavorful, and a reminder that you don’t have to ditch your wellness goals entirely to enjoy real food that warms your soul. Trust me, you’ll want to bookmark this one! If you are looking for a pure sauce recipe to study first, check out this guide on creating a velvety creamy alfredo sauce for any pasta.
Who This Chicken Alfredo Bake Is Perfect For
If your weeknights feel like a sprint to the finish line, this recipe is totally speaking your language. This absolutely amazing Chicken Alfredo Bake is designed for anyone who needs a big, delicious hug in a casserole dish after a long day. Forget complicated techniques!
It’s made for families demanding true comfort food—the kind that tastes amazing the next day, too. Plus, if you’re someone like me, building a balanced life where you *don’t* have to say no to deliciousness, this bake is your answer. It’s hearty and feels indulgent, but it comes together using fantastic, quality ingredients. For more dinner wins that fit your busy schedule, take a peek at my favorite easy weeknight dinners that even the kids will eat.

Why You Will Love This Creamy Chicken Alfredo Bake
We cook to nourish, and sometimes, that means craving something deeply satisfying. This isn’t just a casserole; it’s a game-changer for your weekly rotation. Here’s why I think this Chicken Alfredo Bake is going straight into your ‘favorites’ folder:
- Ultimate Comfort Factor: Forget restaurant-quality expectations—this is better! It’s rich, creamy, and tastes exactly like the indulgent pasta you dream about, but baked into a perfect sliceable square.
- Amazing Leftovers: Seriously, this tastes even better on Day Two! The flavors meld overnight, and you get perfect servings for lunch that just need a quick reheat.
- Homemade Sauce, Zero Stress: We use simple steps to build an incredible sauce right in the skillet. It uses cream cheese for stability, which means a far less finicky sauce than traditional methods. No lumps, guaranteed! I even talk about a similar technique for boosting flavor in my post on healthy comfort food for dinner recipes.
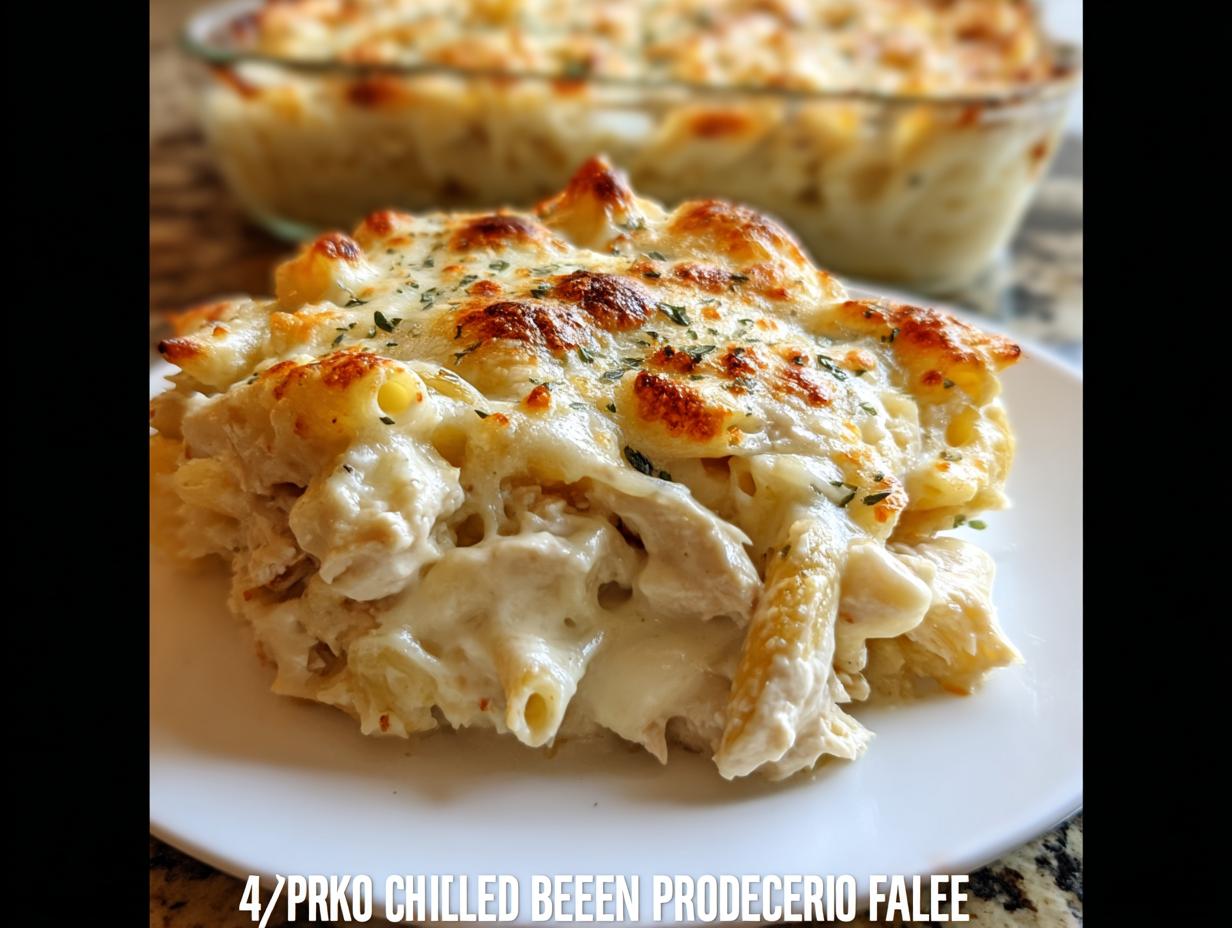
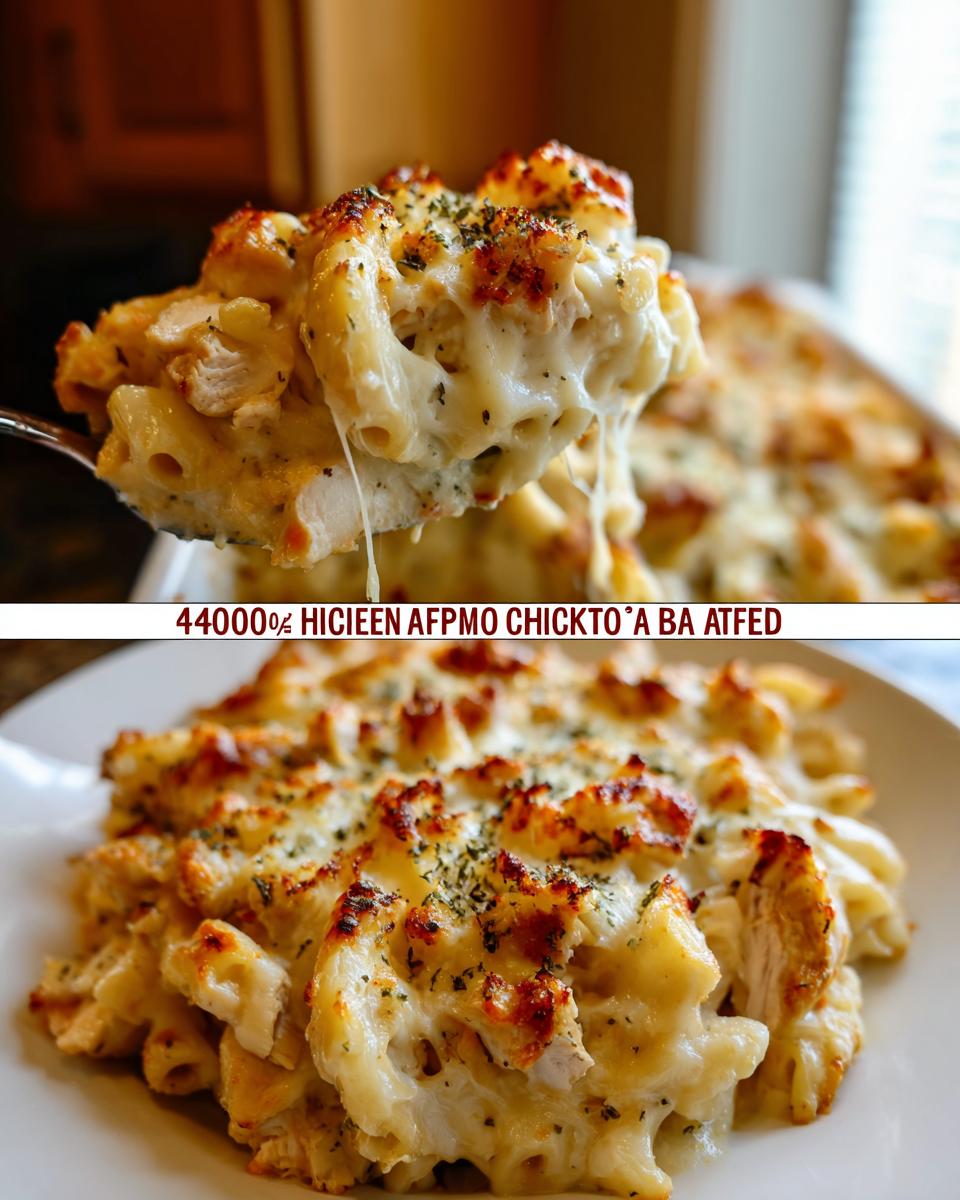
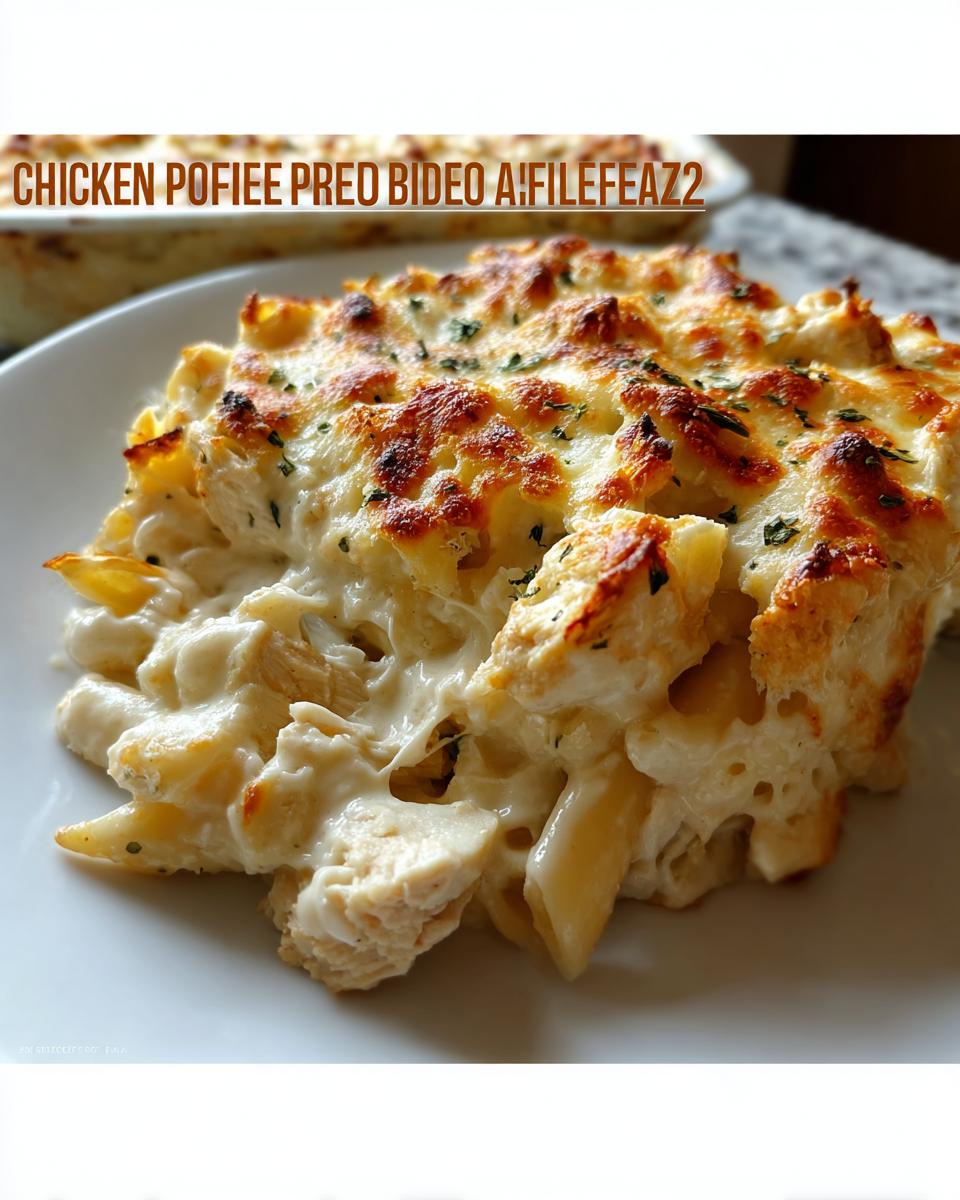
- Perfectly Balanced Textures: You get tender, seasoned chicken mixed with perfectly cooked pasta, all swimming in that creamy sauce, topped with that irresistible golden, bubbly, cheesy crust. It’s texture heaven!
- Easy Assembly for Busy Cooks: Prep time is minimal because we’re keeping the sauce straightforward. You just cook, mix, top, and bake. That’s basically my dream weeknight scenario!
Essential Equipment for the Best Chicken Alfredo Bake
I know, I know, we all have too many gadgets, but for this Chicken Alfredo Bake to come out perfectly—especially that golden, browned top—you need a few solid pieces of gear. Don’t worry, nothing too obscure here, trust me!
You really only need three main pieces that handle the different stages of this recipe:
- A Large Pot: This is strictly for boiling that fettuccine. You need room for the water and the pasta to move around nicely so it cooks evenly; using a giant pot prevents it from clumping up.
- A Large Skillet: This is where the party starts! You’ll use this for searing your seasoned chicken and then, more importantly, building that incredible, creamy sauce base layer by layer. Make sure it has high enough sides to handle the sautéing and the whisking later on.
- Your dedicated 9×13-inch Baking Dish: This is the star of the show for the final act. It gives you the perfect surface area to get that bubbly edge and that crispy topping without making the bake too thick to cook through evenly.
Having these three items ready to go means you can move smoothly from step to step without stopping to wash or scramble for tools. Keeps the momentum going!
Ingredient Notes for a Perfect Chicken Alfredo Bake
Okay, listen up, because this is where the magic—and sometimes the mess—happens! For a Chicken Alfredo Bake this rich, you simply cannot cut corners on the cheese or the dairy. My biggest rule when teaching this recipe is to use freshly grated Parmigiano-Reggiano. Please, *please* skip that stuff in the green shaker can. The pre-shredded cheese has anti-caking agents that make your beautiful sauce grainy instead of silky. It’s a texture disaster!
Also, when you grab your milk, make sure it’s room temperature. If you dump cold milk into your hot roux, you risk seizing up the sauce! Trust me on this one; it saves you scrubbing lumps later. Remember to strategically divide that Parmigiano: 1.5 cups go into the sauce for pure melt factor, and the last ½ cup is reserved strictly for that gorgeous golden crust on top.
Substitutions and Ingredient Clarity
I totally get that life happens and pantries are tricky! If you need to make a swap, here are my go-to adjustments that won’t ruin the bake:
- For the chicken, chicken thighs work like a charm instead of breasts—they stay incredibly juicy during the searing process, and who doesn’t want more juicy chicken?
- If you’re avoiding gluten like many of us working on clean habits, 12 ounces of your favorite good-quality GF fettuccine works beautifully. The sauce is so rich it coats those alternatives perfectly.
- Need a little kick? The red pepper flakes are optional, but they cut through the richness just enough so you don’t feel totally overwhelmed by cream. It’s balanced flavor, not heat! Don’t forget my guide on choosing the right salt, which is crucial even in baking, like with this kosher salt guide.
Step-by-Step Instructions for Your Chicken Alfredo Bake
Alright, let’s get this Chicken Alfredo Bake moving! The secret to preventing this from turning into a dense brick is managing your timing and temperature throughout the process. We’re aiming for tender pasta and a sauce that hugs everything perfectly, not glue! Make sure your oven is humming along at 375°F (190°C) and that 9×13 dish is greased before you even touch the stove element.
Preparing the Pasta and Chicken
First things first: water for the fettuccine needs a serious amount of salt—it should taste like the sea! Throw your 12 ounces of pasta in and cook it for exactly one minute *less* than the box says. We need that pasta a bit underdone because it’s going to absorb liquid and steam while it bakes later. Drain it, give it a quick cool rinse so it doesn’t stick together, and toss it with a tiny bit of olive oil.
Next, season your cubed chicken really well with salt, pepper, garlic, and onion powder. Be generous! Heat 2 tablespoons of oil in that big skillet over medium-high heat. Quick tip here: sear the chicken in batches. If you crowd the pan, the chicken steams instead of browning beautifully. We want that golden sear for flavor, so pull the cooked chicken out and set it aside while you start the sauce.
Building the Homemade Alfredo Sauce Base
This is where flavor gets built! Drop that butter into the same skillet over medium-low heat. Sauté your diced onion until they are soft and sweet—about 4 or 5 minutes. Toss in the minced garlic and pepper flakes for just a minute until you can smell that amazing aroma! Be careful not to burn the garlic; that ruins everything.
Whisk in your flour; cook that roux for a minute and a half to get rid of that raw flour taste. Now, whisk in the milk *slowly*, followed by the heavy cream. Bring this to a very gentle simmer until it thickens up—it should coat the back of a spoon easily. Crucial step: Take the pan OFF the heat before adding the cream cheese cubes. Whisk them in one by one until the sauce is totally velvety smooth. No lumps allowed!
Finish the sauce by whisking in the Parmesan, nutmeg, Dijon, and lemon juice. Give it a good taste test. If it needs more salt or pepper, now is the time to adjust it before folding in the chicken and pasta!
Assembling and Baking the Chicken Alfredo Bake
Time for the grand finale assembly! In a huge bowl—or maybe even the empty pasta pot if you’re like me and hate dirtying extra dishes—gently fold together all that sauce-coated pasta and chicken. Then, mix in the remaining mozzarella and parsley right in the bowl. This ensures every little bit of pasta is covered.
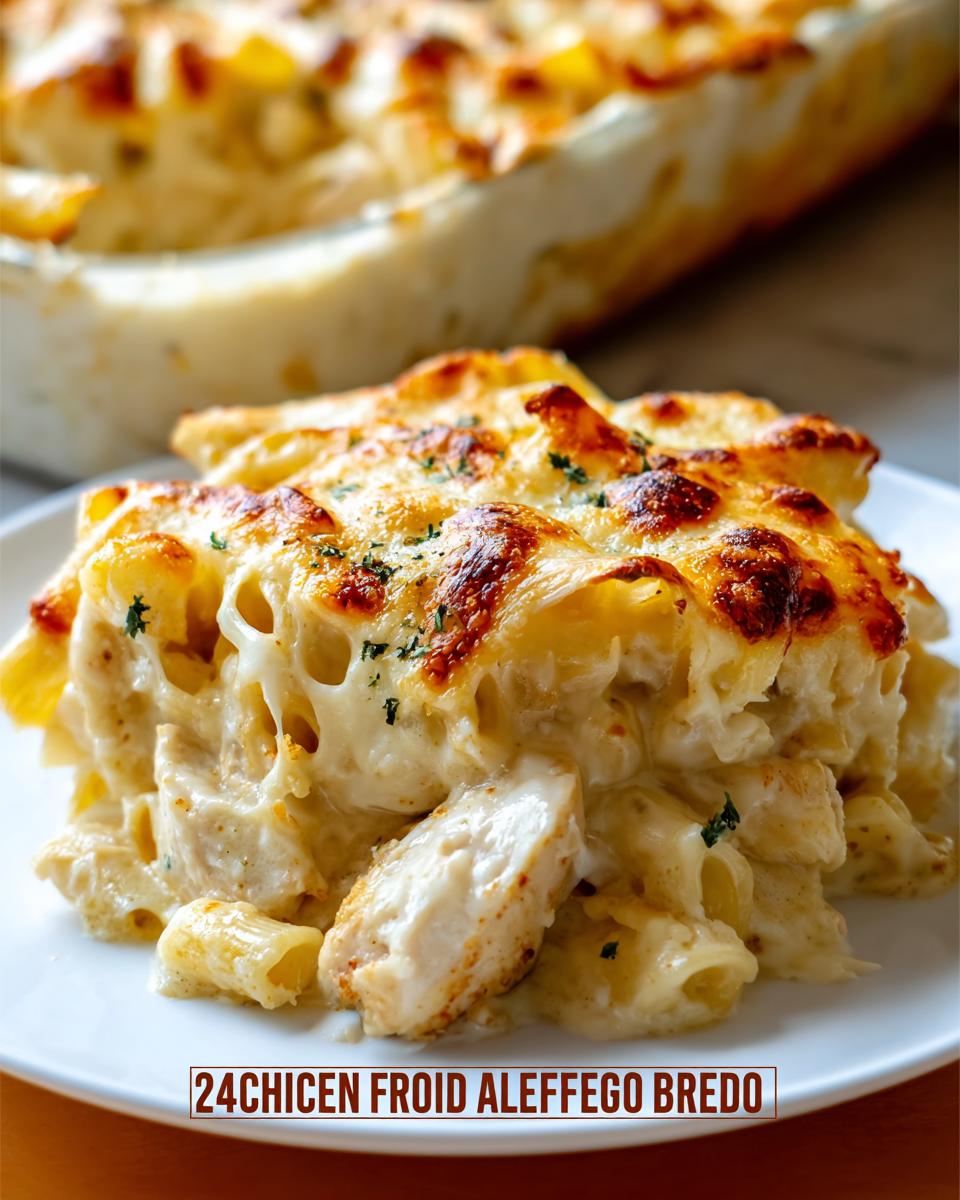
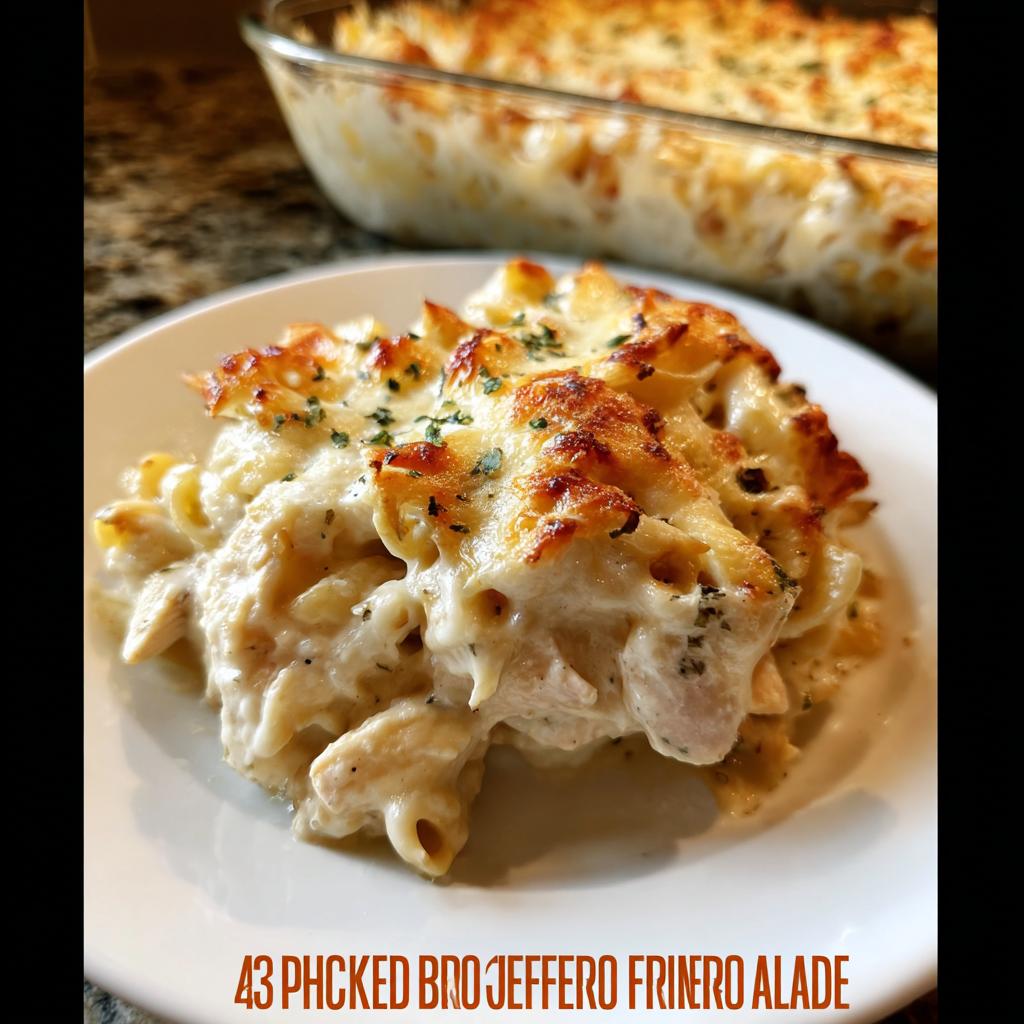
Scrape that goodness into your waiting 9×13-inch dish and smooth it out. Now, sprinkle that reserved Parmesan and mozzarella across the top, along with that optional herbed panko topping if you made it. Bake it at 375°F (190°C) for about 25 to 30 minutes. You are looking for bubbly edges and a gorgeous golden top. Finally, and this is non-negotiable for the best texture: let your Chicken Alfredo Bake rest for a full 10 to 15 minutes before you cut into it. That resting lets the sauce set up perfectly so it just oozes out when you slice it, instead of running everywhere! For extra insights on creating amazing pasta textures, check out my guide on chicken alfredo pasta with velvety texture.
Tips for the Ultimate Chicken Alfredo Bake Texture
I’ve messed up enough casseroles in my life to know exactly where things go wrong! When you’re making something as rich as this amazing Chicken Alfredo Bake, sometimes the sauces can break or the pasta can get a little mushy if you aren’t careful. Don’t panic, though; I have three non-negotiable tips that keep mine tasting incredible, even straight out of the fridge.
First, remember that pasta trick we talked about? Cooking it one minute shy of the box directions is vital. If your pasta is fully done when it goes into the oven, guess what happens during 30 minutes of baking? Soggy sadness! Undercooking slightly lets the pasta absorb the sauce moisture during the bake, giving you that perfect tenderness when you pull the dish out.
My second big tip addresses the sauce stability. When you melt in that cream cheese—and remember, it has to come off the heat!—whisk vigorously. Cream cheese is temperamental when it gets too hot, and if it breaks, your sauce separates when it cools. We want smooth, glossy, beautiful sauce, not an oily mess.
And here is my personal, non-negotiable texture secret, which I bring up in my post about what makes perfect ground beef recipes too: always, always, always grate your own Parmesan! Pre-shredded Parmesan turns grainy under heat because it’s coated in cellulose. When you grate a good brick of Parmigiano-Reggiano fresh, those fine shreds melt seamlessly into the heavy cream and milk, creating a velvety mouthfeel that shelf cheese just can’t replicate. It makes all the difference between a good bake and the *best* bake.
Finally, that 15-minute rest time after baking isn’t just a suggestion—it’s structural support! Let it sit on the counter. This allows the liquids to redistribute and cool just enough so that when you slice into it, you get a neat, gorgeous portion rather than a pooling puddle of sauce. Patience pays off immensely here!
Storing and Reheating Your Chicken Alfredo Bake Leftovers
Okay, one of the best parts about making a big, glorious Chicken Alfredo Bake is knowing you have built-in dinner security for the next few days! I rarely have leftovers because my family attacks this dish like it’s the last food on earth, but when I do manage to save some, I have a precise way of keeping it perfect.
When covering it up, make sure you use plastic wrap directly touching the surface of the casserole before you put the lid on the dish. If you don’t press plastic wrap gently onto the surface, the exposed top layer of sauce and cheese tends to dry out and form this hard, weird crust overnight. Nobody wants that!
You can safely refrigerate this for about three to four days. It holds up really well, but like any baked pasta dish, the texture will firm up a bit once it hits the cold.
Reheating is where you need a tiny bit of finesse, but it’s still super easy. If you’re reheating a large chunk, the oven is definitely your friend. Cover the dish loosely with foil and warm it in a 350°F oven until it’s heated through. This keeps that beautiful cheesiness intact!
If you’re just doing a single serving, the microwave works, but here’s the critical thing I learned the hard way: The sauce always thickens too much when microwaved! Before you pop your portion in the microwave, stir in just a small splash—maybe a teaspoon to start—of whole milk or even just water. It sounds crazy, but this little bit of added liquid turns the sauce from stiff to creamy again. It revitalizes that beautiful richness we worked so hard to achieve! Trust me, that tiny splash is the secret to enjoying leftovers just as much as the first bite.
Common Questions About This Baked Pasta Dish
I get so many awesome questions popping up after people try this Chicken Alfredo Bake for the first time, and honestly, they are usually about how to make it “lighter” or how to use ingredients they already have on hand. Building real wellness habits means being flexible, not rigid, so let’s tackle the big ones!
Here are the most frequent things I hear after folks bake up this creamy goodness:
Can I use pre-shredded cheese instead of grating my own?
I know, I know, grating cheese is exactly the kind of task that makes me want to ditch the recipe halfway through! But for the sauce base, using pre-shredded mozzarella and Parmesan is where you risk that dreaded grainy texture. Those powdery anti-caking agents just don’t melt smooth in a cream sauce. If you absolutely must use pre-shredded for the *sauce*, please measure carefully and treat it like it’s going to be a little less perfect. For the very top layer, pre-shredded mozzarella is fine, though—we just want that nice brown crust there!
Can I make this Chicken Alfredo Bake ahead of time?
Yes, you totally can! This is fantastic for meal prep. You can assemble the entire dish—pasta, sauce, chicken, and topping—up until the baking step. Cover it tightly with foil and stick it in the fridge for up to 24 hours. When you’re ready to bake, just pull it out, let it sit on the counter for about 20 minutes to take the chill off, and then add an extra 10 to 15 minutes onto the baking time since it’s going in cold. It comes out beautifully, seriously. That extended chilling time actually lets the flavors deepen, too!
How can I make this Chicken Alfredo Bake lighter without losing the flavor?
This is my favorite category of questions! Since this is a comfort food powerhouse, dialing back the fat needs to be done thoughtfully, or it tastes sad. Here’s what works for me when I’m craving a lighter take on baked pasta dishes. Instead of using straight heavy cream, I use 1 cup of half-and-half mixed with 1 cup of heavy cream, cutting back on fat while maintaining thickness. You can also use low-fat milk for the milk portion of the sauce, but you must be extra careful when simmering so it doesn’t scorch.
Also, load up on extra veggies! While you’re sautéing the onions, throw in some finely diced mushrooms or spinach—they disappear into the sauce and bulk up the serving size without adding density or tons of calories. It’s a great trick! You can find more ideas on my resources about lightened-up dinner ideas for your whole menu.
Why does my sauce feel thin after mixing everything together?
If your sauce seems too thin *before* you put it in the oven, DON’T FREAK OUT! Remember that the pasta is still slightly undercooked, and that last ½ cup of mozzarella is going to melt and help bind things. But the main reason for thinness is often the temperature difference or not letting the roux cook long enough. If you taste it and it’s runny, just take the whole bowl off the heat and let it sit for five minutes—the proteins will tighten up as they cool slightly. If it’s still too thin after that, try whisking 1 teaspoon of cornstarch into 2 teaspoons of cold water and whisk that slurry into the sauce over low heat until it thickens up. It works faster than flour!
Share Your Thoughts on This Comfort Meal
So, there you have it! My entire blueprint for transforming simple ingredients into the ultimate, soul-satisfying Chicken Alfredo Bake. I truly believe that enjoying rich flavors and building real wellness habits can go hand-in-hand—this casserole is proof!
Now comes the best part: I want to hear from YOU! Did you try it? Did you use chicken thighs or breasts? Did you sneak in extra hidden veggies while building that incredible sauce? Don’t just keep these delicious results to yourself!
Please hop down into the comments below. Tell me how your Chicken Alfredo Bake turned out! A quick star rating lets me know if I nailed the timing, and sharing your little tweaks helps me and everyone else in our community learn and grow. If you snap a picture of that golden, bubbly top, share it over on social media and tag me—I absolutely LIVE for seeing your kitchen successes!
Keep nourishing properly, keep enjoying the classics without the guilt, and keep shining!
Author Information
By Hi, I’m EMILIA, the founder of MeltItClean.com – your digital space for natural weight loss, real wellness habits, and clean-living inspiration that actually fits your life.
For years, I struggled with the ups and downs of dieting. I tried everything — juice cleanses, low-carb crazes, fitness challenges — but I always ended up back where I started: tired, bloated, and frustrated. I didn’t just want to “lose weight” — I wanted energy, mental clarity, glowing skin, and confidence without sacrificing my joy or sanity.
After years of experimenting, learning, and unlearning, I discovered a simple truth: your body is already powerful — it just needs support, not restriction. That’s when I created Melt It Clean — a site dedicated to real transformation through clean, intentional, and nourishing daily habits that anyone can follow.
My goal was simple: build a place where people could feel informed, supported, and empowered without being overwhelmed by wellness fads.
Chicken Alfredo Bake
Ingredients
Equipment
Method
- Preheat your oven to 375°F (190°C). Grease a 9×13-inch baking dish.
- Bring 5 quarts water to a boil with 2 tablespoons kosher salt. Cook pasta 1 minute less than package instructions direct. Drain the pasta, rinse it briefly with cool water, and toss it with 1 teaspoon olive oil. Set the pasta aside.
- Season the chicken cubes with salt, pepper, garlic powder, and onion powder. Heat olive oil in a large skillet over medium-high heat. Sear the chicken in batches until it is golden and just cooked through, about 6–7 minutes total. Transfer the cooked chicken to a plate and tent it with foil.
- In the same skillet, melt the butter over medium-low heat. Sauté the diced onion for 4–5 minutes until it softens. Add the minced garlic and red pepper flakes; cook for 1 minute until fragrant.
- Whisk in the flour. Cook the mixture for 1.5 minutes until a pale blond roux forms.
- Gradually whisk in the milk, followed by the heavy cream. Bring the mixture to a gentle simmer and cook for 4–5 minutes until it thickens slightly.
- Remove the skillet from the heat. Whisk in the cream cheese, adding one piece at a time, until the cheese is fully melted and the sauce is smooth.
- Stir in 1.5 cups of Parmigiano-Reggiano, ½ cup of mozzarella, nutmeg, lemon juice, Dijon mustard, and white pepper. Taste the sauce and adjust the seasoning as needed.
- In a large bowl, combine the cooked pasta, the seared chicken, and the sauce. Gently fold all the components together until the pasta and chicken are fully coated. Fold in the remaining ½ cup of mozzarella and the chopped parsley, if using.
- Transfer the mixture to the greased baking dish and smooth the top surface. Sprinkle the reserved ½ cup Parmigiano, ½ cup mozzarella, and the optional herbed panko topping over the dish.
- Bake uncovered for 25–30 minutes, or until the edges are bubbly and the top is golden brown (the internal temperature should reach 165°F). You can broil the dish for 1–2 minutes for extra browning if you prefer.
- Let the bake rest for 10–15 minutes before serving. Garnish with extra parsley, lemon zest, or black pepper before you serve it.