If your mornings feel like you’re running a three-ring circus before 8 AM, trust me, I get it. Between packing lunches, finding matching socks, and just trying to get myself a cup of coffee that’s actually hot, a healthy, filling breakfast can feel like a pipe dream. That used to be me, pulling out cold cereal or skipping meals altogether, which always left me crashing by 10 AM.
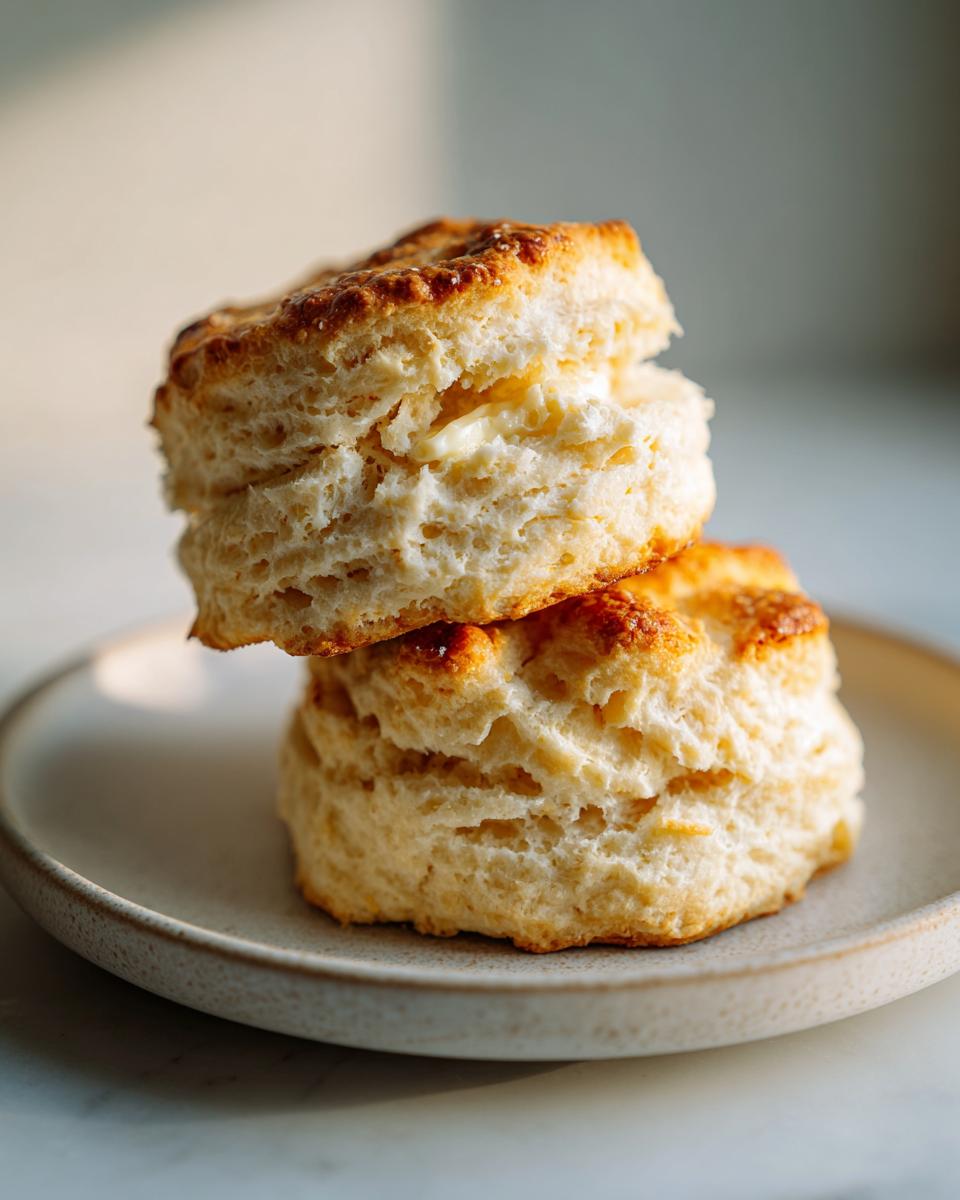
But I cracked the code, and you absolutely need these in your life: Breakfast Protein Biscuits: 14g Protein & Freezer-Friendly! for Busy Moms (Weeknight-Friendly breakfast ideas). These aren’t just glorified dry crackers; they are legitimately satisfying, packed with 14 grams of protein, and they solve the weeknight prep issue perfectly! I whipped these up the first time when my schedule went completely bonkers last fall, and honestly, I don’t know how I survived before.
The best part? You make a batch on Sunday, freeze them, and suddenly every weekday morning is ten times easier. Seriously, grabbing one of these feels like cheating, but it’s all real ingredients and real nutrition. I’m so excited to share the secret behind the perfect savory, fluffy, high-protein bite that will save your morning routine. Don’t forget to check out some other great ideas for high-protein breakfasts when you have a little more time, like these egg-based options!
Why These Breakfast Protein Biscuits: 14g Protein & Freezer-Friendly! Are Essential for Busy Moms
These biscuits aren’t just another recipe; they are survival tools for the morning rush. When you’re juggling carpools and last-minute demands, you need food that works as hard as you do. Trust me, knowing you have these waiting changes the whole vibe of the morning!
Here is exactly why these immediately became a staple in my freezer:
- The Power Punch: We’re talking a solid 14 grams of protein per biscuit! That’s keeps the kids (and me!) full and focused until lunchtime, unlike those sugary snacks that cause instant crashes.
- Freezer Magic: You bake once, eat all week. They freeze beautifully, which is a lifesaver when weeknight dinner planning gets hectic and you realize there’s no time for prep the next morning.
- Weeknight-Friendly: The actual prep and bake time is tiny—only 30 minutes total. You can knock out a whole batch while you’re making dinner or cleaning up after everyone else. For more ideas on quick weekday meals, check out my casserole post!
Equipment Needed for Perfect Breakfast Protein Biscuits: 14g Protein & Freezer-Friendly!
Okay, the great news about these protein biscuits is you don’t need a million fancy gadgets. If you have a basic kitchen setup, you’re good to go. I always say, the simpler the recipe, the more important the quality of the few tools you use becomes!
Here are the things you’ll definitely need gathered before you start mixing up that dough:
- You absolutely need a Large mixing bowl. You’re combining dry and wet ingredients, plus cutting in the butter, so you need plenty of room to work without spilling everything over the counter.
- A sturdy Baking sheet. Make sure it’s clean and ready to line with parchment paper—that’s non-negotiable for easy cleanup!
- This is important: either a Pastry blender or two knives. This is how you’ll blend the cold butter into the flour mixture. I personally prefer the pastry blender because it keeps my hands warmer, which helps keep the butter cold!
My Expert Tip on Cutting Those Biscuits
Listen up, this is where I learned the hard way when I first started relying on these for quick meal prep breakfasts! You need a biscuit cutter, and try to pick one that’s about 2.5 inches across. The secret to why this matters is how you use it.
You have to press the cutter straight down—like a plunge!—and pull it right back out. If you twist it, you seal the edges of the dough. That sealing traps steam inside, and you end up with biscuits that don’t rise properly. They bake flatter and denser. When you press straight down, those straight sides bake straight up, making them perfectly tall and fluffy every single time.
Gathering Ingredients for Your Breakfast Protein Biscuits: 14g Protein & Freezer-Friendly!
Okay, get your ingredients out now, and make sure they are COLD. This is the most important piece of advice I can give you for any good biscuit recipe, but especially when we are trying to sneak in that protein boost. Cold ingredients mean flaky layers, and nobody wants a gritty, tough protein biscuit! While you’re getting everything ready, if you’re looking for other ways to load up on veggies at breakfast, check out my veggie-loaded egg muffins.
We’re going to break this down into the Dry Mix and the Wet Mix. Keep your butter cubed and your milk chilling until the absolute last second. It’s worth the effort, trust me!
Dry Ingredients That Build the Base
Whisk these together first so everything is evenly distributed before the cold stuff sneaks in. That protein powder needs to be totally blended!
- All-purpose flour: You need 2 full cups of this to give the biscuits the structure they need to hold up to all that protein.
- Baking powder: 1 tablespoon for lift!
- Salt: Just 1 teaspoon to balance out the flavor.
- Baking soda: A little 1/2 teaspoon of this helps react with the other ingredients for that fluffy interior.
- Whey protein powder (unflavored or vanilla): This is our powerhouse ingredient! Use precisely 1/4 cup. Remember, the quality of your powder really matters here; a chalky powder will make the biscuits taste, well, chalky!
The Wet Ingredients (Keep Everything Ice Cold!)
If your butter melts even a little before it hits the flour, you’ve lost the flaky factor. Keep your bowl nearby and have everything ready to dump in quickly!
- Cold butter: Cut 1/2 cup into small cubes. And I mean cold, straight from the fridge cold!
- Milk (dairy or non-dairy): Use 3/4 cup, and whatever you do, make sure it’s very cold. If you have buttermilk, that works too, but just make sure it’s chilled!
- Large Egg: Just 1, lightly beaten. You’ll mix this with the milk, but keep the mixture cool.
Once you have these two groups ready—dry whisked, wet combined and cold—we move straight into cutting the butter in. That’s where the magic starts happening!
Step-by-Step Instructions to Make Breakfast Protein Biscuits: 14g Protein & Freezer-Friendly!
We’ve got our cold ingredients lined up; now it’s time for the fun part—bringing it all together! These steps are straightforward, but remember, with biscuits, we are aiming for minimal handling. We want those little pockets of butter to survive long enough to create steam and lift our dough. If you’re looking for another great make-ahead idea, I love these easy breakfast quiches for variety!
Here is exactly how I get these high-protein babies out of the oven and onto the cooling rack:
- Get Hot First: Preheat your oven to a nice hot 425°F (220°C). I always do this first so the oven is perfectly set by the time my dough is ready. Line a baking sheet with parchment paper—it saves so much scrubbing later!
- Whisk Dry: Dump all your dry stuff—flour, baking powder, salt, baking soda, and that crucial protein powder—into your large mixing bowl. Give it a really good whisk until everything looks uniform in color.
- Cut the Butter: Add those cold butter cubes to the flour mix. Now, work it! You need to use your pastry blender or two knives to cut the butter into the flour until it looks like coarse crumbs. You want some pieces about the size of tiny peas still visible. These are your steam pockets!
- Combine Wet: In a separate small bowl, quickly whisk your cold milk and your lightly beaten egg together. Don’t let this mixture sit around!
- Bring It Together: Pour that wet mixture right into the dry ingredients. Mix gently, just using a fork, until everything looks combined. Folks, this is where you need to have restraint!
My Expertise on Not Overmixing the Dough
Seriously, do not grab the electric mixer for this step! Overmixing develops the gluten in the flour too much, and that’s what turns a fluffy biscuit into a hockey puck. I stop mixing as soon as I see no more dry flour streaks. The dough should look shaggy, messy, and weird. That’s good! That means we haven’t destroyed the butter structure.
- Pat and Roll: Turn that messy dough onto a lightly floured surface. Gently pat it or roll it out carefully until it’s about 3/4-inch thick. Don’t fuss with it too much!
- Cut Perfectly: Use your biscuit cutter (remember that 2.5-inch size?) and press straight down to cut out your 8 biscuits.
- Arrange on Sheet: Place them on your prepared sheet. If you want soft sides, put them right next to each other. If you like that crispy, golden edge, leave about an inch between them.
- Bake: Slide them into that hot oven and bake for 13 to 15 minutes, watching until they are golden brown on top.
- Cool: Let them cool slightly before serving warm, or cool completely before wrapping up tightly for your freezer stash. That delicious smell while they bake is your reward for winning the morning game!

Ingredient Notes and Substitutions for Your Breakfast Protein Biscuits
When you look at a recipe that relies heavily on a specialty item, like protein powder, you always wonder, “Can I easily swap this out?” That is a totally valid question, especially when you’re trying to keep specific grocery lists for those ingredient swaps we all rely on midweek. For these protein biscuits, the key is understanding what the protein powder is actually *doing* in the dough.
The Protein Powder Dilemma: Vanilla vs. Unflavored
I specified using unflavored or vanilla whey protein powder, and there’s a good reason for that. Protein powders are drying agents! They soak up moisture, which is why we need those cold liquids to compensate.
If you use unflavored powder, you get a cleaner, slightly more savory biscuit that is perfect with butter and salt, or maybe topped with cheese later. If you use vanilla, you get a slightly sweeter biscuit, which is lovely if your family prefers a sweeter breakfast. The catch is: depending on the brand, vanilla powder might contain extra sugars or stabilizers, so your texture might change slightly. Always aim for a high-quality powder to keep that 14g protein count accurate and the texture soft.
Milk Choices and Their Effect on Texture
I asked you to keep the milk very cold, but I know not everyone keeps dairy in the house, or maybe you’re trying to lower the fat content one morning. Good news: you can absolutely use non-dairy milk!
Almond milk works perfectly fine if it’s cold. Soy milk is also a great option because it has a higher protein content itself, potentially helping boost our total numbers slightly! The main thing to watch for is unsweetened varieties. Because we are already mixing in vanilla or unflavored protein powder, adding sweetened milk might make the final biscuit taste a little too sweet when we are aiming for that balanced savory/sweet breakfast component.

The Importance of Good Flour Quality
While this recipe is fairly forgiving because of all that protein we are adding, I always urge you not to skimp on the flour quality. You don’t need specialty flour here, but make sure your all-purpose flour is fresh.
Old flour loses its ability to properly hold structure, and when you’re depending on the flour mixed with butter to create that lift, you need it performing at its best. I always check the ‘best by’ date on the bag before I start baking, especially when I bake big batches of these freezer-friendly breakfasts. You want reliable results when you’re relying on this for a week’s worth of easy breakfasts!
Tips for Success When Making Freezer-Friendly Breakfast Protein Biscuits
You’ve got the ingredients, you know the steps, but honestly, biscuits can be fussy. They are temperamental little things! I spent way too many mornings with sad, flat protein hockey pucks before I figured out the three non-negotiable rules for making these freezer-friendly treats turn out light and fluffy every single time. This is the wisdom I gained the hard way!
When I first tried this recipe, I thought, “Protein powder is flour, right? I’ll just mix it faster!” Nope! Big mistake. My first batch was so tough I could have used them to hammer things back into shape. Since then, I’ve calmed down and respected the process. Now, these turn out perfectly flaky whether I serve them immediately or pull them out of the freezer weeks later. Check out these tips—they are game-changers!
Rule Number One: The Butter Must Stay Colder Than Your Teenager’s Bedroom
I cannot stress this enough: keep that butter icy! When you cut the cold butter into the flour, those little chunks need to stay distinct. When the biscuit hits the hot oven, the butter melts, creating steam pockets. That steam has nowhere to go but up, which gives you that beautiful lift and flaky layering.
If your kitchen is warm, or if you spend too long cutting the butter in, the fat melts into the flour prematurely. Then, when it bakes, it just kind of fries up instead of steaming, leaving you with a dense result. If you feel the fat getting soft while you’re blending or mixing, just stop! Stick the entire bowl of dry ingredients (butter included!) into the freezer for 10 minutes to chill down before proceeding. Seriously, I learned this after wasting a whole bag of flour on one failed batch.
The Biscuit Cutter’s Straight Path to Perfection
We talked about this briefly during the main instructions, but I need to reinforce it because it affects texture significantly. When you use your cutter to stamp out the 8 biscuits, you must push straight down and lift straight up. Don’t wiggle, don’t twist, don’t rotate.
Twisting seals the edges of the dough. Since we aren’t brushing the sides with butter, the sealed edge can’t expand vertically properly. This ruins the rise. Imagine trying to inflate a balloon but taping the neck shut—it just won’t work right! Preserve those straight sides so they can shoot up toward the heat. This simple trick ensures you get the full height needed for a decent 14g protein serving!
Don’t Rush the Chill Time Post-Assembly
Once you pat out that dough and you’ve cut your 8 pieces, resist the urge to throw them straight into the oven if you see any softening. If you have time, putting the whole sheet onto a tray and popping it in the fridge for 15 minutes before baking sets everything back up.
This extra chill time helps solidify the butter again, which locks in texture right before baking. It’s a fantastic step, especially if you’re prepping these as part of a big weekend cook-up, like when I make these alongside my foolproof chicken recipes for the week. It only takes a few minutes, but it guarantees that final bake is glorious.
Storage and Reheating Your Make-Ahead Breakfast Protein Biscuits
Listen, the reason these are called the ultimate weeknight-friendly breakfast ideas is because of the freezer step. What’s the point of doing all that work if you still have to rush in the morning? None! These protein biscuits are built for making big batches. But you have to store them correctly, otherwise, you end up with freezer burn that tastes like sadness.
I’ve perfected the system for keeping that 14g protein count fresh for weeks so you can just grab and go. If you’re interested in other make-ahead staples, I have a great guide on making mashed potatoes ahead of time that uses similar principles!
The Absolute Must: Cool Them Completely Before Storing
This step seems obvious, but I’ve seen people try to wrap warm biscuits, and it is a disaster waiting to happen. As soon as these brilliant biscuits come out of the oven, you need to get them onto a cooling rack. I mean it—let them cool down to room temperature. All the way. Seriously!
If you wrap them when they are even slightly warm, two things happen. First, they steam themselves and get soggy, completely ruining that beautiful fluffy interior we worked so hard to achieve by keeping the butter cold. Second, that trapped heat immediately creates condensation inside your storage container. Condensation leads to moisture, moisture leads to ice crystals, and ice crystals lead to sad, mushy biscuits when you try to reheat them later.
So, let patience win this brief battle! Wait until they are completely cool to the touch, which usually takes about 30 minutes on a wire rack.
Freezing for Busy Mom Success
Once they are stone cold, separating them is the next crucial mission. You don’t want them freezing together into one giant carbohydrate brick. You need to be able to grab exactly one or two biscuits when you need them.
Here is my layering strategy for the airtight freezer bag:
- Tear off a small square of parchment or wax paper.
- Place one biscuit on the paper.
- Top with another square of paper.
- Repeat the layering until all your biscuits are separated by paper sheets.
Then, slide the whole stack into a heavy-duty, airtight freezer bag. Squeeze out every bit of air you possibly can—a straw works great if you don’t have a vacuum sealer. Properly stored like this, these protein biscuits will taste freshly baked for up to three months! That’s weeks and weeks of guaranteed no-fuss breakfasts.
Reheating Methods: Fast vs. Best Flavor
When that chaotic Monday morning hits and you remember you have these hiding in the back of the freezer, you have two options for reheating. I choose based on how much time I have before I absolutely must leave the house.
The I Need It Now Method (Microwave)
This is for mornings where you have 60 seconds max. Place one or two frozen biscuits on a microwave-safe plate. Cover them loosely with a damp paper towel. Why damp? It creates a little cloud of steam to help gently thaw and heat the biscuit without turning the exterior instantly hard.
Microwave for 30 to 60 seconds. Start low; you can always add 10 more seconds. They will be soft, warm, and hit that 14g protein target immediately. They might lose a tiny bit of that perfectly crisp exterior texture, but they’ll be perfectly edible!
The I Have Five Extra Minutes Method (Oven)
If you can spare about 12 minutes, the oven is always superior for texture. Preheat your oven now to 350°F (175°C). Place the frozen biscuits directly onto a baking sheet—no need for parchment this time since they are already baked. Pop them in for about 10 minutes or until they are heated all the way through and the exterior feels nicely crisp again.
This gets them closer to that ‘fresh out of the oven’ experience. I usually do this if I have a little extra time to butter them up and enjoy a quiet moment before the day kicks off!

Frequently Asked Questions About These High-Protein Breakfast Protein Biscuits
When you’re relying on a recipe for your weeknight-friendly breakfast ideas, you’re bound to have some questions! I always get asked about swapping ingredients or how to boost the fillings. Since these are designed to be simple and fast, I want to be totally clear on what you can change versus what you shouldn’t mess with. For more great high-protein ideas that involve zero cooking in the morning, check out my favorite overnight oats!
Can I add cheese or savory mix-ins to these protein biscuits?
Oh, yes, you absolutely can! If you want to move these away from a slightly sweet profile (especially if you used vanilla protein powder), cheese is fantastic. I recommend mixing about 1/2 cup of finely shredded sharp cheddar directly into the dough when you add the wet ingredients. Make sure the cheese is very cold, just like the butter!
For savory mix-ins, things like dried chives or a tiny bit of dried dill work beautifully. If you are adding things like cooked, crumbled bacon or dried herbs, introduce them right after you cut in the butter. Just remember that anything bulky you add will slightly impact the overall lift, so don’t overdo it!
How much protein is actually in the whole batch of these biscuits?
This is an easy math problem thanks to that 1/4 cup of protein powder! Since the recipe makes exactly 8 biscuits, the total protein content of the *entire batch* is usually around 112 grams (this assumes your protein powder is roughly 80% protein by weight, which is standard for most whey products). Since we’re dividing that by 8 servings, that gives us a solid 14 grams of protein per biscuit! It’s a fantastic way to ensure everyone gets a substantial, satiating start to their busy mornings.
Can I use whole wheat flour instead of all-purpose flour?
You can try, but you have to adjust your expectations and maybe your hydration level slightly! Whole wheat flour absorbs significantly more liquid than white flour, and since we are already adding drying protein powder, sticking only to whole wheat can result in a tough, dry biscuit—and we absolutely do not want that for our freezer-friendly stock!
My advice? If you want to incorporate more whole grains without sacrificing texture, substitute half of the all-purpose flour (that’s 1 cup) with white whole wheat flour. White whole wheat is milder in flavor than traditional red wheat. If the dough feels too stiff after mixing, add just one extra tablespoon of the cold milk until the dough just comes together.
Why are my biscuits dense instead of fluffy?
Nine times out of ten, density when baking biscuits comes down to temperature or overmixing. If you look back at my tips, you’ll see I was militant about keeping the butter cold, right? If the butter melts before it hits the oven, you lose the flaky layers—it becomes dense. Also, if you handled the dough too much rolling or twisting the cutter, you developed too much gluten, and that traps the lift. Keep it cold, mix it minimally, and press the cutter straight down, and you’ll avoid density!
Serving Suggestions for Your Weeknight-Friendly Breakfast Ideas
So, you’ve got a stack of perfectly baked, high-protein biscuits chilling in the freezer, ready to save your weekday mornings. That’s fantastic! But sometimes, eating the same thing plain, even if it’s full of that great 14g protein, gets a little boring. I love shaking things up, especially on a chaotic Friday morning where I need maximum energy but zero cooking time.
These biscuits are seriously versatile, not just a one-trick pony. They stand up beautifully to a little topping or a side dish. They are sturdy enough to handle moisture without immediately dissolving, which is perfect for quick meals.
The Best Spreads for Your Protein Biscuits
Forget those sugary jams for a second; we’re focusing on keeping the protein high and the flavor interesting. A warm, thawed biscuit split open is the perfect vessel for a quick spread.
- Avocado Smash: A simple smash of avocado with a sprinkle of flaky salt and maybe a dash of hot sauce turns this into a savory, healthy fat powerhouse. It pairs surprisingly well with the slight savory note from the protein powder.
- Nut Butter Boost: Almond or peanut butter is a no-brainer. It adds healthy fats and a bit more protein. Top it with a few slices of banana or some hemp seeds for texture!
- Whipped Cottage Cheese: If you want another protein hit, blend cottage cheese until it’s totally smooth (almost like ricotta) and spread a thick layer on your warm biscuit. It’s delicious and keeps you full until lunch!
Making It a Complete Meal with Sides
A biscuit is great, but pairing it with some fresh color turns it into a balanced meal. These are perfect alongside something light and fresh, especially if you have a few minutes on the weekend to prepare a side to grab later in the week. Honestly, if I have time to whip up a quick yogurt bowl, I’ll pair a biscuit on the side for extra carbs!
Here’s how I round out the plate:
- Fresh Berries: A handful of raspberries or blueberries adds necessary freshness, antioxidants, and something cool to counteract the warm, savory biscuit.
- Sliced Tomato and Pepper: If you went savory with cheese or herbs in your biscuit, slice up a colorful bell pepper or a juicy tomato to eat alongside it. It’s fast, requires zero cooking, and adds bulk to the meal.
- Quick Fruit Cup: Macerate some kiwi or orange sections with a tiny sprinkle of cinnamon. The acidity cuts through the richness of the butter in the biscuit perfectly.
See? Eating a high-protein, freezer-friendly breakfast doesn’t have to be boring. A simple spread or a quick side makes all the difference!

Breakfast Protein Biscuits
Ingredients
Equipment
Method
- Preheat your oven to 425°F (220°C). Line a baking sheet with parchment paper.
- In a large mixing bowl, whisk together the flour, baking powder, salt, baking soda, and protein powder until combined.
- Cut the cold butter into the dry ingredients using a pastry blender or two knives until the mixture resembles coarse crumbs with some pea-sized pieces of butter remaining.
- In a separate small bowl, whisk together the cold milk and the lightly beaten egg.
- Pour the wet ingredients into the dry ingredients. Mix gently with a fork until just combined. Do not overmix; the dough will be shaggy.
- Turn the dough out onto a lightly floured surface. Gently pat or roll the dough to about 3/4-inch thickness.
- Use a biscuit cutter (about 2.5 inches) to cut out 8 biscuits. Press the cutter straight down without twisting to get straight sides.
- Place the biscuits close together on the prepared baking sheet for softer sides, or farther apart for crispier sides.
- Bake for 13 to 15 minutes, or until the tops are golden brown.
- Remove from the oven and let cool slightly before serving. For freezing, cool completely before sealing in an airtight freezer bag.