Listen, sometimes you need serious flavor, but you only have ten minutes and a tiny apartment stovetop. I get it! We all crave that deeply savory, crusty, cheeseburger taste without the fuss of grilling or assembling a whole stack of toppings. That’s exactly why I perfected How I Get Smashburger Quesadillas – Mini kitchen magic Perfect Every Time.
Forget flipping separate burgers and dealing with messy cheese slices. This method fuses the best of a fast-food smash technique with the portability of a quesadilla. I’ve spent ages tinkering with the heat and the press right here on my small skillet. Trust me, achieving that dark, caramelized crust—the hallmark of a great smashburger—is totally possible even when you’re working with minimal space. This is my go-to, 20-minute dinner lifeline!
Why You’ll Love This Smashburger Quesadillas – Mini kitchen magic Perfect Every Time
When you’re pressed for time but craving something hearty that tastes gourmet, this recipe hits the spot every single time. Seriously, I keep coming back to this because it solves the riddle of needing big flavor without the big mess. It’s ridiculously satisfying! If you love quick meals, you’ll definitely want to check out these other quick dinner ideas for busy weeknights.
- It’s lightning fast! We are looking at roughly 20 minutes total time, start to finish. I mean, who can argue with that on a Tuesday night?
- Cleanup is almost non-existent. Since we use the same small skillet for smashing, melting, and toasting, you’re basically just washing one pan. Thank goodness!
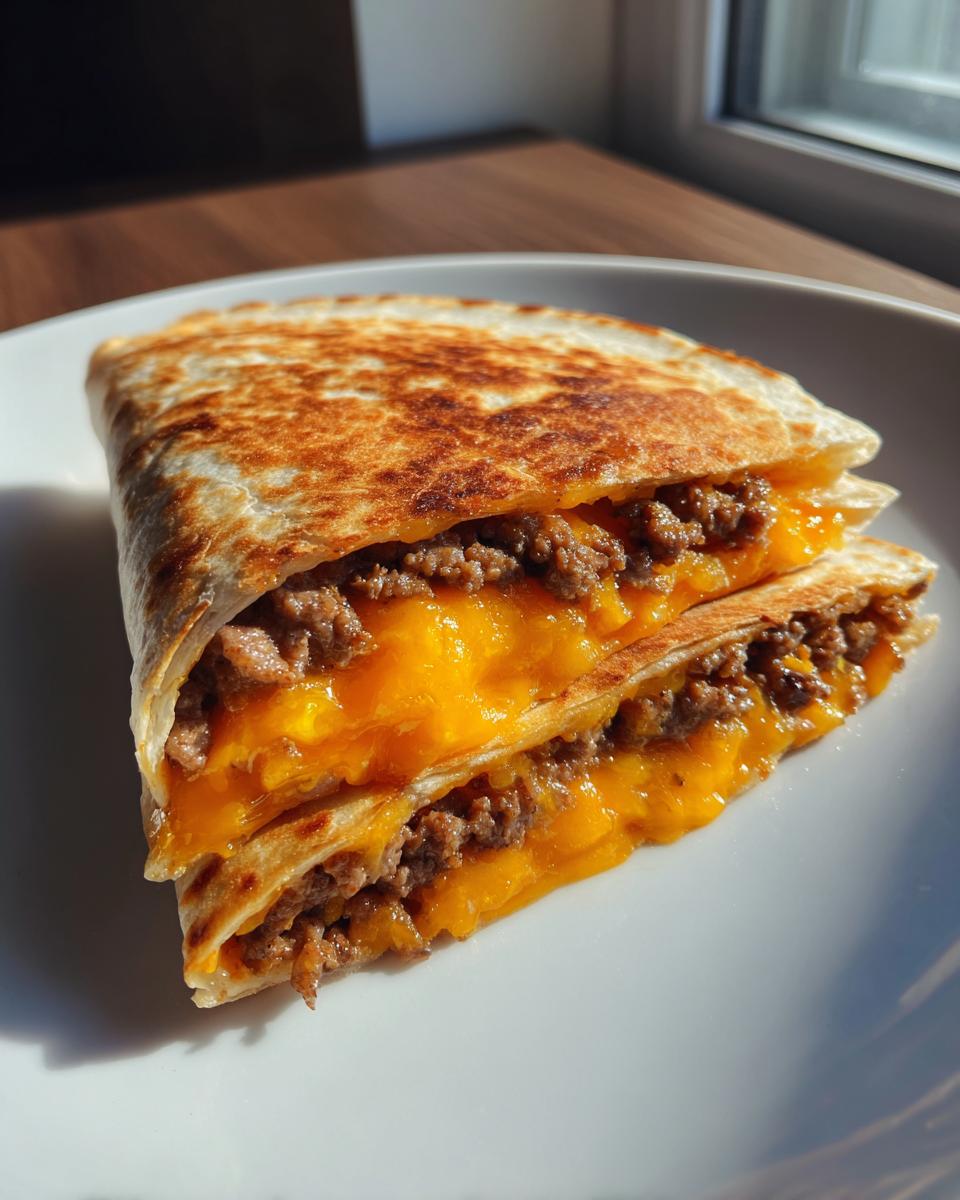
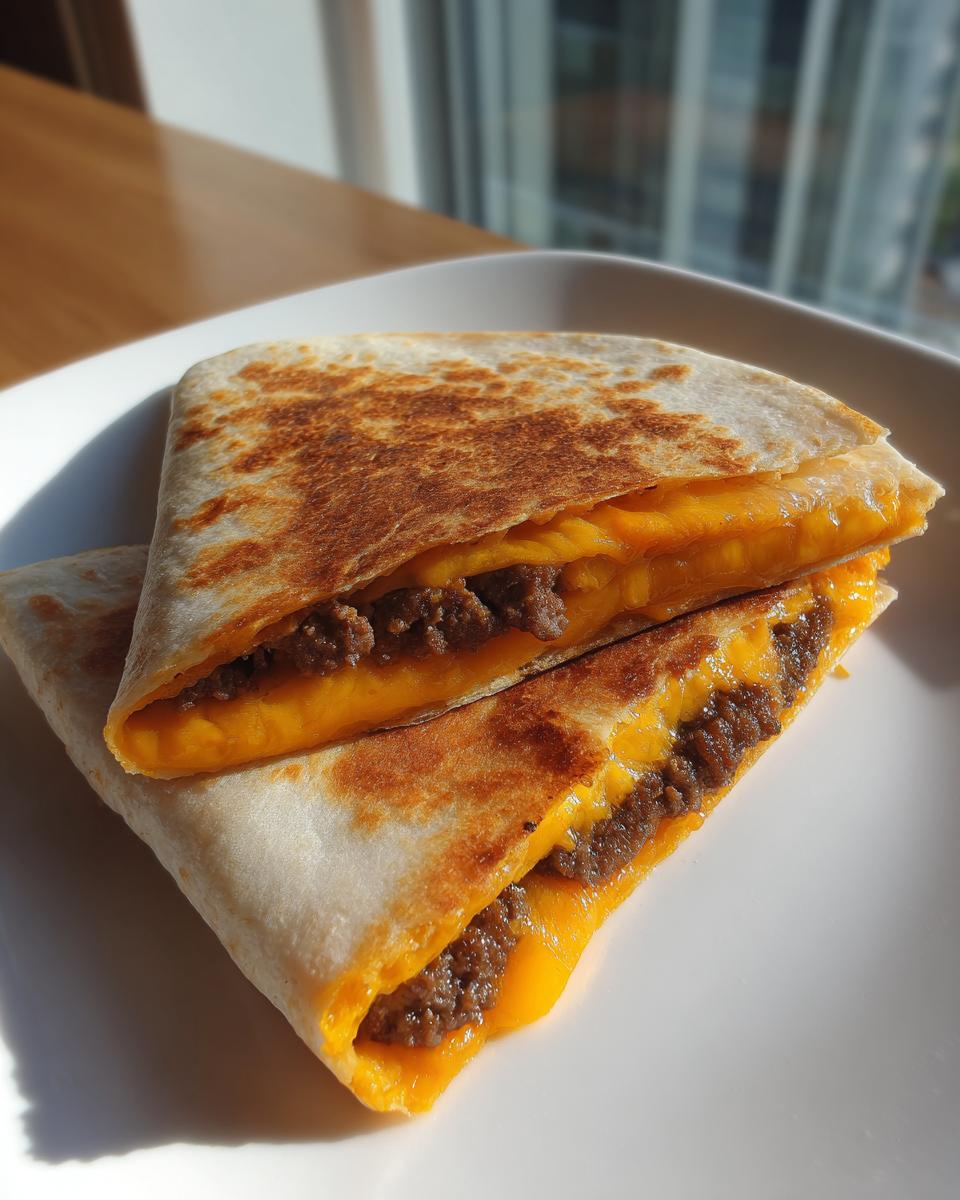
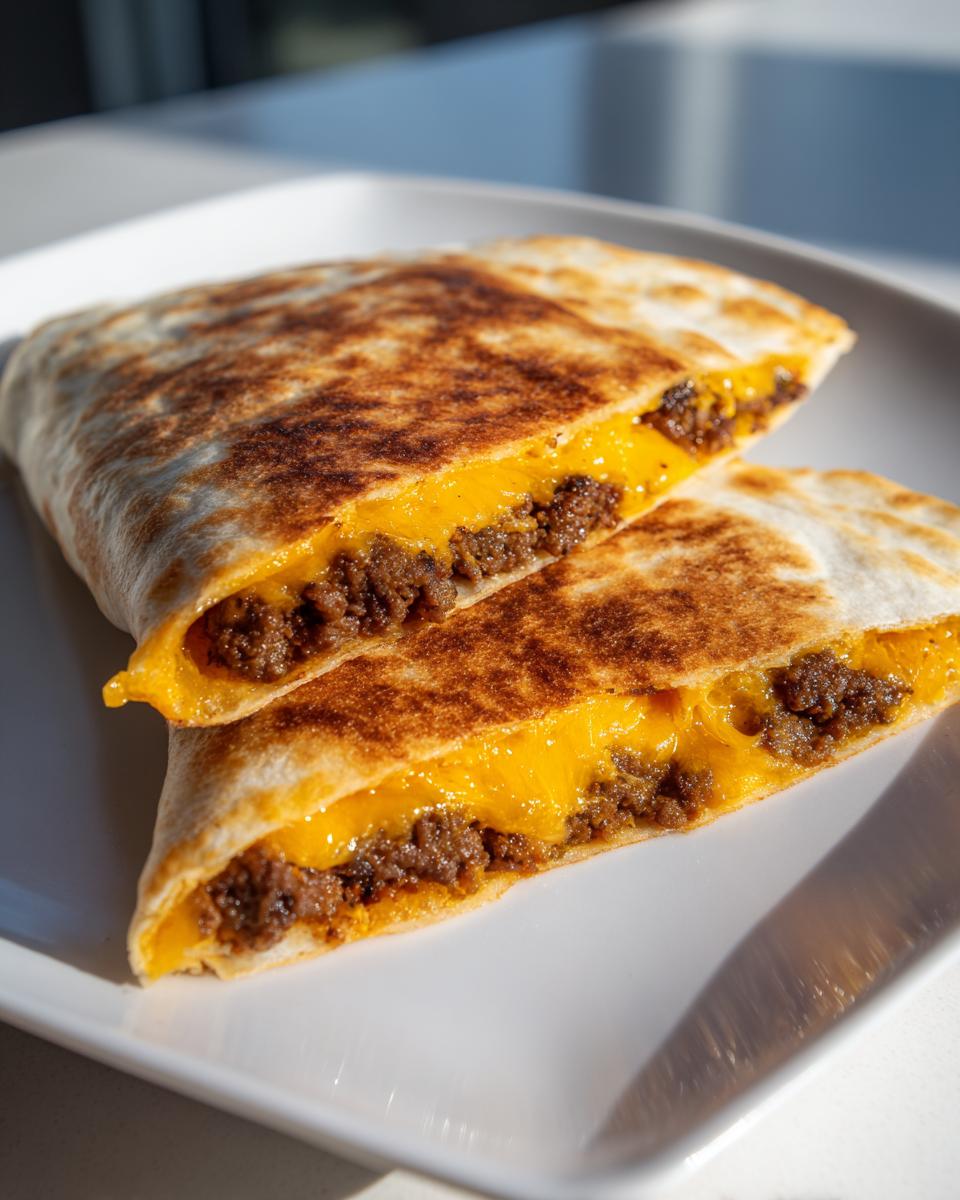
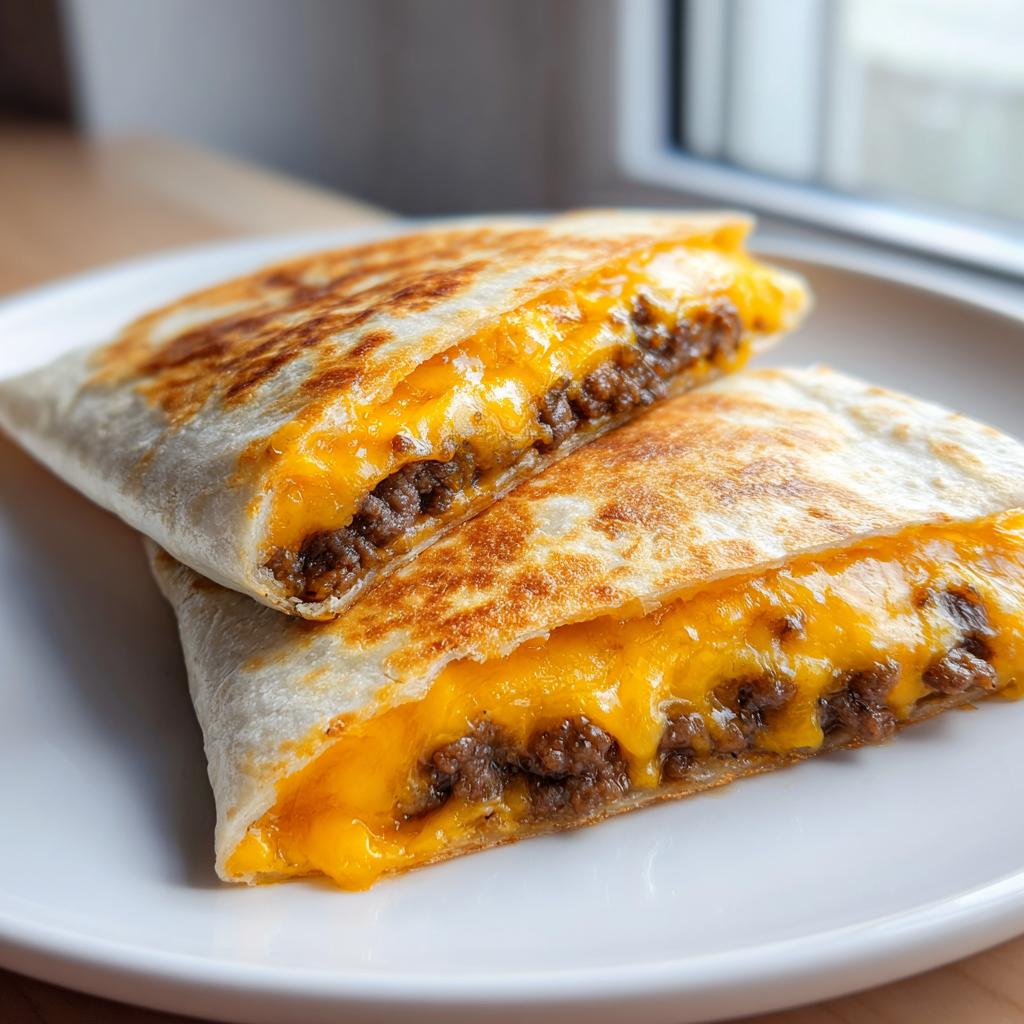
- You get that incredibly savory, crispy crust that only a proper smashburger can deliver, but wrapped up neatly in a melty tortilla. The flavor payoff is huge compared to the effort.
Speed and Simplicity
Twenty minutes is not an exaggeration here. We cut out every single unnecessary step. You don’t waste time forming perfect dome-shaped patties or waiting for a huge grill to heat up. It’s pure, targeted cooking designed for busy weeknights or when you just need a very quick but deeply satisfying dinner. This recipe is designed for minimal effort, maximum taste.
Authentic Smash Texture
Now, this is where I proved myself right, even in my tiny kitchen setup. The hardest part of any smashburger recipe outside of a restaurant is getting that crispy, lacy edge—the Maillard reaction explosion! You need high heat and heavy pressure, right? Well, using a sturdy spatula and pressing down *immediately* when the seasoned beef hits that piping hot skillet creates the magic. That thin patty cooks fast, locks in the juices, and toasts the tortilla perfectly all at once. It works, folks, even on a mini griddle!
Essential Equipment for Your Smashburger Quesadillas – Mini kitchen magic
You don’t need a full arsenal of gadgets to pull off this flavor bomb. Seriously, cooking incredible food doesn’t require a giant commercial kitchen; this recipe proves that mini kitchen magic is absolutely doable! For **How I Get Smashburger Quesadillas – Mini kitchen magic Perfect Every Time**, you only need three things, and one of those is a skillet you probably already have.
I know some folks get intimidated thinking they need super specialized gear for smashing, but you really don’t! We are keeping this minimal. If you’re looking for efficient tools for fast meals, you might want to check out some ideas for quick, low-carb lunches too, since the mindset is similar.
- Small skillet or griddle: This is your stage! It should be an 8 or 10-inch quality non-stick pan. If you have a flat-top cast iron griddle, that’s even better because it holds heat so beautifully.
- Sturdy Spatula: Okay, stop right there. This is my one non-negotiable expert tip. You absolutely need a spatula that is strong enough to withstand serious downward force. If you try smashing those beef balls with a flimsy plastic flipper, you’ll just end up spreading grease everywhere, not forming a crust. You need something metal, rigid, and maybe with a slightly beveled edge so you can get underneath that perfectly toasted tortilla later.
- Small bowl: You need this just for prepping your spices, though you could technically just sprinkle them over the top. I like mixing my salt and pepper together first, though. It keeps the seasoning even!
That’s it! No fancy meat press needed here. Just good heat and the right amount of muscle in your wrist when you apply that spatula!
Gathering Ingredients for How I Get Smashburger Quesadillas
The beauty of **How I Get Smashburger Quesadillas – Mini kitchen magic Perfect Every Time** is that it relies on super standard grocery items, but we treat them like they’re precious gold. Since we are making two whole quesadillas, the math is simple: we divide everything needed for two big burgers right down the middle! You’ll find everything you need right here, and if you’re stocking up on beef anyway, definitely check out some other fun ground beef recipes!
Keep your ingredients separated and ready to go before you even think about turning on the heat. This recipe moves fast once you start smashing, so having everything measured out prevents chaos!
For the Burger Mixture
This is where the flavor starts, so don’t skimp! We need enough beef for two very thin, crusted patties. Since we are making four small beef balls that get smashed down, make sure you divide that eight ounces precisely.
- Ground beef (8 ounces): I insist on 80/20 ground beef here. Seriously, don’t swap it out for leaner stuff unless you want dry, crumbly burgers. The fat is essential for flavor and for creating that beautiful crust when you smash it flat. You need to divide this into 4 equal balls—that’s two balls per quesadilla assembly!
- Salt (1 teaspoon): Generously seasoned, please!
- Black pepper (1/2 teaspoon): Freshly ground is always better, if you have it.
For Assembling the Quesadilla
This part brings in the cheese pull and the crispy tortilla shell. We are making two beautifully wrapped packages here.
- Flour tortillas (4 large): Make sure they are large! We need enough surface area to cover that smashed patty once the cheese starts melting, otherwise, things get messy.
- Shredded cheddar or Monterey Jack cheese (1 cup): I love mixing a little cheddar for flavor and Jack for the stretch. Use whatever melts nicely for you!
- Diced white onion (2 tablespoons): This is listed as optional, but wow, these little bits of onion crisp up under the cheese and turn into pure magic. If you hate onions, skip it, but try it once!
- Butter or oil (2 teaspoons): Just a little bit for cooking the tortilla side. We want golden brown toastiness, not a deep fry!
Step-by-Step Instructions for Smashburger Quesadillas – Mini kitchen magic Perfect Every Time
Okay, this is the moment of truth! If you’ve got your ingredients set up and your skillet hot, we’re moving fast. I remember the first time I tried this on my tiny two-burner stove; I thought the smash technique would just fail, but when I finally got that first patty to crisp up against the metal—wow! It was instant validation that **How I Get Smashburger Quesadillas – Mini kitchen magic Perfect Every Time** really works, even in a shoebox kitchen. Remember, we are making two quesadillas, so we’ll be doing this whole burger assembly process twice.
First, make sure you’ve seasoned those four little balls of beef evenly with your salt and pepper mix. They need to be ready to hit the heat! And speaking of heat, we’re going medium-high. Use just a tiny bit of butter or oil in that skillet—enough to lightly coat the bottom—but not so much that it starts swimming. If you want to know more about getting foolproof beef results generally, check out my guide on how to make ground beef recipes foolproof!
Preparing and Smashing the Patties
Once that fat is shimmering, carefully place *two* of your seasoned beef balls onto the hot surface. Don’t crowd the pan, or you lose that crucial searing heat! Here is the key, and I mean the absolute key: Immediately put your sturdy spatula right on top of the beef ball and press down as hard and flat as you can. You want that patty thin, like just a quarter of an inch thick. If you have to shimmy the spatula a little to maintain the pressure, go for it!
Let that cook for just 1 to 2 minutes. You are looking for serious browning around the edges. That color means flavor, folks! When the edges look deeply browned, it’s time for the flip.
Layering Cheese and Tortilla
As soon as you flip those ultra-thin patties, you have to work fast because the underside is screaming hot. Immediately top each patty with half of your shredded cheese and half of those optional diced onions right on top of the seared beef. This is the glue!
While that cheese is starting to bubble up from the residual heat, take one of your large flour tortillas and gently lay it right over the cheese and meat on each patty. Just press down ever so slightly with your spatula. We aren’t pressing hard like the first smash; we just want the tortilla to adhere to that melting cheese so it doesn’t slide around when we flip the whole sandwich.
Let that cook for about a minute until you can peek underneath and see that tortilla turning a lovely golden brown. That golden color means we are ready for the big event!
Finishing the Smashburger Quesadillas – Mini kitchen magic
Now, this flip takes a little confidence, especially in a small space! Slide your spatula under the entire assembly—the crispy tortilla, all the melted cheese, and the burger—and carefully flip the whole thing over. You want the now-plain tortilla side hitting the hot pan for its final toast.
Cook this second side for another 1 to 2 minutes. You need that tortilla to get perfectly crisp and golden, and you want to ensure every bit of that cheese is fully, delightfully melted. Slide the finished assembly off the pan.
Remember, we only cooked two patties so far! Clean your pan quickly if you need to (I usually wipe mine with a damp paper towel—careful, it’s hot!). Then, you repeat that whole process with the remaining two beef balls and the second tortilla. Consistency is what makes **How I Get Smashburger Quesadillas – Mini kitchen magic Perfect Every Time** so reliable!
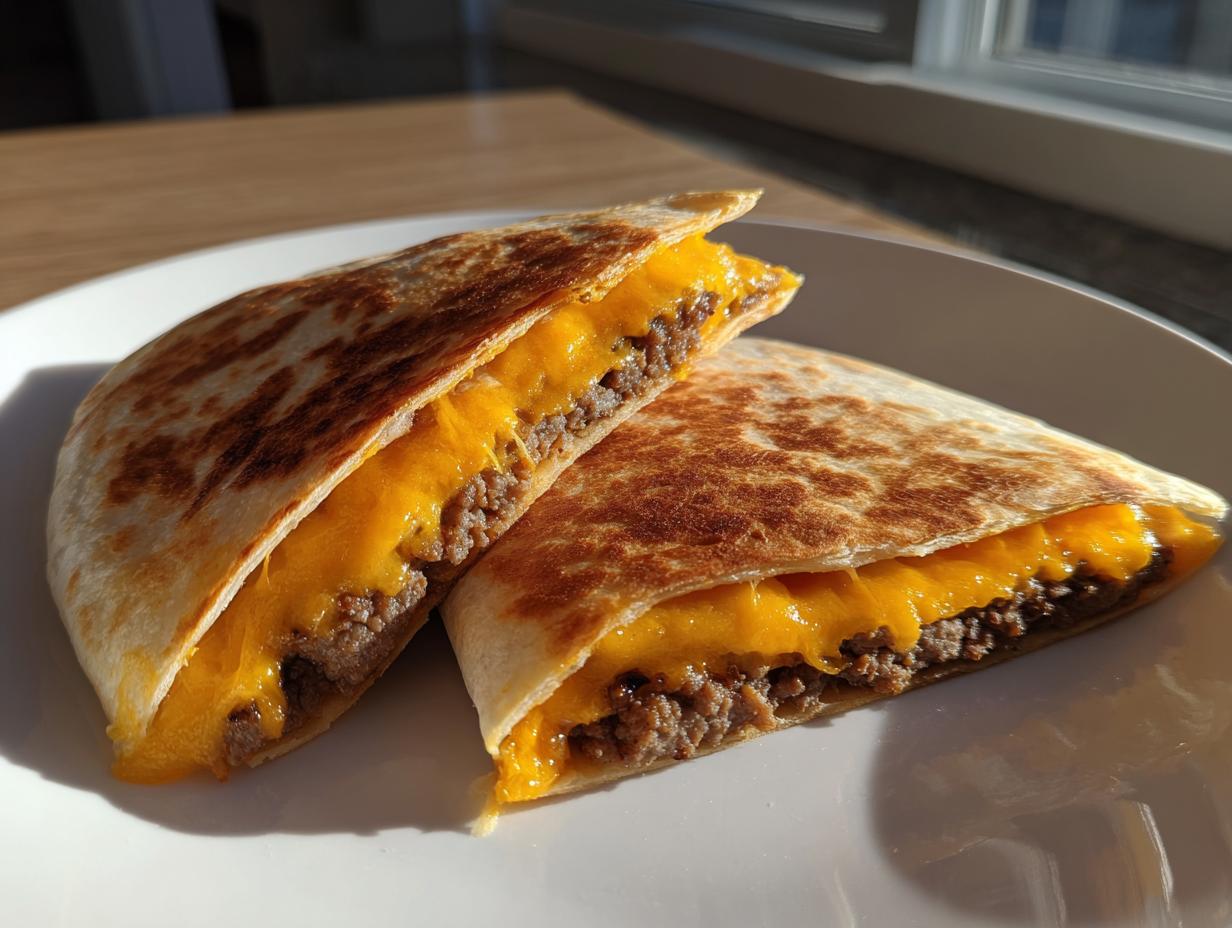
Once both quesadillas are done, slice them in half while they are hot, and serve them right away. That initial sear goes fast, so eat them while they sing!
Expert Tips for Perfect Smashburger Quesadillas – Mini kitchen magic
Even though this recipe is designed to be crazy simple, there are a few little things I learned through trial and, well, *error* that really elevate the final product. Getting that perfect **How I Get Smashburger Quesadillas – Mini kitchen magic Perfect Every Time** isn’t just about following the steps; it’s about nailing the details on heat and cheese management.
We talked about using 80/20 beef because fat equals flavor and crucial crispness, but let’s dive into the finish. If you want maximum crisp on that tortilla exterior, here’s my little trick—use slightly less butter or oil when you cook the second side (the cheese side). You still need enough fat so it doesn’t stick, naturally, but reducing it just a hair makes that tortilla toast up beautifully instead of getting greasy.
Also, don’t walk away when the cheese hits the heat! Cheese can go from perfectly gooey to awkwardly rubbery in about 15 seconds if you lose focus. I find that as soon as the cheese starts to visibly soften—like it’s sagging around the edges of the patty—that’s the signal to slap the tortilla on top. You want the melting process to finish underneath that tortilla cover. It’s all about timing when you’re working with high heat in a small space like this!
If you want to dive deeper into what makes ground beef recipes perfect in general (because these lessons apply everywhere!), you should check out my thoughts over here on what makes perfect ground beef recipes. Little tweaks like these make a massive difference!
Ingredient Substitutions and Notes
You know I preach following the recipe, especially because the 80/20 fat ratio is so critical for that smash texture, but I’m also a realist. Sometimes you open the fridge and you just don’t have a specific thing! Let’s talk swaps so you can still make this happen without running to the store. If you’re looking to simplify even further, sometimes I rely on the bare bones; check out these 5 ingredient ground beef recipes for inspiration on cutting down required components without losing flavor!
The primary thing you should try to keep consistent is the ground beef fat content. But if you’re stuck on cheese, don’t worry too much. The main goal for the quesadilla portion is meltability. Colby Jack is a wonderful substitute if you don’t have Monterey Jack, or even a sharp cheddar works great if you like a stronger flavor punch.
What about the onions? If you’re making this for someone who hates onions—or if you simply don’t have any diced up—feel free to skip them! They add a lovely little savory pop when they cook down and caramelize slightly inside the cheese, but the quesadilla is absolutely delicious as a pure cheeseburger-and-tortilla wrap. If you wanted to add a tiny bit of crunch or tang instead, a few incredibly finely minced pickles slipped under the cheese would be a fun, rebellious twist. Just don’t use too many, or you’ll steam the tortilla instead of crisping it!
A note on the tortillas: While I specify large flour tortillas because we need them to cover the patty completely once smashed, corn tortillas will absolutely fail here. They tear way too easily when you try to press and flip the cheesy meat sandwich. Stick to large, pliable flour versions for structural integrity. When you are worried about sticking, you can always lean on my preferred homemade pan release mixture, even though it’s a bit more work than just butter—it gives such a clean separation!
Storing and Reheating Your Smashburger Quesadillas – Mini kitchen magic
Because this recipe is so quick, honestly, our first choice is always eating it fresh off the skillet—that beautiful, crispy tortilla texture is fleeting! But let’s be real, sometimes life happens, and you’ve got leftovers. If you’re lucky enough to have any of these leftover **How I Get Smashburger Quesadillas – Mini kitchen magic** on hand, you need to store them correctly so you can enjoy that flavor later!
Wrap each cooled quesadilla tightly! I usually use plastic wrap first to make sure air doesn’t get in and dry it out, and then maybe slip it into an air-tight container or a zip-top bag. They’ll keep perfectly fine in the refrigerator for about two to three days. Because 80/20 beef is used, they stay surprisingly flavorful even when cold.

Now, reheating—this is where you can either resurrect the magic or turn it into a rubbery mess. Please, for the love of all things crispy, avoid the microwave if you can! Microwaving works, sure, but it steams the tortilla, and you lose that perfect crispness that defines the smashburger experience.
The absolute best way to reheat these is back in a dry skillet—maybe medium heat. Lay the quesadilla flat and cook it for about 3 to 4 minutes per side, pressing down gently with that sturdy spatula. You’re basically trying to re-toast the tortilla and re-melt the cheese without overcooking the already cooked beef. This method brings back most of the original texture, making it feel almost freshly made. If you need more ideas for using up leftover beef quickly, check out my post on ground beef recipes for busy weeknights!
If you are in a massive rush and the microwave is your only option, nuke it for just 30 seconds max, and then immediately throw it in a dry, very hot pan for 60 seconds per side to try and force some crispness back into that tortilla. It’s a compromise, but better than eating it cold!
Serving Suggestions for Smashburger Quesadillas
Now that we’ve achieved crispy, cheesy, beefy perfection from a tiny setup, you’ve got a seriously hearty meal in your hands! Because these quesadillas are so rich—we’re talking high-fat beef, melted cheese, and toasted tortilla—they hold up well on their own. But honestly, everything is better with a little something crisp or acidic on the side to cut through that richness. It just balances the whole plate, you know?
I love keeping the sides just as simple as the main dish. We aren’t aiming for a giant, complicated meal here; we’re aiming for maximum flavor delivery in minimal time. If you’re looking to add a fresh, colorful side without a ton of work, I highly recommend making my chickpea feta avocado salad. It’s bright, cool, and contrasts beautifully with the hot, savory quesadilla.
Here are a few of my other favorite things to serve alongside this beefy handheld:
- Classic Dips: A dollop of cool sour cream or a spoonful of good quality salsa makes these feel instantly elevated. If you like spice, a drizzle of sriracha mayo is fantastic, too!
- Pickled Vegetables: A small side of quick-pickled red onions or even just some dill pickle chips adds that necessary tang and crunch that cleanses the palate between bites of rich beef and cheese.
- Simple Greens: Sometimes, you just need some green on the plate so you don’t feel guilty about all that cheese. A tiny handful of arugula or mixed greens dressed only with olive oil and a squeeze of lemon juice works wonders. Keep the dressing light!
The key is ensuring your side dish doesn’t require its own dedicated cooking time. We already mastered the mini kitchen magic; we don’t want to ruin that streak by dirtying three more pans for side dishes!
Common Questions About How I Get Smashburger Quesadillas – Mini kitchen magic Perfect Every Time
I know when you read about a recipe this fun and fast, you start having questions! I certainly did when figuring out **How I Get Smashburger Quesadillas – Mini kitchen magic Perfect Every Time** to work reliably on my small burner. Most of the confusion revolves around getting that genuine smash texture when you’re not working with a massive flat top. Don’t worry, the answers are pretty straightforward, and they usually involve making sure you respect the high heat!
If you’re looking for more dependable, easy meal ideas once you master this, definitely take a look at my tips on what makes perfect easy dinner recipes—the principles are similar!
Can I use pre-made burger patties?
Oh, absolutely not, and please trust me on this one! The entire point of the “smash” technique that gives us that incredible crust is starting with a loose, uncompressed ball of meat. If you buy patties from the store, they are already packed tight by a machine, which means you lose that critical surface area to get that lacey sear when you press them down.
To get that true smash texture, you must start loose. Just take your 80/20 ground beef and divide it into those small, loose balls (like golf balls). When those balls hit the smoking hot skillet, *that’s* when you apply the pressure with the spatula. That’s what creates the characteristic crust of a great smashburger, and it’s the secret sauce to **How I Get Smashburger Quesadillas – Mini kitchen magic Perfect Every Time**.
What is the best way to clean the skillet after smashing?
This is a great question because you’ve got caramelized beef bits stuck on there, and you still need to cook a tortilla without burning the leftover fond! Never soak a hot pan, right? The best way, especially in a mini kitchen where you might not want to wait for a massive pan to cool down completely, is the steam-wipe method.
As soon as you remove the burger patty (before you add the cheese!), carefully pour about a tablespoon of water into the hot pan—it will steam aggressively, so stand back! The steam helps lift those browned bits. Right after that boiling hiss dies down, grab a paper towel folded over a wooden spoon or tongs (please don’t use your hands!) and quickly wipe out the debris. You get a surface mostly clean for the cheese and tortilla phase without waiting ages for it to cool for a proper wash.
Can I scale this recipe for more people?
Yes, you can absolutely scale up the ingredients, but remember: your success hinges on the high heat and the space you give those patties to breathe while they sear. You simply cannot crowd the pan if you want that smash texture. If you cram four beef balls into a little 8-inch pan, they’ll steam instead of sear, and you lose the whole point!
My rule for **How I Get Smashburger Quesadillas – Mini kitchen magic Perfect Every Time** is always two patties cooking at once, batch style. So, if you’re cooking for four people (four quesadillas), you’ll crush the first two, take them out, and then immediately start the second batch of two. It takes a few extra minutes, but maintaining that high-heat sear for the best smash texture is non-negotiable!
Share Your Perfect Smashburger Quesadillas – Mini kitchen magic Results
Well, there you have it! My complete blueprint for **How I Get Smashburger Quesadillas – Mini kitchen magic Perfect Every Time**. We took simple ground beef and, with just a little bit of elbow grease and high heat, turned it into the most satisfying, fast dinner imaginable. I truly hope this recipe saves your busy weeknights the way it has saved mine countless times!
I pour so much energy into making sure these small, sometimes chaotic, kitchen wins are repeatable for everyone else. That crust payoff is real, and I want to hear about it! Have you tried smashing your burgers onto a tortilla yet? Did you stick with my Monterey Jack suggestion, or did you use your own favorite meltable cheese combo?
Don’t be shy! Head over to my About Me page or tag me on social media! I absolutely love seeing your creations and hearing how this **How I Get Smashburger Quesadillas – Mini kitchen magic** formula worked out in your own kitchen, whether it’s a huge range or a tiny hotplate. Let me know how many stars you’re giving this game-changing quick meal!
Smashburger Quesadillas
Ingredients
Equipment
Method
- Season the ground beef balls evenly with salt and pepper. You should have four seasoned balls.
- Heat your skillet or griddle over medium-high heat. Add a small amount of butter or oil.
- Place two beef balls on the hot surface. Immediately press each ball down firmly with a sturdy spatula until it forms a thin patty, about 1/4 inch thick. Cook for 1 to 2 minutes until the edges are brown.
- Flip the patties. Immediately top each patty with half of the shredded cheese and half of the diced onion, if using. Cook for 30 seconds until the cheese starts to melt.
- Place one flour tortilla over the cheese and meat on each patty. Press down lightly with the spatula to help the tortilla stick to the melting cheese.
- Cook for about 1 minute until the bottom of the tortilla is golden brown. Carefully flip the entire assembly (tortilla, cheese, meat) using the spatula.
- Cook the second side for 1 to 2 minutes until the tortilla is golden brown and the cheese is fully melted. Remove from the heat.
- Repeat the process with the remaining two beef balls and the second tortilla.
- Slice each quesadilla in half and serve immediately.